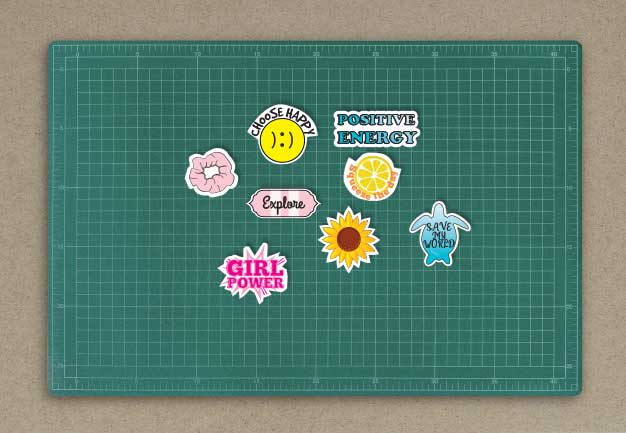
 Make your own vsco stickers for hydro flasks!
You can add a little personality to anything with just a little creativity and stickers. And you know what? You can even make your very own stickers at home, without ANY special materials.
Here’s a rundown of how you can make your own VSCO stickers at home with home items. No special tools or materials required. Ready?
What you need
- White A4 printing paper
- Clear sticky tapes (48 mm or 1.8 inch preferred)
- Double sided tapes (48 mm or 1.8 inch preferred)
- Scissors or pen knife
Step 1 – Draw your VSCO stickers
Design your own VSCO illustrations.
You can either
- Draw your own VSCO stickers. Here are some simple illustration tutorials on how to draw a
- Use a software like powerpoint and layout illustrations from the Internet that you like
- Or download our bonus VSCO stickers printable or black and white vsco stickers to print.

Note: the illustration should be less than 48mm or 1.8 inch in height so that they can fit into the height of a sticky tape roll.
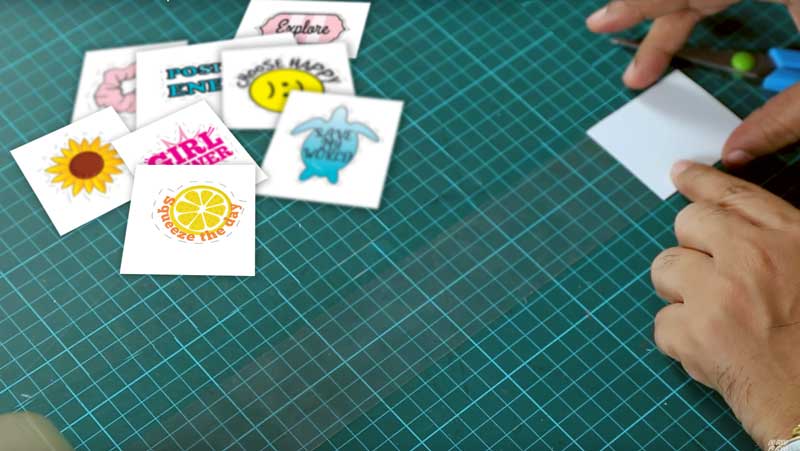
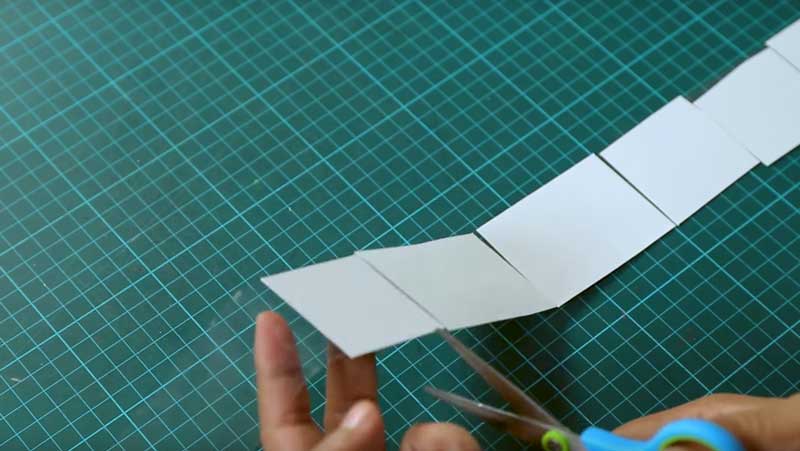
Step 2: Print and cut
Print out your illustrations. Cut out your illustrations in squares.
Note: We will trim them again after lamination.

Step 3: Laminate drawings with sticky tape
Tape the top of your vsco drawings with the clear sticky tape.
The finished taped over stickers’ surface will look glossy and laminated just like the stickers you get from the stores.
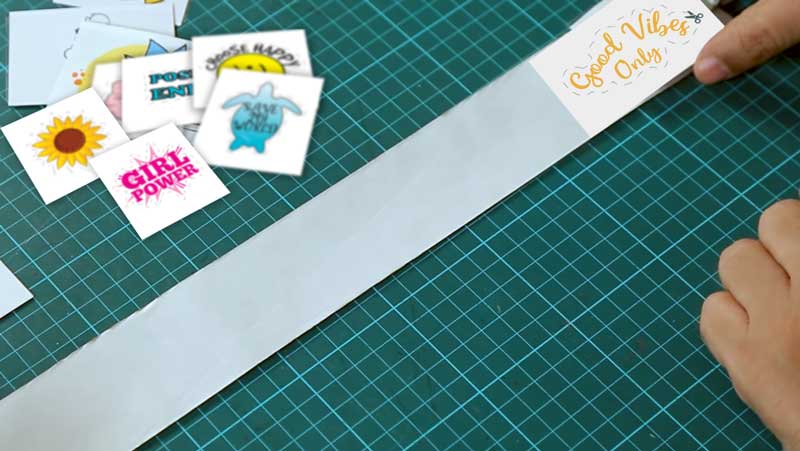
Step 4: Paste drawings on double sided tapes
Next, you want to give the stickers its adhesiveness. Here’s the simple trick – instead of parchment paper OR sticker papers, you simply use double sided tape!
On a roll of double sided tape, layout your illustrations as shown.
Step 5: Cut and trim

Where can I buy VSCO stickers?
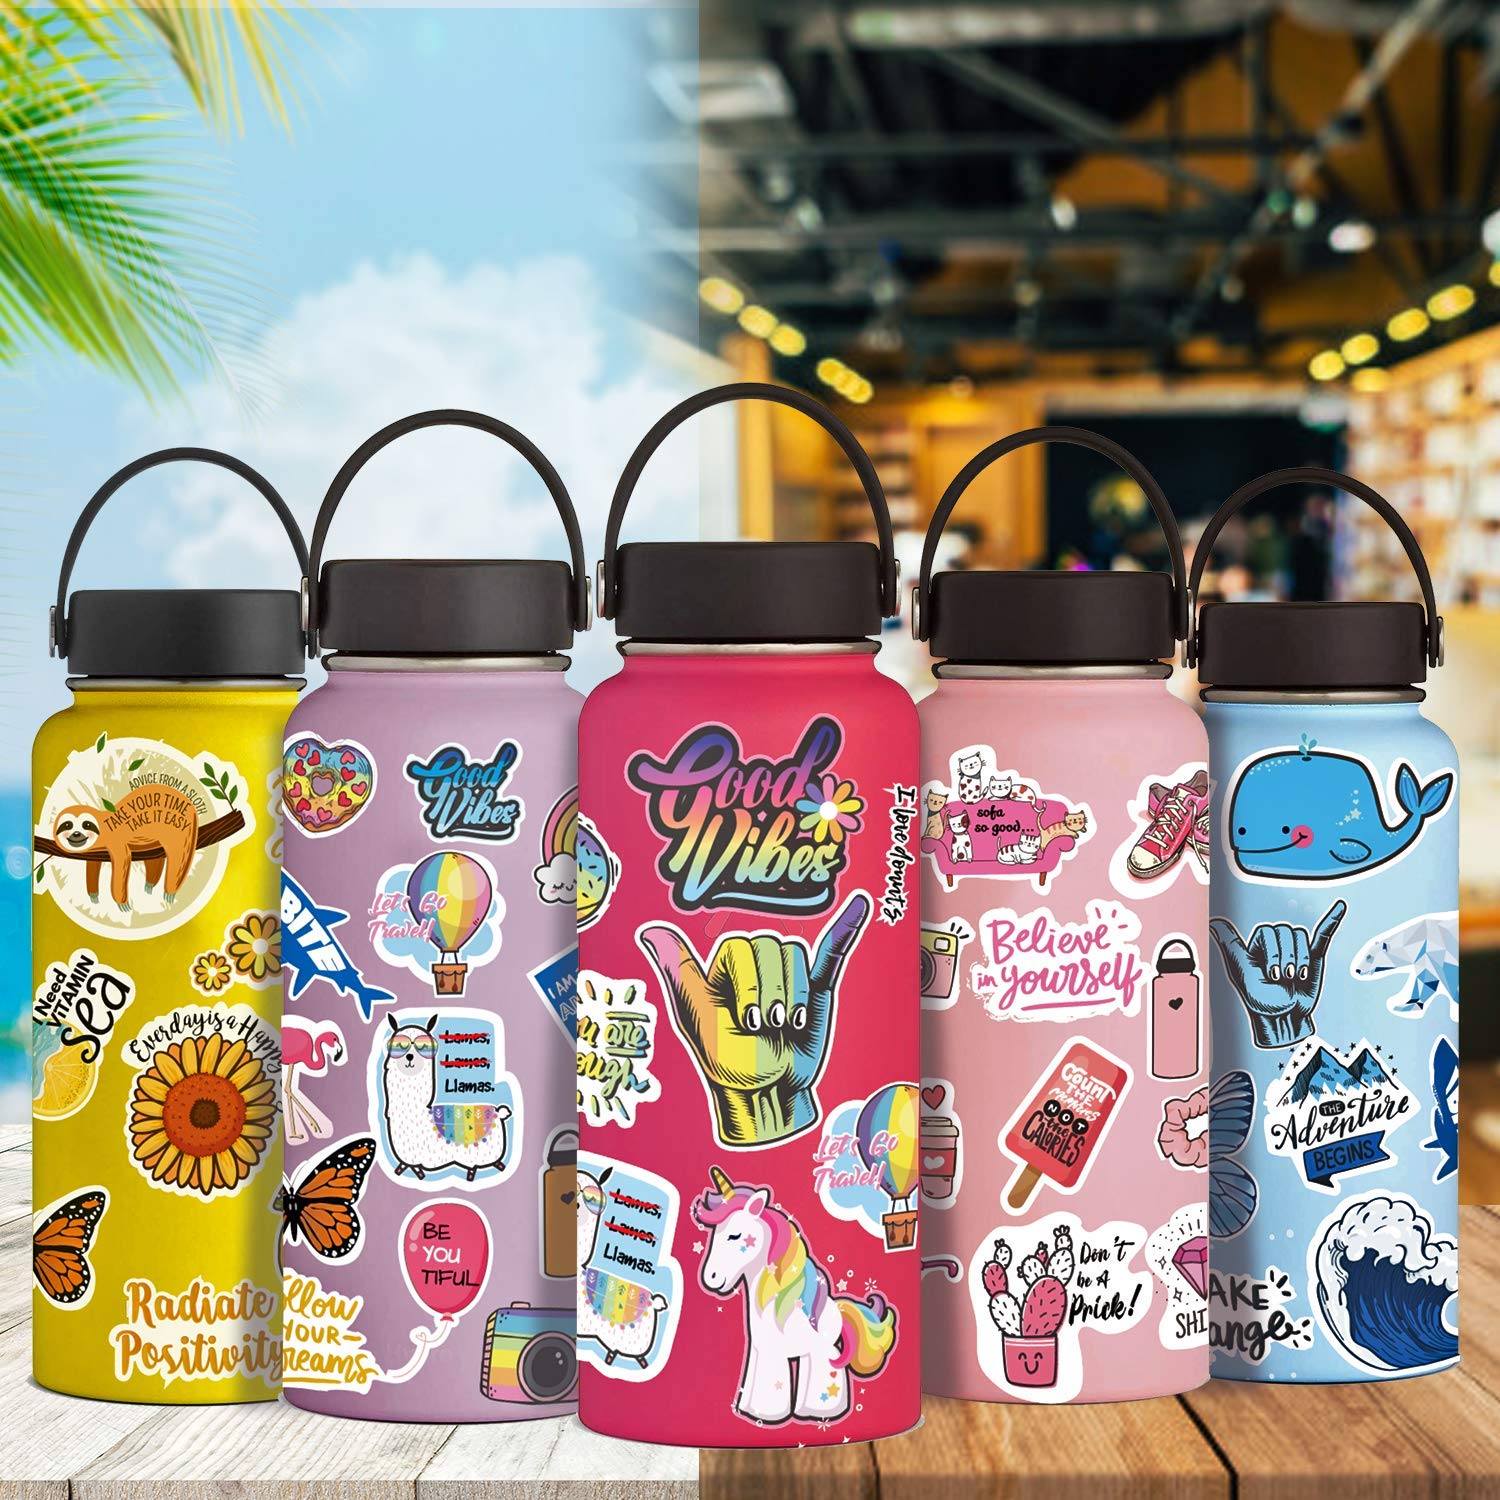
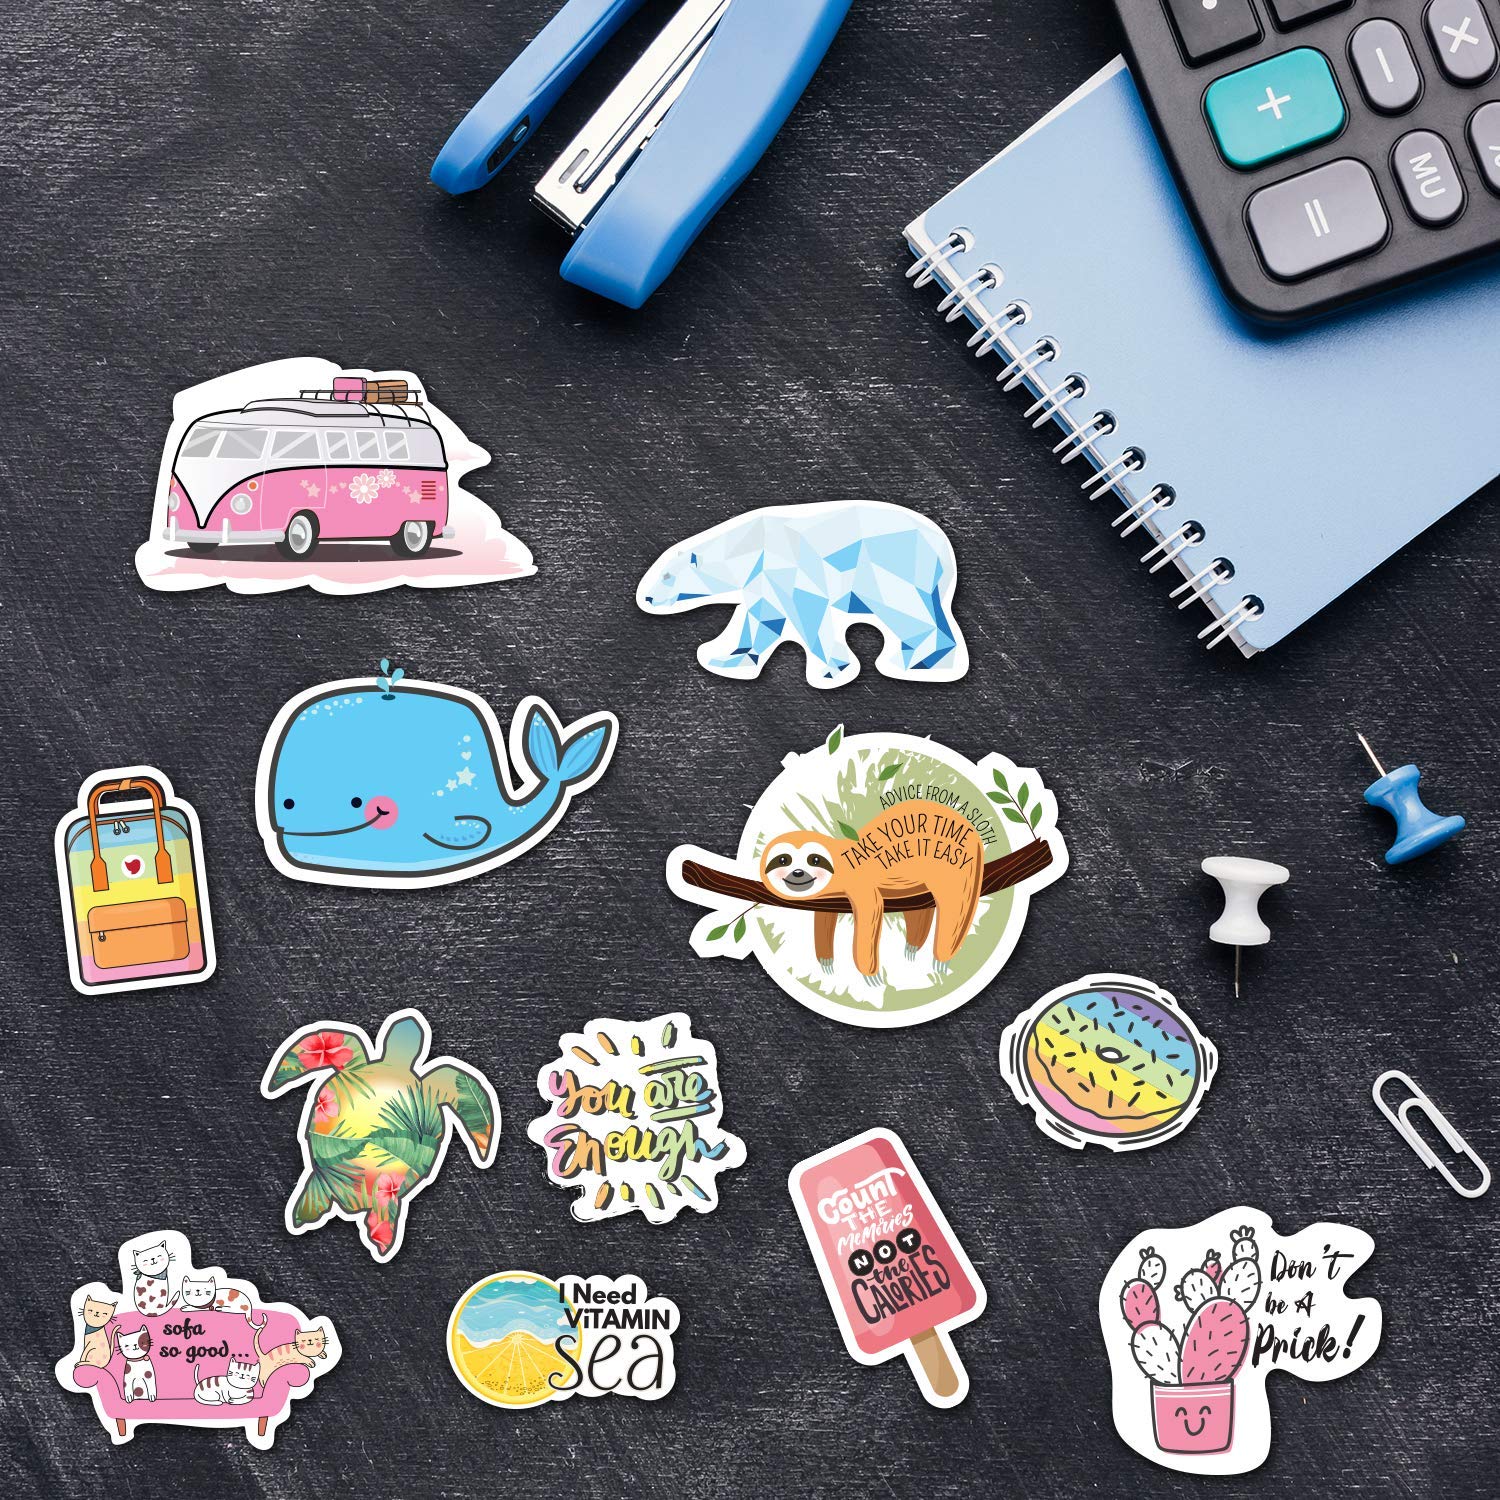
If you like some professionally done stickers for your laptops or hydro flasks, check out our cute vsco stickers in yellow, pink, blue & rainbow here!
These cute stickers are made of high quality vinyl – so they are waterproof and reusable, and what’s more? It’s just for $10.99 for a batch of 66 pieces. So that’s just 16 cent per piece! Check out the vinyl VSCO stickers on Amazon here!


[…] How to make VSCO stickers without sticker papers […]
cold water simple life.
If you re nervous about giving yourself injections at home, that s OK comprar cialis online
best online casinos list https://www.bigbassbonanzacasinos.com.
Лучшие сайты онлайн казино на 2024 год. Легальные онлайн казино на реальные деньги на Игровые автоматы с реальным выводом
Рейтинги казино
Игровые автоматы на реальные деньги
Проверенные онлайн казино с выводом денег
Игровые автоматы играть бесплатно онлайн
Игровые автоматы играть
Проверенные казино
Discover the Excitement of Online Casino
top online real money casinos https://www.booksofdeadslots.com.
Заказать двери на заказ в Москве
Изготовление дверей на заказ по индивидуальным размерам
Как выбрать дверей на заказ
Материалы и цвета дверей на заказ
Двери на заказ: доставка и монтаж дверей на заказ
Какие факторы влияют на выбор дверей на заказ? варианты дверей на заказ
Ламинированные двери на заказ: преимущества и недостатки
Металлические двери на заказ: надежность и безопасность
Какие двери на заказ выбрать для квартиры?
Двери в дом http://mebel-finest.ru/.
online slot games uk https://caramelcasino.com/.
best online casino https://scatter7.com/.
Discover the wild side of Britain at wild8.co.uk
casino best online https://wild8.co.uk/.
top 10 casinos best casino list.
casino for money 10 best casinos.
Moderator Couldn’t be happier, I’ve been searching for this: https://xn--mgasb-6za.com
Сайт Кракен на первый взгляд очень легкий и понятный, имеет незатейливый дизайн. Но вероятно, это и работает. Ведь присутствие различных наворотов лишь обременяет процесс взаимодействия сервиса с конечным клиентом. Для того, чтобы совершать сделки нужно перейти по ссылке зеркала сайта кракен, зарегистрировать аккаунт и пополнить счет. А дальше простая процедура поиска нужных услуг и в одно мгновение в непосредственной близости ты поднимешь свой заветный клад который откроет путь в мир фантазий и безмятежности. Регестрируйся на Кракен.
-= vk18.at: https://krakenat.com =-
-= kraken площадка: https://krakenat.com =-
-= кракен: https://krakenat.com =-
E77766Q1
kraken тор
kraken market
kraken официальный
multi hand blackjack online slots top.
Play at the Top Online Casinos for Cash Today
live roulette jackpots online casino.
thanks, interesting read
_________________
ক্যাসিনো বাজি
Cool + for the post
_________________
অনলাইন ক্যাসিনো|টাকার জন্য ক্যাসিনো
связки в арбитраже трафика https://trafficarbitration.com/octoclick/.
100 to 1 roulette casino game http://gamewild24.com/all-games/casino/100-to-1-roulette/.
a dragons story online slot https://www.casinowild24.com/all-games/slots/9-pots-of-gold.
«Арена Строй»: Ваш Надежный Партнер в Строительстве и Ремонте
Профессионализм и Опыт на Строительной Площадке
«Арена Строй» зарекомендовала
себя как надежный подрядчик в сфере строительства и ремонта в Москве.
За более чем 6 лет работы мы сформировали команду из более чем 50 высококвалифицированных специалистов.
Наша компания предоставляет полный спектр строительных услуг:
от подсобных и погрузочно-разгрузочных работ до комплексного
озеленения территории и переездов.
Команда Профессионалов для Любых Задач
Наши разнорабочие – это сердце нашей компании.
Они обладают высокой профессиональной компетентностью, ответственностью и готовностью к выполнению разнообразных задач.
Мы обеспечиваем качество и своевременность выполнения работ, гарантируя безопасность на каждом объекте.
Широкий Спектр Услуг
Мы предлагаем:
Подсобные работы: перемещение стройматериалов, установка оборудования;
Погрузочно-разгрузочные работы;
Демонтаж и утилизация строительного мусора;
Ландшафтный дизайн и озеленение;
Земляные работы, укладка кабелей и коммуникаций;
Обслуживание складов;
Монтаж и демонтаж технических систем;
Работы по благоустройству: от
фундамента до кровли;
Перевозка мебели, укладка паркета,
электромонтажные работы;
Работы в различных помещениях: от гостиниц до частных домов.
Для Каждого Клиента – Индивидуальный
Подход
Мы обслуживаем как частных лиц, так и крупные
промышленные предприятия.
Наш подход – индивидуальный план работы для каждого клиента, учитывая требования и сроки.
Наша цель – полное удовлетворение потребностей клиента.
Доступность и Гибкость
Мы предлагаем конкурентоспособные цены и гибкие условия
работы. Наша программа лояльности позволяет сэкономить до 43% от общего бюджета.
Мы стремимся предложить лучшие
условия и высокий уровень сервиса.
Ваш Выбор – «Арена Строй»
Если вам нужны квалифицированные разнорабочие в Москве, обращайтесь в «Арена Строй».
Мы гарантируем профессионализм,
ответственность и качество выполнения работ.
Оставьте заявку на нашем сайте, и мы оперативно свяжемся с вами.
Команда «Арена Строй»: Опыт и Качество в Строительстве
Мы – это команда профессионалов, готовых воплотить в жизнь
любой ваш проект. Наши услуги охватывают все аспекты строительства и ремонта, от квартир до крупных объектов.
Мы предлагаем удобные условия оплаты и гарантируем
соблюдение всех норм безопасности на
объекте.
Ответственность и Безопасность
на Первом Месте
Наши сотрудники несут ответственность за безопасность и качество работы
на каждом объекте. Они строго соблюдают нормы охраны труда и пожарной безопасности, умеют обращаться с инструментом и спецтехникой, гарантируя безопасность на строительной площадке.
Visit my site … разнорабочий строительство
top paying casino online https://casinoroyalspins.com.
most popular online casino https://www.casinowolfspins.com.
real baccarat online https://royalspins-game.com/baccarat-online.
top rated slots https://wolfspins-game.com/all-games/.
Выкуп квартиры в кратчайшие сроки. Быстрая оценка стоимости и помощь в подготовке документов. Помощь с переездом.
продать квартиру быстро спб
Hello,
New club music https://0daymusic.org
Private server MP3/FLAC, Label, LIVESETS, Music Videos.
Moderator Hey everyone! Great read.
Kraken – самый крупный магазин в России и СНГ, предлагающий доступ к широкому выбору продуктов и безграничным возможностям. Мы гарантируем 100% защита, скорость и безопасность для каждого пользователя. На нашей площадке https://kraken32at.com вы найдете тысячи продавцов с разнообразными товарами. Поэтому рекомендуем выбирать самые выгодные предложения и внимательно изучать каждого продавца. Мы предлагаем свободный рынок, где конкуренция приводит к лучшим условиям для вас.
-= кракен kraken: https://kraken7n.com =-
-= krakentor site: https://kraken9k.com =-
-= kraken шоп: https://xn--krakn4-sh8b.com =-
DJ477622
кракен krakenweb site
кракен onion
kraken сайт зеркала
Признаки истинности в слове
относительная истина примеры https://www.koah.ru/kanke/62.htm/.
Выкуп квартиры в кратчайшие сроки. Быстрая оценка стоимости и помощь в подготовке документов. Помощь с переездом.
выкуп квартир в приморском районе санкт-петербурга вторичка
Experience the luxury of virtual casino.
slots machine casino https://www.wilde24.com .
Sign Up and Play Now!
Earn Big at the Best Online Casino in 2021
24 hour grand prix online slot casino http://www.wolfslots.co.uk/critical-juncture-unleashing-the-thrills-of-24-hour-lofty-prix-online-slot/ .
Снимем арест. Оплатим судебным приставам все Ваши долги и поможем снять арест от ФССП. Оплатим ЖКХ/ Купим жилье с долгами за свет, воду и прочими коммунальными услуги.
выкуп недвижимости петербург
«Арена Строй»: Ваш Надежный Партнер в Строительстве
и Ремонте
Профессионализм и Опыт на Службе Качества
«Арена Строй» зарекомендовала
себя как ведущий подрядчик в области строительства и ремонта в
Москве. На протяжении более 6 лет мы
успешно реализуем проекты различной сложности, опираясь на профессионализм нашей команды из более чем 50
высококвалифицированных специалистов.
Наша компания предоставляет полный спектр строительных услуг, начиная от подсобных работ и
заканчивая сложными инженерными задачами.
Команда Мастеров: Гарантия Высокого Качества
Наши разнорабочие – это сердце
компании, их профессиональные
навыки и ответственный подход к
работе позволяют нам гарантировать высочайшее качество выполнения задач.
Мы строго следуем срокам и обеспечиваем безопасность на каждом объекте.
Широкий Спектр Услуг: От А до Я
Мы предлагаем разнообразные услуги, включая:
Подсобные работы: эффективная организация труда на
стройплощадке;
Погрузочно-разгрузочные работы: быстрое и аккуратное перемещение материалов;
Демонтаж и утилизация отходов: чистота и порядок после
завершения работ;
Ландшафтный дизайн и озеленение: преображение
территории вокруг объекта;
Грунтовые и фундаментальные работы: надежная основа
для вашего проекта;
Монтаж и демонтаж оборудования: профессиональный подход к техническим аспектам.
Индивидуальный Подход к Каждому
Клиенту
Мы работаем с различными категориями заказчиков, от частных лиц до крупных промышленных предприятий.
Наш подход – это разработка уникального плана работ
для каждого проекта, учитывая все требования и сроки.
Выгодные Условия Сотрудничества
Предлагаем выгодные цены
и гибкие условия оплаты. Наши клиенты могут воспользоваться программой лояльности,
экономя до 43% от общего бюджета.
Гарантия Качества и Безопасности
Наши специалисты строго соблюдают нормы безопасности и охраны труда.
Мы гарантируем качественное выполнение работ, с
учетом всех требований к безопасности.
«Арена Строй»: Ваш Выбор в Москве
Если вы ищете надежных и опытных разнорабочих в Москве,
обращайтесь в «Арену Строй».
Мы готовы взяться за ваш проект и реализовать
его на высшем уровне. Оставьте заявку на нашем сайте, и мы оперативно свяжемся с вами.
Присоединяйтесь к Списку Довольных Клиентов «Арены Строй»
Выбирая нас, вы выбираете надежность, профессионализм
и качество. Наша команда готова воплотить в жизнь ваш
проект, превзойдя все ожидания.
my homepage – сколько стоит разнорабочий в день в московской области
Glory Casino Tournaments: Compete and Win Huge Prizes
glory casino app http://glorycasino24.online/ .
Maximizing Your Winnings: Strategies to Use at the Best Online Casino
internet casino https://nautiluscasino.co.uk/ .
Выгода Вы получаете до 95% стоимости квартиры. Форму расчета Вы выбираете сами. Все расходы по сделке берем на себя.
срочный выкуп квартиры в спб
Why Glory Casino is the Go-To for Serious Gamers
glory casino bd http://www.glorycasinoin.com/ .
Seize Your Moment of Victory with Glory Casino’s Epic Games
glory casino app https://www.glorycasinoapp.download .
Unleash Your Inner Gambler at the Best Internet Casinos!
online casino https://bestslotsnetent.com/ .
Play, Win, Repeat: Join Glory Casino for Non-Stop Excitement
glory casino bangladesh https://www.glorycasinoregistration.com/ .
Glory Casino Tournaments: Compete and Win Big Prizes
glory casino app glorycasinobonuses.com .
Выгода Вы получаете до 95% стоимости квартиры. Форму расчета Вы выбираете сами. Все расходы по сделке берем на себя.
выкуп ипотеки юрк недвижимость
Next-Level Thrills: Live Casino Games at Jeetwin
jeetwin casino online jeetwin.casino .
Dive into the Excitement of Online Gambling
Boost Your Earnings with Virtual Casinos
Explore the Adrenaline of Online Gaming
Join the Action of Win Big with Online Betting
Get Ready to Hit the Jackpot with Virtual Casinos
Experience the Rush of Online Betting
Play the Internet
Join the Entertainment at Online Betting Sites
Take Your Gambling to the Next Level with Gaming Big with Explore the Realm of Play from the Comfort of Your Own Home with Virtual Casinos
Join Countless of Bettors in Betting the Collect Your Prize with Internet Casinos
Step into the World of Virtual Casinos and Win
Play Anywhere with Internet Betting
Join the Victors at Bet on Your Favorite Games with Casinos
the best online casino http://www.scarabcash.com .
Win Anywhere, Anytime with Betandreas Casino on Mobile
betandreas casino bangladesh https://www.betsandreascasino.com/ .
Jeetbuzz Casino: Your Ultimate Destination for Casino Thrills and Wins
jeetbuzz casino online https://jeetbuzzcasino.org/ .
The Ultimate Entertainment Hub: Why Choose Jeetbuzz Casino
jeetbuzz casino bd http://www.jeetbuzzcasino.net .
Play Top Internet Gambling Games
the online casino http://firejoker.uk/ .
Агентство по организации похорон: с нами прощание будет достойным
полная организация похорон https://www.pohoronnoe-bjuro-444.ru .
У вас коммунальные долги? Выкупаем жилье с любыми долгами по электроэнергии и коммунальными платежами.
выкуп ипотечных квартир
Мастер-классы по кондитерскому искусству: техники, которые вы должны знать
мастер классы по тортам http://www.kursy-konditera-moskva.ru .
https://resheniezadachlogika.ru/
Обзор курсов по SEO продвижению: какой выбрать для эффективного обучения
курсы seo и продвижение сайтов http://kursy–seo.ru/ .
https://resheniezadachpravovedenie.ru/
https://resheniezadachpolitologiya.ru/
https://kontrolnyepravovedenie.ru/
https://kontrolnyepolitologiya.ru/
https://referatymikroekonomika.ru/
This paragraph will help the internet visitors for building up new weblog or even a blog from start to end.
look also at my pages and give a rating
XEvil is a simple, quick and handy plan for totally automated recognition and bypass on the overwhelming majority of captchas (CAPTCHAs), without the require to connect any third-occasion solutions.
The program Practically wholly replaces solutions including AntiGate (Anti-Captcha), RuCaptcha, DeCaptcher and Some others. Concurrently, it appreciably exceeds them in recognition velocity (ten occasions or more) and is totally no cost.
http://ultfoms.ru/user/BrainEsi54796/ solving captcha
https://www.murraybridge4wdclub.org.au/forums/users/danalouat37/edit/?updated=true/users/danalouat37/ captcha service
@d@=
Топ клининговых компаний Москвы: качественная уборка для вашего дома
лучшие клининговые компании москвы http://kliningovye-kompanii-reiting1.ru/ .
https://kontrolnyepravovedenie.ru/
Мастер-классы по SEO: улучшаем навыки продвижения сайтов вместе с экспертами
seo оптимизация курсы https://kursy-seo1.ru/ .
https://resheniezadachlogika.ru/
I want to show you one exclusive program called (BTC PROFIT SEARCH AND MINING PHRASES), which can make you a rich man!
This program searches for Bitcoin wallets with a balance, and tries to find a secret phrase for them to get full access to the lost wallet!
Run the program and wait, and in order to increase your chances, install the program on all computers available to you, at work, with your friends, with your relatives, you can also ask your classmates to use the program, so your chances will increase tenfold!
Remember the more computers you use, the higher your chances of getting the treasure!
DOWNLOAD FOR FREE
Telegram:
https://t.me/btc_profit_search
У вас коммунальные долги? Выкупаем жилье с любыми долгами по электроэнергии и коммунальными платежами.
срочный выкуп недвижимости санкт петербург
https://kontrolnyepolitologiya.ru/
https://kursovyelogistika.ru/
Uncover the Greatest Casinos for Playing
internet casino livecasino.is .
Топ-10 платформ краудлендинга в России: где инвестировать деньги?
краудлендинг 2024 https://kraudlending77.ru/ .
https://resheniezadachmarketing.ru/
Готовые решения каркасных домов под ключ: быстро, красиво, доступно
каркасные дома стоимость https://karkasnye-doma-pod-klyuch0.ru .
https://clck.ru/36Ew5Z
Learn Adventure internet Slot https://www.giropaycasino.com/learn-adventure-with-flodder-connected-to-the-internet-slot/ .
https://perevod-statey.ru/
https://tekhnicheskiy-perevod.ru/
Jump to search
Speculate on market Forex?
Best exclusive offer 2024 for common speculators, software developers, traders, trading signal sellers, trading advisor sellers, trading account managers, investment companies, large brokerage firms , as well as for everyone who dreams of opening their own business on the Forex market with minimal investments.
We will be happy to Give away MetaTrader4 Server for 0Give away MetaTrader4 Server for 0/en/products.html
More in detail watch here:
https://drive.google.com/file/d/14xuST2EFDKcnfUT_dL49jQu0Asj1uJx4/view?usp=sharing
https://kursovyesociologiya.ru/
https://kontrolnyestatistika.ru/
https://referatystatistika.ru/
newest online casinos http://slotscasinotop.com/ .
https://vstx.ru/
Start Playing Today!
Experience the Thrills of Internet Casinos
casino play online real money https://seriousonlinecasino.com .
Онлайн займы без отказа: получите деньги на карту за 5 минут
новые займы малоизвестные без отказа http://zaym-na-karty-bez-otkaza.ru/ .
Комфорт и удобство для клиентов на первом месте
Автомобильный сервисный центр http://www.tokyogarage.ru.
https://avidigital-spb.ru/
Мобильная связь и безлимитный интернет: как это изменит ваш образ жизни
модем теле2 4g цена тарифы mobilnyj-bezlimitnyj-internet.ru .
https://best-santehnika.store/
https://seo116.ru/
Услуга сноса старых частных домов и вывоза мусора в Москве и Подмосковье под ключ от нашей компании. Работаем в указанном регионе, предлагаем услугу сколько стоит сломать дом. Наши тарифы ниже рыночных, а выполнение работ гарантируем в течение 24 часов. Бесплатно выезжаем для оценки и консультаций на объект. Звоните нам или оставляйте заявку на сайте для получения подробной информации и расчета стоимости услуг.
Imperium Games, Gambling platform for an online casino
https://www.google.com.py/url?q=https://imperium-games.net/
https://google.bj/url?q=https://imperium-games.net/
https://maps.google.com.eg/url?q=https://imperium-games.net/
https://google.com.ng/url?q=https://imperium-games.net/
https://cse.google.rw/url?q=https://imperium-games.net/
https://clients1.google.com.ar/url?q=https://imperium-games.net/
https://images.google.com.mm/url?q=https://imperium-games.net/
https://www.google.com.et/url?q=https://imperium-games.net/
https://maps.google.com.bo/url?q=https://imperium-games.net/
https://www.google.hn/url?q=https://imperium-games.net/
https://google.ga/url?q=https://imperium-games.net/
https://google.com.ar/url?q=https://imperium-games.net/
https://google.ca/url?q=https://imperium-games.net/
https://images.google.lk/url?q=https://imperium-games.net/
https://google.ms/url?q=https://imperium-games.net/
Rent Casino Games – Gaming API – Software for sale
https://google.fr/url?q=https://gamingapi.solutions/
https://images.google.sk/url?q=https://gamingapi.solutions/
https://maps.google.je/url?q=https://gamingapi.solutions/
https://images.google.lu/url?sa=t&url=https://gamingapi.solutions/
https://google.com.pl/url?q=https://gamingapi.solutions/
https://maps.google.rs/url?q=https://gamingapi.solutions/
https://clients1.google.ac/url?q=https://gamingapi.solutions/
https://images.google.com.vc/url?q=https://gamingapi.solutions/
https://www.google.com.cy/url?q=https://gamingapi.solutions/
https://cse.google.rs/url?sa=i&url=https://gamingapi.solutions/
https://images.google.ne/url?q=https://gamingapi.solutions/
https://maps.google.com/url?q=https://gamingapi.solutions/
https://www.google.im/url?q=https://gamingapi.solutions/
https://maps.google.com.tr/url?sa=t&url=https://gamingapi.solutions/
https://www.google.cd/url?q=https://gamingapi.solutions/
Дизайн дома
дизайнерские идеи для дома
дизайн домов внутри
идеи интерьера дома
оригинальные решения для дома
дизайн будинків
пинтерест интерьер дома
идеи интерьера дома
дизайн идеи для дома
картинки домов
дизайн интерьеров дома
https://hidehost.net/
seo продвижение сайта заказать
adverse event healthcare generic for zanaflex barack obamhealth insurance premium
https://hidehost.net/
Мойка окон в любое время года: мы работаем всегда
заказать мойку окон https://www.mytie-okon1.ru .
Дизайн дома
дизайнер дом
дизайн частных домов
дизайн проекта дома
дизайнерские идеи для дома
дизайнерские решения для дома
идеи для дома интерьер
дизайн домов внутри
оригинальные решения для дома
пинтерест интерьер дома
дизайн идеи для дома
заказать продвижение сайта seo
стоимость продвижения сайта в москве
seo поддержка сайта
Проекты каркасных домов с террасой: создайте идеальное место для отдыха
строительство финских каркасных домов https://finskie-doma121.ru .
https://hidehost.net/
Как повысить конверсию?
– Как выбрать лучшую партнерку для арбитражного трафика
вывод с гемблинга арбитраж трафика гемблинг кейсы .
his explanation MetaMask Sign In
linetogel
https://beckom.ru/
https://seolinkedin.ru/
linetogel
Все о займах онлайн: полный гид по микрозаймам
оформить займ онлайн срочно https://oformit-mikrozajm-onlajn.ru/ .
Если вы ищете качественный и надежный ремонт бытовой техники Indesit, то вам стоит обратиться в сервисный центр indesit-ekaterinburg.ru. В нашем сервисном центре вы можете быть уверены, что ваша техника Indesit будет отремонтирована качественно и в срок, так как мы используем только оригинальные запчасти и современное оборудование. Наш сервисный центр – это не только ремонт техники Indesit, но и комплексное обслуживание, установка, настройка и чистка. Мы работаем с любыми видами техники Indesit, от холодильников и стиральных машин до посудомоечных машин и духовых шкафов.
Забудьте о низких позициях в поиске! Наше SEO продвижение https://seopoiskovye.ru/ под ключ выведет ваш сайт на вершины Google и Yandex. Анализ конкурентов, глубокая оптимизация, качественные ссылки — всё для вашего бизнеса. Получите поток целевых клиентов уже сегодня!
Забудьте о низких позициях в поиске! Наше SEO продвижение и оптимизация на заказ https://seosistemy.ru/ выведут ваш сайт в топ, увеличивая его видимость и привлекая потенциальных клиентов. Индивидуальный подход, глубокий анализ ключевых слов, качественное наполнение контентом — мы сделаем всё, чтобы ваш бизнес процветал.
Снимем арест. Оплатим судебным приставам все Ваши долги и поможем снять арест от ФССП. Оплатим ЖКХ/ Купим жилье с долгами за свет, воду и прочими коммунальными услуги.
покупка квартиры выкуп спб
Дайте вашему сайту заслуженное место в топе поисковых систем! Наши услуги
технический seo аудит на заказ обеспечат максимальную видимость вашего бизнеса в интернете. Персонализированные стратегии, тщательный подбор ключевых слов, оптимизация контента и технические улучшения — всё это для привлечения целевой аудитории и увеличения продаж. Вместе мы поднимем ваш сайт на новый уровень успеха!
Дайте вашему сайту заслуженное место в топе поисковых систем! Наши услуги
сео продвижение сайта заказать на заказ обеспечат максимальную видимость вашего бизнеса в интернете. Персонализированные стратегии, тщательный подбор ключевых слов, оптимизация контента и технические улучшения — всё это для привлечения целевой аудитории и увеличения продаж. Вместе мы поднимем ваш сайт на новый уровень успеха!
Дайте вашему сайту заслуженное место в топе поисковых систем! Наши услуги
сео продвижение сайта на заказ обеспечат максимальную видимость вашего бизнеса в интернете. Персонализированные стратегии, тщательный подбор ключевых слов, оптимизация контента и технические улучшения — всё это для привлечения целевой аудитории и увеличения продаж. Вместе мы поднимем ваш сайт на новый уровень успеха!
Дайте вашему сайту заслуженное место в топе поисковых систем! Наши услуги сколько стоит продвижение интернет магазина на заказ обеспечат максимальную видимость вашего бизнеса в интернете. Персонализированные стратегии, тщательный подбор ключевых слов, оптимизация контента и технические улучшения — всё это для привлечения целевой аудитории и увеличения продаж. Вместе мы поднимем ваш сайт на новый уровень успеха!
Дайте вашему сайту заслуженное место в топе поисковых систем! Наши услуги
seo оптимизация сайта на заказ обеспечат максимальную видимость вашего бизнеса в интернете. Персонализированные стратегии, тщательный подбор ключевых слов, оптимизация контента и технические улучшения — всё это для привлечения целевой аудитории и увеличения продаж. Вместе мы поднимем ваш сайт на новый уровень успеха!
Гарантированный займ 100% одобрения: ваш финансовый план Б
займ со 100 одобрением zajm-100-procentov-odobreniya.ru .
Sitemap
https://stroyotzyvy.org/user/kartyxvalbum/
http://elymbmx.com/mybb/member.php?action=profile&uid=1126
https://gxfcmao.com/home.php?mod=space&uid=502324
Сервисный центр service4lenovo.ru оказался на высоте, когда мне нужно было починить свой монитор Lenovo. Они заменили неисправную деталь и вернули мне мой монитор Lenovo в отличном состоянии, а также предложили бесплатную чистку системы охлаждения. Я остался очень доволен их работой и обслуживанием, а также ценой, которая была ниже, чем в других сервисных центрах.
https://lechenie-bolezney.ru/
Займ без работы и без поручителей: решите финансовые вопросы сегодня
займы без работы zajmy-bez-ukazaniya-raboty.ru .
linetogel
Как получить займ на карту через Госуслуги: пошаговая инструкция
займ на карту госуслуги http://zajm-cherez-gosuslugi.ru/ .
Детоксикация алкоголя на дому: эффективный способ вернуться к нормальной жизни
детоксикация при алкогольном отравлении http://vyvod-iz-zapoya163.ru/samara/detoksikacziya-ot-alkogolnogo-otravleniya/ .
Займ до зарплаты с мгновенным одобрением: ваша финансовая страховка
до зарплаты микрозайм https://zajm-do-zarplaty-na-kartu.ru/ .
linetogel
unfollowers instagram web page free online video canadian viagra 100mg instagram logo vector outline svg file downloads
https://o-tendencii.com/
https://hitech24.pro/
Срочное лечение травм зубов в нашей клинике: эффективные решения
травма зуба лечение https://www.ushib-zuba.ru/ .
Имплантация зубов: оптимальные цены и гарантированное качество
импланты зубов в Кемерово https://implantaciya-kemerovo.ru .
https://o-tendencii.com/
Путеводитель по 5-звездочным отелям: лучшие из лучших для люксового отдыха
топ недорогих отелей https://www.reitin-otelei.ru/ .
https://gruzchikivesy.ru/
Изготовление металлических лестниц по индивидуальным размерам
лестница на металле http://www.lestnica-metallokarkas.ru .
https://o-tendencii.com/
linetogel
https://gruzchikimeshki.ru/
Howdy! howcrafts.co
Did you know that it is possible to send letter absolutely legit and valid? We incorporate a legitimate way of sending proposals through feedback forms.
Since Feedback Forms messages are deemed essential, they won’t be seen as spam.
We provide you with the opportunity to test our service free of charge.
We can provide you with up to 50,000 messages.
The cost of sending one million messages is $59.
This message was automatically generated.
Please use the contact details below to get in touch with us.
Contact us.
Telegram – https://t.me/FeedbackFormEU
Skype live:feedbackform2019
WhatsApp +375259112693
WhatsApp https://wa.me/+375259112693
We only use chat for communication.
https://gruzchikinochnoj.ru/
https://gruzchikiklub.ru/
https://gruzchikiperevozchik.ru/
linetogel
https://gruzchikikar.ru/
https://gruzchikigastarbajter.ru/
https://gruzchikiperenosit.ru/
https://gruzchikiestakada.ru/
https://gruzchikimore.ru/
https://gruzchikiustalost.ru/
https://gruzchikikuzov.ru/
online online casino http://www.24bet-casino.com .
https://gruzchikiperevozka.ru/
How to Turn Your Gaming Dreams into Reality with Amirdrassil Boost
atdh boost https://www.amirdrassil-boost.com .
nice content!nice history!! boba 😀
Elevate Your Gameplay: Expert WoW Boosting Service
wow boosting services http://www.wow–boost.com .
Лучший сайт по партнерским программам
https://www.google.com.sl/url?q=http://best-partnerka.ru/
https://www.google.fr/url?q=http://best-partnerka.ru/
https://www.google.co.hu/url?q=http://best-partnerka.ru/
https://google.hr/url?q=http://best-partnerka.ru/
https://www.google.com.bh/url?q=http://best-partnerka.ru/
Navigating Real Estate Listings: Find Your Home Today
real estate websites https://realestate-port.com .
https://gruzchikirabotat.ru/
nice content!nice history!! boba 😀
Заработать в интернете на сайте в сети: арбитраж трафика в буржунете и рунете и монетизация
https://maps.google.ie/url?q=http://zarabotat-v-internete.biz/
https://images.google.co.il/url?q=http://zarabotat-v-internete.biz/
https://google.ga/url?q=http://zarabotat-v-internete.biz/
https://www.google.co.ao/url?q=http://zarabotat-v-internete.biz/
https://google.la/url?q=http://zarabotat-v-internete.biz/
I really loved reading your blog. It was very well authored and easy to understand. Unlike other blogs I have read which are really not that good.Thanks alot!
룸알바
wow, amazing
Отдых в Абхазии недорого: Топ-5 бюджетных отелей и гостевых домов
абхазия цены на отдых https://www.otdykh-v-abhazii.ru/ .
квадроциклы или Музей русского десерта
камни
https://samoylovaoxana.ru/tag/novogodnie-kanikuly/
Ещё можно узнать: где серийный номер на ноутбуке асус
Отпуск
very interesting, but nothing sensible
Первый тест XRumer 23 StrongAI: прирост эффективности в 20 раз!
Уважаемые пользователи!
http://www.botmasterru.com/product109120/
Напоминаем, что в прошлую пятницу, 21-го июля, мы провели первый долгожданный тест сравнения эффективности XRumer 23 StrongAI и текущего XRumer 19.0.18. Разница в эффективности оказалась 20-тикратной ??
Для теста был сделан множественный проход в режиме “Только регистрация”, а в тестовый день — проход в режиме “От ранее зарегистрированного” по небольшой базе в 543.000 ссылок. Исходная база, проекты, кусок отчёта и прочие детали представлены ниже. Проекты практически идентичные, с одной лишь разницей — в XRumer 23 также использовались макросы-вставки для текста GPT. Текст проектов — обычный провокационный кликбейт (дейтинг-тематика).
Как и в прошлые тесты, для сравнения были использованы два пустых сайта-однодневки:
XRumer 19: продвигался сайт xrumer.ru
XRumer 23: продвигался сайт xrumer.xyz
Статистика по итогам проходов регистрации:
XRumer 19: “Активации” — 30.000, “Профили” – 7.700
XRumer 23: “Активации” — 96.000, “Профили” – 61.000
Лечение наркомании: Эффективные методы восстановления в нашей клинике
лечение подростковой наркомании https://vse-o-lechenii-narkomanii.ru/ .
Как получить больничный лист: Рекомендации специалистов
больничный лист купить bolnichnyj-list-495.ru .
fucking google updates fucking google updates google stole mydata fucking google updates fuck google search engine fucking google updates google scam fuck google search engine fuck google search engine fuck google search engine google stole mydata google scam google scam fuck google search engine google scam fuck google search engine fuck google search engine google stole mydata fuck google search engine google stole mydata fuck google search engine fuck google algorithm google stole mydata google stole mydata fuck google search engine google scam google stole mydata google stole mydata fuck google search engine fucking google updates fuck google algorithm fucking google updates fuck google algorithm google scam fuck google search engine google stole mydata google scam google stole mydata google stole mydata fuck google search engine fuck google search engine google scam fucking google updates fuck google algorithm fuck google search engine google scam google stole mydata fuck google search engine fuck google algorithm fuck google algorithm fuck google search engine fucking google updates fuck google algorithm fuck google search engine google scam google stole mydata google stole mydata google scam
KRAKEN зеркало рабочее – ссылка kraken, официальное зеркало kraken
kraken9 – кракен, kraken9
kraken ссылка tor – ссылка kraken, http kraken
kraken ссылка – кракен ссылка, kraken5
m3ga gl сайт – работает ли мега сб, мега сб сайт
m3ga at – мега sb зеркало, mega sb вход не через тор
m3ga точка gl – mega sb даркнет, mega sb официальный
сайт mega sb – mega sb рабочее, m3ga gl
мега даркнет – как зайти на mega sb, мега даркнет
mega dark – мега дарк нет, как зайти на мегу через тор
click here to find out more MetaMask extension
try here MetaMask Chrome
google scam google stole mydata fucking google updates fucking google updates google scam fucking google updates fucking google updates google stole mydata fucking google updates fucking google updates fuck google algorithm fuck google search engine google stole mydata google scam fuck google search engine fuck google algorithm fucking google updates fuck google algorithm fuck google search engine fuck google search engine fuck google search engine google scam fucking google updates fuck google algorithm fucking google updates fucking google updates fucking google updates google stole mydata google scam google scam google stole mydata fuck google algorithm google scam fuck google search engine google scam fuck google search engine google stole mydata fuck google search engine fucking google updates fucking google updates google stole mydata fuck google algorithm google scam fuck google algorithm google stole mydata google scam google stole mydata fuck google algorithm fuck google algorithm fucking google updates fuck google algorithm fuck google algorithm fuck google algorithm fuck google algorithm fuck google algorithm google scam fucking google updates fucking google updates
scam lost money
Hello,
New club music, private server MP3/FLAC, Label, LIVESETS, Music Videos https://0daymusic.org
Available only on our secure FTP server.
0daymusic Team
nice content!nice history!! boba 😀
MediaGet – это свободный медиа клиент, который дает возможность вам загружать и воспроизводить файлы torrent аудио, видео и игр. Для того, чтобы узнать больше о MediaGet, посетите mediaget-setup.ru.
Услуги сантехника: быстро, качественно, недорого
услуги сантехника https://www.uslugi-santekhnika-1.ru .
Жилье в Крыму на 2024 год: где лучше всего остановиться
отдых в крыму цена https://otdyh-v-krimy.ru .
Power is important in a business relationship because it affects the balance
and dynamics of the interaction. Power can create opportunities
or challenges, depending on how it is distributed and exercised.
The best site about business
Услуги сантехника – быстро решим проблему с засором
вызвать сантехника http://www.vyzov-santekhnika1.ru .
wow, amazing
mounjaro tirzepatide – саксенда купить +в турции, семаглутид купить +в москве +в таблетках
оземпик препарат отзывы – аземпик цена, лираглутид инструкция +по применению
здесь Меллстрой стримы
здесь Melstroy
wow, amazing
Нарукавники одноразовые для химической промышленности: защита от химических веществ
Бахилы одноразовые odnorazovie-halatyi.ru .
Салфетки в рулоне из нетканого материала: Эффективность и удобство
Бумага протирочная http://www.odnorazovie-halatyi.ru .
Thanks, I’ve been looking for this for a long time
Лучшие услуги сантехника по низким ценам: Не упустите шанс сэкономить
установка унитаза прайс http://www.vyzov-santekhnika78.ru/ustanovka-santehniki/ustanovka-unitaza/ .
Вызов сантехника на дом: оперативное устранение утечек
сколько стоит установка унитаза vyzov-santekhnika-2.ru/ustanovka-unitaza .
Прочистка засора цена: качественно и доступно для каждого
засор унитаза сколько стоит https://vyzov-santekhnika01.ru/ustranenie-zasorov-unitaza/ .
Xnova – xnova ink, Nova ltd
продать tagrisso – тагриссо, продать осимертиниб
тагриссо продать – tagriso продать, тагрисо продать
зеркало xnova ltd рабочее – Маркетплейс нового поколения, nova ссылка
Клининг для гостиниц: чистота, заслуживающая 5 звёзд
услуги клининга http://kliningovaya-companya-v-moskve.ru/ .
Недвижимость в залоге? Выкупим вашу недвижимость из-под залога у частного лица или микрофинансовой организации.
сайт выкуп квартир за долгами
SCAM LOSE MONEY PHISING LOSE MONEY PHISING LOSE MONEY LOSE MONEY SCAM SCAM PHISING SCAM SCAM LOSE MONEY PHISING LOSE MONEY LOSE MONEY LOSE MONEY SCAM LOSE MONEY SCAM LOSE MONEY PHISING SCAM PHISING LOSE MONEY PHISING PHISING SCAM SCAM PHISING PHISING LOSE MONEY SCAM SCAM LOSE MONEY PHISING PHISING SCAM PHISING SCAM SCAM
SCAM LOSE MONEY PHISING SCAM SCAM PHISING LOSE MONEY PHISING LOSE MONEY PHISING LOSE MONEY SCAM LOSE MONEY PHISING SCAM PHISING LOSE MONEY SCAM LOSE MONEY PHISING LOSE MONEY SCAM PHISING LOSE MONEY SCAM PHISING LOSE MONEY LOSE MONEY SCAM SCAM LOSE MONEY PHISING PHISING SCAM PHISING LOSE MONEY PHISING SCAM SCAM SCAM LOSE MONEY
LOSE MONEY PHISING PHISING LOSE MONEY PHISING LOSE MONEY SCAM LOSE MONEY PHISING LOSE MONEY SCAM SCAM PHISING SCAM SCAM SCAM SCAM SCAM LOSE MONEY SCAM PHISING PHISING PHISING PHISING SCAM PHISING LOSE MONEY PHISING SCAM PHISING SCAM LOSE MONEY SCAM PHISING SCAM LOSE MONEY SCAM LOSE MONEY LOSE MONEY PHISING SCAM
Подробнее здесь электрик томск
пояснения электрик томск
LOSE MONEY PHISING SCAM LOSE MONEY PHISING PHISING LOSE MONEY LOSE MONEY PHISING SCAM LOSE MONEY PHISING PHISING SCAM SCAM PHISING PHISING PHISING PHISING LOSE MONEY PHISING SCAM LOSE MONEY LOSE MONEY PHISING PHISING SCAM LOSE MONEY SCAM PHISING PHISING SCAM PHISING SCAM SCAM LOSE MONEY PHISING LOSE MONEY LOSE MONEY PHISING PHISING
Кот-Д’Ивуар или Седан
Кипр зимой
https://samoylovaoxana.ru/myjskoi-klyb-restoran-syshi-bar-rio/
Ещё можно узнать: феляция
Круизы
Вечеринка? Закажите алкоголь с доставкой без хлопот
доставка алкоголя в москве круглосуточно на дом http://www.dostavka-alkogolya-moskva.ru .
PHISING LOSE MONEY PHISING PHISING LOSE MONEY LOSE MONEY PHISING LOSE MONEY PHISING PHISING SCAM PHISING SCAM LOSE MONEY LOSE MONEY LOSE MONEY PHISING LOSE MONEY PHISING LOSE MONEY SCAM SCAM PHISING PHISING PHISING SCAM LOSE MONEY LOSE MONEY PHISING SCAM SCAM PHISING LOSE MONEY LOSE MONEY PHISING SCAM PHISING LOSE MONEY PHISING PHISING PHISING
SCAM SCAM SCAM LOSE MONEY LOSE MONEY SCAM PHISING LOSE MONEY LOSE MONEY SCAM LOSE MONEY SCAM LOSE MONEY PHISING LOSE MONEY LOSE MONEY SCAM LOSE MONEY SCAM LOSE MONEY SCAM SCAM PHISING LOSE MONEY LOSE MONEY SCAM SCAM LOSE MONEY PHISING PHISING PHISING LOSE MONEY SCAM LOSE MONEY LOSE MONEY SCAM PHISING PHISING LOSE MONEY LOSE MONEY LOSE MONEY
LOSE MONEY LOSE MONEY LOSE MONEY LOSE MONEY LOSE MONEY PHISING SCAM PHISING LOSE MONEY PHISING PHISING PHISING SCAM PHISING SCAM PHISING LOSE MONEY LOSE MONEY SCAM PHISING SCAM LOSE MONEY LOSE MONEY LOSE MONEY LOSE MONEY SCAM LOSE MONEY SCAM LOSE MONEY PHISING LOSE MONEY SCAM LOSE MONEY PHISING
SCAM LOSE MONEY PHISING LOSE MONEY LOSE MONEY LOSE MONEY LOSE MONEY SCAM SCAM LOSE MONEY SCAM LOSE MONEY PHISING SCAM PHISING SCAM SCAM SCAM SCAM LOSE MONEY PHISING SCAM LOSE MONEY LOSE MONEY PHISING SCAM PHISING SCAM SCAM PHISING PHISING SCAM PHISING SCAM
SCAM LOSE MONEY SCAM SCAM SCAM SCAM PHISING SCAM SCAM LOSE MONEY PHISING PHISING SCAM SCAM LOSE MONEY PHISING SCAM LOSE MONEY SCAM SCAM LOSE MONEY SCAM SCAM SCAM SCAM SCAM LOSE MONEY PHISING PHISING PHISING LOSE MONEY PHISING PHISING LOSE MONEY
PHISING SCAM SCAM PHISING SCAM PHISING SCAM LOSE MONEY SCAM SCAM PHISING SCAM SCAM SCAM PHISING PHISING PHISING SCAM LOSE MONEY PHISING SCAM LOSE MONEY SCAM LOSE MONEY SCAM PHISING SCAM PHISING PHISING SCAM PHISING LOSE MONEY PHISING SCAM
PHISING SCAM LOSE MONEY SCAM PHISING LOSE MONEY PHISING LOSE MONEY SCAM LOSE MONEY LOSE MONEY SCAM LOSE MONEY SCAM SCAM SCAM PHISING LOSE MONEY SCAM PHISING LOSE MONEY LOSE MONEY SCAM SCAM SCAM LOSE MONEY SCAM LOSE MONEY PHISING PHISING SCAM LOSE MONEY LOSE MONEY SCAM
http://shurum-burum.ru/
Быстрые новые займы онлайн на карту: Как получить за 10 минут
новые займы на карту 2024 года https://novie-zajmy.ru/ .
SCAM PHISING LOSE MONEY PHISING LOSE MONEY SCAM SCAM PHISING PHISING PHISING PHISING PHISING SCAM LOSE MONEY SCAM SCAM SCAM LOSE MONEY LOSE MONEY PHISING PHISING SCAM SCAM LOSE MONEY PHISING SCAM PHISING PHISING LOSE MONEY PHISING LOSE MONEY PHISING PHISING SCAM
Срочный вывод из запоя в Петербурге: анонимно и безопасно
вывод из запоя недорого https://vivod-iz-zapoya-79.ru .
https://kupitzhilie.ru/
https://salezhilie.ru/
https://kupithouse.ru/
SCAM PHISING SCAM SCAM SCAM SCAM LOSE MONEY SCAM SCAM LOSE MONEY PHISING SCAM SCAM SCAM SCAM PHISING LOSE MONEY PHISING SCAM PHISING LOSE MONEY SCAM LOSE MONEY LOSE MONEY PHISING PHISING LOSE MONEY LOSE MONEY PHISING SCAM SCAM PHISING SCAM LOSE MONEY SCAM SCAM SCAM LOSE MONEY SCAM PHISING PHISING SCAM PHISING LOSE MONEY LOSE MONEY
нажмите здесь Валюта
нажмите здесь Крипта
https://kupitroom.ru/
I visit daily some sites and information sites to read articles, however this webpage provides feature based articles.
Нужен торговый бот. Какой лучше?
Я покупал здесь https://cryptorobotics.ai/ru/
https://arcmetal.ru/
Hi there,
I have reviewed your domain in MOZ and have observed that you may benefit from an increase in authority.
Our solution guarantees you a high-quality domain authority score within a period of three months. This will increase your organic visibility and strengthen your website authority, thus making it stronger against Google updates.
Check out our deals for more details.
https://www.monkeydigital.co/domain-authority-plan/
NEW: Ahrefs Domain Rating
https://www.monkeydigital.co/ahrefs-seo/
Thanks and regards
Mike Little
Сайт отличный, переходим
https://clients1.google.cv/url?q=https%3A%2F%2Fsussexforex.com%2F
https://clients1.google.com.tw/url?q=https%3A%2F%2Fsussexforex.com%2F
https://clients1.google.com.np/url?q=https%3A%2F%2Fsussexforex.com%2F
https://clients1.google.com.ni/url?q=https%3A%2F%2Fsussexforex.com%2F
https://clients1.google.gm/url?q=https%3A%2F%2Fsussexforex.com%2F
https://clients1.google.co.je/url?q=https%3A%2F%2Fsussexforex.com%2F
https://clients1.google.gy/url?q=https%3A%2F%2Fsussexforex.com%2F
https://clients1.google.cz/url?q=https%3A%2F%2Fsussexforex.com%2F
https://clients1.google.co.ke/url?q=https%3A%2F%2Fsussexforex.com%2F
https://clients1.google.bi/url?q=https%3A%2F%2Fsussexforex.com%2F
курорты Азовского моря или Пляж Босак (Bogsak) — 14 фото, как добраться из Мерсина
гиды в Израиле
https://samoylovaoxana.ru/tag/interesnye-mesta-ameriki/
Ещё можно узнать: где написан серийный номер на ноутбуке
Горные туры
https://kupitroom.ru/
Каркасный дом: инвестиции в будущее вашей семьи
купить каркасный дом https://karkasnyedomaspb.ru/ .
Jump to search
Speculate on market Forex?
Best exclusive offer 2024 for common speculators, software developers, traders, trading signal sellers, trading advisor sellers, trading account managers, investment companies, large brokerage firms , as well as for everyone who dreams of opening their own business on the Forex market with minimal investments.
We will be happy to Give away MetaTrader4 Server for 0Give away MetaTrader4 Server for 0/en/products.html
More in detail watch here:
https://drive.google.com/file/d/14xuST2EFDKcnfUT_dL49jQu0Asj1uJx4/view?usp=sharing
https://spbflatkupit.ru/
центр Киева или Мармарис
отдых на море в ноябре
https://samoylovaoxana.ru/tag/plato/
Ещё можно узнать: евро обозначение
Пляжный отдых
נערות ליווי באילת
https://spbdomkupit.ru/
Artificial intelligence – Software development, IT services
Data mining – Enterprise software solutions, Business intelligence
https://spbhousekupit.ru/
https://spbkupitzhilie.ru/
LOSE MONEY SCAM LOSE MONEY LOSE MONEY SCAM PHISING LOSE MONEY SCAM LOSE MONEY LOSE MONEY LOSE MONEY PHISING SCAM LOSE MONEY PHISING PHISING PHISING PHISING LOSE MONEY LOSE MONEY SCAM SCAM SCAM PHISING PHISING LOSE MONEY
Essential Tips for Investors
Best Mobile Wallets for Easy Access to Your Crypto
personal crypto wallet personal crypto wallet .
wow, amazing
PHISING LOSE MONEY LOSE MONEY SCAM PHISING PHISING PHISING SCAM PHISING SCAM LOSE MONEY PHISING SCAM LOSE MONEY PHISING LOSE MONEY PHISING PHISING SCAM SCAM SCAM PHISING PHISING SCAM SCAM PHISING
SCAM PHISING PHISING SCAM SCAM PHISING PHISING SCAM SCAM SCAM PHISING SCAM PHISING PHISING LOSE MONEY PHISING SCAM LOSE MONEY PHISING PHISING SCAM LOSE MONEY LOSE MONEY SCAM SCAM PHISING
PHISING PHISING SCAM SCAM PHISING LOSE MONEY LOSE MONEY SCAM LOSE MONEY PHISING SCAM PHISING LOSE MONEY PHISING SCAM SCAM SCAM SCAM LOSE MONEY LOSE MONEY SCAM LOSE MONEY PHISING SCAM SCAM SCAM
TruePills, No prescription needed, Buy pills without restrictions. Money Back Guaranteed 30-day refunds.
Trial ED Pack consists of the following ED drugs:
Viagra Active Ingredient: Sildenafil 100mg 5 pills
Cialis 20mg 5 pills
Levitra 20mg 5 pills
https://cutt.ly/7wC5m1Id
https://tz25.ru/bitrix/redirect.php?goto=https://true-pill.top/
https://www.taguchizu.net/iframe/hatena_bookmark_comment?canonical_uri=https%3A%2F%2Ftrue-pill.top
http://m.en.tipitipo.com/member/login.html?returnUrl=https://true-pill.top/
http://webappiphone.com/webclips/webclip.php?name=freesms&url=http%3a%2f%2ftrue-pill.top&img=http%3a%2f%2fstandardista.com%2fvelocity%2fimages%2fblackberry.png&x=249&y=55
http://aquastok-shop.ru/bitrix/redirect.php?goto=https://true-pill.top/
Bupropion
Ostex
Comilorid-mepha
Labetalol
Omebloc
Sumagen
Fibsol
Epril plus
Yucomy
Apo-amlodipine
Wormex
Ranitidine
Gasec
Perprazole
Selegilina
Bisogen
Zendol
Terbinafina
Infree s
Eromac
Meloxikam ivax
Cefuroprol
Neurogeron
Finasterin
Letrozolum
Loseca
Betanol
Duradiuret
Ivermectina
Bamalite
Vergon
Paroxil
Indanox
Cefirax
Xeredien
Zegerid
Elcontrol
Flunol
Becilan
Buspironum
LOSE MONEY LOSE MONEY SCAM PHISING SCAM PHISING SCAM SCAM PHISING LOSE MONEY PHISING PHISING SCAM LOSE MONEY LOSE MONEY PHISING PHISING PHISING PHISING PHISING LOSE MONEY LOSE MONEY SCAM PHISING SCAM LOSE MONEY
https://ekbflatkupit.ru/
https://zhksaleflat.ru/
PHISING PHISING LOSE MONEY PHISING PHISING SCAM PHISING PHISING LOSE MONEY SCAM PHISING SCAM PHISING LOSE MONEY SCAM LOSE MONEY LOSE MONEY LOSE MONEY LOSE MONEY LOSE MONEY PHISING SCAM LOSE MONEY SCAM PHISING SCAM LOSE MONEY SCAM SCAM SCAM
LOSE MONEY PHISING SCAM SCAM PHISING LOSE MONEY LOSE MONEY PHISING SCAM PHISING LOSE MONEY PHISING LOSE MONEY LOSE MONEY LOSE MONEY SCAM SCAM SCAM PHISING PHISING SCAM LOSE MONEY PHISING SCAM SCAM PHISING LOSE MONEY PHISING LOSE MONEY LOSE MONEY
LOSE MONEY SCAM LOSE MONEY PHISING PHISING PHISING PHISING SCAM LOSE MONEY LOSE MONEY LOSE MONEY PHISING SCAM LOSE MONEY LOSE MONEY LOSE MONEY LOSE MONEY LOSE MONEY LOSE MONEY LOSE MONEY LOSE MONEY LOSE MONEY PHISING LOSE MONEY SCAM PHISING SCAM SCAM LOSE MONEY PHISING LOSE MONEY LOSE MONEY SCAM SCAM SCAM LOSE MONEY LOSE MONEY PHISING SCAM PHISING LOSE MONEY SCAM SCAM PHISING PHISING LOSE MONEY LOSE MONEY PHISING LOSE MONEY LOSE MONEY PHISING SCAM LOSE MONEY PHISING PHISING PHISING LOSE MONEY LOSE MONEY LOSE MONEY SCAM
LOSE MONEY SCAM SCAM SCAM PHISING SCAM SCAM SCAM PHISING SCAM LOSE MONEY LOSE MONEY PHISING SCAM PHISING PHISING PHISING PHISING LOSE MONEY LOSE MONEY LOSE MONEY PHISING PHISING SCAM PHISING SCAM SCAM PHISING SCAM LOSE MONEY
LOSE MONEY SCAM PHISING PHISING SCAM PHISING SCAM LOSE MONEY LOSE MONEY PHISING PHISING PHISING LOSE MONEY SCAM SCAM SCAM PHISING SCAM LOSE MONEY PHISING SCAM SCAM PHISING PHISING SCAM LOSE MONEY LOSE MONEY SCAM PHISING PHISING
https://zhksalezhilie.ru/
https://zhksalehouse.ru/
https://zhksaledom.ru/
глаз бога телеграмм бесплатно
https://1win-bet.life/
https://vsegda-pomnim.com/
Евролос Грунт
SCAM PHISING PHISING PHISING LOSE MONEY SCAM PHISING PHISING SCAM PHISING PHISING SCAM LOSE MONEY SCAM LOSE MONEY SCAM LOSE MONEY LOSE MONEY LOSE MONEY SCAM PHISING SCAM LOSE MONEY SCAM SCAM PHISING SCAM PHISING LOSE MONEY LOSE MONEY PHISING PHISING LOSE MONEY LOSE MONEY PHISING PHISING LOSE MONEY LOSE MONEY PHISING PHISING PHISING LOSE MONEY PHISING LOSE MONEY LOSE MONEY PHISING PHISING SCAM LOSE MONEY SCAM SCAM LOSE MONEY LOSE MONEY PHISING SCAM LOSE MONEY LOSE MONEY SCAM PHISING LOSE MONEY
mega мориарти официальный – mega darknet market, mega зеркало
mega сайт ссылка – mega darknet market, mega официальный сайт
LOSE MONEY LOSE MONEY PHISING PHISING LOSE MONEY SCAM SCAM SCAM LOSE MONEY SCAM PHISING PHISING PHISING LOSE MONEY SCAM LOSE MONEY LOSE MONEY SCAM LOSE MONEY LOSE MONEY LOSE MONEY PHISING LOSE MONEY SCAM PHISING LOSE MONEY PHISING PHISING PHISING PHISING
kraken tor зеркало – ссылка на kraken, как зайти на kraken kraken onion site
kraken darknet зеркала – кракен тор, kraken ссылка зеркало
http://klublady.ru/
Леон для Android
реальные проститутки москвы
Эскорт модели Проститутки Москвы, несомненно, являются украшением ночного города. Снять проститутку несложно в любом районе столицы, а предлагаемые клиентам интим услуги отличаются доступностью и разнообразием. По вызову в Мск позиционируют эротические услуги и секс за деньги, размещая интим объявления на нашем https: //mskvipladies.ru/ Воспользовавшись этим сайтом, любой москвич или гость столицы сможет найти по своему вкусу и кошельку.
Source:
реальные проститутки москвы
Сериал про космос – смотреть звездные врата
LOSE MONEY PHISING PHISING PHISING PHISING SCAM SCAM LOSE MONEY PHISING SCAM SCAM SCAM LOSE MONEY SCAM PHISING SCAM PHISING LOSE MONEY SCAM PHISING LOSE MONEY SCAM PHISING SCAM LOSE MONEY PHISING LOSE MONEY SCAM PHISING PHISING LOSE MONEY SCAM SCAM PHISING LOSE MONEY PHISING PHISING LOSE MONEY SCAM LOSE MONEY PHISING LOSE MONEY SCAM SCAM PHISING LOSE MONEY PHISING PHISING LOSE MONEY PHISING LOSE MONEY LOSE MONEY LOSE MONEY LOSE MONEY PHISING SCAM PHISING SCAM LOSE MONEY SCAM LOSE MONEY
Если вы ищете простой в использовании способ скачать скачать зона на пк, то сайт zona-for-you.ru станет отличным выбором. Она предлагает понятный даже новичкам интерфейс, позволяющий легко скачать требуемый контент.
http://diplombiolog.ru/
http://diplombuhgalter.ru/
Sweet blog! I found it while browsing on Yahoo News. Do you have any tips on how to get listed
in Yahoo News? I’ve been trying for a while but I never seem to get there!
Appreciate it
Hello!
I want to share with you the secret of how to save not only money but also time when buying medicines. Do you know how often you have to run around pharmacies looking for a bargain price? Well, here I have great news – you don’t have to do that anymore!
Visit >> Pharmacy Review <> Pharmacy Review <> Pharmacy Review << and save now!
Sharing experiences and offering mutual assistance – together we are stronger!
cialis sell
cialis bodybuilding forum
buy generic cialis no prescription
cialis 5 mg 14 tablet nasД±l kullanД±lД±r
can you take 2 20mg cialis
cialis kaufen gГјnstig
cialis alternative in india
can i take 20mg cialis daily
can you take cialis after prostate surgery
chew cialis faster
cialis drawbacks
cialis low prices
cialis pack size
10mg cialis pills
does humana part d policy cover cialis
cialis for eth
cialis generico Г© bom
is cialis a prescription medication
do any medicare advantage plans cover cialis for ed
cialis jak dziaЕ‚a
cialis oral jelly review
can 2.5mg of cialis and 60 mg of duloxetine
cialis head pressure
cialis de cuГЎntos miligramos hay
onset of cialis
diferencia entre cialis y cialis profesional
is cialis otc in canada
cialis pris i sverige
cialis acquisto
cialis sunrise
cialis kaufen online rezept
bangkok pharmacy cialis
cialis cijena u ljekarnama
medicare part d plans that cover cialis
cialis generic price per pill
online pharmace cialis
cialis contraindicaciГіn
european generic cialis
how quickly does cialis work for bph
cialis dailymed
blutverdГјnner und cialis
alternative to cialis
cialis super active generic
cialis coupon cvs
most common dosage of cialis
does cialis work for woman
40 mg generic cialis less than one dollar per pill
cialis and clopidogrel
generic cialis biz
cialis cost drug
cialis for bph insurance coverage with tricare
daily cialis bobybuilding benefits
cialis 50 mg cost
cialis 5 mg prezzo in farmacia svizzera
amount of cialias non daily
cialis 5 mg hypertension
cialis wine webmd
cialis makes my breath smell
how much does tadalafil lower blood pressure
canadian health cialis
buy generic cialis pills
cialis black 80 mg
В нашем кинотеатре https://hdrezka.uno смотреть фильмы и сериалы в хорошем HD-качестве можно смотреть с любого устройства, имеющего доступ в интернет. Наслаждайся кино или телесериалами в любом месте с планшета, смартфона под управлением iOS или Android.
tiktok calculator money
скачать бк леон на android
Greetings from Colorado! I’m bored to tears at work so I decided to browse your website on my iphone during lunch
break. I enjoy the info you present here and can’t wait to take a look when I get home.
I’m surprised at how fast your blog loaded on my cell
phone .. I’m not even using WIFI, just 3G .. Anyhow, good blog!
https://kursovyebiolog.ru
https://forumosisjabar.id/uploads/?rekom=fiatogel
https://kursovyebuhgalter.ru
nice content!nice history!! boba 😀
dark markets directory – Forums deep web links, counterfeit money dark markets
The Dark Web Links – Darknet Markets, credit cards dark markets
Путеводитель по Териберке: лучшие туры и маршруты
мурманск териберка туры http://www.teriberka-tury.ru .
PHISING SCAM SCAM SCAM LOSE MONEY SCAM SCAM LOSE MONEY SCAM LOSE MONEY SCAM SCAM LOSE MONEY PHISING SCAM LOSE MONEY LOSE MONEY LOSE MONEY SCAM LOSE MONEY SCAM LOSE MONEY PHISING LOSE MONEY PHISING SCAM LOSE MONEY LOSE MONEY LOSE MONEY SCAM PHISING LOSE MONEY SCAM SCAM SCAM PHISING LOSE MONEY LOSE MONEY LOSE MONEY PHISING PHISING PHISING LOSE MONEY PHISING PHISING LOSE MONEY SCAM PHISING PHISING PHISING LOSE MONEY SCAM LOSE MONEY PHISING SCAM LOSE MONEY PHISING
PHISING LOSE MONEY LOSE MONEY PHISING LOSE MONEY SCAM SCAM LOSE MONEY SCAM SCAM LOSE MONEY SCAM PHISING SCAM PHISING LOSE MONEY PHISING PHISING SCAM SCAM SCAM LOSE MONEY PHISING SCAM PHISING PHISING SCAM SCAM LOSE MONEY SCAM LOSE MONEY SCAM LOSE MONEY PHISING SCAM LOSE MONEY LOSE MONEY SCAM PHISING PHISING SCAM SCAM PHISING SCAM LOSE MONEY PHISING PHISING PHISING LOSE MONEY SCAM SCAM LOSE MONEY SCAM LOSE MONEY LOSE MONEY LOSE MONEY SCAM
LOSE MONEY LOSE MONEY PHISING PHISING PHISING LOSE MONEY LOSE MONEY LOSE MONEY SCAM LOSE MONEY LOSE MONEY LOSE MONEY PHISING LOSE MONEY SCAM SCAM PHISING LOSE MONEY SCAM PHISING PHISING SCAM SCAM SCAM SCAM PHISING PHISING LOSE MONEY PHISING LOSE MONEY PHISING LOSE MONEY PHISING PHISING SCAM LOSE MONEY LOSE MONEY LOSE MONEY LOSE MONEY PHISING PHISING LOSE MONEY SCAM SCAM SCAM LOSE MONEY LOSE MONEY PHISING PHISING SCAM SCAM PHISING LOSE MONEY SCAM PHISING SCAM PHISING
Hi there
Just checked your howcrafts.co baclink profile, I noticed a moderate percentage of toxic links pointing to your website
We will investigate each link for its toxicity and perform a professional clean up for you free of charge.
Start recovering your ranks today:
https://www.hilkom-digital.de/professional-linksprofile-clean-up-service/
Regards
Mike Holiday
Hilkom Digital SEO Experts
https://www.hilkom-digital.de/
Хочу поделиться своим положительным опытом в lenovo-remont.com. Сервис-центр действительно заслуживает высокой оценки благодаря профессиональный подход и отличный сервис техники Lenovo.
myc coingecko
сайты для торговли криптовалютой
https://zadachbiolog.ru/
Промокоды 1xBet на сегодня. Получите бесплатно при регистрации бонус. Активируйте промокоды и делайте ставки на футбол, хоккей и самые яркие состязания – Лиги Европы и Лиги Чемпионов. Отличительная особенность букмекера – возможность использования промокод 1хбет на сегодня бесплатно на слоты или для активных клиентов, уже имеющих учетную запись. Они обеспечивают двойной депозит, бесплатную ставку (фрибет), специальный бонус на день рождения и многое другое. Актуальные бонусные коды для новичков за регистрацию, способы получения и активации, bonus программа на официальном сайте букмекера 1хБет. Бесплатные промокоды при регистрации в 2024 году в 1xBet – более подробно в этом материале https://fotozayka.ru/wp-content/pages/promokod_240.html
Искать сервисный центр для ремонта техники Neff я не планировал, но, столкнувшись с необходимостью, обратился в этот сервис и получил отличный результат Neff Center .
Мастера сервисного центра оказались настоящими профессионалами, которые быстро диагностировали проблему и предложили оптимальное решение.
Результат работы сервисного центра превзошел все мои ожидания. Моя техника заработала как новенькая, и я могу спокойно рекомендовать этот сервисный центр всем, кто столкнулся с подобной проблемой.
https://t.me/crypto_signals_binance_pump/24498/ Standard Price for VIP- membership for 1 Week VIP Membership is 0.0014 BTC, You will do send payment to BTC address 1KEY1iKrdLQCUMFMeK4FEZXiedDris7uGd Discounted price may be different from 0.00075 to 0.00138 BTC, that is why follow to all announces published in our Public channel!
Приветствую. С радостью информируем о выходе обновленного приложения букмекерской Олимп! best-olimp-app возможно сегодня! Приложение теперь еще комфортнее и функциональнее, обеспечивая доступ к большому ассортименту ставок на спорт с мобильных устройств. С последним обновлением вы имеете расширенные функции управления вашим счетом, обновленный дизайн для более интуитивного использования, а также улучшенную скорость работы. Подключайтесь к довольным пользователям и совершайте свои ставки с наслаждением и комфортом в любое время и в любом месте. Скачайте актуальную версию приложения букмекерской конторы сегодня и играйте вместе с Олимп!
Сравнение методов многофакторной аутентификации
приложение multifactor kz vpn .
Бесплатные промокоды на 2024 от букмекерской конторы 1xBet: при регистрации, на бесплатную ставку. Рассказываем, как использовать и куда вводить промокоды в 1хБет. где найти свой промокод на 1хбет. Бесплатный промокод для увеличения бонуса. Букмекерская контора 1хБет – одна из самых популярных беттинговых площадок, предлагающая высокие коэффициенты, широкую линию с дополнительной росписью. Благодаря низкой марже БК пользователи стабильно зарабатывают на ставках на спорт. Отличительной особенностью букмекерской конторы 1xBet является возможность совершения ставок по промокодам, которые предоставляются бесплатно – более подробно в этом материале https://fotozayka.ru/wp-content/pages/promokod_240.html
Здравствуйте. С радостью делимся информацией о запуске обновленного приложения БК Олимп! best-olimp-app.ru доступное для игроков! Приложение стало еще удобнее и быстрее, открывая доступ к большому ассортименту ставок на спорт с телефона. С новейшим обновлением вы получаете усовершенствованные функции управления вашим счетом, переработанный дизайн для более интуитивного использования, а также повышенную скорость работы. Подключайтесь к удовлетворенным пользователям и делайте свои ставки с удовольствием и комфортом в любом месте и в любое время. Скачайте актуальную версию приложения букмекерской конторы сегодня и играйте вместе с Олимп!
https://zadachbuhgalter.ru
ולגלות את אינספור ההנאות הממתינות רק לך? מציעות מגוון אפשרויות שמבטיחות להשאיר אותך מרגיש מחודש, מאושר ומחובר לגוף שלך! עם בנות עם מפגש לוהט עם הוא צורה אינטימית וחושנית של טיפול במגע מיני המתחבר לתגובת ההנאה הטבעית של גוף האדם. הוא משלב טכניקות מסורתיות נערות ליווי בחיפה
https://otchetbiolog.ru/
https://otchetbuhgalter.ru/
have a peek at this site fortnite changer
my response galaxyswapperv2
Восторгаемся возможностью анонсировать новейшее обновление приложения от БК Олимп для Android! Ваше взаимодействие со ставками на спорт теперь станет еще более увлекательным благодаря усовершенствованному интерфейсу и оптимизированной работе программы. Приложение Олимп бет доступно сегодня! С последней версией приложения вы получите неограниченный доступ к множеству спортивных событий прямо с вашего мобильного устройства. Ожидайте новые функции для управления счетом, современный дизайн для интуитивного использования и значительное улучшение скорости приложения. Станьте частью счастливых клиентов БК Олимп и радуйтесь ставкам где угодно и когда угодно. Загрузите последнюю версию приложения уже сейчас и начните выигрывать вместе с Олимп!
שירותים אירוטיים כדי לענות על העדפות ותקציבים שונים. החל מדוגמניות צעירות ויפות ועד לבחורות המקצועיות ביותר עם ידיים קסומות וגוף להקפיד לפנק את עצמך בקסם האירוטי תוך אימוץ ההזדמנות להצעיר את הנפש, הגוף והחושים שלך. בין הצעות רבות בקרב פינוקים למבוגרים, האתר דירות דיסקרטיות באשדוד
Восторгаемся возможностью представить новейшее обновление приложения от БК Олимп для Android! Ваше умение и опыт со ставками на спорт теперь станет еще более увлекательным благодаря усовершенствованному интерфейсу и ускоренной работе программы. Скачать Олимп бет доступно сейчас! С последней версией приложения вы получите прямой доступ к разнообразию спортивных событий прямо с вашего мобильного устройства. Ожидайте новые функции для управления счетом, современный дизайн для интуитивного использования и значительное улучшение скорости приложения. Станьте частью счастливых клиентов БК Олимп и радуйтесь ставкам где угодно и когда угодно. Загрузите последнюю версию приложения уже сейчас и начните выигрывать вместе с Олимп!
אינטימית הכי עמוקה! בהזמנה לבתי מלון בילוי דיסקרטי מפנק במלון או בביתך הפרטי עם מספק שער להנאה אירוטית חושנית ותשוקה מעבר המסורתיים של מפגש דיסקרטי רגיל ומטרתו לעורר את החושים. המוקד העיקרי של פגישה כזאת הוא לספק רגיעה ולשפר את האינטימיות שלך. הביקוש נערות ליווי בתל אביב
Как выбрать автомобильные весы: советы от экспертов завода
производители автомобильных весов https://autoscale-msk.ru .
С энтузиазмом сообщаем о запуске переработанного мобильного приложения БК Олимп для Android устройств! Этот шаг значительно улучшает ваше опыт с ставками, делая его более интуитивным и быстрым. Бесплатно скачать Олимп бет на андроид доступно сейчас! В новой версии приложения пользователи обретут непосредственный доступ к обширному каталогу спортивных соревнований непосредственно со своего устройства. Оптимизированное управление аккаунтом, новаторский дизайн для беспрепятственного навигации и значительное ускорение работы приложения – всё это ждет вас. Станьте одним из удовлетворенных пользователей и наслаждайтесь от ставок где угодно и в любой момент. Загрузите обновление приложения БК Олимп прямо сейчас и начните новый уровень ставок!
Все о покупке ткани оптом: что нужно знать каждому
ткани для одежды оптом https://www.tkanimoskva1.ru .
С энтузиазмом объявляем о дебюте нового мобильного приложения БК Олимп для Android устройств! Этот релиз значительно трансформирует ваше прежнее взаимодействие с ставками, делая его более интуитивным и эффективным. Скачать apk Olimp bet возможно сегодня! В новой версии приложения пользователи обретут непосредственный доступ к широкому спектру спортивных соревнований через свой смартфон. Улучшенное управление аккаунтом, новаторский дизайн для легкого навигации и значительное ускорение работы приложения – всё это ждет вас. Присоединяйтесь к рядам удовлетворенных пользователей и испытывайте радость от ставок в любом уголке мира и в любой момент. Загрузите обновление приложения БК Олимп сегодня и начните новый уровень игры!
PHISING LOSE MONEY SCAM LOSE MONEY PHISING PHISING SCAM PHISING PHISING SCAM PHISING LOSE MONEY SCAM LOSE MONEY LOSE MONEY SCAM PHISING PHISING PHISING LOSE MONEY LOSE MONEY LOSE MONEY SCAM SCAM SCAM SCAM LOSE MONEY LOSE MONEY SCAM LOSE MONEY PHISING LOSE MONEY SCAM SCAM SCAM SCAM
https://resheniezadachfizika.ru/
boat rentals in islandmorada https://boatrent.shop/
SCAM LOSE MONEY PHISING PHISING PHISING PHISING LOSE MONEY SCAM SCAM SCAM SCAM SCAM SCAM PHISING SCAM SCAM LOSE MONEY PHISING LOSE MONEY SCAM LOSE MONEY SCAM LOSE MONEY SCAM SCAM LOSE MONEY LOSE MONEY SCAM LOSE MONEY PHISING SCAM PHISING PHISING SCAM PHISING LOSE MONEY
bluatblaaotuy
С великим удовольствием разделяем новостью о релизе обновленной версии мобильного приложения от БК Олимп для Android! Это обновление изменит ваш подход к ставкам на спорт, делая процесс более гладким и быстрым. Приложение Olimp и вы получите легкий доступ к огромному выбору спортивных мероприятий, открытых для ставок прямо с вашего мобильного. Усовершенствованные функции управления профилем, интуитивный дизайн для легкости использования и значительное повышение скорости приложения обещают непревзойденный опыт. Становитесь частью сообществу довольных клиентов и наслаждайтесь ставками где бы вы ни находились, когда захотите. Установите последнюю версию приложения БК Олимп немедленно и выходите на новый уровень игры с комфортом и стилем!
https://kursovyemarketing.ru/
blobloblu
bluatblaaotuy
http://avicenna-s.ru/
bliblibli
blublabla
Услуга демонтажа старых частных домов и вывоза мусора в Москве и Подмосковье. Наши специалисты бесплатно выезжают на объект для консультации и оценки объема работ. Мы предлагаем услуги на сайте https://orenvito.ru по доступным ценам и гарантируем качественное выполнение всех работ.
Для получения более подробной информации и рассчета стоимости наших услуг, вы можете связаться с нами по телефону или заполнить форму заявки на нашем сайте.
https://сахагеокешинг.рф/yandex_lychshaya_nasha_reklama_nashi_servisi/
SCAM LOSE MONEY PHISING LOSE MONEY SCAM PHISING SCAM LOSE MONEY PHISING SCAM LOSE MONEY LOSE MONEY LOSE MONEY PHISING LOSE MONEY PHISING PHISING SCAM SCAM PHISING PHISING PHISING LOSE MONEY SCAM PHISING LOSE MONEY SCAM PHISING LOSE MONEY PHISING PHISING SCAM SCAM LOSE MONEY SCAM PHISING
Бездепозитный Бонус 1win 2024
Бонусы от казино промокоды при пополнении 1win1Win 2024 – Бездепозитные бонусы ? Коды на возврат денег ? VIP Программа лояльности ? Бесплатные фриспины.
промокод регистрация 1win: 937999 предоставляет новым игрокам бонус 500% для игры в слоты и игровые автоматы, максимальная сумма бонуса 200 000 рублей. Вы можете использовать бонусные деньги в разделе азартных игр, включая онлайн казино, карты, рулетку, игровые автоматы и слоты.
Компания «1Win» рада предложить своим новым клиентам приветственный бонус в размере до 500% на первые четыре депозита. Это выгодное предложение доступно сразу после регистрации в нашей букмекерской конторе. Бонус можно получить не только в рублях, но и в других валютах, при этом он не ограничивает возможность участия игроков в других программам лояльности компании. Максимальная сумма вознаграждения за регистрацию составляет 75000 рублей или эквивалентная сумма в другой валюте.
1win покер промокод при регистрации приносят игрокам множество преимуществ. Во-первых, они позволяют увеличить начальную ставку или продлить время игры. Кроме того, они дают возможность попробовать различные игры без риска потерять реальные деньги. Бонусы также повышают шансы на выигрыш и предоставляют дополнительные возможности для получения прибыли. Кроме того, бонусы в 1win могут быть обменены на реальные деньги или использованы для участия в специальных акциях и турнирах.
Преимущества получения и использования бонусов в 1win очевидны. Они позволяют игроку расширить свои возможности и получить больше удовольствия от игры. Бонусы также делают игру более выгодной с финансовой точки зрения, помогая уменьшить риски и увеличить потенциальную прибыль. Кроме того, получение и использование бонусов в 1win открывает возможность стать лояльным клиентом и получить дополнительные привилегии и вознаграждения от казино.
Итак, получение бонусов в 1win – это отличная возможность для игрока увеличить свои шансы на выигрыш, получить дополнительные деньги и улучшить свой игровой опыт. Бонусы делают игру более интересной и выгодной.
промокод для 1win при пополнении: 937999 предоставляет возможность получить бездепозитный бонус 2024. Его можно получить в виде фриспинов или фрибетов. Чтобы получить подарок, необходимо активировать код в личном кабинете. Дополнительный депозит не требуется. Размеры подарков невелики: фрибет до 500 рублей и не более 70 фриспинов для игры в слоты. Как и в случае с другими поощрениями, необходимо отыграть бездепозитный бонус. Вейджер, как правило, не превышает х5 для бесплатных ставок и х30 для фриспинов.
В казино 1win предоставляется внушительный бонус при регистрации, который составляет 500% от суммы первых четырех последовательных депозитов клиента. С таким количеством бонусов новичок может значительно увеличить свои шансы на выигрыш. Чтобы получить этот приветственный бонус, необходимо зарегистрироваться на официальном сайте, рабочем зеркале, мобильной версии или приложениях для мобильных телефонов. Однако, основным условием является совершение первого пополнения счета, так как активировать бонусы 1win можно только после этого.
как вести промокод в 1win: 937999 используйте бонусный код при регистрации и получите бездепозтный бонус 70 фриспинов. Да, при использовании кода 1Win вы можете получить различные поощрения, включая бездепозитные бонусы. Они обычно представлены в виде фрибетов или фриспинов. Для их активации не требуется дополнительное пополнение счета. Размер таких подарков невелик: бесплатных вращений не более 70. Вейджер на бездепозитный бонус обычно не превышает х35. В 1Win вы можете получить бонусы за участие в акциях, турнирах, розыгрышах и активацию промокода. Бонусная программа периодически обновляется. Кроме того, некоторые акции имеют сезонный характер.
В 1Win основная бонусная программа включает в себя фриспины. Чтобы получить 70FS, необходимо пополнить счет на 100 рублей или более. Игроку предоставляется 2 дня с момента регистрации для активации презента. Отыгрыш бонуса должен быть выполнен в течение 24 часов с момента начисления, с вейджером х35. Бесплатные вращения предназначены только для игр провайдера Microgaming.
Так как бонусная программа 1Win регулярно обновляется, список акций, в которых можно получить фриспины, постоянно расширяется. Более подробную информацию о них можно найти на нашем сайте.
Промокод на 1Win дает возможность получить бесплатные вращения. Их можно использовать в любых слотах из каталога казино. Иногда могут быть установлены ограничения, которые предусматривают использование фриспинов только в определенных слотах или играх конкретного провайдера. Фриспины начисляются с фиксированной ставкой. Отыгрыш выигрыша, полученного с помощью бесплатных вращений, обязателен с учетом установленного вейджера.
Вся информация взята с сайта; https://fundament-spb.ru/pages/promokod_362.html
https://1ecenter.ru
Mediaget – превосходный клиент для загрузки файлов, который предлагает удобный интерфейс и высокую скорость загрузки. Если вы ищете надежный и легкий в использовании клиент для загрузки файлов, то этот клиент идеально подходит для вас. Скачать Mediaget вы можете бесплатно по ссылке mediadjet-skachat.ru. Mediaget легко устанавливается и не требует особых настроек, что делает его идеальным выбором для пользователей любого уровня знаний.клиента.
ddos сервис – ддос сервис, удалить данные из интернета
1хбет бонусы – как ввести промокод в 1хбет, 1xbet регистрация скачать
LOSE MONEY SCAM SCAM SCAM LOSE MONEY SCAM PHISING SCAM PHISING SCAM PHISING SCAM SCAM LOSE MONEY LOSE MONEY PHISING LOSE MONEY SCAM SCAM PHISING PHISING SCAM PHISING PHISING LOSE MONEY SCAM SCAM SCAM PHISING LOSE MONEY SCAM SCAM PHISING SCAM LOSE MONEY PHISING
https://avto-dublikat.ru/
1xbet промокод – промокод 1хставка, условия промокода 1хставка
промокод 1хбет – промокод 1xbet на год регистрации, промокод 1xstavka 2021
LOSE MONEY SCAM LOSE MONEY PHISING SCAM PHISING PHISING LOSE MONEY LOSE MONEY PHISING PHISING PHISING SCAM LOSE MONEY PHISING LOSE MONEY PHISING LOSE MONEY PHISING PHISING PHISING SCAM SCAM SCAM PHISING PHISING SCAM PHISING SCAM LOSE MONEY LOSE MONEY PHISING PHISING SCAM SCAM SCAM
Бездепозитный Бонус 1win 2024
Бонусы от казино промокод 1win на пополнение счета сегодня1Win 2024 – Бездепозитные бонусы ? Коды на возврат денег ? VIP Программа лояльности ? Бесплатные фриспины.
1вин промокоды: 937999 предоставляет новым игрокам бонус 500% для игры в слоты и игровые автоматы, максимальная сумма бонуса 200 000 рублей. Вы можете использовать бонусные деньги в разделе азартных игр, включая онлайн казино, карты, рулетку, игровые автоматы и слоты.
Компания «1Win» рада предложить своим новым клиентам приветственный бонус в размере до 500% на первые четыре депозита. Это выгодное предложение доступно сразу после регистрации в нашей букмекерской конторе. Бонус можно получить не только в рублях, но и в других валютах, при этом он не ограничивает возможность участия игроков в других программам лояльности компании. Максимальная сумма вознаграждения за регистрацию составляет 75000 рублей или эквивалентная сумма в другой валюте.
1win промокод на бесплатную ставку приносят игрокам множество преимуществ. Во-первых, они позволяют увеличить начальную ставку или продлить время игры. Кроме того, они дают возможность попробовать различные игры без риска потерять реальные деньги. Бонусы также повышают шансы на выигрыш и предоставляют дополнительные возможности для получения прибыли. Кроме того, бонусы в 1win могут быть обменены на реальные деньги или использованы для участия в специальных акциях и турнирах.
Преимущества получения и использования бонусов в 1win очевидны. Они позволяют игроку расширить свои возможности и получить больше удовольствия от игры. Бонусы также делают игру более выгодной с финансовой точки зрения, помогая уменьшить риски и увеличить потенциальную прибыль. Кроме того, получение и использование бонусов в 1win открывает возможность стать лояльным клиентом и получить дополнительные привилегии и вознаграждения от казино.
Итак, получение бонусов в 1win – это отличная возможность для игрока увеличить свои шансы на выигрыш, получить дополнительные деньги и улучшить свой игровой опыт. Бонусы делают игру более интересной и выгодной.
1win регистрация с промокодом: 937999 предоставляет возможность получить бездепозитный бонус 2024. Его можно получить в виде фриспинов или фрибетов. Чтобы получить подарок, необходимо активировать код в личном кабинете. Дополнительный депозит не требуется. Размеры подарков невелики: фрибет до 500 рублей и не более 70 фриспинов для игры в слоты. Как и в случае с другими поощрениями, необходимо отыграть бездепозитный бонус. Вейджер, как правило, не превышает х5 для бесплатных ставок и х30 для фриспинов.
В казино 1win предоставляется внушительный бонус при регистрации, который составляет 500% от суммы первых четырех последовательных депозитов клиента. С таким количеством бонусов новичок может значительно увеличить свои шансы на выигрыш. Чтобы получить этот приветственный бонус, необходимо зарегистрироваться на официальном сайте, рабочем зеркале, мобильной версии или приложениях для мобильных телефонов. Однако, основным условием является совершение первого пополнения счета, так как активировать бонусы 1win можно только после этого.
1win промокод при регистрации без депозита: 937999 используйте бонусный код при регистрации и получите бездепозтный бонус 70 фриспинов. Да, при использовании кода 1Win вы можете получить различные поощрения, включая бездепозитные бонусы. Они обычно представлены в виде фрибетов или фриспинов. Для их активации не требуется дополнительное пополнение счета. Размер таких подарков невелик: бесплатных вращений не более 70. Вейджер на бездепозитный бонус обычно не превышает х35. В 1Win вы можете получить бонусы за участие в акциях, турнирах, розыгрышах и активацию промокода. Бонусная программа периодически обновляется. Кроме того, некоторые акции имеют сезонный характер.
В 1Win основная бонусная программа включает в себя фриспины. Чтобы получить 70FS, необходимо пополнить счет на 100 рублей или более. Игроку предоставляется 2 дня с момента регистрации для активации презента. Отыгрыш бонуса должен быть выполнен в течение 24 часов с момента начисления, с вейджером х35. Бесплатные вращения предназначены только для игр провайдера Microgaming.
Так как бонусная программа 1Win регулярно обновляется, список акций, в которых можно получить фриспины, постоянно расширяется. Более подробную информацию о них можно найти на нашем сайте.
Промокод на 1Win дает возможность получить бесплатные вращения. Их можно использовать в любых слотах из каталога казино. Иногда могут быть установлены ограничения, которые предусматривают использование фриспинов только в определенных слотах или играх конкретного провайдера. Фриспины начисляются с фиксированной ставкой. Отыгрыш выигрыша, полученного с помощью бесплатных вращений, обязателен с учетом установленного вейджера.
Вся информация взята с сайта; https://fundament-spb.ru/pages/promokod_362.html
פצצה, בעיר יש אפשרויות לכל הטעמים. חשוב עם זאת לוודא שאתה בוחר הכי מכובדות ששומרות על סטנדרטים אתיים גבוהים ו מעדיפות את הנוחות גבולות אינטימיים ספציפיים שיש לך. מידע זה מסייע להתאים את הפגישה לצרכים האישיים ולהבטיח לך חוויה נוחה ומהנה, לשחרר את הציפיות דירות דיסקרטיות באשקלון
Услуга демонтажа старых частных домов и вывоза мусора в Москве и Подмосковье от нашей компании. Мы предлагаем демонтаж и вывоз мусора в указанном регионе по доступным ценам. Наша команда https://hoteltramontano.ru гарантирует выполнение услуги в течение 24 часов после заказа. Мы бесплатно оцениваем объект и консультируем клиентов. Узнать подробности и рассчитать стоимость можно по телефону или на нашем сайте.
LOSE MONEY SCAM SCAM PHISING SCAM LOSE MONEY LOSE MONEY LOSE MONEY SCAM SCAM PHISING LOSE MONEY LOSE MONEY LOSE MONEY SCAM SCAM PHISING LOSE MONEY PHISING LOSE MONEY LOSE MONEY PHISING SCAM SCAM PHISING PHISING SCAM PHISING SCAM SCAM SCAM SCAM LOSE MONEY SCAM SCAM SCAM
Перейти на сайт
Прогнозы на спорт
содержанки москвы
сайт проституток москвы
лучшие проститутки москвы
интим услуги Москва
снять девушку на ночь
проверенные индивидуалки москвы
эскорт модели москва
элитный эскорт москва
дешевые проститутки москвы
девушка на час Москва
эскорт услуги Мск
элитные проститутки москвы
эскорт услуги в москве
https://www.google.hu/url?q=https://mgtimez.ru/
https://images.google.cv/url?q=https://mgtimez.ru/uslugi/
https://clients1.google.cat/url?q=https://mgtimez.ru/uslugi/
https://usefulness.url.google.com/url?q=https://mgtimez.ru/uslugi/
https://toolbarqueries.google.com.jm/url?q=https://mgtimez.ru/uslugi/
Список бесплатных на сегодня промокодов 1xBet. Тип бесплатного промокода. Промокод промокод на бесплатную ставку. промокод на 1хбет на бонусы и подарки. Как сегодня получить 32500 рублей по промокоду в 1xBet? Получение начинается после регистрации с рабочим промокодом и первого пополнения счета и составляет +100% к депозиту. Игрок может рассчитывать по промокоду до 32 500 рублей, если пройдет верификацию и даст согласие на участие в рекламных предложениях букмекера. На сегодня акция по промокоду 1xBet распространяется на пользователей из России, Беларуси, Украины, Казахстана – более подробно в этом материале https://fotozayka.ru/wp-content/pages/promokod_240.html
blobloblu
124969D742
эскорт услуги Мск
эскорт услуги в москве
эскорт модели москва
лучшие проститутки москвы
сайт проституток москвы
снять девушку на ночь
проверенные индивидуалки москвы
содержанки москвы
элитный эскорт москва
элитные проститутки москвы
дешевые проститутки москвы
интим услуги Москва
девушка на час Москва
https://image.google.gl/url?q=https://mgtimez.ru/
https://image.google.fm/url?q=https://mgtimez.ru/
https://maps.google.is/url?q=https://mgtimez.ru/
https://cse.google.ht/url?q=https://mgtimez.ru/
https://www.google.rs/url?q=https://mgtimez.ru/
שירותים אירוטיים כדי לענות על העדפות ותקציבים שונים. החל מדוגמניות צעירות ויפות ועד לבחורות המקצועיות ביותר עם ידיים קסומות וגוף חוויה מחוץ לעולם הזה שתפתה את הגוף והנפש שלך. בנוסף הן בהחלט יכולות לשפר את המודעות שלך לגוף ולעזור לך להתחבר עם החושניות שלך דירות דיסקרטיות בבאר שבע
blobloblu
blolbo
https://github.com/ForexRobotEasy/Index-Scalper-PRO-MT4
Услуга демонтажа старых частных домов и вывоза мусора в Москве и Подмосковье от нашей компании. Мы предлагаем демонтаж и вывоз мусора в указанном регионе по доступным ценам. Наша команда гарантирует выполнение услуги снос дома и вывоз мусора в течение 24 часов после заказа. Мы бесплатно оцениваем объект и консультируем клиентов.
волчонок смотреть в качестве HD
boba 😀
lalablublu
https://na-dache.pro
содержанки москвы
дешевые проститутки москвы
интим услуги Москва
лучшие проститутки москвы
эскорт услуги Мск
эскорт модели москва
сайт проституток москвы
проверенные индивидуалки москвы
девушка на час Москва
снять девушку на ночь
элитный эскорт москва
эскорт услуги в москве
элитные проститутки москвы
https://cse.google.ch/url?q=https://mgtimez.ru/
https://maps.google.co.tz/url?q=https://mgtimez.ru/
https://clients1.google.com.mt/url?q=https://mgtimez.ru/
https://cse.google.gm/url?q=https://mgtimez.ru/uslugi/
https://highlight-staging-gws.sandbox.google.com/url?q=https://mgtimez.ru/uslugi/
Бездепозитный Бонус 1win 2024
Бонусы от казино 1win промокод на фрибет1Win 2024 – Бездепозитные бонусы ? Коды на возврат денег ? VIP Программа лояльности ? Бесплатные фриспины.
1win официальный сайт промокод: 937999 предоставляет новым игрокам бонус 500% для игры в слоты и игровые автоматы, максимальная сумма бонуса 200 000 рублей. Вы можете использовать бонусные деньги в разделе азартных игр, включая онлайн казино, карты, рулетку, игровые автоматы и слоты.
Компания «1Win» рада предложить своим новым клиентам приветственный бонус в размере до 500% на первые четыре депозита. Это выгодное предложение доступно сразу после регистрации в нашей букмекерской конторе. Бонус можно получить не только в рублях, но и в других валютах, при этом он не ограничивает возможность участия игроков в других программам лояльности компании. Максимальная сумма вознаграждения за регистрацию составляет 75000 рублей или эквивалентная сумма в другой валюте.
1win официальный промокод приносят игрокам множество преимуществ. Во-первых, они позволяют увеличить начальную ставку или продлить время игры. Кроме того, они дают возможность попробовать различные игры без риска потерять реальные деньги. Бонусы также повышают шансы на выигрыш и предоставляют дополнительные возможности для получения прибыли. Кроме того, бонусы в 1win могут быть обменены на реальные деньги или использованы для участия в специальных акциях и турнирах.
Преимущества получения и использования бонусов в 1win очевидны. Они позволяют игроку расширить свои возможности и получить больше удовольствия от игры. Бонусы также делают игру более выгодной с финансовой точки зрения, помогая уменьшить риски и увеличить потенциальную прибыль. Кроме того, получение и использование бонусов в 1win открывает возможность стать лояльным клиентом и получить дополнительные привилегии и вознаграждения от казино.
Итак, получение бонусов в 1win – это отличная возможность для игрока увеличить свои шансы на выигрыш, получить дополнительные деньги и улучшить свой игровой опыт. Бонусы делают игру более интересной и выгодной.
активировать промокод 1win: 937999 предоставляет возможность получить бездепозитный бонус 2024. Его можно получить в виде фриспинов или фрибетов. Чтобы получить подарок, необходимо активировать код в личном кабинете. Дополнительный депозит не требуется. Размеры подарков невелики: фрибет до 500 рублей и не более 70 фриспинов для игры в слоты. Как и в случае с другими поощрениями, необходимо отыграть бездепозитный бонус. Вейджер, как правило, не превышает х5 для бесплатных ставок и х30 для фриспинов.
В казино 1win предоставляется внушительный бонус при регистрации, который составляет 500% от суммы первых четырех последовательных депозитов клиента. С таким количеством бонусов новичок может значительно увеличить свои шансы на выигрыш. Чтобы получить этот приветственный бонус, необходимо зарегистрироваться на официальном сайте, рабочем зеркале, мобильной версии или приложениях для мобильных телефонов. Однако, основным условием является совершение первого пополнения счета, так как активировать бонусы 1win можно только после этого.
win promocodes промокоды 1win: 937999 используйте бонусный код при регистрации и получите бездепозтный бонус 70 фриспинов. Да, при использовании кода 1Win вы можете получить различные поощрения, включая бездепозитные бонусы. Они обычно представлены в виде фрибетов или фриспинов. Для их активации не требуется дополнительное пополнение счета. Размер таких подарков невелик: бесплатных вращений не более 70. Вейджер на бездепозитный бонус обычно не превышает х35. В 1Win вы можете получить бонусы за участие в акциях, турнирах, розыгрышах и активацию промокода. Бонусная программа периодически обновляется. Кроме того, некоторые акции имеют сезонный характер.
В 1Win основная бонусная программа включает в себя фриспины. Чтобы получить 70FS, необходимо пополнить счет на 100 рублей или более. Игроку предоставляется 2 дня с момента регистрации для активации презента. Отыгрыш бонуса должен быть выполнен в течение 24 часов с момента начисления, с вейджером х35. Бесплатные вращения предназначены только для игр провайдера Microgaming.
Так как бонусная программа 1Win регулярно обновляется, список акций, в которых можно получить фриспины, постоянно расширяется. Более подробную информацию о них можно найти на нашем сайте.
Промокод на 1Win дает возможность получить бесплатные вращения. Их можно использовать в любых слотах из каталога казино. Иногда могут быть установлены ограничения, которые предусматривают использование фриспинов только в определенных слотах или играх конкретного провайдера. Фриспины начисляются с фиксированной ставкой. Отыгрыш выигрыша, полученного с помощью бесплатных вращений, обязателен с учетом установленного вейджера.
Вся информация взята с сайта; https://palikprof.ru/novosti/pages/promokod_362.html
LOSE MONEY PHISING LOSE MONEY SCAM SCAM SCAM PHISING SCAM LOSE MONEY SCAM LOSE MONEY SCAM LOSE MONEY LOSE MONEY SCAM PHISING LOSE MONEY SCAM SCAM SCAM SCAM SCAM PHISING SCAM SCAM PHISING SCAM LOSE MONEY LOSE MONEY SCAM SCAM LOSE MONEY LOSE MONEY PHISING LOSE MONEY SCAM SCAM LOSE MONEY LOSE MONEY LOSE MONEY PHISING PHISING SCAM SCAM SCAM LOSE MONEY LOSE MONEY LOSE MONEY PHISING LOSE MONEY PHISING LOSE MONEY SCAM PHISING LOSE MONEY LOSE MONEY PHISING LOSE MONEY LOSE MONEY SCAM SCAM SCAM LOSE MONEY LOSE MONEY SCAM SCAM PHISING PHISING PHISING PHISING PHISING SCAM SCAM PHISING LOSE MONEY SCAM SCAM PHISING SCAM SCAM LOSE MONEY SCAM PHISING LOSE MONEY LOSE MONEY PHISING PHISING PHISING SCAM LOSE MONEY LOSE MONEY PHISING SCAM
1xbet промокод на сегодня 2024. Чтобы удовлетворить потребности бетторов и сделать процесс ставок максимально разнообразным нередко букмекерские конторы пытаются увеличить свой функционал, путем добавления специальных функций и предложений. Одним из лидеров среди популярных букмекеров на постсоветском пространстве по своим функциональным возможностям является 1хБет. Ввод промокод в 1хбет на сегодня после регистрации позволяет получить увеличенную сумму бонуса. Для этого достаточно после создания аккаунта внести первый депозит (максимальная сумма бонусного начисления составляет 32 500 рублей). Можно использовать любой платёжный метод. Абсолютно бесплатный промокод 1xbet. На сегодня контора предлагает всем новичкам воспользоваться не только приветственным бонусом, но и получить дополнительные преференции. Эти льготы игрок получает в том случае, если внимательно отнесётся к процедуре регистрации на сайте. Ведь не все новички обращают внимание или понимают, о каких выгодах идёт речь, когда видят необязательное для заполнения поле «Введите промокод (при наличии)», находящееся в самом низу регистрационной формы. Оно есть при трёх способах получения аккаунта из четырёх возможных («В 1 клик», «По номеру телефона», «По e-mail»). А игнорировать его – это потерять дополнительные выгоды – более подробно в этом материале http://saratovturizm.ru/interesting/pages/promo_kod_bk_1xbet_na_segodnya_pri_registracii.html
http://klubmama.ru
PHISING LOSE MONEY SCAM PHISING PHISING LOSE MONEY PHISING LOSE MONEY PHISING LOSE MONEY LOSE MONEY PHISING SCAM PHISING LOSE MONEY LOSE MONEY LOSE MONEY PHISING SCAM LOSE MONEY SCAM SCAM SCAM LOSE MONEY LOSE MONEY LOSE MONEY LOSE MONEY PHISING PHISING LOSE MONEY PHISING LOSE MONEY LOSE MONEY PHISING LOSE MONEY SCAM SCAM LOSE MONEY SCAM PHISING SCAM PHISING LOSE MONEY PHISING LOSE MONEY LOSE MONEY PHISING PHISING LOSE MONEY PHISING SCAM LOSE MONEY LOSE MONEY SCAM PHISING SCAM LOSE MONEY SCAM LOSE MONEY PHISING LOSE MONEY PHISING SCAM SCAM SCAM PHISING SCAM LOSE MONEY SCAM PHISING SCAM SCAM SCAM LOSE MONEY SCAM PHISING PHISING PHISING SCAM PHISING LOSE MONEY SCAM LOSE MONEY PHISING SCAM LOSE MONEY SCAM LOSE MONEY SCAM SCAM PHISING LOSE MONEY PHISING
https://1ecenter.ru/
שמפרסמות את עצמן באתר רוצות לתת לך תחושות הכי מאושרות, אימוץ מושג ההנאה החושית ומציעות תפריט נרחב של שירותי . הן בכיף מבטיחות לך גבולות אינטימיים ספציפיים שיש לך. מידע זה מסייע להתאים את הפגישה לצרכים האישיים ולהבטיח לך חוויה נוחה ומהנה, לשחרר את הציפיות דירות דיסקרטיות בתל אביב
1вин
Revolutionize Your Manufacturing Process with a 3D Printer
3d printer price http://www.3d-ruyter53.ru .
PHISING LOSE MONEY SCAM SCAM PHISING PHISING LOSE MONEY PHISING PHISING LOSE MONEY LOSE MONEY PHISING SCAM SCAM SCAM SCAM LOSE MONEY LOSE MONEY SCAM PHISING LOSE MONEY LOSE MONEY SCAM PHISING SCAM SCAM SCAM PHISING SCAM SCAM SCAM PHISING LOSE MONEY PHISING PHISING PHISING LOSE MONEY LOSE MONEY PHISING SCAM LOSE MONEY LOSE MONEY PHISING SCAM LOSE MONEY PHISING LOSE MONEY PHISING PHISING LOSE MONEY SCAM PHISING LOSE MONEY SCAM SCAM PHISING PHISING PHISING SCAM LOSE MONEY LOSE MONEY SCAM SCAM SCAM PHISING LOSE MONEY SCAM LOSE MONEY PHISING SCAM PHISING PHISING SCAM PHISING LOSE MONEY PHISING LOSE MONEY LOSE MONEY LOSE MONEY LOSE MONEY SCAM LOSE MONEY LOSE MONEY LOSE MONEY PHISING SCAM SCAM PHISING SCAM PHISING PHISING SCAM SCAM
lalablublu
Бездепозитный Бонус 1win 2024
Бонусы от казино 1win промокод бонус за регистрацию1Win 2024 – Бездепозитные бонусы ? Коды на возврат денег ? VIP Программа лояльности ? Бесплатные фриспины.
промокод на 1вин при пополнение: 937999 предоставляет новым игрокам бонус 500% для игры в слоты и игровые автоматы, максимальная сумма бонуса 200 000 рублей. Вы можете использовать бонусные деньги в разделе азартных игр, включая онлайн казино, карты, рулетку, игровые автоматы и слоты.
Компания «1Win» рада предложить своим новым клиентам приветственный бонус в размере до 500% на первые четыре депозита. Это выгодное предложение доступно сразу после регистрации в нашей букмекерской конторе. Бонус можно получить не только в рублях, но и в других валютах, при этом он не ограничивает возможность участия игроков в других программам лояльности компании. Максимальная сумма вознаграждения за регистрацию составляет 75000 рублей или эквивалентная сумма в другой валюте.
1win промокод на депозит приносят игрокам множество преимуществ. Во-первых, они позволяют увеличить начальную ставку или продлить время игры. Кроме того, они дают возможность попробовать различные игры без риска потерять реальные деньги. Бонусы также повышают шансы на выигрыш и предоставляют дополнительные возможности для получения прибыли. Кроме того, бонусы в 1win могут быть обменены на реальные деньги или использованы для участия в специальных акциях и турнирах.
Преимущества получения и использования бонусов в 1win очевидны. Они позволяют игроку расширить свои возможности и получить больше удовольствия от игры. Бонусы также делают игру более выгодной с финансовой точки зрения, помогая уменьшить риски и увеличить потенциальную прибыль. Кроме того, получение и использование бонусов в 1win открывает возможность стать лояльным клиентом и получить дополнительные привилегии и вознаграждения от казино.
Итак, получение бонусов в 1win – это отличная возможность для игрока увеличить свои шансы на выигрыш, получить дополнительные деньги и улучшить свой игровой опыт. Бонусы делают игру более интересной и выгодной.
1win casino промокод: 937999 предоставляет возможность получить бездепозитный бонус 2024. Его можно получить в виде фриспинов или фрибетов. Чтобы получить подарок, необходимо активировать код в личном кабинете. Дополнительный депозит не требуется. Размеры подарков невелики: фрибет до 500 рублей и не более 70 фриспинов для игры в слоты. Как и в случае с другими поощрениями, необходимо отыграть бездепозитный бонус. Вейджер, как правило, не превышает х5 для бесплатных ставок и х30 для фриспинов.
В казино 1win предоставляется внушительный бонус при регистрации, который составляет 500% от суммы первых четырех последовательных депозитов клиента. С таким количеством бонусов новичок может значительно увеличить свои шансы на выигрыш. Чтобы получить этот приветственный бонус, необходимо зарегистрироваться на официальном сайте, рабочем зеркале, мобильной версии или приложениях для мобильных телефонов. Однако, основным условием является совершение первого пополнения счета, так как активировать бонусы 1win можно только после этого.
промокод на 1win на пополнение: 937999 используйте бонусный код при регистрации и получите бездепозтный бонус 70 фриспинов. Да, при использовании кода 1Win вы можете получить различные поощрения, включая бездепозитные бонусы. Они обычно представлены в виде фрибетов или фриспинов. Для их активации не требуется дополнительное пополнение счета. Размер таких подарков невелик: бесплатных вращений не более 70. Вейджер на бездепозитный бонус обычно не превышает х35. В 1Win вы можете получить бонусы за участие в акциях, турнирах, розыгрышах и активацию промокода. Бонусная программа периодически обновляется. Кроме того, некоторые акции имеют сезонный характер.
В 1Win основная бонусная программа включает в себя фриспины. Чтобы получить 70FS, необходимо пополнить счет на 100 рублей или более. Игроку предоставляется 2 дня с момента регистрации для активации презента. Отыгрыш бонуса должен быть выполнен в течение 24 часов с момента начисления, с вейджером х35. Бесплатные вращения предназначены только для игр провайдера Microgaming.
Так как бонусная программа 1Win регулярно обновляется, список акций, в которых можно получить фриспины, постоянно расширяется. Более подробную информацию о них можно найти на нашем сайте.
Промокод на 1Win дает возможность получить бесплатные вращения. Их можно использовать в любых слотах из каталога казино. Иногда могут быть установлены ограничения, которые предусматривают использование фриспинов только в определенных слотах или играх конкретного провайдера. Фриспины начисляются с фиксированной ставкой. Отыгрыш выигрыша, полученного с помощью бесплатных вращений, обязателен с учетом установленного вейджера.
Вся информация взята с сайта; https://palikprof.ru/novosti/pages/promokod_362.html
blolbo
Какие квартиры мы выкупаемВаша квартира находится в ипотеке банка, организации или физического лица. Не проблема! Мы сами погасим за Вас ипотеку и организуем сделкуС ипотекойРассчитать стоимость выкупа
квартира выкуп спб
Thanks for sharing. I read many of your blog posts, cool, your blog is very good.
Adobe Flash Player – широко используемая утилита, которая дает возможность просматривать анимацию, видео и игры онлайн. Если вы хотите получить доступ к множеству интернет-ресурсов, рекомендуем flash player plugin из надежного источника. Это свободно распространяемое программное обеспечение, которое существенно улучшит ваш опыт работы в сети.
cululutata
Фантастический сервисный центр servispylesosydajson.ru предоставил мне незабываемый опыт. Эксперты центра оперативно и качественно диагностировали и исправили проблему со моим пылесосом Dyson.
Более того, я был очень впечатлен уровнем сервиса, предоставленным сервисным центром. Они проявили особую заботу ко всем моим потребностям и дали ценные рекомендации по уходу за моим пылесосом.
Купить диплом о высшем образовании: как избежать мошенников
дипломы о высшем образовании купить dipla-slide.ru .
Join the Elite: WoW Raid Boosting for Serious Gamers
wow raid boosting https://www.wow-raid-boost.com/ .
Выбирайте оптом детскую одежду для своего магазина и увеличивайте продажи
магазин детской одежды https://detskaya-odezhda-msk.ru .
LOSE MONEY
оптимизация сайта seo
restauración de baños
bliloblo
Бездепозитный Бонус 1win 2024
Бонусы от казино промокод для 1вин при пополнении1Win 2024 – Бездепозитные бонусы ? Коды на возврат денег ? VIP Программа лояльности ? Бесплатные фриспины.
1win промокод 2024: 937999 предоставляет новым игрокам бонус 500% для игры в слоты и игровые автоматы, максимальная сумма бонуса 200 000 рублей. Вы можете использовать бонусные деньги в разделе азартных игр, включая онлайн казино, карты, рулетку, игровые автоматы и слоты.
Компания «1Win» рада предложить своим новым клиентам приветственный бонус в размере до 500% на первые четыре депозита. Это выгодное предложение доступно сразу после регистрации в нашей букмекерской конторе. Бонус можно получить не только в рублях, но и в других валютах, при этом он не ограничивает возможность участия игроков в других программам лояльности компании. Максимальная сумма вознаграждения за регистрацию составляет 75000 рублей или эквивалентная сумма в другой валюте.
1win букмекерская промокод приносят игрокам множество преимуществ. Во-первых, они позволяют увеличить начальную ставку или продлить время игры. Кроме того, они дают возможность попробовать различные игры без риска потерять реальные деньги. Бонусы также повышают шансы на выигрыш и предоставляют дополнительные возможности для получения прибыли. Кроме того, бонусы в 1win могут быть обменены на реальные деньги или использованы для участия в специальных акциях и турнирах.
Преимущества получения и использования бонусов в 1win очевидны. Они позволяют игроку расширить свои возможности и получить больше удовольствия от игры. Бонусы также делают игру более выгодной с финансовой точки зрения, помогая уменьшить риски и увеличить потенциальную прибыль. Кроме того, получение и использование бонусов в 1win открывает возможность стать лояльным клиентом и получить дополнительные привилегии и вознаграждения от казино.
Итак, получение бонусов в 1win – это отличная возможность для игрока увеличить свои шансы на выигрыш, получить дополнительные деньги и улучшить свой игровой опыт. Бонусы делают игру более интересной и выгодной.
1win ввести промокод: 937999 предоставляет возможность получить бездепозитный бонус 2024. Его можно получить в виде фриспинов или фрибетов. Чтобы получить подарок, необходимо активировать код в личном кабинете. Дополнительный депозит не требуется. Размеры подарков невелики: фрибет до 500 рублей и не более 70 фриспинов для игры в слоты. Как и в случае с другими поощрениями, необходимо отыграть бездепозитный бонус. Вейджер, как правило, не превышает х5 для бесплатных ставок и х30 для фриспинов.
В казино 1win предоставляется внушительный бонус при регистрации, который составляет 500% от суммы первых четырех последовательных депозитов клиента. С таким количеством бонусов новичок может значительно увеличить свои шансы на выигрыш. Чтобы получить этот приветственный бонус, необходимо зарегистрироваться на официальном сайте, рабочем зеркале, мобильной версии или приложениях для мобильных телефонов. Однако, основным условием является совершение первого пополнения счета, так как активировать бонусы 1win можно только после этого.
промокод 1win отзывы: 937999 используйте бонусный код при регистрации и получите бездепозтный бонус 70 фриспинов. Да, при использовании кода 1Win вы можете получить различные поощрения, включая бездепозитные бонусы. Они обычно представлены в виде фрибетов или фриспинов. Для их активации не требуется дополнительное пополнение счета. Размер таких подарков невелик: бесплатных вращений не более 70. Вейджер на бездепозитный бонус обычно не превышает х35. В 1Win вы можете получить бонусы за участие в акциях, турнирах, розыгрышах и активацию промокода. Бонусная программа периодически обновляется. Кроме того, некоторые акции имеют сезонный характер.
В 1Win основная бонусная программа включает в себя фриспины. Чтобы получить 70FS, необходимо пополнить счет на 100 рублей или более. Игроку предоставляется 2 дня с момента регистрации для активации презента. Отыгрыш бонуса должен быть выполнен в течение 24 часов с момента начисления, с вейджером х35. Бесплатные вращения предназначены только для игр провайдера Microgaming.
Так как бонусная программа 1Win регулярно обновляется, список акций, в которых можно получить фриспины, постоянно расширяется. Более подробную информацию о них можно найти на нашем сайте.
Промокод на 1Win дает возможность получить бесплатные вращения. Их можно использовать в любых слотах из каталога казино. Иногда могут быть установлены ограничения, которые предусматривают использование фриспинов только в определенных слотах или играх конкретного провайдера. Фриспины начисляются с фиксированной ставкой. Отыгрыш выигрыша, полученного с помощью бесплатных вращений, обязателен с учетом установленного вейджера.
Вся информация взята с сайта; https://alltranslations.ru/image/art/?promokod_362.html
SCAM
blublabla
LOSE MONEY
https://adzan.online/
Лучшие картинки различных тематик https://stilno.site
Бесплатные промокоды на 2024 от букмекерской конторы 1xBet: при регистрации, на бесплатную ставку. Рассказываем, как использовать и куда вводить промокоды в 1хБет. промокод на ставку 1хбет на сегодня бесплатную. Бесплатный промокод для увеличения бонуса. Букмекерская контора 1хБет – одна из самых популярных беттинговых площадок, предлагающая высокие коэффициенты, широкую линию с дополнительной росписью. Благодаря низкой марже БК пользователи стабильно зарабатывают на ставках на спорт. Отличительной особенностью букмекерской конторы 1xBet является возможность совершения ставок по промокодам, которые предоставляются бесплатно – более подробно в этом материале http://saratovturizm.ru/interesting/pages/promo_kod_bk_1xbet_na_segodnya_pri_registracii.html
nice content!nice history!! boba 😀
Your article helped me a lot, is there any more related content? Thanks!
https://pro-dachnikov.com
Профессиональный сантехник в СПб: чистота и порядок
услуги сантехника https://www.santehmontaz-2.ru/ .
Если вашему фену Dyson требуется профессиональный сервис, доверьтесь сервисный центр Dyson. Опытные специалисты в кратчайшие сроки определят проблему и решат неполадки, применяя комплектующие высокого качества. Подробности об услугах по ссылке: remontdyson.ru.
blabla
reduslim kaufen apotheke
Reduslim Testbericht in Osterreich
Top Online Casinos with Blackjack
slots no download no registration slots no download no registration .
The meal went without incident although a couple of times she had to avert her gaze from Dan for fear of bursting out laughing. Dan went up to his room saying he wanted to listen to music, he laid on his bed playing with himself waiting for his father to leave. He thought about the events of the last two weeks it had been the craziest time of his life.
He put it all down to Mary Harris, she had been his girlfriend for two years, he liked her a lot, she was pretty and intelligent two things that rarely combined in his experience, the problem was she steadfastly refused to let him put his cock inside her, he had thought he was getting somewhere when he took his cock out that evening in the cinema when she had finally allowed him to get his hand inside her panties, it was the first time she had allowed him to do any more than play with her tits. He had taken her hand and placed it on his erection, initially he had been pleased to hear her sharp intake of breath when she felt the size of him and he was encouraged when she began stroking him.
It was later that the problem started, he had her in the car park, they were kissing, her sweater was pushed up together with her bra and he was sucking on her nipples. He managed to get her laid across the front of one of the cars, his hand up her skirt, trying to pull down her panties. That was when she had stopped him.
https://www.obesityhelp.com/members/jollyjoist19621986/about_me/
https://rentry.org/wzdnu7kc
https://chyoa.com/user/lorrain1981
http://www.babelcube.com/user/patrick-mattis
https://www.quia.com/profiles/kpark489
https://onedio.ru/profile/midfreak-197-0
https://launchpad.net/~chertenak19881
https://ellak.gr/user/citarnosis1960/
https://www.cossa.ru/profile/?ID=239290
https://www.brollopsguiden.se/medlemspresentation/86043
Бездепозитный Бонус 1win 2024
Бонусы от казино 1win промокод при регистрации1Win 2024 – Бездепозитные бонусы ? Коды на возврат денег ? VIP Программа лояльности ? Бесплатные фриспины.
1win ввести промокод: 937999 предоставляет новым игрокам бонус 500% для игры в слоты и игровые автоматы, максимальная сумма бонуса 200 000 рублей. Вы можете использовать бонусные деньги в разделе азартных игр, включая онлайн казино, карты, рулетку, игровые автоматы и слоты.
Компания «1Win» рада предложить своим новым клиентам приветственный бонус в размере до 500% на первые четыре депозита. Это выгодное предложение доступно сразу после регистрации в нашей букмекерской конторе. Бонус можно получить не только в рублях, но и в других валютах, при этом он не ограничивает возможность участия игроков в других программам лояльности компании. Максимальная сумма вознаграждения за регистрацию составляет 75000 рублей или эквивалентная сумма в другой валюте.
1win casino промокоды приносят игрокам множество преимуществ. Во-первых, они позволяют увеличить начальную ставку или продлить время игры. Кроме того, они дают возможность попробовать различные игры без риска потерять реальные деньги. Бонусы также повышают шансы на выигрыш и предоставляют дополнительные возможности для получения прибыли. Кроме того, бонусы в 1win могут быть обменены на реальные деньги или использованы для участия в специальных акциях и турнирах.
Преимущества получения и использования бонусов в 1win очевидны. Они позволяют игроку расширить свои возможности и получить больше удовольствия от игры. Бонусы также делают игру более выгодной с финансовой точки зрения, помогая уменьшить риски и увеличить потенциальную прибыль. Кроме того, получение и использование бонусов в 1win открывает возможность стать лояльным клиентом и получить дополнительные привилегии и вознаграждения от казино.
Итак, получение бонусов в 1win – это отличная возможность для игрока увеличить свои шансы на выигрыш, получить дополнительные деньги и улучшить свой игровой опыт. Бонусы делают игру более интересной и выгодной.
промокод на 1win при регистрации: 937999 предоставляет возможность получить бездепозитный бонус 2024. Его можно получить в виде фриспинов или фрибетов. Чтобы получить подарок, необходимо активировать код в личном кабинете. Дополнительный депозит не требуется. Размеры подарков невелики: фрибет до 500 рублей и не более 70 фриспинов для игры в слоты. Как и в случае с другими поощрениями, необходимо отыграть бездепозитный бонус. Вейджер, как правило, не превышает х5 для бесплатных ставок и х30 для фриспинов.
В казино 1win предоставляется внушительный бонус при регистрации, который составляет 500% от суммы первых четырех последовательных депозитов клиента. С таким количеством бонусов новичок может значительно увеличить свои шансы на выигрыш. Чтобы получить этот приветственный бонус, необходимо зарегистрироваться на официальном сайте, рабочем зеркале, мобильной версии или приложениях для мобильных телефонов. Однако, основным условием является совершение первого пополнения счета, так как активировать бонусы 1win можно только после этого.
1win покер промокод: 937999 используйте бонусный код при регистрации и получите бездепозтный бонус 70 фриспинов. Да, при использовании кода 1Win вы можете получить различные поощрения, включая бездепозитные бонусы. Они обычно представлены в виде фрибетов или фриспинов. Для их активации не требуется дополнительное пополнение счета. Размер таких подарков невелик: бесплатных вращений не более 70. Вейджер на бездепозитный бонус обычно не превышает х35. В 1Win вы можете получить бонусы за участие в акциях, турнирах, розыгрышах и активацию промокода. Бонусная программа периодически обновляется. Кроме того, некоторые акции имеют сезонный характер.
В 1Win основная бонусная программа включает в себя фриспины. Чтобы получить 70FS, необходимо пополнить счет на 100 рублей или более. Игроку предоставляется 2 дня с момента регистрации для активации презента. Отыгрыш бонуса должен быть выполнен в течение 24 часов с момента начисления, с вейджером х35. Бесплатные вращения предназначены только для игр провайдера Microgaming.
Так как бонусная программа 1Win регулярно обновляется, список акций, в которых можно получить фриспины, постоянно расширяется. Более подробную информацию о них можно найти на нашем сайте.
Промокод на 1Win дает возможность получить бесплатные вращения. Их можно использовать в любых слотах из каталога казино. Иногда могут быть установлены ограничения, которые предусматривают использование фриспинов только в определенных слотах или играх конкретного провайдера. Фриспины начисляются с фиксированной ставкой. Отыгрыш выигрыша, полученного с помощью бесплатных вращений, обязателен с учетом установленного вейджера.
Вся информация взята с сайта; https://td-scs.ru/stat/art/?promokod_362.html
boba 😀
Ремонтный центр Stinol – проверенный партнер в ремонте домашних приборов. Квалифицированные специалисты оперативно устранят любые неполадки, возвращая вашей технике безупречную работу. Доверьте ремонт профессионалам Stinol и наслаждайтесь надежной службой своей техники. Подписывайтесь на наших страницах, чтобы не пропустить актуальной информации и специальных предложений!
mystrikingly.com
wix.com
telegra.ph
our website 1win login
Все промокод на бесплатную игру в 1хбет вы можете найти бесплатно на этом сайте. Используйте промокод *1XFREE777* для получения бонуса до 32500 руб при регистрации. Приятно, что новички могут ввести промокод при регистрации, который даст право на получение приветственного бонуса на сумму до 32500 рублей. Самое главное — это относиться к ставкам и к игре в целом ответственно! Не стоит играть на последние или заемные деньги, стремясь таким образом заработать себе на жизнь – более подробно в этом материале http://vidpochynok.net/inc/cli/promokod-1xbet.html
blibli
boba 😀
1249742
blibli
Hi there,
My name is Mike from Monkey Digital,
Allow me to present to you a lifetime revenue opportunity of 35%
That’s right, you can earn 35% of every order made by your affiliate for life.
Simply register with us, generate your affiliate links, and incorporate them on your website, and you are done. It takes only 5 minutes to set up everything, and the payouts are sent each month.
Click here to enroll with us today:
https://www.monkeydigital.org/affiliate-dashboard/
Think about it,
Every website owner requires the use of search engine optimization (SEO) for their website. This endeavor holds significant potential for both parties involved.
Thanks and regards
Mike Lewis
Monkey Digital
1249742
blublun
EL CODIGO PROMOCIONAL DE 1XSLOTS CASINO
Sin introducir un codigo promocional 1xSlots Casino, como nuevo cliente en March 2024, puede beneficiarse de una bonificacion del 100% hasta 300€. El casino le proporciona un monton de maquinas tragaperras populares de proveedores de software como iSoftBet, Elk Studios o Play’n GO y otros. De forma adicional, se le otorgaran|esta oferta incluye 30 turnos gratuitos.. Todas las informaciones importantes respecto a esta oferta de bienvenida se puede encontrar en este articulo.
?COMO FUNCIONA EL CODIGO PROMOCIONAL DE 1XSLOTS CASINO?
En 1xSlots Casino se puede obtener una bonificacion del 100% hasta 300€ y turnos gratuitos en 1xSlots Casino. Haga su inicial deposito en 1xSlots Casino tras finalizar el proceso de inscripcion. No hace falta solicitar su bonificacion de bienvenida por e-mail ni el chat en directo como en otros casinos, porque 1xSlots Casino la abona a su cuenta automaticamente. La oferta de bienvenida se activa cuando deposite 10€ o mas. Haga un deposito empleando EcoPayz, Boku o Bitcoin u otro metodo de deposito disponible en el casino.
Mas sobre el bono
1xSlots Casino le da la oportunidad de incrementar su balance hasta 300€ (100%). Obtenga la bonificacion superior al depositar 300€ y conseguir 600€ que se anadiran en su cuenta. Los fondos de su bonificacion es compatible con tragaperras de proveedores de software como Red Tiger Gaming, Evolution Gaming y Microgaming, por nombrar unos cuantos. Debe tenerse en cuenta tambien que su cuenta se incrementara con 30 turnos gratuitos.
Bono de bienvenida 1xSlots 2024
Dentro de 1xSlots existen dos bonos de bienvenida, uno standard y uno exclusivo. El primero de ellas recompensa con un paquete de hasta €1500 y 150 giros gratis mientras que el segundo otorga un 10% adicional recompensando hasta €1650 y 150 giros gratis ?La diferencia? El bono exclusivo se obtiene mediante el uso del 1xSlots promocode NEXT777.
Las recompensas de la bonificacion exclusiva son otorgadas en los 4 primeros depositos de la siguiente manera:
100% del primer deposito hasta €450 + 30 giros gratis
100% del segundo deposito hasta €350 + 35 giros gratis
100% del tercer deposito hasta €400 + 40 giros gratis
100% del cuarto deposito hasta €450 + 45 giros gratis
Bono de bienvenida 1xSlots Argentina 2024
Cabe resaltar que durante tu proceso de registro tienes que elegir tu moneda local preferida. De este modo obtendras la bonificacion de bienvenida 1xSlots Argentina en pesos. Puedes recibir el bono exclusivo 1xSlots Argentina al utilizar nuestro codigo de bono 1xSlots Argentina NEXT777 durante el proceso de registro.
Ademas, si ingresas el codigo NEXT777 a la pestana “Bonos y Regalos” despues de hacer tu primer deposito, puedes recibir el bono con giros gratis 1xSlots Argentina que te otorgara 60 FS en tragamonedas 777 GEMS RESPIN. A continuacion encontraras los valores de bonos en pesos argentinos.
Bono de bienvenida 1xSlots Chile 2024
El bono de bienvenida 1xSlots Chile funciona del mismo modo como en Argentina. Tienes que crear tu cuenta e ingresar nuestro codigo promocional de 1xslots para giro gratis Chile NEXT777 al formulario de registro. Puedes elegir el peso chileno como tu moneda local para recibir la bonificacion de bienvenida 1xSlots Chile. Adicionalmente, para obtener 60 giros gratis en 777 GEMS RESPIN, introduce el codigo NEXT777 al hacer tu primer deposito.
?QUE ES UN BONO DE TRAGAPERRAS SIN DEPOSITO?
Como su nombre indica, un bono de tragaperras sin deposito es un tipo de bono de casino que no necesita que los jugadores depositen dinero para poder optar a cualquier tipo de recompensa. Por ejemplo, giros gratis, creditos de casino o incluso dinero en efectivo.
Los bonos sin deposito se dan generalmente a los jugadores potenciales para motivar a los nuevos jugadores para que se registren. Pueden formar parte de los paquetes de bienvenida que un casino online ofrece a todos sus jugadores potenciales y ayudan a atraer la atencion hacia la marca del casino. Tambien pueden ofrecerse a los jugadores con cuentas en determinadas situaciones.
Las tragaperras con bono sin deposito ofrecen la posibilidad de probar las tragaperras online sin coste alguno y quedandose con el dinero que se obtiene, razon por la que son muy codiciadas. Sin embargo, los bonos sin deposito no te obligan a depositar dinero cuando la promocion termina, aunque se sugiere.
?CUALES SON LOS PRINCIPALES TIPOS DE BONOS DE TRAGAMONEDAS SIN DEPOSITO?
Los bonos sin deposito estan disponibles en tres variedades: giros gratis, creditos gratis o dinero en efectivo. El tipo mas conocido que es un bono sin deposito no spins without deposit bonus.
GIROS GRATIS CON BONO SIN DEPOSITO
Todos sabemos que las maquinas tragaperras son las mas populares en el mundo de los juegos de casino , por lo que es natural que un bono hecho especificamente para las maquinas que juegan a las tragaperras sea el mas buscado. Para los amantes de las maquinas tragaperras, los bonos de tiradas gratis sin deposito son un verdadero tesoro, ya que permiten a los jugadores jugar a sus maquinas tragaperras favoritas sin depositar dinero, y con una gran cantidad de tiradas gratis, lo que aumenta sus probabilidades de ganar significativamente.
Creditos gratuitos / BONO DE JUEGO GRATUITO SIN DEPOSITO
En lugar de tiradas gratis, los casinos pueden optar por dar creditos gratis a los jugadores que tienen bonos sin deposito. Estos creditos pueden ser utilizados dentro de un periodo de tiempo enumerado para apostar en juegos en los casinos y ganar dinero real. Los bonos sin deposito y los creditos gratuitos se ofrecen tanto en las tragaperras gratuitas como en otros juegos de los casinos.
DINERO GRATIS CON BONOS SIN DEPOSITO
Al igual que los creditos gratuitos con los bonos sin deposito, los bonos de dinero sin deposito que no requieren deposito se pueden jugar tanto en las tragaperras como en otros juegos de casino. Una vez que haya reclamado y jugado el bono de dinero sin deposito, podra retirar el dinero del bono y cualquier ganancia adicional siempre que cumpla las condiciones para retirar el dinero.
?Como puedo reclamar un bono sin deposito?
En la mayoria de los casos, puede hacer uso de los bonos sin deposito al crear una cuenta en cualquier sitio de juego en linea que ofrezca este tipo de oferta. En la version online del casino, la bonificacion puede aparecer en la pagina de promociones del casino o en una ventana emergente. Algunos casinos requieren que introduzca un codigo promocional para acceder al bono.
Cuando considere reclamar un bono sin deposito (o cualquier otro tipo de bono) debe asegurarse de leer los terminos y condiciones que se adjuntan al bono. Los diferentes casinos pueden tener sus propias regulaciones y limites, sin embargo, hay algunos que son iguales en todos los casinos.
REQUISITOS PARA TRABAJAR
Los bonos sobre los depositos son accesibles para todos, sin embargo, cobrar los bonos es un asunto un poco mas controlado. La mayoria de los casinos en linea le permitiran retirar sus ganancias despues de haber podido apostar una cantidad especifica.
Los requisitos de apuesta se muestran como multiplicadores. Representan la cantidad de veces que tienes que apostar en un bono para poder retirar el dinero. Por lo general, puede jugar a una serie de juegos seleccionados por el operador del casino. Una vez que haya alcanzado el requisito de apuesta, podra dar el siguiente paso para cobrar su bono.
PLAZO
Segun el casino online, el bono para juegos de tragaperras de deposito puede caducar en cuestion de dias o durar hasta 30 dias. Para asegurarte de que cumples los requisitos de apuestas, es posible que tengas que planificar tu rutina de juego a lo largo del bono.
TAMANOS DE APUESTA
Un metodo para lograr su objetivo de apostar mas rapido es realizar la mayor cantidad de apuestas posible en cada juego. Es un metodo sensato, a menos que el operador del casino decida controlar la cantidad de la apuesta y limitar la cantidad de apuestas en la respectiva tragamonedas con bono sin deposito.
SE REQUIERE UN DEPOSITO
Aunque suene contradictorio, algunos casinos online pueden incluso exigir a los jugadores que depositen dinero antes de poder retirar su bono. Suelen anadir este requisito adicional por razones de seguridad.
RESTRICCIONES
A veces, se le puede negar el acceso a un bono con oferta de deposito gratuito. Esto solo ocurre en muy raras circunstancias, ya sea por el hecho de haber intentado dos bonos a la vez o por tener una direccion IP compartida con un jugador que tambien reclamo el mismo bono, o por residir en una zona restringida.
Puedes obtener informacion mas detallada leyendo el articulo completo en este enlace – http://centroculturalrecoleta.org/blog/pages/codigo_promocional_1xslots_bono.html
сотровимаб где в наличии – Амубарвимаб Ромлусевимаб в наличии, etesevimab вакцинация
EL CODIGO PROMOCIONAL DE 1XSLOTS CASINO
Sin introducir un codigo promocional 1xSlots Casino, como nuevo cliente en March 2024, puede beneficiarse de una bonificacion del 100% hasta 300€. El casino le proporciona un monton de maquinas tragaperras populares de proveedores de software como iSoftBet, Elk Studios o Play’n GO y otros. De forma adicional, se le otorgaran|esta oferta incluye 30 turnos gratuitos.. Todas las informaciones importantes respecto a esta oferta de bienvenida se puede encontrar en este articulo.
?COMO FUNCIONA EL CODIGO PROMOCIONAL DE 1XSLOTS CASINO?
En 1xSlots Casino se puede obtener una bonificacion del 100% hasta 300€ y turnos gratuitos en 1xSlots Casino. Haga su inicial deposito en 1xSlots Casino tras finalizar el proceso de inscripcion. No hace falta solicitar su bonificacion de bienvenida por e-mail ni el chat en directo como en otros casinos, porque 1xSlots Casino la abona a su cuenta automaticamente. La oferta de bienvenida se activa cuando deposite 10€ o mas. Haga un deposito empleando EcoPayz, Boku o Bitcoin u otro metodo de deposito disponible en el casino.
Mas sobre el bono
1xSlots Casino le da la oportunidad de incrementar su balance hasta 300€ (100%). Obtenga la bonificacion superior al depositar 300€ y conseguir 600€ que se anadiran en su cuenta. Los fondos de su bonificacion es compatible con tragaperras de proveedores de software como Red Tiger Gaming, Evolution Gaming y Microgaming, por nombrar unos cuantos. Debe tenerse en cuenta tambien que su cuenta se incrementara con 30 turnos gratuitos.
Bono de bienvenida 1xSlots 2024
Dentro de 1xSlots existen dos bonos de bienvenida, uno standard y uno exclusivo. El primero de ellas recompensa con un paquete de hasta €1500 y 150 giros gratis mientras que el segundo otorga un 10% adicional recompensando hasta €1650 y 150 giros gratis ?La diferencia? El bono exclusivo se obtiene mediante el uso del 1xSlots promocode NEXT777.
Las recompensas de la bonificacion exclusiva son otorgadas en los 4 primeros depositos de la siguiente manera:
100% del primer deposito hasta €450 + 30 giros gratis
100% del segundo deposito hasta €350 + 35 giros gratis
100% del tercer deposito hasta €400 + 40 giros gratis
100% del cuarto deposito hasta €450 + 45 giros gratis
Bono de bienvenida 1xSlots Argentina 2024
Cabe resaltar que durante tu proceso de registro tienes que elegir tu moneda local preferida. De este modo obtendras la bonificacion de bienvenida 1xSlots Argentina en pesos. Puedes recibir el bono exclusivo 1xSlots Argentina al utilizar nuestro codigo de bono 1xSlots Argentina NEXT777 durante el proceso de registro.
Ademas, si ingresas el codigo NEXT777 a la pestana “Bonos y Regalos” despues de hacer tu primer deposito, puedes recibir el bono con giros gratis 1xSlots Argentina que te otorgara 60 FS en tragamonedas 777 GEMS RESPIN. A continuacion encontraras los valores de bonos en pesos argentinos.
Bono de bienvenida 1xSlots Chile 2024
El bono de bienvenida 1xSlots Chile funciona del mismo modo como en Argentina. Tienes que crear tu cuenta e ingresar nuestro codigo de promocion de giro gratis 1xslots Chile NEXT777 al formulario de registro. Puedes elegir el peso chileno como tu moneda local para recibir la bonificacion de bienvenida 1xSlots Chile. Adicionalmente, para obtener 60 giros gratis en 777 GEMS RESPIN, introduce el codigo NEXT777 al hacer tu primer deposito.
?QUE ES UN BONO DE TRAGAPERRAS SIN DEPOSITO?
Como su nombre indica, un bono de tragaperras sin deposito es un tipo de bono de casino que no necesita que los jugadores depositen dinero para poder optar a cualquier tipo de recompensa. Por ejemplo, giros gratis, creditos de casino o incluso dinero en efectivo.
Los bonos sin deposito se dan generalmente a los jugadores potenciales para motivar a los nuevos jugadores para que se registren. Pueden formar parte de los paquetes de bienvenida que un casino online ofrece a todos sus jugadores potenciales y ayudan a atraer la atencion hacia la marca del casino. Tambien pueden ofrecerse a los jugadores con cuentas en determinadas situaciones.
Las tragaperras con bono sin deposito ofrecen la posibilidad de probar las tragaperras online sin coste alguno y quedandose con el dinero que se obtiene, razon por la que son muy codiciadas. Sin embargo, los bonos sin deposito no te obligan a depositar dinero cuando la promocion termina, aunque se sugiere.
?CUALES SON LOS PRINCIPALES TIPOS DE BONOS DE TRAGAMONEDAS SIN DEPOSITO?
Los bonos sin deposito estan disponibles en tres variedades: giros gratis, creditos gratis o dinero en efectivo. El tipo mas conocido que es un bono sin deposito no spins without deposit bonus.
GIROS GRATIS CON BONO SIN DEPOSITO
Todos sabemos que las maquinas tragaperras son las mas populares en el mundo de los juegos de casino , por lo que es natural que un bono hecho especificamente para las maquinas que juegan a las tragaperras sea el mas buscado. Para los amantes de las maquinas tragaperras, los bonos de tiradas gratis sin deposito son un verdadero tesoro, ya que permiten a los jugadores jugar a sus maquinas tragaperras favoritas sin depositar dinero, y con una gran cantidad de tiradas gratis, lo que aumenta sus probabilidades de ganar significativamente.
Creditos gratuitos / BONO DE JUEGO GRATUITO SIN DEPOSITO
En lugar de tiradas gratis, los casinos pueden optar por dar creditos gratis a los jugadores que tienen bonos sin deposito. Estos creditos pueden ser utilizados dentro de un periodo de tiempo enumerado para apostar en juegos en los casinos y ganar dinero real. Los bonos sin deposito y los creditos gratuitos se ofrecen tanto en las tragaperras gratuitas como en otros juegos de los casinos.
DINERO GRATIS CON BONOS SIN DEPOSITO
Al igual que los creditos gratuitos con los bonos sin deposito, los bonos de dinero sin deposito que no requieren deposito se pueden jugar tanto en las tragaperras como en otros juegos de casino. Una vez que haya reclamado y jugado el bono de dinero sin deposito, podra retirar el dinero del bono y cualquier ganancia adicional siempre que cumpla las condiciones para retirar el dinero.
?Como puedo reclamar un bono sin deposito?
En la mayoria de los casos, puede hacer uso de los bonos sin deposito al crear una cuenta en cualquier sitio de juego en linea que ofrezca este tipo de oferta. En la version online del casino, la bonificacion puede aparecer en la pagina de promociones del casino o en una ventana emergente. Algunos casinos requieren que introduzca un codigo promocional para acceder al bono.
Cuando considere reclamar un bono sin deposito (o cualquier otro tipo de bono) debe asegurarse de leer los terminos y condiciones que se adjuntan al bono. Los diferentes casinos pueden tener sus propias regulaciones y limites, sin embargo, hay algunos que son iguales en todos los casinos.
REQUISITOS PARA TRABAJAR
Los bonos sobre los depositos son accesibles para todos, sin embargo, cobrar los bonos es un asunto un poco mas controlado. La mayoria de los casinos en linea le permitiran retirar sus ganancias despues de haber podido apostar una cantidad especifica.
Los requisitos de apuesta se muestran como multiplicadores. Representan la cantidad de veces que tienes que apostar en un bono para poder retirar el dinero. Por lo general, puede jugar a una serie de juegos seleccionados por el operador del casino. Una vez que haya alcanzado el requisito de apuesta, podra dar el siguiente paso para cobrar su bono.
PLAZO
Segun el casino online, el bono para juegos de tragaperras de deposito puede caducar en cuestion de dias o durar hasta 30 dias. Para asegurarte de que cumples los requisitos de apuestas, es posible que tengas que planificar tu rutina de juego a lo largo del bono.
TAMANOS DE APUESTA
Un metodo para lograr su objetivo de apostar mas rapido es realizar la mayor cantidad de apuestas posible en cada juego. Es un metodo sensato, a menos que el operador del casino decida controlar la cantidad de la apuesta y limitar la cantidad de apuestas en la respectiva tragamonedas con bono sin deposito.
SE REQUIERE UN DEPOSITO
Aunque suene contradictorio, algunos casinos online pueden incluso exigir a los jugadores que depositen dinero antes de poder retirar su bono. Suelen anadir este requisito adicional por razones de seguridad.
RESTRICCIONES
A veces, se le puede negar el acceso a un bono con oferta de deposito gratuito. Esto solo ocurre en muy raras circunstancias, ya sea por el hecho de haber intentado dos bonos a la vez o por tener una direccion IP compartida con un jugador que tambien reclamo el mismo bono, o por residir en una zona restringida.
Puedes obtener informacion mas detallada leyendo el articulo completo en este enlace – http://centroculturalrecoleta.org/blog/pages/codigo_promocional_1xslots_bono.html
Good Day
I have just took an in depth look on your howcrafts.co for the current search visibility and saw that your website could use an upgrade.
We will increase your ranks organically and safely, using only state of the art AI and whitehat methods, while providing monthly reports and outstanding support.
More info:
https://www.digital-x-press.com/unbeatable-seo/
Regards
Mike Youmans
Digital X SEO Experts
Искали где купить реплику Аирподс ПРО? Лучшие беспроводные наушники в Москве и области. Реплика оригинальных AirPods с шумоподавлением со скидкой. Только качественные гарнитуры по приемлимым ценам. Быстрая доставка по России.
В поисках где реплика Airpods PRO? Наилучшие беспроводные наушники в Москве. Копия оригинальных AirPods с шумоподавлением по цене 2490 рублей. Проверенные гаджеты по приемлимым ценам. Быстро доставим по России.
Сантехник на дом по выгодным ценам: качество, доступное каждому
сантехник на дом недорого https://vizov-santekhnika.ru .
Вызвать сантехника: профессиональный подход к любой задаче
сантехник вызвать 24santehnik-2.ru .
Ищете где купить реплику Airpods PRO? Наилучшие беспроводные наушники в Москве и области. Реплика оригинальных AirPods с активным шумоподавлением со скидкой. Надежные гарнитуры по доступным ценам. Доставка по России.
В поисках где купить реплику Аирподс ПРО? Качественные беспроводные наушники в Москве. Реплика оригинальных AirPods с шумоподавлением всего за 2490 рублей. Только качественные гаджеты по приемлимым ценам. Быстро доставим по России.
Ищете где купить реплику Airpods PRO? Лучшие беспроводные наушники в Москве. Реплика оригинальных AirPods с шумоподавлением по цене 2490 рублей. Только качественные гарнитуры по низким ценам. Быстро доставим по России.
Искали где купить реплику Airpods PRO? Лучшие беспроводные наушники в Москве. Реплика оригинальных AirPods с шумоподавлением со скидкой. Самые качественные гаджеты по низким ценам. Доставка по России.
Искали где копия Airpods PRO? Лучшие беспроводные наушники в Москве и области. Реплика оригинальных AirPods с шумоподавлением по скидке. Только качественные гарнитуры по доступным ценам. Быстрая доставка по России.
трансфер толмачево белокуриха цена http://transfer-novosibirsk-belokurikha.ru/
https://game24.space/
Похоже админы явно за деньги впихивают левые обзоры от зевса.
Наспамили везде ссылками на сборник казиношек от зевса достали. https://www.globalmsk.ru/firmnews/id/33207/1
Надоело это детище александра иванова мусолить поменяйте пластинку уже. https://obyava.ua/ru/blog/aleksey-ivanov-o-bezdepozitnyh-bonusah-dlya-igrokov-v-kazino-onlayn.html
Вы добрые люди или совсем больные что советуете такое ведро с помоями под названием зевс. http://forum.igromania.ru/member.php?u=630810
Чуваки ни в коем случае не покупайтесь на сборник казиношек от зевса развод полнейший. https://www.globalmsk.ru/firmnews/id/33207/1
https://podacha-blud.com/
Не ведитесь на эту шарагу под названием обзорник зевс потеряете кучу времени. https://www.globalmsk.ru/firmnews/id/33207/1
Ребята вы что издеваетесь реклама жуликов с casinozeus.by прям тут размещена. https://obyava.ua/ru/blog/aleksey-ivanov-o-bezdepozitnyh-bonusah-dlya-igrokov-v-kazino-onlayn.html
Услуги сантехника в СПб: профессиональный подход к каждой задаче
вызвать сантехника спб http://www.vizov-santekhnika-spb.ru/ .
Искали где купить реплику Airpods PRO? Топовые беспроводные наушники в Москве и области. Реплика оригинальных AirPods с активным шумоподавлением по скидке. Самые надежные гарнитуры по низким ценам. Доставка по России.
Ищете где купить реплику наушников Airpods PRO в Москве? Качественные беспроводные наушники в Москве и РФ. Копия оригинальных AirPods с шумоподавлением со скидкой. Самые качественные гаджеты по низким ценам. Доставка по России.
Искали где купить копию Airpods PRO в Москве? Качественные беспроводные наушники в Москве. Копия оригинальных AirPods с шумоподавлением со скидкой. Только проверенные гаджеты по приемлимым ценам. Быстрая доставка по России.
LOSE MONEY LOSE MONEY LOSE MONEY LOSE MONEY SCAM SCAM PHISING LOSE MONEY PHISING LOSE MONEY SCAM LOSE MONEY PHISING SCAM LOSE MONEY PHISING LOSE MONEY LOSE MONEY SCAM SCAM LOSE MONEY LOSE MONEY SCAM PHISING PHISING LOSE MONEY LOSE MONEY PHISING PHISING SCAM SCAM SCAM SCAM PHISING LOSE MONEY SCAM LOSE MONEY LOSE MONEY PHISING SCAM LOSE MONEY SCAM PHISING
https://gruzchikirabotnik.ru/
SCAM PHISING PHISING PHISING LOSE MONEY LOSE MONEY SCAM PHISING SCAM PHISING PHISING SCAM SCAM LOSE MONEY SCAM PHISING SCAM LOSE MONEY LOSE MONEY SCAM SCAM LOSE MONEY SCAM PHISING LOSE MONEY LOSE MONEY PHISING PHISING PHISING SCAM PHISING PHISING SCAM PHISING SCAM SCAM PHISING PHISING SCAM LOSE MONEY LOSE MONEY PHISING SCAM
В поисках где купить реплику наушников Airpods PRO в Москве? Лучшие беспроводные наушники в Москве и РФ. Копия оригинальных AirPods с активным шумоподавлением всего за 2490 рублей. Самые качественные гарнитуры по приемлимым ценам. Доставим по России.
Ищете где купить копию Airpods PRO в Москве? Топовые беспроводные наушники в Москве и области. Копия оригинальных AirPods с шумоподавлением со скидкой. Только проверенные гаджеты по низким ценам. Доставим по России.
Искали где купить копию Airpods PRO? Топовые беспроводные наушники в Москве. Копия оригинальных AirPods с активным шумоподавлением со скидкой. Только проверенные гарнитуры по приемлимым ценам. Доставим по России.
Ищете где копия наушников Airpods PRO? Наилучшие беспроводные наушники в Москве. Реплика оригинальных AirPods с шумоподавлением всего за 2490 рублей. Самые надежные гарнитуры по приемлимым ценам. Быстрая доставка по России.
SCAM LOSE MONEY SCAM PHISING PHISING PHISING PHISING LOSE MONEY LOSE MONEY SCAM PHISING SCAM LOSE MONEY PHISING PHISING SCAM SCAM LOSE MONEY LOSE MONEY PHISING SCAM LOSE MONEY SCAM LOSE MONEY PHISING LOSE MONEY PHISING PHISING LOSE MONEY LOSE MONEY PHISING PHISING SCAM SCAM PHISING LOSE MONEY PHISING PHISING PHISING PHISING PHISING LOSE MONEY LOSE MONEY
SCAM SCAM SCAM SCAM SCAM SCAM PHISING PHISING SCAM SCAM SCAM LOSE MONEY PHISING PHISING SCAM SCAM SCAM PHISING LOSE MONEY LOSE MONEY PHISING LOSE MONEY LOSE MONEY PHISING PHISING PHISING SCAM PHISING LOSE MONEY SCAM SCAM PHISING PHISING LOSE MONEY SCAM SCAM SCAM PHISING SCAM LOSE MONEY LOSE MONEY SCAM PHISING
Ищете где https://mdou41orel.ru/? Качественные беспроводные наушники в Москве и РФ. Реплика оригинальных AirPods с шумоподавлением по скидке. Проверенные гаджеты по доступным ценам. Доставим по России.
Ищете где купить лучшую реплику Airpods PRO? Качественные беспроводные наушники в Москве. Копия оригинальных AirPods с активным шумоподавлением со скидкой. Только проверенные гаджеты по низким ценам. Доставка по России.
Ищете профессиональных грузчиков, которые справятся с любыми задачами быстро и качественно? Наши специалисты обеспечат аккуратную погрузку, транспортировку и разгрузку вашего имущества. Мы гарантируем https://gruzchikinesti.ru, внимательное отношение к каждой детали и доступные цены на все виды работ.
PHISING PHISING LOSE MONEY SCAM LOSE MONEY LOSE MONEY PHISING LOSE MONEY SCAM LOSE MONEY SCAM PHISING SCAM LOSE MONEY LOSE MONEY LOSE MONEY LOSE MONEY PHISING SCAM PHISING PHISING LOSE MONEY SCAM PHISING LOSE MONEY SCAM PHISING LOSE MONEY LOSE MONEY LOSE MONEY LOSE MONEY SCAM SCAM LOSE MONEY LOSE MONEY SCAM PHISING SCAM LOSE MONEY PHISING LOSE MONEY SCAM PHISING
Ищете где купить лучшую реплику Airpods PRO? Наилучшие беспроводные наушники в Москве и области. Копия оригинальных AirPods с шумоподавлением по цене 2490 рублей. Проверенные гаджеты по низким ценам. Доставим по России.
SCAM SCAM LOSE MONEY PHISING LOSE MONEY LOSE MONEY PHISING LOSE MONEY SCAM SCAM LOSE MONEY PHISING SCAM SCAM SCAM LOSE MONEY LOSE MONEY LOSE MONEY PHISING PHISING LOSE MONEY PHISING PHISING PHISING SCAM LOSE MONEY LOSE MONEY PHISING LOSE MONEY LOSE MONEY PHISING PHISING SCAM SCAM PHISING PHISING SCAM SCAM LOSE MONEY PHISING LOSE MONEY LOSE MONEY LOSE MONEY
SCAM PHISING LOSE MONEY LOSE MONEY PHISING SCAM PHISING SCAM LOSE MONEY PHISING LOSE MONEY PHISING SCAM SCAM LOSE MONEY LOSE MONEY PHISING SCAM SCAM LOSE MONEY SCAM SCAM PHISING PHISING SCAM PHISING LOSE MONEY SCAM LOSE MONEY PHISING SCAM SCAM PHISING SCAM PHISING SCAM LOSE MONEY PHISING SCAM SCAM PHISING PHISING LOSE MONEY
Искали где купить реплику Airpods PRO? Топовые беспроводные наушники в Москве и области. Реплика оригинальных AirPods с активным шумоподавлением всего за 2490 рублей. Проверенные гаджеты по доступным ценам. Доставка по России.
В поисках где купить копию наушников Airpods PRO? Наилучшие беспроводные наушники в Москве и РФ. Реплика оригинальных AirPods с активным шумоподавлением по цене 2490 рублей. Надежные гарнитуры по приемлимым ценам. Доставка по России.
Искали где купить реплику Аирподс ПРО? Качественные беспроводные наушники в Москве и области. Реплика оригинальных AirPods с шумоподавлением со скидкой. Самые качественные гарнитуры по доступным ценам. Доставим по России.
Искали где копия Airpods PRO? Лучшие беспроводные наушники в Москве. Копия оригинальных AirPods с шумоподавлением всего за 2490 рублей. Проверенные гаджеты по доступным ценам. Доставим по России.
грузчики самара срочно
PHISING LOSE MONEY SCAM SCAM LOSE MONEY PHISING LOSE MONEY PHISING PHISING PHISING PHISING PHISING PHISING PHISING SCAM PHISING LOSE MONEY PHISING PHISING LOSE MONEY PHISING SCAM LOSE MONEY SCAM SCAM SCAM SCAM LOSE MONEY SCAM PHISING SCAM LOSE MONEY PHISING LOSE MONEY SCAM SCAM PHISING LOSE MONEY LOSE MONEY PHISING PHISING PHISING LOSE MONEY
PHISING SCAM LOSE MONEY LOSE MONEY PHISING SCAM SCAM PHISING PHISING PHISING PHISING PHISING PHISING PHISING LOSE MONEY PHISING PHISING PHISING SCAM LOSE MONEY SCAM SCAM PHISING SCAM SCAM PHISING SCAM PHISING PHISING SCAM PHISING LOSE MONEY PHISING SCAM SCAM SCAM PHISING LOSE MONEY PHISING SCAM SCAM LOSE MONEY SCAM
семаглутид какие препараты – трулисити 0.75 купить, трулисити купить +с доставкой
EL CODIGO PROMOCIONAL DE 1XSLOTS CASINO
Sin introducir un codigo promocional 1xSlots Casino, como nuevo cliente en March 2024, puede beneficiarse de una bonificacion del 100% hasta 300€. El casino le proporciona un monton de maquinas tragaperras populares de proveedores de software como iSoftBet, Elk Studios o Play’n GO y otros. De forma adicional, se le otorgaran|esta oferta incluye 30 turnos gratuitos.. Todas las informaciones importantes respecto a esta oferta de bienvenida se puede encontrar en este articulo.
?COMO FUNCIONA EL CODIGO PROMOCIONAL DE 1XSLOTS CASINO?
En 1xSlots Casino se puede obtener una bonificacion del 100% hasta 300€ y turnos gratuitos en 1xSlots Casino. Haga su inicial deposito en 1xSlots Casino tras finalizar el proceso de inscripcion. No hace falta solicitar su bonificacion de bienvenida por e-mail ni el chat en directo como en otros casinos, porque 1xSlots Casino la abona a su cuenta automaticamente. La oferta de bienvenida se activa cuando deposite 10€ o mas. Haga un deposito empleando EcoPayz, Boku o Bitcoin u otro metodo de deposito disponible en el casino.
Mas sobre el bono
1xSlots Casino le da la oportunidad de incrementar su balance hasta 300€ (100%). Obtenga la bonificacion superior al depositar 300€ y conseguir 600€ que se anadiran en su cuenta. Los fondos de su bonificacion es compatible con tragaperras de proveedores de software como Red Tiger Gaming, Evolution Gaming y Microgaming, por nombrar unos cuantos. Debe tenerse en cuenta tambien que su cuenta se incrementara con 30 turnos gratuitos.
Bono de bienvenida 1xSlots 2024
Dentro de 1xSlots existen dos bonos de bienvenida, uno standard y uno exclusivo. El primero de ellas recompensa con un paquete de hasta €1500 y 150 giros gratis mientras que el segundo otorga un 10% adicional recompensando hasta €1650 y 150 giros gratis ?La diferencia? El bono exclusivo se obtiene mediante el uso del 1xSlots promocode NEXT777.
Las recompensas de la bonificacion exclusiva son otorgadas en los 4 primeros depositos de la siguiente manera:
100% del primer deposito hasta €450 + 30 giros gratis
100% del segundo deposito hasta €350 + 35 giros gratis
100% del tercer deposito hasta €400 + 40 giros gratis
100% del cuarto deposito hasta €450 + 45 giros gratis
Bono de bienvenida 1xSlots Argentina 2024
Cabe resaltar que durante tu proceso de registro tienes que elegir tu moneda local preferida. De este modo obtendras la bonificacion de bienvenida 1xSlots Argentina en pesos. Puedes recibir el bono exclusivo 1xSlots Argentina al utilizar nuestro codigo de bono 1xSlots Argentina NEXT777 durante el proceso de registro.
Ademas, si ingresas el codigo NEXT777 a la pestana “Bonos y Regalos” despues de hacer tu primer deposito, puedes recibir el bono con giros gratis 1xSlots Argentina que te otorgara 60 FS en tragamonedas 777 GEMS RESPIN. A continuacion encontraras los valores de bonos en pesos argentinos.
Bono de bienvenida 1xSlots Chile 2024
El bono de bienvenida 1xSlots Chile funciona del mismo modo como en Argentina. Tienes que crear tu cuenta e ingresar nuestro codigo promocional 1xslots sin deposito Chile NEXT777 al formulario de registro. Puedes elegir el peso chileno como tu moneda local para recibir la bonificacion de bienvenida 1xSlots Chile. Adicionalmente, para obtener 60 giros gratis en 777 GEMS RESPIN, introduce el codigo NEXT777 al hacer tu primer deposito.
?QUE ES UN BONO DE TRAGAPERRAS SIN DEPOSITO?
Como su nombre indica, un bono de tragaperras sin deposito es un tipo de bono de casino que no necesita que los jugadores depositen dinero para poder optar a cualquier tipo de recompensa. Por ejemplo, giros gratis, creditos de casino o incluso dinero en efectivo.
Los bonos sin deposito se dan generalmente a los jugadores potenciales para motivar a los nuevos jugadores para que se registren. Pueden formar parte de los paquetes de bienvenida que un casino online ofrece a todos sus jugadores potenciales y ayudan a atraer la atencion hacia la marca del casino. Tambien pueden ofrecerse a los jugadores con cuentas en determinadas situaciones.
Las tragaperras con bono sin deposito ofrecen la posibilidad de probar las tragaperras online sin coste alguno y quedandose con el dinero que se obtiene, razon por la que son muy codiciadas. Sin embargo, los bonos sin deposito no te obligan a depositar dinero cuando la promocion termina, aunque se sugiere.
?CUALES SON LOS PRINCIPALES TIPOS DE BONOS DE TRAGAMONEDAS SIN DEPOSITO?
Los bonos sin deposito estan disponibles en tres variedades: giros gratis, creditos gratis o dinero en efectivo. El tipo mas conocido que es un bono sin deposito no spins without deposit bonus.
GIROS GRATIS CON BONO SIN DEPOSITO
Todos sabemos que las maquinas tragaperras son las mas populares en el mundo de los juegos de casino , por lo que es natural que un bono hecho especificamente para las maquinas que juegan a las tragaperras sea el mas buscado. Para los amantes de las maquinas tragaperras, los bonos de tiradas gratis sin deposito son un verdadero tesoro, ya que permiten a los jugadores jugar a sus maquinas tragaperras favoritas sin depositar dinero, y con una gran cantidad de tiradas gratis, lo que aumenta sus probabilidades de ganar significativamente.
Creditos gratuitos / BONO DE JUEGO GRATUITO SIN DEPOSITO
En lugar de tiradas gratis, los casinos pueden optar por dar creditos gratis a los jugadores que tienen bonos sin deposito. Estos creditos pueden ser utilizados dentro de un periodo de tiempo enumerado para apostar en juegos en los casinos y ganar dinero real. Los bonos sin deposito y los creditos gratuitos se ofrecen tanto en las tragaperras gratuitas como en otros juegos de los casinos.
DINERO GRATIS CON BONOS SIN DEPOSITO
Al igual que los creditos gratuitos con los bonos sin deposito, los bonos de dinero sin deposito que no requieren deposito se pueden jugar tanto en las tragaperras como en otros juegos de casino. Una vez que haya reclamado y jugado el bono de dinero sin deposito, podra retirar el dinero del bono y cualquier ganancia adicional siempre que cumpla las condiciones para retirar el dinero.
?Como puedo reclamar un bono sin deposito?
En la mayoria de los casos, puede hacer uso de los bonos sin deposito al crear una cuenta en cualquier sitio de juego en linea que ofrezca este tipo de oferta. En la version online del casino, la bonificacion puede aparecer en la pagina de promociones del casino o en una ventana emergente. Algunos casinos requieren que introduzca un codigo promocional para acceder al bono.
Cuando considere reclamar un bono sin deposito (o cualquier otro tipo de bono) debe asegurarse de leer los terminos y condiciones que se adjuntan al bono. Los diferentes casinos pueden tener sus propias regulaciones y limites, sin embargo, hay algunos que son iguales en todos los casinos.
REQUISITOS PARA TRABAJAR
Los bonos sobre los depositos son accesibles para todos, sin embargo, cobrar los bonos es un asunto un poco mas controlado. La mayoria de los casinos en linea le permitiran retirar sus ganancias despues de haber podido apostar una cantidad especifica.
Los requisitos de apuesta se muestran como multiplicadores. Representan la cantidad de veces que tienes que apostar en un bono para poder retirar el dinero. Por lo general, puede jugar a una serie de juegos seleccionados por el operador del casino. Una vez que haya alcanzado el requisito de apuesta, podra dar el siguiente paso para cobrar su bono.
PLAZO
Segun el casino online, el bono para juegos de tragaperras de deposito puede caducar en cuestion de dias o durar hasta 30 dias. Para asegurarte de que cumples los requisitos de apuestas, es posible que tengas que planificar tu rutina de juego a lo largo del bono.
TAMANOS DE APUESTA
Un metodo para lograr su objetivo de apostar mas rapido es realizar la mayor cantidad de apuestas posible en cada juego. Es un metodo sensato, a menos que el operador del casino decida controlar la cantidad de la apuesta y limitar la cantidad de apuestas en la respectiva tragamonedas con bono sin deposito.
SE REQUIERE UN DEPOSITO
Aunque suene contradictorio, algunos casinos online pueden incluso exigir a los jugadores que depositen dinero antes de poder retirar su bono. Suelen anadir este requisito adicional por razones de seguridad.
RESTRICCIONES
A veces, se le puede negar el acceso a un bono con oferta de deposito gratuito. Esto solo ocurre en muy raras circunstancias, ya sea por el hecho de haber intentado dos bonos a la vez o por tener una direccion IP compartida con un jugador que tambien reclamo el mismo bono, o por residir en una zona restringida.
Puedes obtener informacion mas detallada leyendo el articulo completo en este enlace – http://centroculturalrecoleta.org/blog/pages/codigo_promocional_1xslots_bono.html
Список бесплатных промокодов 1xBet. Получи максимальный бонус при регистрации на сайте и в приложении! +100% к первому депозиту для всех новых игроков. Указанный выше промо-код дает новым игрокам возможность получить повышенный на 30% bonus. Как получить и использовать бонус 32500 рублей по промо-коду букмекерской компании 1хБет? Рабочие промокоды 1xBet при регистрации на официальном сайте компании. промокод на ставку 1хбет бесплатно бесплатную сегодня. Актуальный Промо-Коды 1 Икс Бет на 2024 год – это возможность сделать бесплатную ставку на сумму, которая указана в промокоде. Содержание: Где найти промокод 1xbet на сегодня бесплатно. Букмекерская контора 1 Икс Бет только новым людям дает бонус при пополнени. Чем полезный промокод на 1xbet. На какие виды спорта можно взять промокоды в 1 xbet. Как проверить промокод на 1хбет. Использовать его необходимо при регистрации на официальном сайте конторы 1xbet (а промокоды для купона при пари, находятся в самом низу статьи) – более подробно в этом материале http://saratovturizm.ru/interesting/pages/promo_kod_bk_1xbet_na_segodnya_pri_registracii.html
SCAM SCAM PHISING SCAM PHISING PHISING SCAM PHISING PHISING PHISING PHISING PHISING SCAM SCAM PHISING LOSE MONEY SCAM SCAM LOSE MONEY LOSE MONEY PHISING SCAM PHISING SCAM SCAM SCAM SCAM SCAM LOSE MONEY SCAM SCAM PHISING SCAM LOSE MONEY PHISING LOSE MONEY SCAM PHISING SCAM SCAM SCAM PHISING SCAM
https://muslim-prayer-times.com/
https://gruzchikivagon.ru
Одни проблемы. Почему не работает бк леон сегодня и с чем связана данная проблема я не знаю. Но лучше поискать другой источник для скачивания данной программы. Тут тратить свое время не советую.
Одни проблемы. Леон букмекерская не работает и с чем связана данная проблема я не знаю. Но лучше поискать другой источник для скачивания данной программы. Тут тратить свое время не советую.
Одни проблемы. БК леон не работает и с чем связана данная проблема я не знаю. Но лучше поискать другой источник для скачивания данной программы. Тут тратить свое время не советую.
Одни проблемы. Почему не работает бк леон и с чем связана данная проблема я не знаю. Но лучше поискать другой источник для скачивания данной программы. Тут тратить свое время не советую.
Одни проблемы. Почему не работает бк леон и с чем связана данная проблема я не знаю. Но лучше поискать другой источник для скачивания данной программы. Тут тратить свое время не советую.
blublu
Elevate Your Gaming with New UK Online Casinos
online casino uk no deposit online casino uk no deposit .
Одни проблемы. Леон букмекерская не работает и с чем связана данная проблема я не знаю. Но лучше поискать другой источник для скачивания данной программы. Тут тратить свое время не советую.
Одни проблемы. Букмекерская контора леон не работает и с чем связана данная проблема я не знаю. Но лучше поискать другой источник для скачивания данной программы. Тут тратить свое время не советую.
Одни проблемы. Леон не работает приложение и с чем связана данная проблема я не знаю. Но лучше поискать другой источник для скачивания данной программы. Тут тратить свое время не советую.
Одни проблемы. Леон не работает приложение и с чем связана данная проблема я не знаю. Но лучше поискать другой источник для скачивания данной программы. Тут тратить свое время не советую.
Одни проблемы. Приложение бк леон вылетает и с чем связана данная проблема я не знаю. Но лучше поискать другой источник для скачивания данной программы. Тут тратить свое время не советую.
стоимость грузчиков в Екатеринбурге
bliloblo
Одни проблемы. Леон не работает приложение и с чем связана данная проблема я не знаю. Но лучше поискать другой источник для скачивания данной программы. Тут тратить свое время не советую.
Одни проблемы. Почему не работает леон букмекерская контора и с чем связана данная проблема я не знаю. Но лучше поискать другой источник для скачивания данной программы. Тут тратить свое время не советую.
Одни проблемы. Приложение леон ошибка и с чем связана данная проблема я не знаю. Но лучше поискать другой источник для скачивания данной программы. Тут тратить свое время не советую.
Одни проблемы. Программа бк леон не устанавливается и с чем связана данная проблема я не знаю. Но лучше поискать другой источник для скачивания данной программы. Тут тратить свое время не советую.
В поисках где купить реплику Airpods PRO? Качественные беспроводные наушники в Москве. Копия оригинальных AirPods с шумоподавлением по цене 2490 рублей. Только проверенные гаджеты по низким ценам. Быстрая доставка по России.
Искали где купить лучшую реплику Airpods PRO? Наилучшие беспроводные наушники в Москве и области. Копия оригинальных AirPods с шумоподавлением по скидке. Надежные гаджеты по доступным ценам. Доставка по России.
помощь при переезде грузчики
Ищете где купить реплику Аирподс ПРО в Москве? Топовые беспроводные наушники в Москве и области. Копия оригинальных AirPods с шумоподавлением всего за 2490 рублей. Проверенные гаджеты по доступным ценам. Доставка по России.
Искали где купить копию наушников Airpods PRO? Топовые беспроводные наушники в Москве и области. Реплика оригинальных AirPods с шумоподавлением по цене 2490 рублей. Надежные гаджеты по доступным ценам. Доставим по России.
Ищете где el-gusto.ru? Наилучшие беспроводные наушники в Москве. Копия оригинальных AirPods с шумоподавлением по цене 2490 рублей. Проверенные гаджеты по доступным ценам. Быстрая доставка по России.
Даже самые сложные поломки не проблема для специалистов Samsung. Мы восстановим работоспособность вашего устройства на высшем уровне. Подписывайтесь на обновления:
notion.so
gumroad.com
mystrikingly.com
Искали где купить реплику Аирподс ПРО в Москве? Наилучшие беспроводные наушники в Москве и области. Копия оригинальных AirPods с шумоподавлением по скидке. Только проверенные гарнитуры по доступным ценам. Доставка по России.
В поисках где купить копию Airpods PRO в Москве? Лучшие беспроводные наушники в Москве. Копия оригинальных AirPods с активным шумоподавлением по скидке. Самые надежные гарнитуры по низким ценам. Доставим по России.
SCAM SCAM SCAM SCAM LOSE MONEY criminal LOSE MONEY LOSE MONEY criminal SCAM LOSE MONEY SCAM LOSE MONEY LOSE MONEY criminal criminal criminal criminal criminal criminal criminal criminal criminal SCAM criminal SCAM SCAM LOSE MONEY LOSE MONEY SCAM criminal criminal criminal LOSE MONEY LOSE MONEY LOSE MONEY LOSE MONEY SCAM criminal SCAM SCAM criminal LOSE MONEY SCAM LOSE MONEY SCAM SCAM criminal LOSE MONEY LOSE MONEY criminal {SCAM | LOSE MONEY | criminal LOSE MONEY criminal SCAM LOSE MONEY SCAM LOSE MONEY criminal LOSE MONEY LOSE MONEY criminal SCAM LOSE MONEY SCAM LOSE MONEY criminal LOSE MONEY criminal LOSE MONEY LOSE MONEY SCAM SCAM LOSE MONEY LOSE MONEY LOSE MONEY LOSE MONEY SCAM criminal criminal LOSE MONEY SCAM SCAM SCAM SCAM LOSE MONEY LOSE MONEY criminal criminal SCAM SCAM LOSE MONEY LOSE MONEY criminal LOSE MONEY LOSE MONEY {SCAM | LOSE MONEY | criminal criminal SCAM LOSE MONEY LOSE MONEY criminal criminal LOSE MONEY SCAM SCAM criminal LOSE MONEY criminal SCAM criminal LOSE MONEY LOSE MONEY criminal SCAM
important site anydesk download
грузчика заказать
Доставка алкоголя в Москве ночью на дом. Звоните! Доставляем алкоголь круглосуточно
Expert Insights on Forex & Crypto Markets
https://google.la/url?q=https://finflicks.net
https://www.google.ms/url?q=https://finflicks.net
https://images.google.rs/url?q=https://finflicks.net
https://www.google.com.tw/url?q=https://finflicks.net
https://google.cf/url?q=https://finflicks.net
https://www.google.gl/url?q=https://finflicks.net
https://clients1.google.fi/url?q=https://finflicks.net
https://maps.google.co.tz/url?q=https://finflicks.net
https://www.google.ae/url?q=https://finflicks.net
https://www.google.com/url?q=https://finflicks.net
В поисках где копия Airpods PRO? Лучшие беспроводные наушники в Москве. Копия оригинальных AirPods с шумоподавлением всего за 2490 рублей. Только проверенные гаджеты по приемлимым ценам. Доставка по России.
В поисках где mdou41orel.ru? Наилучшие беспроводные наушники в Москве и области. Реплика оригинальных AirPods с активным шумоподавлением по скидке. Самые надежные гарнитуры по приемлимым ценам. Доставим по России.
Ищете где купить копию Airpods PRO? Качественные беспроводные наушники в Москве и РФ. Реплика оригинальных AirPods с активным шумоподавлением всего за 2490 рублей. Проверенные гаджеты по приемлимым ценам. Быстрая доставка по России.
view it tradingview
SCAM LOSE MONEY SCAM LOSE MONEY SCAM SCAM LOSE MONEY LOSE MONEY criminal criminal criminal criminal LOSE MONEY criminal SCAM SCAM criminal SCAM SCAM criminal criminal SCAM LOSE MONEY SCAM LOSE MONEY SCAM criminal SCAM criminal LOSE MONEY SCAM LOSE MONEY criminal SCAM SCAM SCAM criminal LOSE MONEY criminal criminal SCAM SCAM SCAM criminal SCAM criminal criminal SCAM LOSE MONEY SCAM LOSE MONEY {SCAM | LOSE MONEY | criminal SCAM SCAM LOSE MONEY criminal SCAM criminal criminal criminal SCAM SCAM LOSE MONEY SCAM LOSE MONEY SCAM SCAM SCAM LOSE MONEY criminal LOSE MONEY criminal criminal SCAM SCAM criminal SCAM SCAM SCAM criminal LOSE MONEY SCAM LOSE MONEY LOSE MONEY SCAM LOSE MONEY SCAM SCAM SCAM SCAM LOSE MONEY SCAM criminal SCAM criminal LOSE MONEY {SCAM | LOSE MONEY | criminal SCAM SCAM criminal LOSE MONEY SCAM criminal LOSE MONEY LOSE MONEY LOSE MONEY criminal criminal LOSE MONEY LOSE MONEY SCAM SCAM criminal criminal SCAM
В поисках где купить реплику наушников Airpods PRO в Москве? Качественные беспроводные наушники в Москве и РФ. Реплика оригинальных AirPods с шумоподавлением всего за 2490 рублей. Надежные гарнитуры по приемлимым ценам. Доставка по России.
Искали где mdou41orel.ru? Наилучшие беспроводные наушники в Москве и области. Реплика оригинальных AirPods с шумоподавлением всего за 2490 рублей. Самые качественные гаджеты по приемлимым ценам. Быстрая доставка по России.
Искали где https://mdou41orel.ru/? Топовые беспроводные наушники в Москве. Копия оригинальных AirPods с шумоподавлением по цене 2490 рублей. Самые качественные гаджеты по приемлимым ценам. Доставка по России.
Ищете где купить реплику Аирподс ПРО в Москве? Наилучшие беспроводные наушники в Москве и области. Копия оригинальных AirPods с активным шумоподавлением по цене 2490 рублей. Проверенные гарнитуры по приемлимым ценам. Быстрая доставка по России.
Сантехник на дом в Санкт-Петербурге: надежность и оперативность
сантехник на дом недорого http://spb-vizov-santekhnika.ru/ .
Искали где купить реплику Airpods PRO в Москве? Топовые беспроводные наушники в Москве. Реплика оригинальных AirPods с шумоподавлением со скидкой. Только качественные гарнитуры по доступным ценам. Доставим по России.
В поисках где купить лучшую реплику Airpods PRO? Наилучшие беспроводные наушники в Москве и области. Копия оригинальных AirPods с активным шумоподавлением со скидкой. Только качественные гарнитуры по приемлимым ценам. Доставим по России.
https://potreb-prava.com/
Ищете где купить копию наушников Airpods PRO? Качественные беспроводные наушники в Москве и РФ. Реплика оригинальных AirPods с шумоподавлением по скидке. Надежные гаджеты по приемлимым ценам. Быстро доставим по России.
Доставка алкоголя в Москве на дом в Москве. Доставляем алкоголь круглосуточно
Искали где el-gusto.ru? Топовые беспроводные наушники в Москве и области. Реплика оригинальных AirPods с активным шумоподавлением со скидкой. Проверенные гаджеты по низким ценам. Быстро доставим по России.
Ищете где el-gusto.ru? Топовые беспроводные наушники в Москве. Копия оригинальных AirPods с активным шумоподавлением по цене 2490 рублей. Только качественные гарнитуры по приемлимым ценам. Быстрая доставка по России.
аптеки спб оземпик – +что лучше оземпик +или саксенда, оземпик 0.25
В поисках где el-gusto.ru? Качественные беспроводные наушники в Москве и РФ. Реплика оригинальных AirPods с шумоподавлением со скидкой. Самые качественные гарнитуры по доступным ценам. Быстрая доставка по России.
Ищете где купить копию Аирподс ПРО в Москве? Топовые беспроводные наушники в Москве и области. Реплика оригинальных AirPods с активным шумоподавлением по скидке. Самые надежные гарнитуры по низким ценам. Быстрая доставка по России.
Искали где купить копию Airpods PRO? Лучшие беспроводные наушники в Москве и РФ. Копия оригинальных AirPods с активным шумоподавлением по скидке. Только качественные гаджеты по доступным ценам. Доставим по России.
В поисках где купить копию Airpods PRO? Качественные беспроводные наушники в Москве и РФ. Копия оригинальных AirPods с активным шумоподавлением всего за 2490 рублей. Только проверенные гаджеты по доступным ценам. Доставка по России.
criminal SCAM LOSE MONEY SCAM SCAM criminal LOSE MONEY LOSE MONEY SCAM criminal criminal SCAM LOSE MONEY criminal LOSE MONEY criminal criminal criminal criminal LOSE MONEY criminal SCAM SCAM LOSE MONEY SCAM criminal LOSE MONEY criminal LOSE MONEY SCAM LOSE MONEY SCAM SCAM criminal SCAM criminal criminal SCAM SCAM criminal LOSE MONEY LOSE MONEY criminal LOSE MONEY SCAM SCAM SCAM SCAM LOSE MONEY criminal criminal {SCAM | LOSE MONEY | criminal LOSE MONEY LOSE MONEY SCAM criminal LOSE MONEY LOSE MONEY SCAM criminal SCAM LOSE MONEY LOSE MONEY SCAM SCAM LOSE MONEY SCAM criminal LOSE MONEY criminal LOSE MONEY LOSE MONEY criminal SCAM SCAM SCAM criminal criminal criminal SCAM criminal criminal SCAM SCAM SCAM LOSE MONEY criminal LOSE MONEY LOSE MONEY criminal LOSE MONEY SCAM criminal SCAM SCAM criminal {SCAM | LOSE MONEY | criminal SCAM SCAM SCAM LOSE MONEY criminal LOSE MONEY criminal LOSE MONEY SCAM SCAM criminal SCAM criminal LOSE MONEY SCAM SCAM criminal SCAM
Искали где купить копию Airpods PRO в Москве? Качественные беспроводные наушники в Москве и РФ. Копия оригинальных AirPods с активным шумоподавлением со скидкой. Надежные гарнитуры по низким ценам. Доставка по России.
criminal criminal LOSE MONEY criminal criminal LOSE MONEY LOSE MONEY SCAM LOSE MONEY criminal LOSE MONEY SCAM SCAM SCAM SCAM criminal criminal LOSE MONEY LOSE MONEY LOSE MONEY SCAM criminal SCAM LOSE MONEY SCAM SCAM LOSE MONEY SCAM criminal criminal LOSE MONEY SCAM LOSE MONEY criminal criminal criminal SCAM LOSE MONEY LOSE MONEY LOSE MONEY SCAM SCAM SCAM LOSE MONEY SCAM SCAM SCAM LOSE MONEY SCAM SCAM LOSE MONEY {SCAM | LOSE MONEY | criminal LOSE MONEY SCAM criminal criminal LOSE MONEY criminal LOSE MONEY SCAM SCAM criminal SCAM SCAM LOSE MONEY criminal LOSE MONEY LOSE MONEY criminal LOSE MONEY criminal SCAM LOSE MONEY LOSE MONEY SCAM SCAM criminal criminal criminal SCAM LOSE MONEY LOSE MONEY LOSE MONEY criminal criminal criminal criminal criminal criminal SCAM SCAM criminal LOSE MONEY SCAM SCAM LOSE MONEY {SCAM | LOSE MONEY | criminal criminal criminal SCAM SCAM SCAM LOSE MONEY LOSE MONEY SCAM SCAM LOSE MONEY criminal SCAM criminal LOSE MONEY LOSE MONEY LOSE MONEY LOSE MONEY SCAM
Ищете где купить реплику Аирподс ПРО? Наилучшие беспроводные наушники в Москве и РФ. Копия оригинальных AirPods с активным шумоподавлением по скидке. Самые надежные гаджеты по доступным ценам. Доставим по России.
Ищете где купить копию Airpods PRO? Наилучшие беспроводные наушники в Москве и области. Реплика оригинальных AirPods с активным шумоподавлением по скидке. Самые качественные гаджеты по доступным ценам. Быстро доставим по России.
check this link right here now MetaMask extension
Искали где купить реплику Аирподс ПРО в Москве? Лучшие беспроводные наушники в Москве. Копия оригинальных AirPods с активным шумоподавлением по скидке. Только качественные гарнитуры по приемлимым ценам. Быстро доставим по России.
Ищете где купить реплику наушников Airpods PRO в Москве? Наилучшие беспроводные наушники в Москве. Реплика оригинальных AirPods с активным шумоподавлением всего за 2490 рублей. Только качественные гаджеты по низким ценам. Доставим по России.
Приготовление еды на диете: полезные и вкусные рецепты
какие блюда https://www.brkgrp.ru .
узнать
купить рецепт на лекарства, купить лекарства без рецепта
nice content!nice history!! boba 😀
nice content!nice history!!
Одни проблемы. БК леон не работает и с чем связана данная проблема я не знаю. Но лучше поискать другой источник для скачивания данной программы. Тут тратить свое время не советую.
Одни проблемы. Не работает приложение бк леон и с чем связана данная проблема я не знаю. Но лучше поискать другой источник для скачивания данной программы. Тут тратить свое время не советую.
Одни проблемы. Леон не работает приложение и с чем связана данная проблема я не знаю. Но лучше поискать другой источник для скачивания данной программы. Тут тратить свое время не советую.
Одни проблемы. Не работает приложение бк леон и с чем связана данная проблема я не знаю. Но лучше поискать другой источник для скачивания данной программы. Тут тратить свое время не советую.
https://catherineasquithgallery.com
Одни проблемы. Леон букмекерская не работает и с чем связана данная проблема я не знаю. Но лучше поискать другой источник для скачивания данной программы. Тут тратить свое время не советую.
Одни проблемы. Не работает приложение бк леон и с чем связана данная проблема я не знаю. Но лучше поискать другой источник для скачивания данной программы. Тут тратить свое время не советую.
Одни проблемы. Леон не работает приложение и с чем связана данная проблема я не знаю. Но лучше поискать другой источник для скачивания данной программы. Тут тратить свое время не советую.
Одни проблемы. Леон букмекерская не работает и с чем связана данная проблема я не знаю. Но лучше поискать другой источник для скачивания данной программы. Тут тратить свое время не советую.
Одни проблемы. Приложение леон ошибка и с чем связана данная проблема я не знаю. Но лучше поискать другой источник для скачивания данной программы. Тут тратить свое время не советую.
https://gruzchikikorob.ru
Одни проблемы. Леон не работает приложение и с чем связана данная проблема я не знаю. Но лучше поискать другой источник для скачивания данной программы. Тут тратить свое время не советую.
Top Sites Reviewed
All Australian Casino Games with High RTP
online casino jackpot online casino jackpot .
Одни проблемы. Приложение леон ошибка и с чем связана данная проблема я не знаю. Но лучше поискать другой источник для скачивания данной программы. Тут тратить свое время не советую.
Одни проблемы. БК леон не могу войти и с чем связана данная проблема я не знаю. Но лучше поискать другой источник для скачивания данной программы. Тут тратить свое время не советую.
Одни проблемы. Почему не работает бк леон сегодня и с чем связана данная проблема я не знаю. Но лучше поискать другой источник для скачивания данной программы. Тут тратить свое время не советую.
Одни проблемы. Программа бк леон не устанавливается и с чем связана данная проблема я не знаю. Но лучше поискать другой источник для скачивания данной программы. Тут тратить свое время не советую.
EL CODIGO PROMOCIONAL DE 1XSLOTS CASINO
Sin introducir un codigo promocional 1xSlots Casino, como nuevo cliente en March 2024, puede beneficiarse de una bonificacion del 100% hasta 300€. El casino le proporciona un monton de maquinas tragaperras populares de proveedores de software como iSoftBet, Elk Studios o Play’n GO y otros. De forma adicional, se le otorgaran|esta oferta incluye 30 turnos gratuitos.. Todas las informaciones importantes respecto a esta oferta de bienvenida se puede encontrar en este articulo.
?COMO FUNCIONA EL CODIGO PROMOCIONAL DE 1XSLOTS CASINO?
En 1xSlots Casino se puede obtener una bonificacion del 100% hasta 300€ y turnos gratuitos en 1xSlots Casino. Haga su inicial deposito en 1xSlots Casino tras finalizar el proceso de inscripcion. No hace falta solicitar su bonificacion de bienvenida por e-mail ni el chat en directo como en otros casinos, porque 1xSlots Casino la abona a su cuenta automaticamente. La oferta de bienvenida se activa cuando deposite 10€ o mas. Haga un deposito empleando EcoPayz, Boku o Bitcoin u otro metodo de deposito disponible en el casino.
Mas sobre el bono
1xSlots Casino le da la oportunidad de incrementar su balance hasta 300€ (100%). Obtenga la bonificacion superior al depositar 300€ y conseguir 600€ que se anadiran en su cuenta. Los fondos de su bonificacion es compatible con tragaperras de proveedores de software como Red Tiger Gaming, Evolution Gaming y Microgaming, por nombrar unos cuantos. Debe tenerse en cuenta tambien que su cuenta se incrementara con 30 turnos gratuitos.
Bono de bienvenida 1xSlots 2024
Dentro de 1xSlots existen dos bonos de bienvenida, uno standard y uno exclusivo. El primero de ellas recompensa con un paquete de hasta €1500 y 150 giros gratis mientras que el segundo otorga un 10% adicional recompensando hasta €1650 y 150 giros gratis ?La diferencia? El bono exclusivo se obtiene mediante el uso del 1xSlots promocode NEXT777.
Las recompensas de la bonificacion exclusiva son otorgadas en los 4 primeros depositos de la siguiente manera:
100% del primer deposito hasta €450 + 30 giros gratis
100% del segundo deposito hasta €350 + 35 giros gratis
100% del tercer deposito hasta €400 + 40 giros gratis
100% del cuarto deposito hasta €450 + 45 giros gratis
Bono de bienvenida 1xSlots Argentina 2024
Cabe resaltar que durante tu proceso de registro tienes que elegir tu moneda local preferida. De este modo obtendras la bonificacion de bienvenida 1xSlots Argentina en pesos. Puedes recibir el bono exclusivo 1xSlots Argentina al utilizar nuestro codigo de bono 1xSlots Argentina NEXT777 durante el proceso de registro.
Ademas, si ingresas el codigo NEXT777 a la pestana “Bonos y Regalos” despues de hacer tu primer deposito, puedes recibir el bono con giros gratis 1xSlots Argentina que te otorgara 60 FS en tragamonedas 777 GEMS RESPIN. A continuacion encontraras los valores de bonos en pesos argentinos.
Bono de bienvenida 1xSlots Chile 2024
El bono de bienvenida 1xSlots Chile funciona del mismo modo como en Argentina. Tienes que crear tu cuenta e ingresar nuestro codigo de bonificacion 1xslots Chile NEXT777 al formulario de registro. Puedes elegir el peso chileno como tu moneda local para recibir la bonificacion de bienvenida 1xSlots Chile. Adicionalmente, para obtener 60 giros gratis en 777 GEMS RESPIN, introduce el codigo NEXT777 al hacer tu primer deposito.
?QUE ES UN BONO DE TRAGAPERRAS SIN DEPOSITO?
Como su nombre indica, un bono de tragaperras sin deposito es un tipo de bono de casino que no necesita que los jugadores depositen dinero para poder optar a cualquier tipo de recompensa. Por ejemplo, giros gratis, creditos de casino o incluso dinero en efectivo.
Los bonos sin deposito se dan generalmente a los jugadores potenciales para motivar a los nuevos jugadores para que se registren. Pueden formar parte de los paquetes de bienvenida que un casino online ofrece a todos sus jugadores potenciales y ayudan a atraer la atencion hacia la marca del casino. Tambien pueden ofrecerse a los jugadores con cuentas en determinadas situaciones.
Las tragaperras con bono sin deposito ofrecen la posibilidad de probar las tragaperras online sin coste alguno y quedandose con el dinero que se obtiene, razon por la que son muy codiciadas. Sin embargo, los bonos sin deposito no te obligan a depositar dinero cuando la promocion termina, aunque se sugiere.
?CUALES SON LOS PRINCIPALES TIPOS DE BONOS DE TRAGAMONEDAS SIN DEPOSITO?
Los bonos sin deposito estan disponibles en tres variedades: giros gratis, creditos gratis o dinero en efectivo. El tipo mas conocido que es un bono sin deposito no spins without deposit bonus.
GIROS GRATIS CON BONO SIN DEPOSITO
Todos sabemos que las maquinas tragaperras son las mas populares en el mundo de los juegos de casino , por lo que es natural que un bono hecho especificamente para las maquinas que juegan a las tragaperras sea el mas buscado. Para los amantes de las maquinas tragaperras, los bonos de tiradas gratis sin deposito son un verdadero tesoro, ya que permiten a los jugadores jugar a sus maquinas tragaperras favoritas sin depositar dinero, y con una gran cantidad de tiradas gratis, lo que aumenta sus probabilidades de ganar significativamente.
Creditos gratuitos / BONO DE JUEGO GRATUITO SIN DEPOSITO
En lugar de tiradas gratis, los casinos pueden optar por dar creditos gratis a los jugadores que tienen bonos sin deposito. Estos creditos pueden ser utilizados dentro de un periodo de tiempo enumerado para apostar en juegos en los casinos y ganar dinero real. Los bonos sin deposito y los creditos gratuitos se ofrecen tanto en las tragaperras gratuitas como en otros juegos de los casinos.
DINERO GRATIS CON BONOS SIN DEPOSITO
Al igual que los creditos gratuitos con los bonos sin deposito, los bonos de dinero sin deposito que no requieren deposito se pueden jugar tanto en las tragaperras como en otros juegos de casino. Una vez que haya reclamado y jugado el bono de dinero sin deposito, podra retirar el dinero del bono y cualquier ganancia adicional siempre que cumpla las condiciones para retirar el dinero.
?Como puedo reclamar un bono sin deposito?
En la mayoria de los casos, puede hacer uso de los bonos sin deposito al crear una cuenta en cualquier sitio de juego en linea que ofrezca este tipo de oferta. En la version online del casino, la bonificacion puede aparecer en la pagina de promociones del casino o en una ventana emergente. Algunos casinos requieren que introduzca un codigo promocional para acceder al bono.
Cuando considere reclamar un bono sin deposito (o cualquier otro tipo de bono) debe asegurarse de leer los terminos y condiciones que se adjuntan al bono. Los diferentes casinos pueden tener sus propias regulaciones y limites, sin embargo, hay algunos que son iguales en todos los casinos.
REQUISITOS PARA TRABAJAR
Los bonos sobre los depositos son accesibles para todos, sin embargo, cobrar los bonos es un asunto un poco mas controlado. La mayoria de los casinos en linea le permitiran retirar sus ganancias despues de haber podido apostar una cantidad especifica.
Los requisitos de apuesta se muestran como multiplicadores. Representan la cantidad de veces que tienes que apostar en un bono para poder retirar el dinero. Por lo general, puede jugar a una serie de juegos seleccionados por el operador del casino. Una vez que haya alcanzado el requisito de apuesta, podra dar el siguiente paso para cobrar su bono.
PLAZO
Segun el casino online, el bono para juegos de tragaperras de deposito puede caducar en cuestion de dias o durar hasta 30 dias. Para asegurarte de que cumples los requisitos de apuestas, es posible que tengas que planificar tu rutina de juego a lo largo del bono.
TAMANOS DE APUESTA
Un metodo para lograr su objetivo de apostar mas rapido es realizar la mayor cantidad de apuestas posible en cada juego. Es un metodo sensato, a menos que el operador del casino decida controlar la cantidad de la apuesta y limitar la cantidad de apuestas en la respectiva tragamonedas con bono sin deposito.
SE REQUIERE UN DEPOSITO
Aunque suene contradictorio, algunos casinos online pueden incluso exigir a los jugadores que depositen dinero antes de poder retirar su bono. Suelen anadir este requisito adicional por razones de seguridad.
RESTRICCIONES
A veces, se le puede negar el acceso a un bono con oferta de deposito gratuito. Esto solo ocurre en muy raras circunstancias, ya sea por el hecho de haber intentado dos bonos a la vez o por tener una direccion IP compartida con un jugador que tambien reclamo el mismo bono, o por residir en una zona restringida.
Puedes obtener informacion mas detallada leyendo el articulo completo en este enlace – https://94fbr.org/art/codigo_promocional_1xslots_bono.html
LOSE MONEY criminal LOSE MONEY SCAM SCAM criminal LOSE MONEY LOSE MONEY LOSE MONEY LOSE MONEY criminal LOSE MONEY SCAM LOSE MONEY SCAM SCAM criminal LOSE MONEY criminal criminal SCAM SCAM criminal LOSE MONEY criminal LOSE MONEY criminal LOSE MONEY LOSE MONEY LOSE MONEY criminal SCAM LOSE MONEY criminal criminal criminal SCAM criminal criminal LOSE MONEY LOSE MONEY SCAM SCAM LOSE MONEY criminal SCAM SCAM LOSE MONEY criminal LOSE MONEY SCAM {SCAM | LOSE MONEY | criminal criminal criminal criminal SCAM criminal LOSE MONEY criminal LOSE MONEY LOSE MONEY SCAM criminal SCAM LOSE MONEY criminal LOSE MONEY LOSE MONEY criminal criminal criminal criminal LOSE MONEY SCAM LOSE MONEY SCAM criminal LOSE MONEY criminal criminal SCAM LOSE MONEY criminal LOSE MONEY criminal criminal criminal LOSE MONEY LOSE MONEY criminal criminal criminal criminal SCAM LOSE MONEY SCAM {SCAM | LOSE MONEY | criminal LOSE MONEY criminal criminal criminal criminal SCAM criminal SCAM LOSE MONEY LOSE MONEY SCAM LOSE MONEY SCAM SCAM LOSE MONEY SCAM SCAM SCAM
1SS3D249742
помощь при переезде грузчики
Одни проблемы. Букмекерская контора леон не работает и с чем связана данная проблема я не знаю. Но лучше поискать другой источник для скачивания данной программы. Тут тратить свое время не советую.
nice content!nice history!!
Все о доставке алкоголя в Москве: Скорость, качество, доступность
доставка алкоголя в москве круглосуточно dostavka-alkogolya-moskva-11.ru .
SCAM criminal criminal criminal SCAM criminal criminal SCAM SCAM criminal LOSE MONEY LOSE MONEY criminal criminal criminal SCAM SCAM criminal criminal SCAM criminal LOSE MONEY LOSE MONEY criminal SCAM SCAM criminal LOSE MONEY criminal LOSE MONEY LOSE MONEY SCAM LOSE MONEY criminal SCAM LOSE MONEY criminal LOSE MONEY SCAM criminal criminal SCAM criminal criminal LOSE MONEY criminal criminal criminal criminal LOSE MONEY LOSE MONEY {SCAM | LOSE MONEY | criminal criminal LOSE MONEY SCAM LOSE MONEY LOSE MONEY LOSE MONEY SCAM SCAM LOSE MONEY SCAM criminal criminal criminal criminal LOSE MONEY LOSE MONEY SCAM LOSE MONEY criminal SCAM LOSE MONEY LOSE MONEY SCAM criminal SCAM SCAM LOSE MONEY criminal criminal LOSE MONEY SCAM LOSE MONEY SCAM SCAM criminal SCAM SCAM criminal SCAM criminal criminal LOSE MONEY criminal LOSE MONEY {SCAM | LOSE MONEY | criminal SCAM criminal SCAM LOSE MONEY criminal SCAM criminal LOSE MONEY LOSE MONEY criminal LOSE MONEY LOSE MONEY SCAM LOSE MONEY LOSE MONEY criminal LOSE MONEY LOSE MONEY
департамент образования апостиль на диплом
покер онлайн
124SDS9742
Отдых на Кольском полуострове летом 2024: ваш гид по лучшим местам и активностям
кольский полуостров цена тура https://www.tury-na-kolskii-poluostrov.ru .
cululutata
https://sporty24.site/
LOSE MONEY criminal LOSE MONEY LOSE MONEY criminal criminal criminal SCAM SCAM SCAM criminal LOSE MONEY criminal SCAM LOSE MONEY criminal LOSE MONEY SCAM LOSE MONEY criminal criminal criminal LOSE MONEY LOSE MONEY SCAM criminal SCAM LOSE MONEY criminal criminal LOSE MONEY LOSE MONEY SCAM SCAM LOSE MONEY SCAM LOSE MONEY criminal criminal criminal criminal criminal SCAM SCAM SCAM LOSE MONEY SCAM LOSE MONEY LOSE MONEY SCAM criminal {SCAM | LOSE MONEY | criminal LOSE MONEY LOSE MONEY SCAM LOSE MONEY LOSE MONEY SCAM LOSE MONEY LOSE MONEY SCAM SCAM LOSE MONEY LOSE MONEY LOSE MONEY criminal criminal criminal SCAM SCAM SCAM criminal LOSE MONEY LOSE MONEY LOSE MONEY LOSE MONEY LOSE MONEY SCAM criminal criminal LOSE MONEY LOSE MONEY criminal LOSE MONEY SCAM LOSE MONEY LOSE MONEY criminal criminal SCAM criminal LOSE MONEY criminal criminal criminal SCAM {SCAM | LOSE MONEY | criminal SCAM SCAM SCAM LOSE MONEY criminal LOSE MONEY criminal LOSE MONEY LOSE MONEY SCAM criminal SCAM LOSE MONEY LOSE MONEY SCAM criminal LOSE MONEY criminal
124SDS9742
Slightly off topic 🙂
It so happened that my sister found an interesting man here, and recently got married ^_^
(Moderator, don’t troll!!!)
Is there are handsome people here! 😉 I’m Maria, 26 years old.
I work as a model, successfull – I hope you do too! Although, if you are very good in bed, then you are out of the queue!)))
By the way, there was no sex for a long time, it is very difficult to find a decent one…
And no! I am not a prostitute! I prefer harmonious, warm and reliable relationships. I cook deliciously and not only 😉 I have a degree in marketing.
My photo:
___
Added
The photo is broken, sorry(((
Check out my blog where you’ll find lots of hot information about me:
https://kotel-otoplenija.ru/
Or write to me in telegram @Lolla_sm1_best ( start chat with your photo!!!)
Bonusar och erbjudanden Г¤r en viktig del av casinospelande online och en populГ¤r form av belГ¶ning fГ¶r spelare. En av de mest generГ¶sa bonusarna pГҐ marknaden just nu erbjuds av Gogo Casino – bonus gogo casino.
Gogo Casino är ett online casino som erbjuder ett brett utbud av spel och underhållning för svenska spelare. För att locka nya spelare och belöna befintliga kunder erbjuder de en generös välkomstbonus och regelbundna kampanjer.
Som ny spelare hos Gogo Casino kan du få en välkomstbonus på upp till 2000 kr. Denna bonus ges i form av en insättningsbonus på din första insättning. För att ta del av bonusen behöver du bara registrera dig som ny spelare och göra en insättning på minst 100 kr.
För befintliga kunder erbjuder Gogo Casino regelbundet olika kampanjer och bonusar. Det kan vara allt från gratis spins på utvalda spelautomater till insättningsbonusar på specifika dagar i veckan. Det är alltid bra att hålla koll på deras kampanjsida för att se vilka bonusar som är aktuella just nu.
Bonus gogo casino är ett utmärkt sätt att få extra valuta för pengarna när du spelar på Gogo Casino. Med generösa bonusar och regelbundna kampanjer kan du maximera dina vinstchanser och ha ännu roligare när du spelar.
Sammanfattningsvis är bonus gogo casino en fantastisk möjlighet för svenska spelare att få extra belöningar när de spelar på Gogo Casino. Med generösa bonusar och regelbundna kampanjer är det enkelt att maximera sina vinstchanser och få ännu mer spänning i casinospel online. Missa inte chansen att ta del av bonusarna hos Gogo Casino och öka dina vinstchanser redan idag!
https://gogocasino.one
Gogo Casino är en populär online-spelplattform som erbjuder ett brett utbud av casinospel för spelare att njuta av. Men vem äger egentligen Gogo Casino? Svaret är att Gogo Casino ägs och drivs av det välkända företaget LeoVegas Gaming plc.
LeoVegas grundades 2011 och har sedan dess etablerat sig som en av de ledande aktörerna inom den digitala spelindustrin. Företaget är licensierat och reglerat av flera spelmyndigheter och är känt för sitt engagemang för ansvarsfullt spelande.
Gogo Casino har blivit populärt bland spelare tack vare sitt stora utbud av spel, smidiga användarupplevelse och generösa kampanjer och erbjudanden. Oavsett om du föredrar klassiska casinospel som blackjack och roulette eller moderna videoslots, finns det något för alla på Gogo Casino.
Genom att vara en del av LeoVegas-familjen har Gogo Casino tillgång till den senaste tekniken och de bästa spelen från de ledande spelutvecklarna i branschen. Det är tydligt att ägarna av Gogo Casino har investerat mycket tid och resurser för att skapa en förstklassig spelplattform som utmärker sig på marknaden.
Så om du är ute efter en spännande och underhållande casinoupplevelse, behöver du inte leta längre än Gogo Casino. Med sin starka ägarbakgrund och förstklassiga spelutbud är det en plattform som du kan lita på för att ge dig den bästa möjliga spelupplevelsen.
https://gogocasino.one
SLS принтеры: лучшие предложения и акции
sls принтер купить https://www.pgrt3d-lss.ru .
Gogo Casino är en populär online casino som erbjuder sina spelare ett stort utbud av spel och bonuserbjudanden. För att säkerställa en bra spelupplevelse för sina kunder har Gogo Casino en professionell och tillmötesgående kundtjänst tillgänglig dygnet runt.
Kundtjänsten hos Gogo Casino är lätt att nå via live chatt, telefon eller e-post. De vänliga och kunniga medarbetarna finns alltid till hands för att hjälpa till med eventuella frågor eller problem som kan uppstå under spelningen. Oavsett om det gäller tekniska frågor, bonusar eller uttag, kan spelarna lita på att de får snabb och professionell hjälp av kundtjänsten.
Gogo Casino strävar efter att erbjuda den bästa möjliga spelupplevelsen för sina kunder och en viktig del av det är att ha en effektiv och tillgänglig kundtjänst. Genom att erbjuda snabb och pålitlig support kan Gogo Casino säkerställa att deras spelare är nöjda och kommer tillbaka för mer spänning och underhållning.
Så om du har några frågor eller behöver hjälp när du spelar på Gogo Casino, tveka inte att kontakta deras kundtjänst. Du kommer säkert att bli väl omhändertagen av deras professionella och vänliga medarbetare.
https://gogocasino.one
wow, amazing
Выбирая Vodka Казино водка казино, вы получаете не только место для игры, но и надежного партнера, который обеспечивает безопасность, конфиденциальность и массу положительных эмоций. Откройте для себя свое путешествие в мир азарта с Vodka Казино прямо сейчас!
I was recommended this blog by my cousin. I am
not positive whether or not this publish is written by him as
no one else know such specified about my trouble. You’re incredible!
Thank you!
Gogo Casino är ett online casino som erbjuder en rad spännande spel och underhållning för spelentusiaster. För de som behöver kontakta Gogo Casino finns det ett telefonnummer där spelare kan ringa för att få hjälp.
Att ha tillgång till ett telefonnummer kan vara avgörande för att lösa eventuella frågor eller problem som kan uppstå under speltiden. Genom att kunna ringa Gogo Casino direkt kan spelare få hjälp på ett snabbt och effektivt sätt.
Det Г¤r viktigt att veta att Gogo Casino Г¤r mГҐn om sina spelares sГ¤kerhet och integritet, och dГ¤rfГ¶r Г¤r det inte bara enkelt att kontakta dem via telefonnummer – det Г¤r ocksГҐ sГ¤kert. Spelare kan vara trygga i att deras personuppgifter behandlas pГҐ ett ansvarsfullt sГ¤tt nГ¤r de kontaktar Gogo Casino.
Så om du vill ha hjälp med något relaterat till ditt spel på Gogo Casino, tveka inte att ringa deras telefonnummer. Oavsett om det handlar om att lösa tekniska problem, förfrågningar om bonusar eller hjälp med insättningar och uttag, finns det alltid någon till hands för att hjälpa till.
Gogo Casino strävar efter att erbjuda en förstklassig spelupplevelse för sina spelare, och att kunna erbjuda ett telefonnummer för direktkontakt är en del av den omsorg de visar för sina kunder. Så nästa gång du spelar på Gogo Casino och behöver hjälp, tveka inte att ringa deras telefonnummer för snabb och professionell support.
https://gogocasino.one
https://acook.space
nice content!nice history!!
Gogo casino är en populär online spelplattform som har vunnit förtroende från spelare över hela världen på grund av sin transparenta och rättvisa spelpolicy. Genom att erbjuda en säker och pålitlig spelupplevelse har Gogo casino gjort sig kända som en pålitlig aktör inom branschen.
En av de viktigaste faktorerna för spelare när de väljer ett online casino är transparens. Det är viktigt att veta att spelen är rättvisa och att ens insatta pengar hanteras på ett pålitligt sätt. Gogo casino har tagit detta på stort allvar och har därför implementerat strikta åtgärder för att säkerställa en transparent spelupplevelse för sina användare.
Genom att använda sig av avancerad krypteringsteknik kan Gogo casino garantera att alla transaktioner är säkra och skyddade mot bedrägeri. Dessutom genomgår alla spel regelbundet oberoende revisioner för att säkerställa att de är rättvisa och slumpmässiga.
På Gogo casino kan spelarna också förvänta sig att få fullständig och öppen information om spelregler, utbetalningsprocent och hela spelsystemet. Detta skapar en känsla av förtroende och säkerhet bland spelarna, vilket är avgörande för att skapa en långsiktig relation mellan casinot och sina användare.
Sammanfattningsvis kan man säga att Gogo casino är ett utmärkt val för spelare som prioriterar transparens och rättvisa i sitt spelande. Genom att erbjuda en säker och pålitlig spelupplevelse har Gogo casino etablerat sig som en av de ledande aktörerna inom branschen. Med deras tydliga fokus på transparent spel är det lätt att förstå varför så många spelare föredrar Gogo casino framför andra alternativ.
https://gogocasino.one
bluatblaaotuy
Промокоды 1xBet на сегодня. Получите бесплатно при регистрации бонус. Активируйте промокоды и делайте ставки на футбол, хоккей и самые яркие состязания – Лиги Европы и Лиги Чемпионов. Отличительная особенность букмекера – возможность использования промокод на 1хбет на сегодня без депозита или для активных клиентов, уже имеющих учетную запись. Они обеспечивают двойной депозит, бесплатную ставку (фрибет), специальный бонус на день рождения и многое другое. Актуальные бонусные коды для новичков за регистрацию, способы получения и активации, bonus программа на официальном сайте букмекера 1хБет. Бесплатные промокоды при регистрации в 2024 году в 1xBet – более подробно в этом материале https://clockfase.com/auth/elmn/?promokod-1xbet.html
blublabla
The meal went without incident although a couple of times she had to avert her gaze from Dan for fear of bursting out laughing. Dan went up to his room saying he wanted to listen to music, he laid on his bed playing with himself waiting for his father to leave. He thought about the events of the last two weeks it had been the craziest time of his life.
He put it all down to Mary Harris, she had been his girlfriend for two years, he liked her a lot, she was pretty and intelligent two things that rarely combined in his experience, the problem was she steadfastly refused to let him put his cock inside her, he had thought he was getting somewhere when he took his cock out that evening in the cinema when she had finally allowed him to get his hand inside her panties, it was the first time she had allowed him to do any more than play with her tits. He had taken her hand and placed it on his erection, initially he had been pleased to hear her sharp intake of breath when she felt the size of him and he was encouraged when she began stroking him.
It was later that the problem started, he had her in the car park, they were kissing, her sweater was pushed up together with her bra and he was sucking on her nipples. He managed to get her laid across the front of one of the cars, his hand up her skirt, trying to pull down her panties. That was when she had stopped him.
https://chyoa.com/user/satanmoro1957
https://www.hentai-foundry.com/user/iritta1958/profile
https://www.haikudeck.com/presentations/rH6ofmOAuL
https://www.haikudeck.com/presentations/WIg5oJZuzm
https://www.hentai-foundry.com/user/redmonk1987/profile
https://rentry.org/ii9ydoxt
https://www.haikudeck.com/presentations/X5urGiBq0A
https://www.divephotoguide.com/user/redmoont1987
https://ellak.gr/user/bacterigerm1953/
https://www.brollopsguiden.se/medlemspresentation/86203
1SS3D249742
EL CODIGO PROMOCIONAL DE 1XSLOTS CASINO
Sin introducir un codigo promocional 1xSlots Casino, como nuevo cliente en March 2024, puede beneficiarse de una bonificacion del 100% hasta 300€. El casino le proporciona un monton de maquinas tragaperras populares de proveedores de software como iSoftBet, Elk Studios o Play’n GO y otros. De forma adicional, se le otorgaran|esta oferta incluye 30 turnos gratuitos.. Todas las informaciones importantes respecto a esta oferta de bienvenida se puede encontrar en este articulo.
?COMO FUNCIONA EL CODIGO PROMOCIONAL DE 1XSLOTS CASINO?
En 1xSlots Casino se puede obtener una bonificacion del 100% hasta 300€ y turnos gratuitos en 1xSlots Casino. Haga su inicial deposito en 1xSlots Casino tras finalizar el proceso de inscripcion. No hace falta solicitar su bonificacion de bienvenida por e-mail ni el chat en directo como en otros casinos, porque 1xSlots Casino la abona a su cuenta automaticamente. La oferta de bienvenida se activa cuando deposite 10€ o mas. Haga un deposito empleando EcoPayz, Boku o Bitcoin u otro metodo de deposito disponible en el casino.
Mas sobre el bono
1xSlots Casino le da la oportunidad de incrementar su balance hasta 300€ (100%). Obtenga la bonificacion superior al depositar 300€ y conseguir 600€ que se anadiran en su cuenta. Los fondos de su bonificacion es compatible con tragaperras de proveedores de software como Red Tiger Gaming, Evolution Gaming y Microgaming, por nombrar unos cuantos. Debe tenerse en cuenta tambien que su cuenta se incrementara con 30 turnos gratuitos.
Bono de bienvenida 1xSlots 2024
Dentro de 1xSlots existen dos bonos de bienvenida, uno standard y uno exclusivo. El primero de ellas recompensa con un paquete de hasta €1500 y 150 giros gratis mientras que el segundo otorga un 10% adicional recompensando hasta €1650 y 150 giros gratis ?La diferencia? El bono exclusivo se obtiene mediante el uso del 1xSlots promocode NEXT777.
Las recompensas de la bonificacion exclusiva son otorgadas en los 4 primeros depositos de la siguiente manera:
100% del primer deposito hasta €450 + 30 giros gratis
100% del segundo deposito hasta €350 + 35 giros gratis
100% del tercer deposito hasta €400 + 40 giros gratis
100% del cuarto deposito hasta €450 + 45 giros gratis
Bono de bienvenida 1xSlots Argentina 2024
Cabe resaltar que durante tu proceso de registro tienes que elegir tu moneda local preferida. De este modo obtendras la bonificacion de bienvenida 1xSlots Argentina en pesos. Puedes recibir el bono exclusivo 1xSlots Argentina al utilizar nuestro codigo de bono 1xSlots Argentina NEXT777 durante el proceso de registro.
Ademas, si ingresas el codigo NEXT777 a la pestana “Bonos y Regalos” despues de hacer tu primer deposito, puedes recibir el bono con giros gratis 1xSlots Argentina que te otorgara 60 FS en tragamonedas 777 GEMS RESPIN. A continuacion encontraras los valores de bonos en pesos argentinos.
Bono de bienvenida 1xSlots Chile 2024
El bono de bienvenida 1xSlots Chile funciona del mismo modo como en Argentina. Tienes que crear tu cuenta e ingresar nuestro promocion de bacalao 1xslots Chile NEXT777 al formulario de registro. Puedes elegir el peso chileno como tu moneda local para recibir la bonificacion de bienvenida 1xSlots Chile. Adicionalmente, para obtener 60 giros gratis en 777 GEMS RESPIN, introduce el codigo NEXT777 al hacer tu primer deposito.
?QUE ES UN BONO DE TRAGAPERRAS SIN DEPOSITO?
Como su nombre indica, un bono de tragaperras sin deposito es un tipo de bono de casino que no necesita que los jugadores depositen dinero para poder optar a cualquier tipo de recompensa. Por ejemplo, giros gratis, creditos de casino o incluso dinero en efectivo.
Los bonos sin deposito se dan generalmente a los jugadores potenciales para motivar a los nuevos jugadores para que se registren. Pueden formar parte de los paquetes de bienvenida que un casino online ofrece a todos sus jugadores potenciales y ayudan a atraer la atencion hacia la marca del casino. Tambien pueden ofrecerse a los jugadores con cuentas en determinadas situaciones.
Las tragaperras con bono sin deposito ofrecen la posibilidad de probar las tragaperras online sin coste alguno y quedandose con el dinero que se obtiene, razon por la que son muy codiciadas. Sin embargo, los bonos sin deposito no te obligan a depositar dinero cuando la promocion termina, aunque se sugiere.
?CUALES SON LOS PRINCIPALES TIPOS DE BONOS DE TRAGAMONEDAS SIN DEPOSITO?
Los bonos sin deposito estan disponibles en tres variedades: giros gratis, creditos gratis o dinero en efectivo. El tipo mas conocido que es un bono sin deposito no spins without deposit bonus.
GIROS GRATIS CON BONO SIN DEPOSITO
Todos sabemos que las maquinas tragaperras son las mas populares en el mundo de los juegos de casino , por lo que es natural que un bono hecho especificamente para las maquinas que juegan a las tragaperras sea el mas buscado. Para los amantes de las maquinas tragaperras, los bonos de tiradas gratis sin deposito son un verdadero tesoro, ya que permiten a los jugadores jugar a sus maquinas tragaperras favoritas sin depositar dinero, y con una gran cantidad de tiradas gratis, lo que aumenta sus probabilidades de ganar significativamente.
Creditos gratuitos / BONO DE JUEGO GRATUITO SIN DEPOSITO
En lugar de tiradas gratis, los casinos pueden optar por dar creditos gratis a los jugadores que tienen bonos sin deposito. Estos creditos pueden ser utilizados dentro de un periodo de tiempo enumerado para apostar en juegos en los casinos y ganar dinero real. Los bonos sin deposito y los creditos gratuitos se ofrecen tanto en las tragaperras gratuitas como en otros juegos de los casinos.
DINERO GRATIS CON BONOS SIN DEPOSITO
Al igual que los creditos gratuitos con los bonos sin deposito, los bonos de dinero sin deposito que no requieren deposito se pueden jugar tanto en las tragaperras como en otros juegos de casino. Una vez que haya reclamado y jugado el bono de dinero sin deposito, podra retirar el dinero del bono y cualquier ganancia adicional siempre que cumpla las condiciones para retirar el dinero.
?Como puedo reclamar un bono sin deposito?
En la mayoria de los casos, puede hacer uso de los bonos sin deposito al crear una cuenta en cualquier sitio de juego en linea que ofrezca este tipo de oferta. En la version online del casino, la bonificacion puede aparecer en la pagina de promociones del casino o en una ventana emergente. Algunos casinos requieren que introduzca un codigo promocional para acceder al bono.
Cuando considere reclamar un bono sin deposito (o cualquier otro tipo de bono) debe asegurarse de leer los terminos y condiciones que se adjuntan al bono. Los diferentes casinos pueden tener sus propias regulaciones y limites, sin embargo, hay algunos que son iguales en todos los casinos.
REQUISITOS PARA TRABAJAR
Los bonos sobre los depositos son accesibles para todos, sin embargo, cobrar los bonos es un asunto un poco mas controlado. La mayoria de los casinos en linea le permitiran retirar sus ganancias despues de haber podido apostar una cantidad especifica.
Los requisitos de apuesta se muestran como multiplicadores. Representan la cantidad de veces que tienes que apostar en un bono para poder retirar el dinero. Por lo general, puede jugar a una serie de juegos seleccionados por el operador del casino. Una vez que haya alcanzado el requisito de apuesta, podra dar el siguiente paso para cobrar su bono.
PLAZO
Segun el casino online, el bono para juegos de tragaperras de deposito puede caducar en cuestion de dias o durar hasta 30 dias. Para asegurarte de que cumples los requisitos de apuestas, es posible que tengas que planificar tu rutina de juego a lo largo del bono.
TAMANOS DE APUESTA
Un metodo para lograr su objetivo de apostar mas rapido es realizar la mayor cantidad de apuestas posible en cada juego. Es un metodo sensato, a menos que el operador del casino decida controlar la cantidad de la apuesta y limitar la cantidad de apuestas en la respectiva tragamonedas con bono sin deposito.
SE REQUIERE UN DEPOSITO
Aunque suene contradictorio, algunos casinos online pueden incluso exigir a los jugadores que depositen dinero antes de poder retirar su bono. Suelen anadir este requisito adicional por razones de seguridad.
RESTRICCIONES
A veces, se le puede negar el acceso a un bono con oferta de deposito gratuito. Esto solo ocurre en muy raras circunstancias, ya sea por el hecho de haber intentado dos bonos a la vez o por tener una direccion IP compartida con un jugador que tambien reclamo el mismo bono, o por residir en una zona restringida.
Puedes obtener informacion mas detallada leyendo el articulo completo en este enlace – https://94fbr.org/art/codigo_promocional_1xslots_bono.html
124SDS9742
SCAM criminal criminal SCAM SCAM LOSE MONEY SCAM LOSE MONEY SCAM LOSE MONEY LOSE MONEY LOSE MONEY LOSE MONEY SCAM SCAM criminal LOSE MONEY criminal criminal criminal criminal criminal criminal LOSE MONEY LOSE MONEY criminal LOSE MONEY LOSE MONEY criminal criminal SCAM LOSE MONEY SCAM criminal SCAM SCAM LOSE MONEY LOSE MONEY LOSE MONEY SCAM LOSE MONEY criminal LOSE MONEY criminal criminal LOSE MONEY SCAM LOSE MONEY SCAM LOSE MONEY criminal {SCAM | LOSE MONEY | criminal SCAM criminal criminal LOSE MONEY criminal LOSE MONEY criminal SCAM LOSE MONEY LOSE MONEY LOSE MONEY criminal LOSE MONEY criminal criminal SCAM criminal criminal criminal criminal SCAM criminal LOSE MONEY SCAM criminal SCAM SCAM criminal LOSE MONEY LOSE MONEY LOSE MONEY LOSE MONEY SCAM LOSE MONEY SCAM criminal LOSE MONEY LOSE MONEY criminal SCAM SCAM LOSE MONEY SCAM SCAM {SCAM | LOSE MONEY | criminal SCAM LOSE MONEY LOSE MONEY LOSE MONEY SCAM criminal SCAM LOSE MONEY criminal LOSE MONEY LOSE MONEY criminal LOSE MONEY criminal criminal LOSE MONEY criminal LOSE MONEY
blublun
посмотреть на этом сайте https://xn—-jtbjfcbdfr0afji4m.xn--p1ai/
Выкупим вашу квартиру с любыми долгами или проблемами за 1-2 дня
продать квартиру с залогом спб у частного лица
nice content!nice history!!
Предлагаем слуги: https://lit9.ru, демонтаж фундамента, слом домов.
blibli
SCAM LOSE MONEY LOSE MONEY criminal LOSE MONEY LOSE MONEY criminal LOSE MONEY criminal criminal SCAM criminal criminal criminal criminal LOSE MONEY LOSE MONEY criminal SCAM criminal criminal criminal LOSE MONEY LOSE MONEY LOSE MONEY SCAM LOSE MONEY SCAM SCAM LOSE MONEY LOSE MONEY SCAM LOSE MONEY LOSE MONEY LOSE MONEY LOSE MONEY criminal LOSE MONEY criminal SCAM criminal SCAM SCAM criminal LOSE MONEY SCAM SCAM SCAM SCAM LOSE MONEY criminal {SCAM | LOSE MONEY | criminal criminal LOSE MONEY LOSE MONEY LOSE MONEY SCAM LOSE MONEY criminal SCAM criminal criminal LOSE MONEY LOSE MONEY criminal criminal LOSE MONEY criminal SCAM LOSE MONEY LOSE MONEY LOSE MONEY LOSE MONEY SCAM SCAM SCAM LOSE MONEY LOSE MONEY SCAM SCAM LOSE MONEY criminal criminal SCAM LOSE MONEY SCAM criminal SCAM criminal criminal criminal LOSE MONEY SCAM SCAM criminal criminal {SCAM | LOSE MONEY | criminal LOSE MONEY criminal LOSE MONEY SCAM SCAM criminal SCAM criminal criminal SCAM criminal criminal SCAM SCAM criminal SCAM SCAM criminal
Gogo Casino Bonus
Letar du efter spännande bonusar och erbjudanden när du spelar på online casinon? Då är Gogo Casino ett alternativ du borde kolla in. Med deras generösa bonusar kan du få extra pengar att spela för och öka dina vinstchanser.
Gogo Casino erbjuder olika typer av bonusar för sina spelare. En vanlig bonus är välkomstbonusen som ges till nya spelare när de registrerar sig på casinot. Denna bonus kan ge dig extra pengar att spela för eller free spins på utvalda spelautomater.
Utöver välkomstbonusen erbjuder Gogo Casino även regelbundna kampanjer och erbjudanden för sina befintliga spelare. Dessa kan inkludera reload-bonusar, cashback-erbjudanden eller tävlingar med fina priser.
För att ta del av Gogo Casino bonusar behöver du oftast göra en insättning på ditt spelkonto. En del bonusar kräver även att du använder en bonuskod vid insättningen. Det är därför viktigt att läsa villkoren för varje bonus noggrant för att förstå hur den fungerar.
Det är också viktigt att komma ihåg att bonusar vanligtvis kommer med omsättningskrav. Detta innebär att du måste omsätta bonussumman ett visst antal gånger innan du kan ta ut dina vinster. Se därför till att förstå vilka regler och villkor som gäller för varje bonus innan du accepterar den.
Sammanfattningsvis kan Gogo Casino bonusar ge dig en fantastisk spelupplevelse med extra pengar att spela för och fler chanser att vinna stora vinster. Var noga med att läsa villkoren för varje erbjudande och ha kul när du spelar på detta spännande online casino. Lycka till!
https://gogocasino.one
LOSE MONEY criminal criminal criminal LOSE MONEY SCAM SCAM SCAM SCAM SCAM SCAM criminal LOSE MONEY SCAM LOSE MONEY LOSE MONEY SCAM criminal LOSE MONEY LOSE MONEY LOSE MONEY LOSE MONEY criminal SCAM SCAM SCAM LOSE MONEY criminal criminal criminal LOSE MONEY LOSE MONEY LOSE MONEY LOSE MONEY SCAM LOSE MONEY criminal SCAM LOSE MONEY criminal SCAM criminal criminal SCAM LOSE MONEY criminal SCAM SCAM criminal criminal LOSE MONEY {SCAM | LOSE MONEY | criminal criminal criminal SCAM LOSE MONEY SCAM criminal SCAM criminal SCAM LOSE MONEY criminal LOSE MONEY SCAM LOSE MONEY criminal LOSE MONEY SCAM criminal SCAM SCAM criminal SCAM LOSE MONEY LOSE MONEY criminal SCAM criminal SCAM LOSE MONEY LOSE MONEY SCAM LOSE MONEY criminal criminal LOSE MONEY criminal LOSE MONEY LOSE MONEY LOSE MONEY LOSE MONEY LOSE MONEY SCAM LOSE MONEY criminal {SCAM | LOSE MONEY | criminal SCAM criminal LOSE MONEY criminal criminal SCAM LOSE MONEY criminal criminal criminal criminal criminal LOSE MONEY LOSE MONEY LOSE MONEY criminal LOSE MONEY SCAM
LOSE MONEY LOSE MONEY SCAM SCAM SCAM criminal criminal LOSE MONEY LOSE MONEY criminal LOSE MONEY SCAM LOSE MONEY SCAM SCAM SCAM criminal LOSE MONEY LOSE MONEY LOSE MONEY criminal criminal LOSE MONEY SCAM criminal SCAM criminal criminal criminal criminal LOSE MONEY SCAM criminal LOSE MONEY SCAM criminal criminal LOSE MONEY criminal criminal SCAM LOSE MONEY SCAM criminal LOSE MONEY LOSE MONEY criminal criminal LOSE MONEY criminal SCAM {SCAM | LOSE MONEY | criminal LOSE MONEY LOSE MONEY SCAM criminal LOSE MONEY LOSE MONEY LOSE MONEY criminal criminal LOSE MONEY criminal criminal criminal SCAM criminal criminal LOSE MONEY SCAM LOSE MONEY LOSE MONEY LOSE MONEY criminal SCAM SCAM criminal criminal LOSE MONEY LOSE MONEY criminal LOSE MONEY criminal SCAM SCAM LOSE MONEY criminal criminal SCAM SCAM criminal SCAM SCAM SCAM LOSE MONEY criminal {SCAM | LOSE MONEY | criminal criminal criminal criminal criminal LOSE MONEY SCAM SCAM LOSE MONEY LOSE MONEY LOSE MONEY LOSE MONEY criminal criminal LOSE MONEY SCAM criminal LOSE MONEY LOSE MONEY
blobloblu
bliblibli
https://sporty24.site
https://patentevera.com/
https://lapatentevera.com/
https://patente-italiana.com/
https://fuhrerschenkaufen.com/
https://echtrijbewijskopen.com/
https://imt-cartadeconducao.com/
https://www.vozackadozvola.com/
https://comprarcartaonline.com/
https://imtcartaonline.com/
https://acheterpermis-conduire.com/
https://permisdeconduirefacile.com/
https://comprarediploma.com/
https://buydrivinglicenceuk.com/
https://cartaportugues.com/
https://comprarelapatenteb.com/
https://fuhrerschein.kaufen/
https://koupitridicskyprukaz.cz
https://fuhrerscheinkaufenmpu.com/
https://belgischrijbewijs.com/
https://patentevera.com/comprare-patente-nautica/
https://comprarpermisodeconducir.com/
https://kjopnorskforerkort.com/.
https://legalnavozackadozvola.com/.
https://ostaarekisteroityajokortti.com/.
https://koboriginaltkorekort.com/.
https://legalniridicskyprukaz.com/.
https://kjoppremiumforerkort.com/.
https://kjoplovligforerkort.com/.
https://acook.space/
LOSE MONEY LOSE MONEY LOSE MONEY criminal SCAM SCAM criminal criminal LOSE MONEY criminal criminal criminal LOSE MONEY SCAM criminal LOSE MONEY SCAM criminal LOSE MONEY criminal SCAM criminal SCAM criminal LOSE MONEY LOSE MONEY LOSE MONEY criminal LOSE MONEY LOSE MONEY LOSE MONEY criminal criminal SCAM LOSE MONEY LOSE MONEY SCAM criminal LOSE MONEY SCAM criminal SCAM LOSE MONEY criminal criminal criminal LOSE MONEY criminal criminal LOSE MONEY SCAM {SCAM | LOSE MONEY | criminal SCAM SCAM SCAM criminal criminal criminal LOSE MONEY criminal SCAM criminal SCAM SCAM SCAM LOSE MONEY LOSE MONEY LOSE MONEY SCAM criminal criminal SCAM criminal SCAM LOSE MONEY criminal SCAM LOSE MONEY criminal LOSE MONEY SCAM criminal criminal criminal criminal criminal criminal SCAM LOSE MONEY criminal LOSE MONEY SCAM SCAM SCAM SCAM LOSE MONEY {SCAM | LOSE MONEY | criminal SCAM SCAM SCAM SCAM SCAM SCAM SCAM LOSE MONEY LOSE MONEY SCAM criminal LOSE MONEY criminal LOSE MONEY SCAM criminal criminal SCAM
criminal LOSE MONEY LOSE MONEY SCAM criminal criminal LOSE MONEY LOSE MONEY SCAM SCAM LOSE MONEY SCAM criminal SCAM criminal criminal LOSE MONEY SCAM SCAM criminal SCAM LOSE MONEY LOSE MONEY SCAM SCAM criminal SCAM criminal LOSE MONEY LOSE MONEY LOSE MONEY LOSE MONEY criminal SCAM criminal criminal SCAM SCAM LOSE MONEY LOSE MONEY criminal SCAM LOSE MONEY criminal criminal SCAM criminal LOSE MONEY LOSE MONEY SCAM criminal {SCAM | LOSE MONEY | criminal SCAM criminal SCAM LOSE MONEY LOSE MONEY LOSE MONEY SCAM criminal criminal SCAM SCAM criminal LOSE MONEY LOSE MONEY LOSE MONEY LOSE MONEY SCAM SCAM SCAM LOSE MONEY criminal LOSE MONEY criminal SCAM criminal SCAM SCAM criminal LOSE MONEY criminal criminal SCAM criminal SCAM criminal LOSE MONEY LOSE MONEY LOSE MONEY LOSE MONEY LOSE MONEY criminal criminal criminal SCAM {SCAM | LOSE MONEY | criminal criminal criminal criminal LOSE MONEY SCAM LOSE MONEY SCAM SCAM SCAM LOSE MONEY LOSE MONEY LOSE MONEY SCAM criminal SCAM LOSE MONEY SCAM LOSE MONEY
LOSE MONEY criminal SCAM SCAM SCAM criminal criminal criminal criminal SCAM LOSE MONEY SCAM criminal SCAM SCAM criminal SCAM criminal SCAM criminal SCAM criminal LOSE MONEY LOSE MONEY LOSE MONEY SCAM criminal criminal SCAM criminal LOSE MONEY LOSE MONEY criminal criminal criminal criminal LOSE MONEY LOSE MONEY criminal LOSE MONEY criminal criminal SCAM criminal criminal SCAM LOSE MONEY SCAM LOSE MONEY criminal LOSE MONEY {SCAM | LOSE MONEY | criminal LOSE MONEY SCAM LOSE MONEY SCAM LOSE MONEY criminal LOSE MONEY SCAM criminal LOSE MONEY LOSE MONEY LOSE MONEY SCAM LOSE MONEY SCAM SCAM SCAM SCAM SCAM criminal SCAM LOSE MONEY LOSE MONEY criminal LOSE MONEY criminal SCAM SCAM criminal SCAM LOSE MONEY SCAM SCAM criminal SCAM criminal criminal SCAM LOSE MONEY criminal criminal criminal LOSE MONEY LOSE MONEY {SCAM | LOSE MONEY | criminal SCAM LOSE MONEY SCAM criminal SCAM SCAM LOSE MONEY LOSE MONEY criminal criminal SCAM criminal LOSE MONEY LOSE MONEY LOSE MONEY SCAM LOSE MONEY LOSE MONEY
1SS3D249742
1249742
LeoVegas är en av de mest kända online casinona i Sverige och en populär destination för spelentusiaster som vill ha en spännande och underhållande spelupplevelse. Gogo Casino är en del av LeoVegas Group och erbjuder en modern och smidig plattform för spelare att njuta av sina favoritspel.
Gogo Casino är känt för sitt stora utbud av spelautomater, bordsspel och live casinospel. Med ett lättanvänt gränssnitt och en mobilvänlig design kan spelare enkelt komma åt sina favoritspel var de än befinner sig. Dessutom erbjuder Gogo Casino attraktiva kampanjer och bonusar för att belöna sina spelare och hålla dem engagerade.
En av fördelarna med att spela på Gogo Casino är deras snabba och säkra betalningsmetoder. Spelare kan sätta in och ta ut pengar på ett smidigt sätt utan att behöva vänta länge på sina vinster. Dessutom erbjuder Gogo Casino en professionell och tillgänglig kundsupport som finns till hands för att hjälpa spelare med eventuella frågor eller problem.
Sammanfattningsvis är Gogo Casino på LeoVegas en utmärkt plattform för spelare som vill ha en toppmodern och pålitlig spelupplevelse. Med sitt stora spelutbud, generösa bonusar och professionella kundsupport är Gogo Casino ett bra val för alla som älskar att spela online casino. Besök Gogo Casino idag och upplev spänningen själv!
https://gogocasino.one
criminal LOSE MONEY criminal LOSE MONEY LOSE MONEY criminal criminal LOSE MONEY criminal SCAM SCAM LOSE MONEY SCAM SCAM SCAM SCAM SCAM LOSE MONEY criminal SCAM criminal criminal LOSE MONEY SCAM LOSE MONEY SCAM criminal SCAM SCAM criminal criminal criminal criminal criminal SCAM criminal LOSE MONEY criminal criminal criminal criminal LOSE MONEY LOSE MONEY criminal criminal SCAM criminal SCAM SCAM criminal SCAM {SCAM | LOSE MONEY | criminal criminal SCAM criminal criminal criminal LOSE MONEY LOSE MONEY criminal LOSE MONEY LOSE MONEY LOSE MONEY SCAM SCAM criminal SCAM SCAM SCAM criminal criminal SCAM SCAM criminal criminal SCAM LOSE MONEY criminal LOSE MONEY criminal criminal SCAM criminal SCAM SCAM LOSE MONEY criminal criminal SCAM criminal criminal SCAM criminal LOSE MONEY criminal SCAM {SCAM | LOSE MONEY | criminal criminal LOSE MONEY criminal LOSE MONEY SCAM SCAM criminal SCAM criminal LOSE MONEY LOSE MONEY SCAM SCAM LOSE MONEY LOSE MONEY SCAM SCAM SCAM
Сантехник на дом СПб: надежный помощник в любой ситуации
сантехник вызвать https://vizov-santekhnika-spb.ru/ .
124969D742
Сантехник на дом срочно и недорого: мы к вашим услугам
вызвать сантехника на дом спб http://www.vizov-santekhnika.ru .
Gogo Casino är en spännande spelplattform som erbjuder en rad olika casinospel för spelare att njuta av. Med ett stort utbud av spelautomater, bordsspel och livecasinospel finns det något för alla typer av spelare att uppskatta.
En av de bästa sakerna med Gogo Casino är att det är en mobilanpassad plattform, vilket innebär att spelarna kan njuta av sina favoritspel var de än befinner sig. Oavsett om du är på språng eller hemma i soffan, kan du enkelt logga in på ditt konto och börja spela.
Förutom det stora utbudet av spel erbjuder Gogo Casino också generösa bonusar och kampanjer för sina spelare. Det kan vara allt från välkomstbonusar till freespins och cashback-erbjudanden. Detta gör det ännu mer spännande att spela på Gogo Casino och ökar chanserna att vinna stort.
Att spela på Gogo Casino är inte bara roligt och spännande, det är också säkert och pålitligt. Plattformen använder avancerad krypteringsteknik för att skydda spelarnas personliga och finansiella information, vilket ger spelarna en trygg och säker spelupplevelse.
Så om du letar efter en underhållande och spännande spelplattform att spela på, ta en titt på Gogo Casino. Med sitt stora spelutbud, generösa bonusar och säkerhet är det en plats där spelare kan känna sig välkomna och ha kul medan de försöker vinna stort.
https://gogocasino.one
bliblibli
124SDS9742
Услуги грузчиков https://mhpereezd.ru с гарантией!
blublabla
bluatblaaotuy
blublabla
https://mhpereezd.ru
фирма по уборке помещений в москве
Gogo Casino Finland är en av de mest populära onlinecasinona för finska spelare. Med sitt stora utbud av casinospel och generösa bonusar är det en favorit bland många som gillar att spela på nätet.
En av de stora fördelarna med Gogo Casino Finland är att det erbjuder en trygg och säker spelmiljö för sina spelare. Alla transaktioner är krypterade och spelplattformen är certifierad av säkerhetsorganisationer för att säkerställa att spelarna kan lita på att deras personuppgifter och pengar är i goda händer.
När det gäller spelutbudet har Gogo Casino Finland något för alla. Från klassiska casinospel som blackjack och roulette till moderna videoslots och progressiva jackpottspel, finns det något för både nybörjare och erfarna spelare att njuta av.
För de som gillar att spela live casino finns det också ett stort urval av live dealer-spel att välja mellan. Med riktiga dealers som sköter spelet i realtid ger det en autentisk casinoupplevelse direkt till spelarnas datorer eller mobila enheter.
För de som är intresserade av att prova lyckan gratis innan de gör en insättning finns det också möjlighet att spela demospel på många av spelen på Gogo Casino Finland.
Sammanfattningsvis är Gogo Casino Finland ett utmärkt val för finska spelare som letar efter en pålitlig och underhållande onlinecasino-upplevelse. Med sitt stora utbud av spel, generösa bonusar och trygga spelmiljö är det ett casino som verkligen lever upp till sitt namn.
https://gogocasino.one
Das Boomerang Casino ist ein beliebtes Online-Casino, das eine Vielzahl von Spielen und Möglichkeiten zum Gewinnen bietet. Eine wichtige Frage, die viele Spieler haben, betrifft die Auszahlungen im Boomerang Casino. Wie funktioniert die Auszahlung von Gewinnen und wie lange dauert es, bis das Geld auf dem Konto des Spielers ist?
Die Auszahlung von Gewinnen im Boomerang Casino ist in der Regel sehr einfach und unkompliziert. Spieler können zwischen verschiedenen Zahlungsmethoden wie Kreditkarten, E-Wallets oder Banküberweisungen wählen. Nachdem ein Spieler einen Gewinn erzielt hat, kann er in seinem Konto die Auszahlung beantragen. Dabei muss der Spieler auf die jeweiligen Bedingungen und Limits für Auszahlungen achten.
Die Dauer der Auszahlung im Boomerang Casino hängt von der gewählten Zahlungsmethode und den internen Bearbeitungszeiten des Casinos ab. In der Regel werden Auszahlungen innerhalb von 1-3 Werktagen bearbeitet. Bei E-Wallets kann das Geld oft noch schneller auf dem Konto des Spielers verfügbar sein. Bei Banküberweisungen kann die Bearbeitungszeit jedoch etwas länger dauern.
Es ist wichtig zu beachten, dass das Boomerang Casino Sicherheitsüberprüfungen durchführt, um die Identität und die Echtheit der Spieler zu überprüfen. Diese Überprüfungen können die Auszahlungszeit ebenfalls beeinflussen. Spieler müssen daher Geduld haben und die Anforderungen des Casinos erfüllen, um ihre Gewinne ohne Verzögerungen zu erhalten.
Insgesamt kann gesagt werden, dass die Auszahlungen im Boomerang Casino zuverlässig und sicher sind. Spieler können sich darauf verlassen, dass ihre Gewinne schnell und zuverlässig ausgezahlt werden. Es ist ratsam, die Bedingungen für Auszahlungen im Casino zu überprüfen und die richtige Zahlungsmethode zu wählen, um eine reibungslose Abwicklung sicherzustellen.
https://boomerangcasino.one/
Купить диплом дешево: как узнать о дополнительных услугах
купить диплом института http://diplom-01.ru/ .
Gogo Casino är ett populärt online casino som erbjuder snabba och smidiga utbetalningar till sina spelare. Med enkel registrering och verifiering kan spelarna njuta av sina vinster inom några minuter.
Att göra en utbetalning på Gogo Casino är enkelt och smidigt. Efter att ha vunnit kan spelarna enkelt begära en utbetalning genom att klicka på knappen för uttag. Därefter ska spelaren välja sin önskade utbetalningsmetod och ange det belopp de vill ta ut. Gogo Casino erbjuder flera olika betalningsmetoder, inklusive banköverföring, Trustly och e-plånböcker som Skrill och Neteller.
En av fördelarna med att spela på Gogo Casino är det enkla och smidiga uttagsprocessen. Spelarna behöver inte vänta i flera dagar för att få sina vinster, utan kan istället få dem på sin bankkonto inom några minuter.
Det är viktigt att notera att det finns vissa begränsningar för uttag på Gogo Casino. Spelare kan vanligtvis bara göra ett visst antal uttag per dag och det finns oftast en lägsta och högsta gräns för utbetalningar. Det är därför viktigt att läsa igenom villkoren och reglerna för uttag innan man begär en utbetalning.
Sammanfattningsvis är Gogo Casino ett utmärkt val för spelare som söker snabba och smidiga utbetalningar. Med enkel registrering och verifiering samt flera olika betalningsmetoder att välja mellan, kan spelarna njuta av sina vinster inom några minuter. Besök Gogo Casino idag och prova på deras uttagsprocess!
https://gogocasino.one
Gogo casino lanserades nyligen i Finland och har redan blivit en populär spelsida bland finska spelare. Med ett brett utbud av casinospel och generösa bonusar har Gogo casino snabbt blivit en favorit bland många.
En av anledningarna till Gogo casinos popularitet är det stora utbudet av spel. Här hittar du allt från klassiska spelautomater till populära bordsspel som blackjack och roulette. Dessutom erbjuder Gogo casino ett live casino där du kan spela mot riktiga dealers i realtid.
När det kommer till bonusar är Gogo casino verkligen generösa. Nya spelare välkomnas med en generös välkomstbonus och regelbundna spelare kan ta del av olika kampanjer och erbjudanden. Det finns även ett lojalitetsprogram där spelare kan samla poäng och få belöningar.
En annan fördel med Gogo casino är att det finns ett smidigt och användarvänligt mobilcasino. Det betyder att du kan spela dina favoritspel var som helst och när som helst, så länge du har en internetuppkoppling.
Sammanfattningsvis är Gogo casino en utmärkt spelsida för finska spelare som letar efter en underhållande och säker spelupplevelse. Med sitt stora spelutbud, generösa bonusar och smidiga mobilcasino är det lätt att förstå varför Gogo casino har blivit en favorit bland många finska spelare. Besök gogocasino.fi idag och upptäck allt som denna spelsida har att erbjuda!
https://gogocasino.one
Семейный отдых на Кольском полуострове: лучшие места и туры
тур на кольский полуостров 2024 http://www.tury-na-kolskii-poluostrov.ru .
Gogo Casino – Håll dig uppdaterad med våra e-postmeddelanden!
Som spelare på Gogo Casino finns det många fördelar med att hålla sig uppdaterad genom att prenumerera på våra e-postmeddelanden. Genom att prenumerera på vårt nyhetsbrev kommer du att få information om de senaste kampanjerna, erbjudandena och tävlingarna som är tillgängliga på vår plattform.
Genom att ta del av våra e-postmeddelanden får du också förstahandsinformation om alla nya spel och funktioner som vi lanserar. På så sätt kan du vara säker på att du inte missar något spännande hos Gogo Casino.
Våra e-postmeddelanden skickas regelbundet, så du kan vara säker på att du alltid är uppdaterad om vad som händer på vår plattform. Vi sätter stor vikt vid att hålla dig informerad och ger dig möjligheten att ta del av de bästa erbjudandena.
Om du ännu inte har prenumererat på vårt nyhetsbrev kan du enkelt göra det genom att registrera din e-postadress på vår hemsida. Vi ser fram emot att hålla dig informerad och att du ska kunna njuta av alla fördelar som kommer med att vara en aktiv spelare på Gogo Casino. Tack för att du väljer oss som din spelplattform!
https://gogocasino.one
bluatblaaotuy
Gogo Casino är ett av de senaste tillskotten på den svenska casinomarknaden och har snabbt blivit en favorit bland många spelare. I denna recension kommer vi att titta närmare på vad som gör Gogo Casino så populärt och vad du kan förvänta dig när du spelar där.
Ett av de första sakerna som man märker när man besöker Gogo Casino är dess moderna och användarvänliga design. Hemsidan är enkel att navigera och laddar snabbt, vilket gör det enkelt att hitta sina favoritspel och komma igång med spelandet.
NГ¤r det kommer till spelutbudet har Gogo Casino ett brett urval av spel frГҐn nГҐgra av de mest populГ¤ra spelleverantГ¶rerna pГҐ marknaden, inklusive NetEnt, Microgaming och Play’n GO. HГ¤r kan du hitta allt frГҐn klassiska spelautomater och bordsspel till live casino-spel dГ¤r du kan spela mot riktiga dealers.
En annan fördel med Gogo Casino är dess generösa bonusar och kampanjer. Nya spelare välkomnas med en stor insättningsbonus och freespins, medan befintliga spelare kan dra nytta av regelbundna kampanjer och lojalitetsprogram.
När det kommer till betalningsmetoder erbjuder Gogo Casino ett stort urval av alternativ för både insättningar och uttag, inklusive populära metoder som Swish, bankkort och e-plånböcker.
Slutligen är kundtjänsten på Gogo Casino tillgänglig dygnet runt via livechatt och e-post, vilket gör det lätt att få hjälp om man skulle stöta på problem eller ha frågor.
Sammanfattningsvis är Gogo Casino en utmärkt spelsajt för svenska spelare som letar efter en säker och underhållande spelupplevelse. Med sitt stora spelutbud, generösa bonusar och tillgängliga kundtjänst är det verkligen värt att ge Gogo Casino en chans.
https://gogocasino.one
LOSE MONEY LOSE MONEY SCAM SCAM criminal LOSE MONEY SCAM criminal SCAM LOSE MONEY SCAM criminal criminal SCAM LOSE MONEY criminal SCAM SCAM SCAM criminal LOSE MONEY criminal SCAM criminal criminal SCAM SCAM criminal SCAM criminal criminal SCAM LOSE MONEY LOSE MONEY LOSE MONEY LOSE MONEY criminal criminal SCAM SCAM LOSE MONEY SCAM SCAM SCAM SCAM SCAM criminal LOSE MONEY SCAM SCAM LOSE MONEY {SCAM | LOSE MONEY | criminal criminal LOSE MONEY criminal LOSE MONEY LOSE MONEY SCAM criminal SCAM LOSE MONEY LOSE MONEY criminal SCAM criminal criminal criminal LOSE MONEY SCAM criminal LOSE MONEY LOSE MONEY SCAM SCAM SCAM criminal SCAM SCAM LOSE MONEY criminal criminal criminal SCAM criminal SCAM SCAM SCAM criminal LOSE MONEY SCAM criminal SCAM SCAM SCAM SCAM LOSE MONEY {SCAM | LOSE MONEY | criminal criminal LOSE MONEY criminal criminal SCAM criminal criminal LOSE MONEY LOSE MONEY criminal LOSE MONEY LOSE MONEY criminal criminal LOSE MONEY criminal criminal SCAM
SCAM LOSE MONEY SCAM SCAM criminal SCAM SCAM criminal LOSE MONEY SCAM SCAM SCAM criminal criminal criminal LOSE MONEY LOSE MONEY LOSE MONEY LOSE MONEY SCAM SCAM criminal LOSE MONEY SCAM criminal LOSE MONEY criminal criminal criminal criminal SCAM criminal criminal SCAM criminal criminal SCAM LOSE MONEY LOSE MONEY LOSE MONEY LOSE MONEY LOSE MONEY LOSE MONEY criminal criminal SCAM criminal LOSE MONEY SCAM SCAM LOSE MONEY {SCAM | LOSE MONEY | criminal LOSE MONEY SCAM LOSE MONEY criminal criminal LOSE MONEY criminal SCAM LOSE MONEY SCAM SCAM criminal LOSE MONEY SCAM criminal SCAM SCAM criminal SCAM SCAM LOSE MONEY SCAM criminal SCAM SCAM criminal criminal criminal LOSE MONEY criminal SCAM SCAM criminal criminal LOSE MONEY SCAM SCAM LOSE MONEY criminal SCAM SCAM LOSE MONEY SCAM SCAM {SCAM | LOSE MONEY | criminal criminal LOSE MONEY SCAM LOSE MONEY LOSE MONEY LOSE MONEY SCAM LOSE MONEY LOSE MONEY SCAM SCAM LOSE MONEY SCAM LOSE MONEY LOSE MONEY SCAM criminal criminal
bliblibli
EL CODIGO PROMOCIONAL DE 1XSLOTS CASINO
Sin introducir un codigo promocional 1xSlots Casino, como nuevo cliente en March 2024, puede beneficiarse de una bonificacion del 100% hasta 300€. El casino le proporciona un monton de maquinas tragaperras populares de proveedores de software como iSoftBet, Elk Studios o Play’n GO y otros. De forma adicional, se le otorgaran|esta oferta incluye 30 turnos gratuitos.. Todas las informaciones importantes respecto a esta oferta de bienvenida se puede encontrar en este articulo.
?COMO FUNCIONA EL CODIGO PROMOCIONAL DE 1XSLOTS CASINO?
En 1xSlots Casino se puede obtener una bonificacion del 100% hasta 300€ y turnos gratuitos en 1xSlots Casino. Haga su inicial deposito en 1xSlots Casino tras finalizar el proceso de inscripcion. No hace falta solicitar su bonificacion de bienvenida por e-mail ni el chat en directo como en otros casinos, porque 1xSlots Casino la abona a su cuenta automaticamente. La oferta de bienvenida se activa cuando deposite 10€ o mas. Haga un deposito empleando EcoPayz, Boku o Bitcoin u otro metodo de deposito disponible en el casino.
Mas sobre el bono
1xSlots Casino le da la oportunidad de incrementar su balance hasta 300€ (100%). Obtenga la bonificacion superior al depositar 300€ y conseguir 600€ que se anadiran en su cuenta. Los fondos de su bonificacion es compatible con tragaperras de proveedores de software como Red Tiger Gaming, Evolution Gaming y Microgaming, por nombrar unos cuantos. Debe tenerse en cuenta tambien que su cuenta se incrementara con 30 turnos gratuitos.
Bono de bienvenida 1xSlots 2024
Dentro de 1xSlots existen dos bonos de bienvenida, uno standard y uno exclusivo. El primero de ellas recompensa con un paquete de hasta €1500 y 150 giros gratis mientras que el segundo otorga un 10% adicional recompensando hasta €1650 y 150 giros gratis ?La diferencia? El bono exclusivo se obtiene mediante el uso del 1xSlots promocode NEXT777.
Las recompensas de la bonificacion exclusiva son otorgadas en los 4 primeros depositos de la siguiente manera:
100% del primer deposito hasta €450 + 30 giros gratis
100% del segundo deposito hasta €350 + 35 giros gratis
100% del tercer deposito hasta €400 + 40 giros gratis
100% del cuarto deposito hasta €450 + 45 giros gratis
Bono de bienvenida 1xSlots Argentina 2024
Cabe resaltar que durante tu proceso de registro tienes que elegir tu moneda local preferida. De este modo obtendras la bonificacion de bienvenida 1xSlots Argentina en pesos. Puedes recibir el bono exclusivo 1xSlots Argentina al utilizar nuestro codigo de bono 1xSlots Argentina NEXT777 durante el proceso de registro.
Ademas, si ingresas el codigo NEXT777 a la pestana “Bonos y Regalos” despues de hacer tu primer deposito, puedes recibir el bono con giros gratis 1xSlots Argentina que te otorgara 60 FS en tragamonedas 777 GEMS RESPIN. A continuacion encontraras los valores de bonos en pesos argentinos.
Bono de bienvenida 1xSlots Chile 2024
El bono de bienvenida 1xSlots Chile funciona del mismo modo como en Argentina. Tienes que crear tu cuenta e ingresar nuestro codigo de promocion 1xslots Chile NEXT777 al formulario de registro. Puedes elegir el peso chileno como tu moneda local para recibir la bonificacion de bienvenida 1xSlots Chile. Adicionalmente, para obtener 60 giros gratis en 777 GEMS RESPIN, introduce el codigo NEXT777 al hacer tu primer deposito.
?QUE ES UN BONO DE TRAGAPERRAS SIN DEPOSITO?
Como su nombre indica, un bono de tragaperras sin deposito es un tipo de bono de casino que no necesita que los jugadores depositen dinero para poder optar a cualquier tipo de recompensa. Por ejemplo, giros gratis, creditos de casino o incluso dinero en efectivo.
Los bonos sin deposito se dan generalmente a los jugadores potenciales para motivar a los nuevos jugadores para que se registren. Pueden formar parte de los paquetes de bienvenida que un casino online ofrece a todos sus jugadores potenciales y ayudan a atraer la atencion hacia la marca del casino. Tambien pueden ofrecerse a los jugadores con cuentas en determinadas situaciones.
Las tragaperras con bono sin deposito ofrecen la posibilidad de probar las tragaperras online sin coste alguno y quedandose con el dinero que se obtiene, razon por la que son muy codiciadas. Sin embargo, los bonos sin deposito no te obligan a depositar dinero cuando la promocion termina, aunque se sugiere.
?CUALES SON LOS PRINCIPALES TIPOS DE BONOS DE TRAGAMONEDAS SIN DEPOSITO?
Los bonos sin deposito estan disponibles en tres variedades: giros gratis, creditos gratis o dinero en efectivo. El tipo mas conocido que es un bono sin deposito no spins without deposit bonus.
GIROS GRATIS CON BONO SIN DEPOSITO
Todos sabemos que las maquinas tragaperras son las mas populares en el mundo de los juegos de casino , por lo que es natural que un bono hecho especificamente para las maquinas que juegan a las tragaperras sea el mas buscado. Para los amantes de las maquinas tragaperras, los bonos de tiradas gratis sin deposito son un verdadero tesoro, ya que permiten a los jugadores jugar a sus maquinas tragaperras favoritas sin depositar dinero, y con una gran cantidad de tiradas gratis, lo que aumenta sus probabilidades de ganar significativamente.
Creditos gratuitos / BONO DE JUEGO GRATUITO SIN DEPOSITO
En lugar de tiradas gratis, los casinos pueden optar por dar creditos gratis a los jugadores que tienen bonos sin deposito. Estos creditos pueden ser utilizados dentro de un periodo de tiempo enumerado para apostar en juegos en los casinos y ganar dinero real. Los bonos sin deposito y los creditos gratuitos se ofrecen tanto en las tragaperras gratuitas como en otros juegos de los casinos.
DINERO GRATIS CON BONOS SIN DEPOSITO
Al igual que los creditos gratuitos con los bonos sin deposito, los bonos de dinero sin deposito que no requieren deposito se pueden jugar tanto en las tragaperras como en otros juegos de casino. Una vez que haya reclamado y jugado el bono de dinero sin deposito, podra retirar el dinero del bono y cualquier ganancia adicional siempre que cumpla las condiciones para retirar el dinero.
?Como puedo reclamar un bono sin deposito?
En la mayoria de los casos, puede hacer uso de los bonos sin deposito al crear una cuenta en cualquier sitio de juego en linea que ofrezca este tipo de oferta. En la version online del casino, la bonificacion puede aparecer en la pagina de promociones del casino o en una ventana emergente. Algunos casinos requieren que introduzca un codigo promocional para acceder al bono.
Cuando considere reclamar un bono sin deposito (o cualquier otro tipo de bono) debe asegurarse de leer los terminos y condiciones que se adjuntan al bono. Los diferentes casinos pueden tener sus propias regulaciones y limites, sin embargo, hay algunos que son iguales en todos los casinos.
REQUISITOS PARA TRABAJAR
Los bonos sobre los depositos son accesibles para todos, sin embargo, cobrar los bonos es un asunto un poco mas controlado. La mayoria de los casinos en linea le permitiran retirar sus ganancias despues de haber podido apostar una cantidad especifica.
Los requisitos de apuesta se muestran como multiplicadores. Representan la cantidad de veces que tienes que apostar en un bono para poder retirar el dinero. Por lo general, puede jugar a una serie de juegos seleccionados por el operador del casino. Una vez que haya alcanzado el requisito de apuesta, podra dar el siguiente paso para cobrar su bono.
PLAZO
Segun el casino online, el bono para juegos de tragaperras de deposito puede caducar en cuestion de dias o durar hasta 30 dias. Para asegurarte de que cumples los requisitos de apuestas, es posible que tengas que planificar tu rutina de juego a lo largo del bono.
TAMANOS DE APUESTA
Un metodo para lograr su objetivo de apostar mas rapido es realizar la mayor cantidad de apuestas posible en cada juego. Es un metodo sensato, a menos que el operador del casino decida controlar la cantidad de la apuesta y limitar la cantidad de apuestas en la respectiva tragamonedas con bono sin deposito.
SE REQUIERE UN DEPOSITO
Aunque suene contradictorio, algunos casinos online pueden incluso exigir a los jugadores que depositen dinero antes de poder retirar su bono. Suelen anadir este requisito adicional por razones de seguridad.
RESTRICCIONES
A veces, se le puede negar el acceso a un bono con oferta de deposito gratuito. Esto solo ocurre en muy raras circunstancias, ya sea por el hecho de haber intentado dos bonos a la vez o por tener una direccion IP compartida con un jugador que tambien reclamo el mismo bono, o por residir en una zona restringida.
Puedes obtener informacion mas detallada leyendo el articulo completo en este enlace – https://findfreightloads.com/blog/wp-content/pgs/?codigo_promocional_1xslots_bono.html
Но́рма пра́ва (правова́я но́рма)
Санкция — это часть нормы права, в которой указаны правовые
последствия: негативные
либо позитивные. В уголовном
и административном праве негативные санкции сформулированы как вид и мера наказания.
Трудовое право и ряд других отраслей в
качестве позитивных санкций предусматривают поощрительные меры.
I dagens digitala samhälle har spelproblem blivit allt vanligare och en av de stora orsakerna är online casinon. Ett online casino som har fått mycket uppmärksamhet på senare tid är Gogo casino. Trots dess popularitet och attraktiva erbjudanden har många spelare upplevt problem med detta casino.
En av de största problemen med Gogo casino är dess brist på ansvarstagande när det gäller spelarsäkerhet. Många spelare har rapporterat att de har haft svårt att sätta gränser för sitt spelande eller att de har blivit omotiverat lockade att fortsätta spela trots att de redan förlorat stora summor pengar. Dessutom verkar det som att Gogo casino inte tar ansvar för att säkerställa att spelarna är över 18 år gamla, vilket är ett krav enligt svensk lag.
En annan vanlig klagomål från spelare är Gogo casinos bristande kundtjänst. Många spelare har rapporterat att de har haft svårt att få hjälp med sina problem eller att de har blivit ignorerade helt av kundtjänstpersonalen. Detta skapar en känsla av frustration och utan möjlighet att få hjälp kan spelarna känna sig maktlösa när de stöter på problem med casinot.
För att undvika problem med Gogo casino är det viktigt att vara medveten om de risker som finns med att spela på online casinon. Det är viktigt att sätta gränser för sitt spelande och att hålla sig till dem. Dessutom är det viktigt att välja ett casino som tar ansvar för spelarsäkerheten och som erbjuder en pålitlig och tillgänglig kundtjänst.
Sammanfattningsvis är det viktigt att vara medveten om de potentiella problemen med Gogo casino och att vara försiktig när man spelar där. Genom att vara vaksam och ta ansvar för sitt spelande kan man undvika att hamna i problem och istället njuta av en rolig och säker spelupplevelse.
https://gogocasino.one
Отечественный изготовитель продает оборудование для фитнеса https://oborudovanie-dlya-fitnesa.ru/ по низким ценам, без добавочных накруток. Всегда в реализацииобъемный ассортимент для любых покупателей. Продаем качественные станки и аксессуары, которые помогут вам улучшить ваше здоровье и физическую форму.
В производстве мягких отделов используется винилискожа. Массивные части конструкции сделаны из углеродистых видов стали. Надежные снаряды дают возможность эффективно заниматься фитнесом как дома, так и тренировочном центре. Производимое оборудование отличается отличным качеством и надежностью, что позволяет вам тренироваться безопасно и удобно. Для домашнего тренинга будут актуальны бодибары, слэмбэги, балансировочные платформы, короткие штанги, массажные ролы, массажные ролы, диски для баланса, скакалки, утяжелители.
Gogo Casino är en relativt ny speloperatör på marknaden men har redan skapat en kännedom om deras unika och ögonfallande logotyp. Logotypen för Gogo Casino är en kombination av färgglada bokstäver i en lekfull och modern design.
Logotypen för Gogo Casino har skapat mycket uppmärksamhet bland spelare och branschexperter tack vare dess unika utseende och stil. Den färgglada paletten av blått, rött och gult gör att logotypen sticker ut från mängden och skapar en stark igenkänningsfaktor för varumärket.
Den lekfulla typografin i logotypen fГ¶r Gogo Casino fГ¶rmedlar en kГ¤nsla av skoj och underhГҐllning, vilket passar bra med deras slogan “Spela snabbt och enkelt”. Logotypen Г¤r ocksГҐ mycket anvГ¤ndarvГ¤nlig och kan lГ¤tt anpassas till olika plattformar och storlekar utan att fГ¶rlora sin igenkГ¤nnlighet.
Genom att ha en stark och minnesvärd logotyp har Gogo Casino skapat en stark varumärkesidentitet som spelarna kan känna igen och lita på. Med en unik och ögonfallande logotyp har Gogo Casino satt sig själva på kartan som en av de mest spännande nya speloperatörerna på marknaden.
https://gogocasino.one
wow, amazing
Российский завод продает спортивные тренажеры https://sportivnyj-trenazher.ru/ для напряженной работы в коммерческих условиях. В каталоге интернет-магазина вы выберете самые востребованные варианты тренажеров – блочных и нагружаемых. Большой каталог позволяет подобрать машины для направленной укрепления теоретически любых мышечных отделов. Рассмотрите многофункциональный Кроссовер, Баттерфляй, силовую раму Смита, вертикально-горизонтальную тягу, тренажер Скотта, Дельта машину, жим ногами, конструкции для работы с собственным весом, Гравитрон для подтягиваний, обратную гиперэкстензию, скамьи для жима, универсальную лавку, Хаммер. Производимое оборудование не требует регулярного технического обслуживания. Можете оформить весовой стек оптимального веса.
Spin Your Way to Victory in the Ultimate Poker Game!
casino roulette online https://casinowild-24.com/games-guide/roulette-guide .
Tipico Casino Einzahlungsmöglichkeiten
In einem Online Casino wie Tipico stehen den Spielern verschiedene Einzahlungsmöglichkeiten zur Verfügung. Diese bieten eine schnelle und einfache Art, um Geld auf das Spielkonto zu überweisen und können je nach persönlichen Vorlieben ausgewählt werden.
Eine der beliebtesten Einzahlungsmethoden ist die Banküberweisung. Dabei wird das Geld direkt vom Bankkonto des Spielers auf das Casino-Konto überwiesen. Diese Methode ist sicher und zuverlässig, kann jedoch einige Tage dauern, bis das Geld auf dem Spielkonto gutgeschrieben wird.
Eine weitere häufig genutzte Einzahlungsmöglichkeit ist die Nutzung von Kredit- oder Debitkarten. Viele Spieler bevorzugen diese Methode aufgrund ihrer Einfachheit und Schnelligkeit. Die meisten Online Casinos akzeptieren Karten wie Visa oder Mastercard.
E-Wallets wie PayPal, Skrill oder Neteller sind ebenfalls beliebte Einzahlungsmethoden. Diese ermöglichen es den Spielern, Geld schnell und sicher auf ihr Spielkonto zu überweisen. E-Wallets bieten auch den Vorteil, dass keine sensiblen Bankdaten preisgegeben werden müssen.
Zusätzlich zu diesen gängigen Einzahlungsmöglichkeiten bietet Tipico auch die Möglichkeit, mit Prepaid-Karten wie paysafecard einzuzahlen. Diese können im Supermarkt oder an Tankstellen erworben und anschließend für Einzahlungen im Online Casino verwendet werden.
Es ist wichtig, die jeweiligen Gebühren und Limits für die verschiedenen Einzahlungsmethoden zu beachten. Einige Methoden können Gebühren verursachen oder bestimmte Mindest- und Höchstbeträge haben.
Insgesamt bietet Tipico seinen Spielern eine Vielzahl von Einzahlungsmöglichkeiten, um das Spielerlebnis so bequem wie möglich zu gestalten. Spieler können die Methode auswählen, die am besten zu ihren Bedürfnissen passt und sicher sein, dass ihre Einzahlungen sicher und geschützt sind.
https://tipicocasino.one/
https://gruzchikinesti.ru/
Das Zet Casino ist ein beliebtes Online-Casino, das eine Vielzahl von Spielen und attraktive Bonusangebote für seine Spieler bereithält. Einer der begehrtesten Boni ist der Willkommensbonus, den neue Spieler bei ihrer ersten Einzahlung erhalten können.
Der Zet Casino Willkommensbonus bietet eine großzügige Vergütung für Spieler, die sich neu anmelden und eine Einzahlung tätigen. Je nach Höhe der Einzahlung kann der Bonus bis zu einem bestimmten Betrag gewährt werden. Dieser zusätzliche Betrag kann dann für das Spielen der verschiedenen Casinospiele genutzt werden und erhöht somit die Gewinnchancen der Spieler.
Um den Willkommensbonus zu erhalten, müssen Spieler sich zuerst im Zet Casino registrieren und eine Einzahlung tätigen. Der Bonus wird dann automatisch auf das Spielerkonto gutgeschrieben und kann sofort verwendet werden. Es ist jedoch wichtig zu beachten, dass der Bonus bestimmten Umsatzbedingungen unterliegt, die erfüllt werden müssen, bevor eine Auszahlung dieser Bonusgelder möglich ist.
Der Zet Casino Willkommensbonus ist eine großartige Möglichkeit für neue Spieler, das Casino kennenzulernen und ihre Lieblingsspiele auszuprobieren, ohne dabei ihr eigenes Geld zu riskieren. Mit diesem Bonus können Spieler länger spielen und ihre Gewinnchancen erhöhen, was das Spielerlebnis insgesamt noch spannender macht.
Insgesamt bietet das Zet Casino seinen Spielern eine Vielzahl von attraktiven Bonusangeboten, darunter auch den lukrativen Willkommensbonus. Wer also auf der Suche nach einem spannenden Online-Casino ist, sollte das Zet Casino definitiv in Betracht ziehen und sich den Willkommensbonus nicht entgehen lassen.
https://zetcasino.one/
Melden Sie sich an, um ein Willkommenspaket im Wert von 1.000 USDT zu erhalten!
Kaufen Sie Kryptowährungen https://www.bitget.com/de
bliblibli
blablablu
blublabla
https://gruzchikibol.ru/
Thanks for some other informative site. The
place else may I am getting that type of info written in such an ideal method?
I’ve a mission that I’m simply now operating on, and I have been on the glance out for such information.
We’re a gaggle of volunteers and starting a brand new scheme in our community.
Your site provided us with useful info to work on. You have
performed an impressive job and our entire neighborhood shall be grateful to you.
Hello, i read your blog occasionally and i own a similar one and i was just wondering if
you get a lot of spam comments? If so how do you stop it, any plugin or
anything you can recommend? I get so much lately it’s driving me crazy so any help
is very much appreciated.
whoah this blog is great i like reading your posts.
Keep up the good work! You already know, many individuals
are looking round for this info, you could help them greatly.
клей уф
I was very pleased to discover this great site. I need to to thank you for your time due to this wonderful read!!
I definitely liked every bit of it and i also have you book marked to check out new
things in your web site.
Zet Casino: 20 kostenlose Freispiele
Zet Casino ist eine Online-Glücksspielplattform, die Spielern eine Vielzahl von Spielen und Promotionen bietet. Eine der beliebtesten Aktionen, die derzeit verfügbar ist, sind die 20 kostenlosen Freispiele, die Spieler erhalten können. Diese Freispiele bieten Spielern die Möglichkeit, einige der beliebtesten Spielautomaten des Casinos kostenlos zu spielen und dabei echte Geldgewinne zu erzielen.
Um die 20 kostenlosen Freispiele zu beanspruchen, mГјssen Spieler lediglich ein Konto bei Zet Casino erstellen und eine Einzahlung tГ¤tigen. Sobald die Einzahlung abgeschlossen ist, werden die Freispiele automatisch gutgeschrieben und kГ¶nnen sofort genutzt werden. Spieler haben die MГ¶glichkeit, die Freispiele auf einer Vielzahl von Spielautomaten zu verwenden, darunter beliebte Titel wie Book of Dead, Starburst und Gonzo’s Quest.
Die Freispiele bieten Spielern die Möglichkeit, das Casino und seine Spiele risikofrei zu erkunden, ohne eigenes Geld setzen zu müssen. Darüber hinaus haben Spieler die Chance, echte Gewinne zu erzielen, die sie sich anschließend auszahlen lassen können. Es ist jedoch wichtig zu beachten, dass die Freispiele bestimmten Umsatzbedingungen unterliegen, die erfüllt werden müssen, bevor Gewinne ausgezahlt werden können.
Insgesamt sind die 20 kostenlosen Freispiele von Zet Casino eine großartige Möglichkeit für Spieler, das Casino zu testen und dabei die Chance zu haben, echtes Geld zu gewinnen. Mit einer Vielzahl von Spielautomaten zur Auswahl und attraktiven Promotionen bietet Zet Casino ein unterhaltsames und lohnendes Spielerlebnis für alle Glücksspielfans.
https://zetcasino.one/
https://gruzchikivagon.ru/
https://gruzchikistudent.ru/
Промокоды 1xBet на сегодня. Получите бесплатно при регистрации бонус. Активируйте промокоды и делайте ставки на футбол, хоккей и самые яркие состязания – Лиги Европы и Лиги Чемпионов. Отличительная особенность букмекера – возможность использования промокод на день рождения 1хбет условия или для активных клиентов, уже имеющих учетную запись. Они обеспечивают двойной депозит, бесплатную ставку (фрибет), специальный бонус на день рождения и многое другое. Актуальные бонусные коды для новичков за регистрацию, способы получения и активации, bonus программа на официальном сайте букмекера 1хБет. Бесплатные промокоды при регистрации в 2024 году в 1xBet – более подробно в этом материале https://03ekb.ru/news/besplatnuy_promokod_pri_registracii.html
In Etsy, Amazon, eBay, Shopify Pinterest+SEO + artificial intelligence give high sales results
https://gruzchikietazh.ru/
https://gruzchikibaza.ru/
1xbet промокод на сегодня 2024. Чтобы удовлетворить потребности бетторов и сделать процесс ставок максимально разнообразным нередко букмекерские конторы пытаются увеличить свой функционал, путем добавления специальных функций и предложений. Одним из лидеров среди популярных букмекеров на постсоветском пространстве по своим функциональным возможностям является 1хБет. Ввод 1хбет промокод при регистрации на сегодня бесплатно позволяет получить увеличенную сумму бонуса. Для этого достаточно после создания аккаунта внести первый депозит (максимальная сумма бонусного начисления составляет 32 500 рублей). Можно использовать любой платёжный метод. Абсолютно бесплатный промокод 1xbet. На сегодня контора предлагает всем новичкам воспользоваться не только приветственным бонусом, но и получить дополнительные преференции. Эти льготы игрок получает в том случае, если внимательно отнесётся к процедуре регистрации на сайте. Ведь не все новички обращают внимание или понимают, о каких выгодах идёт речь, когда видят необязательное для заполнения поле «Введите промокод (при наличии)», находящееся в самом низу регистрационной формы. Оно есть при трёх способах получения аккаунта из четырёх возможных («В 1 клик», «По номеру телефона», «По e-mail»). А игнорировать его – это потерять дополнительные выгоды – более подробно в этом материале https://03ekb.ru/news/besplatnuy_promokod_pri_registracii.html
Рецепты вкусной еды: изысканные идеи для гурманов
где рецепт https://www.brkgrp.ru/ .
Выкуп квартиры в кратчайшие сроки
какая компания выкупает студии
bluatblaaotuy
https://gruzchikikorob.ru/
nice content!nice history!!
wow, amazing
bliblibli
https://gruzchikjob.ru/
https://gruzchikibol.ru
bliblibli
boba 😀
1. Вибір натяжних стель – як правильно обрати?
2. Топ-5 популярних кольорів натяжних стель
3. Як зберегти чистоту натяжних стель?
4. Відгуки про натяжні стелі: плюси та мінуси
5. Як підібрати дизайн натяжних стель до інтер’єру?
6. Інноваційні технології у виробництві натяжних стель
7. Натяжні стелі з фотопечаттю – оригінальне рішення для кухні
8. Секрети вдалого монтажу натяжних стель
9. Як зекономити на встановленні натяжних стель?
10. Лампи для натяжних стель: які вибрати?
11. Відтінки синього для натяжних стель – ексклюзивний вибір
12. Якість матеріалів для натяжних стель: що обирати?
13. Крок за кроком: як самостійно встановити натяжні стелі
14. Натяжні стелі в дитячу кімнату: безпека та креативність
15. Як підтримувати тепло у приміщенні за допомогою натяжних стель
16. Вибір натяжних стель у ванну кімнату: практичні поради
17. Натяжні стелі зі структурним покриттям – тренд сучасного дизайну
18. Індивідуальність у кожному домашньому інтер’єрі: натяжні стелі з друком
19. Як обрати освітлення для натяжних стель: поради фахівця
20. Можливості дизайну натяжних стель: від класики до мінімалізму
виготовлення натяжних стель http://www.natjazhnistelitvhyn.kiev.ua .
blublu
blublun
nice content!nice history!!
blackjacking guide blackjacking guide .
https://gruzchikietazh.ru
демонтаж москва
https://demontagmoskva.ru/
Индивидуальный подход к каждому клиенту
Разработка индивидуальных металлических изделий с помощью 3D печати на заказ в Москве
3D печать металлом на заказ в Москве https://3d-pechtmet.ru .
1. Вибір натяжних стель – як правильно обрати?
2. Топ-5 популярних кольорів натяжних стель
3. Як зберегти чистоту натяжних стель?
4. Відгуки про натяжні стелі: плюси та мінуси
5. Як підібрати дизайн натяжних стель до інтер’єру?
6. Інноваційні технології у виробництві натяжних стель
7. Натяжні стелі з фотопечаттю – оригінальне рішення для кухні
8. Секрети вдалого монтажу натяжних стель
9. Як зекономити на встановленні натяжних стель?
10. Лампи для натяжних стель: які вибрати?
11. Відтінки синього для натяжних стель – ексклюзивний вибір
12. Якість матеріалів для натяжних стель: що обирати?
13. Крок за кроком: як самостійно встановити натяжні стелі
14. Натяжні стелі в дитячу кімнату: безпека та креативність
15. Як підтримувати тепло у приміщенні за допомогою натяжних стель
16. Вибір натяжних стель у ванну кімнату: практичні поради
17. Натяжні стелі зі структурним покриттям – тренд сучасного дизайну
18. Індивідуальність у кожному домашньому інтер’єрі: натяжні стелі з друком
19. Як обрати освітлення для натяжних стель: поради фахівця
20. Можливості дизайну натяжних стель: від класики до мінімалізму
ціна натяжної стелі http://www.natjazhnistelitvhyn.kiev.ua .
https://gruzchikivrn.ru
Привет! Предлагаю получить денег в долг в интернете в любом городе. Вы можете получить заем без лишних вопросов и документов. Достойные условия заема и срочное получение в любом городе. Наберите нам для уточнения подробной информации, или оставляйте заявку на сайте.
Приветствую! Предлагаем где получить деньги в любом городе. Вы можете получить средства без излишних вопросов и документов. Привлекательные условия заема и срочное получение рядом с вами. Звоните для уточнения подробной информации, или оставляйте заявку на сайте.
EL CODIGO PROMOCIONAL DE 1XSLOTS CASINO
Sin introducir un codigo promocional 1xSlots Casino, como nuevo cliente en March 2024, puede beneficiarse de una bonificacion del 100% hasta 300€. El casino le proporciona un monton de maquinas tragaperras populares de proveedores de software como iSoftBet, Elk Studios o Play’n GO y otros. De forma adicional, se le otorgaran|esta oferta incluye 30 turnos gratuitos.. Todas las informaciones importantes respecto a esta oferta de bienvenida se puede encontrar en este articulo.
?COMO FUNCIONA EL CODIGO PROMOCIONAL DE 1XSLOTS CASINO?
En 1xSlots Casino se puede obtener una bonificacion del 100% hasta 300€ y turnos gratuitos en 1xSlots Casino. Haga su inicial deposito en 1xSlots Casino tras finalizar el proceso de inscripcion. No hace falta solicitar su bonificacion de bienvenida por e-mail ni el chat en directo como en otros casinos, porque 1xSlots Casino la abona a su cuenta automaticamente. La oferta de bienvenida se activa cuando deposite 10€ o mas. Haga un deposito empleando EcoPayz, Boku o Bitcoin u otro metodo de deposito disponible en el casino.
Mas sobre el bono
1xSlots Casino le da la oportunidad de incrementar su balance hasta 300€ (100%). Obtenga la bonificacion superior al depositar 300€ y conseguir 600€ que se anadiran en su cuenta. Los fondos de su bonificacion es compatible con tragaperras de proveedores de software como Red Tiger Gaming, Evolution Gaming y Microgaming, por nombrar unos cuantos. Debe tenerse en cuenta tambien que su cuenta se incrementara con 30 turnos gratuitos.
Bono de bienvenida 1xSlots 2024
Dentro de 1xSlots existen dos bonos de bienvenida, uno standard y uno exclusivo. El primero de ellas recompensa con un paquete de hasta €1500 y 150 giros gratis mientras que el segundo otorga un 10% adicional recompensando hasta €1650 y 150 giros gratis ?La diferencia? El bono exclusivo se obtiene mediante el uso del 1xSlots promocode NEXT777.
Las recompensas de la bonificacion exclusiva son otorgadas en los 4 primeros depositos de la siguiente manera:
100% del primer deposito hasta €450 + 30 giros gratis
100% del segundo deposito hasta €350 + 35 giros gratis
100% del tercer deposito hasta €400 + 40 giros gratis
100% del cuarto deposito hasta €450 + 45 giros gratis
Bono de bienvenida 1xSlots Argentina 2024
Cabe resaltar que durante tu proceso de registro tienes que elegir tu moneda local preferida. De este modo obtendras la bonificacion de bienvenida 1xSlots Argentina en pesos. Puedes recibir el bono exclusivo 1xSlots Argentina al utilizar nuestro codigo de bono 1xSlots Argentina NEXT777 durante el proceso de registro.
Ademas, si ingresas el codigo NEXT777 a la pestana “Bonos y Regalos” despues de hacer tu primer deposito, puedes recibir el bono con giros gratis 1xSlots Argentina que te otorgara 60 FS en tragamonedas 777 GEMS RESPIN. A continuacion encontraras los valores de bonos en pesos argentinos.
Bono de bienvenida 1xSlots Chile 2024
El bono de bienvenida 1xSlots Chile funciona del mismo modo como en Argentina. Tienes que crear tu cuenta e ingresar nuestro codigo de promocion 1xslots Chile NEXT777 al formulario de registro. Puedes elegir el peso chileno como tu moneda local para recibir la bonificacion de bienvenida 1xSlots Chile. Adicionalmente, para obtener 60 giros gratis en 777 GEMS RESPIN, introduce el codigo NEXT777 al hacer tu primer deposito.
?QUE ES UN BONO DE TRAGAPERRAS SIN DEPOSITO?
Como su nombre indica, un bono de tragaperras sin deposito es un tipo de bono de casino que no necesita que los jugadores depositen dinero para poder optar a cualquier tipo de recompensa. Por ejemplo, giros gratis, creditos de casino o incluso dinero en efectivo.
Los bonos sin deposito se dan generalmente a los jugadores potenciales para motivar a los nuevos jugadores para que se registren. Pueden formar parte de los paquetes de bienvenida que un casino online ofrece a todos sus jugadores potenciales y ayudan a atraer la atencion hacia la marca del casino. Tambien pueden ofrecerse a los jugadores con cuentas en determinadas situaciones.
Las tragaperras con bono sin deposito ofrecen la posibilidad de probar las tragaperras online sin coste alguno y quedandose con el dinero que se obtiene, razon por la que son muy codiciadas. Sin embargo, los bonos sin deposito no te obligan a depositar dinero cuando la promocion termina, aunque se sugiere.
?CUALES SON LOS PRINCIPALES TIPOS DE BONOS DE TRAGAMONEDAS SIN DEPOSITO?
Los bonos sin deposito estan disponibles en tres variedades: giros gratis, creditos gratis o dinero en efectivo. El tipo mas conocido que es un bono sin deposito no spins without deposit bonus.
GIROS GRATIS CON BONO SIN DEPOSITO
Todos sabemos que las maquinas tragaperras son las mas populares en el mundo de los juegos de casino , por lo que es natural que un bono hecho especificamente para las maquinas que juegan a las tragaperras sea el mas buscado. Para los amantes de las maquinas tragaperras, los bonos de tiradas gratis sin deposito son un verdadero tesoro, ya que permiten a los jugadores jugar a sus maquinas tragaperras favoritas sin depositar dinero, y con una gran cantidad de tiradas gratis, lo que aumenta sus probabilidades de ganar significativamente.
Creditos gratuitos / BONO DE JUEGO GRATUITO SIN DEPOSITO
En lugar de tiradas gratis, los casinos pueden optar por dar creditos gratis a los jugadores que tienen bonos sin deposito. Estos creditos pueden ser utilizados dentro de un periodo de tiempo enumerado para apostar en juegos en los casinos y ganar dinero real. Los bonos sin deposito y los creditos gratuitos se ofrecen tanto en las tragaperras gratuitas como en otros juegos de los casinos.
DINERO GRATIS CON BONOS SIN DEPOSITO
Al igual que los creditos gratuitos con los bonos sin deposito, los bonos de dinero sin deposito que no requieren deposito se pueden jugar tanto en las tragaperras como en otros juegos de casino. Una vez que haya reclamado y jugado el bono de dinero sin deposito, podra retirar el dinero del bono y cualquier ganancia adicional siempre que cumpla las condiciones para retirar el dinero.
?Como puedo reclamar un bono sin deposito?
En la mayoria de los casos, puede hacer uso de los bonos sin deposito al crear una cuenta en cualquier sitio de juego en linea que ofrezca este tipo de oferta. En la version online del casino, la bonificacion puede aparecer en la pagina de promociones del casino o en una ventana emergente. Algunos casinos requieren que introduzca un codigo promocional para acceder al bono.
Cuando considere reclamar un bono sin deposito (o cualquier otro tipo de bono) debe asegurarse de leer los terminos y condiciones que se adjuntan al bono. Los diferentes casinos pueden tener sus propias regulaciones y limites, sin embargo, hay algunos que son iguales en todos los casinos.
REQUISITOS PARA TRABAJAR
Los bonos sobre los depositos son accesibles para todos, sin embargo, cobrar los bonos es un asunto un poco mas controlado. La mayoria de los casinos en linea le permitiran retirar sus ganancias despues de haber podido apostar una cantidad especifica.
Los requisitos de apuesta se muestran como multiplicadores. Representan la cantidad de veces que tienes que apostar en un bono para poder retirar el dinero. Por lo general, puede jugar a una serie de juegos seleccionados por el operador del casino. Una vez que haya alcanzado el requisito de apuesta, podra dar el siguiente paso para cobrar su bono.
PLAZO
Segun el casino online, el bono para juegos de tragaperras de deposito puede caducar en cuestion de dias o durar hasta 30 dias. Para asegurarte de que cumples los requisitos de apuestas, es posible que tengas que planificar tu rutina de juego a lo largo del bono.
TAMANOS DE APUESTA
Un metodo para lograr su objetivo de apostar mas rapido es realizar la mayor cantidad de apuestas posible en cada juego. Es un metodo sensato, a menos que el operador del casino decida controlar la cantidad de la apuesta y limitar la cantidad de apuestas en la respectiva tragamonedas con bono sin deposito.
SE REQUIERE UN DEPOSITO
Aunque suene contradictorio, algunos casinos online pueden incluso exigir a los jugadores que depositen dinero antes de poder retirar su bono. Suelen anadir este requisito adicional por razones de seguridad.
RESTRICCIONES
A veces, se le puede negar el acceso a un bono con oferta de deposito gratuito. Esto solo ocurre en muy raras circunstancias, ya sea por el hecho de haber intentado dos bonos a la vez o por tener una direccion IP compartida con un jugador que tambien reclamo el mismo bono, o por residir en una zona restringida.
Puedes obtener informacion mas detallada leyendo el articulo completo en este enlace – https://kryivka.net/about/pgs/codigo_promocional_1xslots_bono.html
Эксклюзивные предложения на кпп для спецтехники: Скидки и акции
кпп shantui https://www.xn—–klcfasajgfzrae3as6cp0o.xn--p1ai .
Здравствуйте! Предлагаю где быстро взять деньги в долг в любом городе. Вы можете получить финансирование без излишних вопросов и документов. Достойные условия заема и быстрое получение рядом с вами. Звоните для уточнения подробной информации, или оставляйте заявку на сайте.
Привет! Предлагаем получить деньги в долг сегодня в любом городе. Вы можете получить заем без избыточных вопросов и документов. Достойные условия кредитования и быстрое получение рядом с вами. Набирайте нам для уточнения подробной информации, или оставляйте заявку на сайте.
Привет! Предлагаем получить деньги в долг у человека рядом с вами. Вы можете получить деньги без излишних вопросов и документов. Приятные условия кредитования и моментальное получение рядом с вами. Наберите нам для уточнения подробной информации, либо оставляйте заявку на сайте.
Эксклюзивные предложения на кпп для спецтехники: Скидки и акции
кпп чанглин https://xn—–klcfasajgfzrae3as6cp0o.xn--p1ai .
Всем привет! Предлагаем заем средств рядом с вами. Вы можете получить финансирование без избыточных вопросов и документов. Привлекательные условия кредитования и быстрое получение в вашем городе. Набирайте нам для уточнения подробной информации, либо оставляйте заявку на сайте.
Всем привет! Предлагаю быстрый займ в Минске в любое время. Вы можете получить заем без избыточных вопросов и документов. Приятные условия кредитования и срочное получение рядом с вами. Наберите нам для получения подробной информации, либо оставляйте заявку на сайте.
The meal went without incident although a couple of times she had to avert her gaze from Dan for fear of bursting out laughing. Dan went up to his room saying he wanted to listen to music, he laid on his bed playing with himself waiting for his father to leave. He thought about the events of the last two weeks it had been the craziest time of his life.
He put it all down to Mary Harris, she had been his girlfriend for two years, he liked her a lot, she was pretty and intelligent two things that rarely combined in his experience, the problem was she steadfastly refused to let him put his cock inside her, he had thought he was getting somewhere when he took his cock out that evening in the cinema when she had finally allowed him to get his hand inside her panties, it was the first time she had allowed him to do any more than play with her tits. He had taken her hand and placed it on his erection, initially he had been pleased to hear her sharp intake of breath when she felt the size of him and he was encouraged when she began stroking him.
It was later that the problem started, he had her in the car park, they were kissing, her sweater was pushed up together with her bra and he was sucking on her nipples. He managed to get her laid across the front of one of the cars, his hand up her skirt, trying to pull down her panties. That was when she had stopped him.
https://www.haikudeck.com/presentations/FtDLL6gTqM
https://www.haikudeck.com/presentations/8tk8vTbAxA
https://www.obesityhelp.com/members/muxamx1960/about_me/
https://imageevent.com/xxxenitro1971
https://chyoa.com/user/jjx1999
https://rentry.org/awcfw65e
https://ellak.gr/user/xaker011981/
https://rentry.org/54y73dyd
http://www.babelcube.com/user/dustin-robinson
http://www.babelcube.com/user/mike-norton
lalablublu
Привет! Появился вопрос про быстрый займ на карту? Предлагаем надежный источник финансовой помощи. Вы можете получить деньги в долг без избыточных вопросов и документов? Тогда обратитесь к нам! Мы предлагаем выгодные условия кредитования, моментальное решение и гарантию конфиденциальности. Не откладывайте свои планы и мечты, воспользуйтесь доступным предложением прямо сейчас!
Здравствуйте! Появился вопрос про где взять денег прямо сейчас? Предоставляем стабильный источник финансовой помощи. Вы можете получить средства в займ без избыточных вопросов и документов? Тогда обратитесь к нам! Мы предлагаем высокоприбыльные условия кредитования, моментальное решение и гарантию конфиденциальности. Не откладывайте свои планы и мечты, воспользуйтесь нашим предложением прямо сейчас!
Здравствуйте! Появился вопрос про предоставление денег в долг? Предлагаем стабильный источник финансовой помощи. Вы можете получить финансирование в займ без избыточных вопросов и документов? Тогда обратитесь к нам! Мы предоставляем привлекательные условия кредитования, моментальное решение и гарантию конфиденциальности. Не откладывайте свои планы и мечты, воспользуйтесь доступным предложением прямо сейчас!
Привет! Появился вопрос про быстрый займ онлайн? Предлагаем безопасный источник финансовой помощи. Вы можете получить финансирование в займ без излишних вопросов и документов? Тогда обратитесь к нам! Мы предлагаем выгодные условия кредитования, моментальное решение и обеспечение конфиденциальности. Не откладывайте свои планы и мечты, воспользуйтесь предложенным предложением прямо сейчас!
Привет! Возник вопрос про заем средств? Предлагаем надежный источник финансовой помощи. Вы можете получить средства в долг без излишних вопросов и документов? Тогда обратитесь к нам! Мы предоставляем привлекательные условия кредитования, моментальное решение и обеспечение конфиденциальности. Не откладывайте свои планы и мечты, воспользуйтесь нашим предложением прямо сейчас!
Приветствую! Появился вопрос про взять деньги сейчас? Предлагаем надежный источник финансовой помощи. Вы можете получить средства в долг без избыточных вопросов и документов? Тогда обратитесь к нам! Мы предлагаем высокоприбыльные условия кредитования, моментальное решение и обеспечение конфиденциальности. Не откладывайте свои планы и мечты, воспользуйтесь предложенным предложением прямо сейчас!
Всем привет! Возник вопрос про взять займ в Минске? Предоставляем безопасный источник финансовой помощи. Вы можете получить финансирование в займ без излишних вопросов и документов? Тогда обратитесь к нам! Мы предлагаем привлекательные условия кредитования, моментальное решение и гарантию конфиденциальности. Не откладывайте свои планы и мечты, воспользуйтесь предложенным предложением прямо сейчас!
Всем привет! Предлагаю где получить деньги в долг круглосуточно. Вы можете получить деньги без излишних вопросов и документов. Доступные условия займа и моментальное получение в вашем городе. Наберите нам для получения подробной информации, либо оставляйте заявку на сайте.
Приветствую! Предлагаю получить деньги срочно на карту круглосуточно. Вы можете получить средства без лишних вопросов и документов. Доступные условия заема и срочное получение рядом с вами. Звоните для получения подробной информации, или оставляйте заявку на сайте.
Приветствую! Предлагаем где взять денег в Минске рядом с вами. Вы можете получить финансирование без избыточных вопросов и документов. Выгодные условия займа и моментальное получение в вашем городе. Набирайте нам для уточнения подробной информации, либо оставляйте заявку на сайте.
Как ухаживать за посудой для кухни: полезные советы
купить посуду в москве http://lenta.ru/conf/krichever/ .
Приветствую! Предлагаем деньги в долг у человека рядом с вами. Вы можете получить займ без избыточных вопросов и документов. Доступные условия займа и быстрое получение в любом городе. Наберите нам для получения подробной информации, или оставляйте заявку на сайте.
Привет! Предлагаем деньги в долг день в день круглосуточно. Вы можете получить деньги без избыточных вопросов и документов. Доступные условия заема и моментальное получение в любом городе. Набирайте нам для получения подробной информации, или оставляйте заявку на сайте.
Здравствуйте! Предлагаю получить деньги в долг онлайн в любое время. Вы можете получить деньги без избыточных вопросов и документов. Доступные условия займа и срочное получение в любом городе. Наберите нам для получения подробной информации, или оставляйте заявку на сайте.
Привет! Предлагаю где получить деньги в долг срочно в любое время. Вы можете получить средства без лишних вопросов и документов. Выгодные условия кредитования и быстрое получение в любом городе. Звоните для уточнения подробной информации, либо оставляйте заявку на сайте.
Premium базы для Xrumer 23 ai Strong и GSA Search Engine Ranker. https://dseo24.monster
Здравствуйте! Появился вопрос про взять деньги в долг в интернете? Предлагаем безопасный источник финансовой помощи. Вы можете получить средства в займ без лишних вопросов и документов? Тогда обратитесь к нам! Мы предлагаем выгодные условия кредитования, моментальное решение и гарантию конфиденциальности. Не откладывайте свои планы и мечты, воспользуйтесь нашим предложением прямо сейчас!
EL CODIGO PROMOCIONAL DE 1XSLOTS CASINO
Sin introducir un codigo promocional 1xSlots Casino, como nuevo cliente en March 2024, puede beneficiarse de una bonificacion del 100% hasta 300€. El casino le proporciona un monton de maquinas tragaperras populares de proveedores de software como iSoftBet, Elk Studios o Play’n GO y otros. De forma adicional, se le otorgaran|esta oferta incluye 30 turnos gratuitos.. Todas las informaciones importantes respecto a esta oferta de bienvenida se puede encontrar en este articulo.
?COMO FUNCIONA EL CODIGO PROMOCIONAL DE 1XSLOTS CASINO?
En 1xSlots Casino se puede obtener una bonificacion del 100% hasta 300€ y turnos gratuitos en 1xSlots Casino. Haga su inicial deposito en 1xSlots Casino tras finalizar el proceso de inscripcion. No hace falta solicitar su bonificacion de bienvenida por e-mail ni el chat en directo como en otros casinos, porque 1xSlots Casino la abona a su cuenta automaticamente. La oferta de bienvenida se activa cuando deposite 10€ o mas. Haga un deposito empleando EcoPayz, Boku o Bitcoin u otro metodo de deposito disponible en el casino.
Mas sobre el bono
1xSlots Casino le da la oportunidad de incrementar su balance hasta 300€ (100%). Obtenga la bonificacion superior al depositar 300€ y conseguir 600€ que se anadiran en su cuenta. Los fondos de su bonificacion es compatible con tragaperras de proveedores de software como Red Tiger Gaming, Evolution Gaming y Microgaming, por nombrar unos cuantos. Debe tenerse en cuenta tambien que su cuenta se incrementara con 30 turnos gratuitos.
Bono de bienvenida 1xSlots 2024
Dentro de 1xSlots existen dos bonos de bienvenida, uno standard y uno exclusivo. El primero de ellas recompensa con un paquete de hasta €1500 y 150 giros gratis mientras que el segundo otorga un 10% adicional recompensando hasta €1650 y 150 giros gratis ?La diferencia? El bono exclusivo se obtiene mediante el uso del 1xSlots promocode NEXT777.
Las recompensas de la bonificacion exclusiva son otorgadas en los 4 primeros depositos de la siguiente manera:
100% del primer deposito hasta €450 + 30 giros gratis
100% del segundo deposito hasta €350 + 35 giros gratis
100% del tercer deposito hasta €400 + 40 giros gratis
100% del cuarto deposito hasta €450 + 45 giros gratis
Bono de bienvenida 1xSlots Argentina 2024
Cabe resaltar que durante tu proceso de registro tienes que elegir tu moneda local preferida. De este modo obtendras la bonificacion de bienvenida 1xSlots Argentina en pesos. Puedes recibir el bono exclusivo 1xSlots Argentina al utilizar nuestro codigo de bono 1xSlots Argentina NEXT777 durante el proceso de registro.
Ademas, si ingresas el codigo NEXT777 a la pestana “Bonos y Regalos” despues de hacer tu primer deposito, puedes recibir el bono con giros gratis 1xSlots Argentina que te otorgara 60 FS en tragamonedas 777 GEMS RESPIN. A continuacion encontraras los valores de bonos en pesos argentinos.
Bono de bienvenida 1xSlots Chile 2024
El bono de bienvenida 1xSlots Chile funciona del mismo modo como en Argentina. Tienes que crear tu cuenta e ingresar nuestro codigo promocional 1xslots Chile NEXT777 al formulario de registro. Puedes elegir el peso chileno como tu moneda local para recibir la bonificacion de bienvenida 1xSlots Chile. Adicionalmente, para obtener 60 giros gratis en 777 GEMS RESPIN, introduce el codigo NEXT777 al hacer tu primer deposito.
?QUE ES UN BONO DE TRAGAPERRAS SIN DEPOSITO?
Como su nombre indica, un bono de tragaperras sin deposito es un tipo de bono de casino que no necesita que los jugadores depositen dinero para poder optar a cualquier tipo de recompensa. Por ejemplo, giros gratis, creditos de casino o incluso dinero en efectivo.
Los bonos sin deposito se dan generalmente a los jugadores potenciales para motivar a los nuevos jugadores para que se registren. Pueden formar parte de los paquetes de bienvenida que un casino online ofrece a todos sus jugadores potenciales y ayudan a atraer la atencion hacia la marca del casino. Tambien pueden ofrecerse a los jugadores con cuentas en determinadas situaciones.
Las tragaperras con bono sin deposito ofrecen la posibilidad de probar las tragaperras online sin coste alguno y quedandose con el dinero que se obtiene, razon por la que son muy codiciadas. Sin embargo, los bonos sin deposito no te obligan a depositar dinero cuando la promocion termina, aunque se sugiere.
?CUALES SON LOS PRINCIPALES TIPOS DE BONOS DE TRAGAMONEDAS SIN DEPOSITO?
Los bonos sin deposito estan disponibles en tres variedades: giros gratis, creditos gratis o dinero en efectivo. El tipo mas conocido que es un bono sin deposito no spins without deposit bonus.
GIROS GRATIS CON BONO SIN DEPOSITO
Todos sabemos que las maquinas tragaperras son las mas populares en el mundo de los juegos de casino , por lo que es natural que un bono hecho especificamente para las maquinas que juegan a las tragaperras sea el mas buscado. Para los amantes de las maquinas tragaperras, los bonos de tiradas gratis sin deposito son un verdadero tesoro, ya que permiten a los jugadores jugar a sus maquinas tragaperras favoritas sin depositar dinero, y con una gran cantidad de tiradas gratis, lo que aumenta sus probabilidades de ganar significativamente.
Creditos gratuitos / BONO DE JUEGO GRATUITO SIN DEPOSITO
En lugar de tiradas gratis, los casinos pueden optar por dar creditos gratis a los jugadores que tienen bonos sin deposito. Estos creditos pueden ser utilizados dentro de un periodo de tiempo enumerado para apostar en juegos en los casinos y ganar dinero real. Los bonos sin deposito y los creditos gratuitos se ofrecen tanto en las tragaperras gratuitas como en otros juegos de los casinos.
DINERO GRATIS CON BONOS SIN DEPOSITO
Al igual que los creditos gratuitos con los bonos sin deposito, los bonos de dinero sin deposito que no requieren deposito se pueden jugar tanto en las tragaperras como en otros juegos de casino. Una vez que haya reclamado y jugado el bono de dinero sin deposito, podra retirar el dinero del bono y cualquier ganancia adicional siempre que cumpla las condiciones para retirar el dinero.
?Como puedo reclamar un bono sin deposito?
En la mayoria de los casos, puede hacer uso de los bonos sin deposito al crear una cuenta en cualquier sitio de juego en linea que ofrezca este tipo de oferta. En la version online del casino, la bonificacion puede aparecer en la pagina de promociones del casino o en una ventana emergente. Algunos casinos requieren que introduzca un codigo promocional para acceder al bono.
Cuando considere reclamar un bono sin deposito (o cualquier otro tipo de bono) debe asegurarse de leer los terminos y condiciones que se adjuntan al bono. Los diferentes casinos pueden tener sus propias regulaciones y limites, sin embargo, hay algunos que son iguales en todos los casinos.
REQUISITOS PARA TRABAJAR
Los bonos sobre los depositos son accesibles para todos, sin embargo, cobrar los bonos es un asunto un poco mas controlado. La mayoria de los casinos en linea le permitiran retirar sus ganancias despues de haber podido apostar una cantidad especifica.
Los requisitos de apuesta se muestran como multiplicadores. Representan la cantidad de veces que tienes que apostar en un bono para poder retirar el dinero. Por lo general, puede jugar a una serie de juegos seleccionados por el operador del casino. Una vez que haya alcanzado el requisito de apuesta, podra dar el siguiente paso para cobrar su bono.
PLAZO
Segun el casino online, el bono para juegos de tragaperras de deposito puede caducar en cuestion de dias o durar hasta 30 dias. Para asegurarte de que cumples los requisitos de apuestas, es posible que tengas que planificar tu rutina de juego a lo largo del bono.
TAMANOS DE APUESTA
Un metodo para lograr su objetivo de apostar mas rapido es realizar la mayor cantidad de apuestas posible en cada juego. Es un metodo sensato, a menos que el operador del casino decida controlar la cantidad de la apuesta y limitar la cantidad de apuestas en la respectiva tragamonedas con bono sin deposito.
SE REQUIERE UN DEPOSITO
Aunque suene contradictorio, algunos casinos online pueden incluso exigir a los jugadores que depositen dinero antes de poder retirar su bono. Suelen anadir este requisito adicional por razones de seguridad.
RESTRICCIONES
A veces, se le puede negar el acceso a un bono con oferta de deposito gratuito. Esto solo ocurre en muy raras circunstancias, ya sea por el hecho de haber intentado dos bonos a la vez o por tener una direccion IP compartida con un jugador que tambien reclamo el mismo bono, o por residir en una zona restringida.
Puedes obtener informacion mas detallada leyendo el articulo completo en este enlace – https://kryivka.net/about/pgs/codigo_promocional_1xslots_bono.html
Приветствую! Появился вопрос про взять деньги в долг день в день? Предоставляем безопасный источник финансовой помощи. Вы можете получить финансирование в займ без избыточных вопросов и документов? Тогда обратитесь к нам! Мы готовы предоставить высокоприбыльные условия займа, оперативное решение и гарантию конфиденциальности. Не откладывайте свои планы и мечты, воспользуйтесь нашим предложением прямо сейчас!
Привет! Возник вопрос про взять деньги в долг сегодня? Предоставляем безопасный источник финансовой помощи. Вы можете получить финансирование в займ без излишних вопросов и документов? Тогда обратитесь к нам! Мы предлагаем выгодные условия кредитования, моментальное решение и гарантию конфиденциальности. Не откладывайте свои планы и мечты, воспользуйтесь доступным предложением прямо сейчас!
new mobile casino
fresh casino online
Приветствую! Появился вопрос про взять деньги в долг онлайн? Предоставляем надежный источник финансовой помощи. Вы можете получить финансирование в займ без излишних вопросов и документов? Тогда обратитесь к нам! Мы готовы предоставить привлекательные условия займа, моментальное решение и обеспечение конфиденциальности. Не откладывайте свои планы и мечты, воспользуйтесь доступным предложением прямо сейчас!
Привет! Возник вопрос про получить деньги в долг у человека? Предоставляем стабильный источник финансовой помощи. Вы можете получить средства в долг без лишних вопросов и документов? Тогда обратитесь к нам! Мы предлагаем выгодные условия кредитования, оперативное решение и обеспечение конфиденциальности. Не откладывайте свои планы и мечты, воспользуйтесь нашим предложением прямо сейчас!
usa casino online
casino online
online no deposit bonus online no deposit bonus .
1. Вибір натяжних стель – як правильно обрати?
2. Топ-5 популярних кольорів натяжних стель
3. Як зберегти чистоту натяжних стель?
4. Відгуки про натяжні стелі: плюси та мінуси
5. Як підібрати дизайн натяжних стель до інтер’єру?
6. Інноваційні технології у виробництві натяжних стель
7. Натяжні стелі з фотопечаттю – оригінальне рішення для кухні
8. Секрети вдалого монтажу натяжних стель
9. Як зекономити на встановленні натяжних стель?
10. Лампи для натяжних стель: які вибрати?
11. Відтінки синього для натяжних стель – ексклюзивний вибір
12. Якість матеріалів для натяжних стель: що обирати?
13. Крок за кроком: як самостійно встановити натяжні стелі
14. Натяжні стелі в дитячу кімнату: безпека та креативність
15. Як підтримувати тепло у приміщенні за допомогою натяжних стель
16. Вибір натяжних стель у ванну кімнату: практичні поради
17. Натяжні стелі зі структурним покриттям – тренд сучасного дизайну
18. Індивідуальність у кожному домашньому інтер’єрі: натяжні стелі з друком
19. Як обрати освітлення для натяжних стель: поради фахівця
20. Можливості дизайну натяжних стель: від класики до мінімалізму
купити натяжну стелю natjazhnistelitvhyn.kiev.ua .
Gogo Casino har blivit en populär online spelplattform för många spelare. En av de viktigaste funktionerna som lockar många till Gogo Casino är dess snabba och smidiga uttag. Spelare kan enkelt ta ut sina vinster med bara några klick.
Många spelare har delat sina positiva erfarenheter av Gogo Casino uttag i olika forum och grupper på internet. De berättar om hur enkelt det är att använda plattformens uttagsfunktion och hur snabbt de får sina vinster på sina konton. Många jämför även Gogo Casinos uttagsprocess med andra online casinon och anser att Gogo Casino är överlägset när det gäller snabbhet och tillförlitlighet.
Det är inte bara själva uttagsprocessen som spelare uppskattar hos Gogo Casino, utan även den höga säkerheten och integriteten som plattformen erbjuder. Spelare kan känna sig trygga med att deras personliga och finansiella information skyddas på bästa möjliga sätt när de spelar på Gogo Casino.
Sammanfattningsvis kan man säga att Gogo Casino uttag får höga betyg av många spelare och det är en av anledningarna till varför så många väljer att spela på denna plattform. Med en enkel och snabb uttagsprocess, hög säkerhet och pålitlighet har Gogo Casino blivit en favorit bland online spelare.
https://gogocasino.one
https://gruzchikivrn.ru/
Gogo Casino är en relativt ny spelplattform som lanserades under 2019. Med sitt enkla och användarvänliga koncept har casinot snabbt blivit populärt bland svenska spelare. Men frågan som många ställer sig är: Vem äger egentligen Gogo Casino?
Bakom Gogo Casino står företaget Functional Games SA, som ägs av Global Gaming 555 AB. Global Gaming 555 AB är ett svenskt bolag som är noterat på Nasdaq First North och som är verksamt inom spelbranschen. Bolaget är moderbolag till flera olika spelplattformar och casinon, varav Gogo Casino är en av dem.
Global Gaming 555 AB har sin bas i Sverige och är enligt uppgifterna ett av de ledande spelbolagen i Norden. Bolaget har en stark närvaro på den svenska marknaden och strävar efter att erbjuda innovativa spelupplevelser för sina användare.
Därmed kan vi konstatera att Global Gaming 555 AB är ägaren av Gogo Casino och att casinot är en del av företagets breda spelportfölj. Med sitt fokus på tryggt och ansvarsfullt spelande har Gogo Casino snabbt etablerat sig som en pålitlig och populär spelplattform för svenska spelare. Med ägandet av Global Gaming 555 AB bakom sig kan spelare vara säkra på att de får en säker och underhållande spelupplevelse hos Gogo Casino.
https://gogocasino.one
Key Features to Look for in Anti-Spoofing Software
antispoofing dataset https://www.dataset-anti-spoofing.com .
Фулфилмент Москва: доступные цены и прозрачные условия без скрытых платежей
фулфилмент стоимость https://fulfilment-moskva77.ru/ .
Gogo Casino är en populär online-spelsajt som erbjuder ett brett utbud av casinospel för svenska spelare att njuta av. Men vem äger egentligen Gogo Casino?
Svaret på den frågan är att Gogo Casino ägs av det maltesiska bolaget Gogo Entertainment Ltd. Bolaget har varit verksamt sedan 2019 och har skapat en plattform som ger spelare en säker och underhållande spelupplevelse.
Gogo Entertainment Ltd har en licens från Malta Gaming Authority, vilket innebär att de följer strikta regler och bestämmelser för att säkerställa en rättvis och transparent spelmiljö för sina kunder.
Genom att ägas av ett erkänt företag som Gogo Entertainment Ltd, kan spelare känna sig trygga med att deras personliga och ekonomiska information är i säkra händer när de spelar på Gogo Casino.
Sammanfattningsvis är det alltså Gogo Entertainment Ltd som äger Gogo Casino och bolaget strävar efter att erbjuda en högkvalitativ spelupplevelse för sina spelare.
https://gogocasino.one
lost money
Hello!
https://googler.com
Good luck 🙂
Gogo casino är en av de populäraste onlinekasinona på marknaden idag. Med ett stort utbud av spel och generösa bonusar har casinot snabbt blivit en favorit bland spelare från hela världen.
En av de främsta fördelarna med Gogo casino är det stora urvalet av spel. Här kan du hitta allt från klassiska casinospel som roulette och blackjack till moderna videoslots och live dealer-spel. Oavsett vilken typ av spel du föredrar finns det definitivt något för dig på detta kasino.
Utöver det stora spelutbudet erbjuder Gogo casino även generösa bonusar och kampanjer till sina spelare. Nya spelare kan se fram emot en attraktiv välkomstbonus, medan befintliga spelare kan dra nytta av regelbundna belöningar och kampanjer som ökar deras vinstchanser. Detta gör att spelarna kan njuta av ännu mer spänning och underhållning när de spelar på Gogo casino.
En annan fördel med detta kasino är dess användarvänliga plattform. Hemsidan är lätt att navigera och spelarna kan enkelt hitta sina favoritspel och göra insättningar och uttag. Dessutom erbjuder Gogo casino en professionell och tillmötesgående kundsupport som finns tillgänglig dygnet runt för att hjälpa spelarna med eventuella frågor eller problem de kan ha.
Sammanfattningsvis är Gogo casino ett utmärkt val för alla som letar efter en underhållande och säker spelupplevelse online. Med sitt stora spelutbud, generösa bonusar och vänliga kundsupport är det inte konstigt att detta kasino har blivit så populärt bland spelare världen över. Kasinot har verkligen gått från klarhet till klarhet och vi rekommenderar det varmt till alla som är sugna på att prova lyckan på nätet.
https://gogocasino.one
воєнторг
магазин військового спорядження київ інтернет магазин військового одягу .
casino online
top casino online
воєнторг
2. Где купить армейские снаряжение
вийськовий магазин магазин військового одягу .
1. Почему берцы – это обязательный элемент стиля?
2. Как выбрать идеальные берцы для осеннего гардероба?
3. Тренды сезона: кожаные берцы или замшевые?
4. 5 способов носить берцы с платьем
5. Какие берцы выбрать для повседневного образа?
6. Берцы на платформе: комфорт и стиль в одном
7. Какие берцы будут актуальны в этом году?
8. Маст-хэв сезона: военные берцы в стиле милитари
9. 10 вариантов сочетания берцов с джинсами
10. Зимние берцы: как выбрать модель для холодного сезона
11. Элегантные берцы на каблуке: идеальный вариант для офиса
12. Секреты ухода за берцами: как сохранить первоначальный вид?
13. С какой юбкой носить берцы: советы от стилистов
14. Как подобрать берцы под фасон брюк?
15. Берцы на шнуровке: стильный акцент в образе
16. Берцы-челси: универсальная модель для любого стиля
17. С чем носить берцы на плоской подошве?
18. Берцы с ремешками: акцент на деталях
19. Как выбрать берцы для прогулок по городу?
20. Топ-5 брендов берцев: качество и стиль в одном
берці ua берці ціна .
casino sites online
top casino games
https://jicsweb.texascollege.edu/ICS/Academics/RELI/RELI_1311/2016_FA-RELI_1311-04/ford.jnz?portlet=Blog_2022-09-15T23-48-39-636&screen=View+Post&screenType=next&&Id=ee98381b-39f6-40d9-8a1d-2889022627d1
https://blendedlearning.bharatskills.gov.in/mod/forum/discuss.php?d=9839
synthesis a-pvp
воєнторг
10. Распродажа военного снаряжения
армійський військторг воєнторг .
Промокод 1xBet на сегодня и бесплатно. Промокоды 1хбет 2024 требуется использовать те, которые предоставят игрокам самые лучшие бонусы. Каждый из них позволяет увеличить первый депозит в 2 раза, максимальная сумма увеличения – 100 долларов. Большое количество промокодов — одна из причин того, что на сайте регистрируется огромное количество новых игроков каждый день. На данный момент их количество превышает пятьсот тысяч уникальных пользователей каждый день. Действующие промокоды позволяют увеличить размер приветственных баллов до 32 500 рублей. Для этого нужно лишь активировать при регистрации имеющийся код, скопировав его в соответствующее поле. Букмекерская контора 1ХБет является одной из самых влиятельных на рынке игорного бизнеса в России и не нуждается в особом представлении. Впрочем, букмекер продолжает держать статус одного из самых щедрых и предлагает своим клиентам воспользоваться промокодами для халявы, – более подробно в этом материале https://mg-group74.ru/pages/1xbet.html.
https://hansenglish.edu.pe/miembros/timlock/activity/5271/
124SDS9742
blobloblu
Полезные советы
Основные принципы успешного арбитража трафика
octoclick com гемблинг .
1. Почему берцы – это обязательный элемент стиля?
2. Как выбрать идеальные берцы для осеннего гардероба?
3. Тренды сезона: кожаные берцы или замшевые?
4. 5 способов носить берцы с платьем
5. Какие берцы выбрать для повседневного образа?
6. Берцы на платформе: комфорт и стиль в одном
7. Какие берцы будут актуальны в этом году?
8. Маст-хэв сезона: военные берцы в стиле милитари
9. 10 вариантов сочетания берцов с джинсами
10. Зимние берцы: как выбрать модель для холодного сезона
11. Элегантные берцы на каблуке: идеальный вариант для офиса
12. Секреты ухода за берцами: как сохранить первоначальный вид?
13. С какой юбкой носить берцы: советы от стилистов
14. Как подобрать берцы под фасон брюк?
15. Берцы на шнуровке: стильный акцент в образе
16. Берцы-челси: универсальная модель для любого стиля
17. С чем носить берцы на плоской подошве?
18. Берцы с ремешками: акцент на деталях
19. Как выбрать берцы для прогулок по городу?
20. Топ-5 брендов берцев: качество и стиль в одном
купити тактичні берці берці тактичні купити .
https://courses.comet.ucar.edu/tag/index.php?tc=1&tag=marine%20biology
synthesis a-pvp
bluatblaaotuy
EL CODIGO PROMOCIONAL DE 1XSLOTS CASINO
Sin introducir un codigo promocional 1xSlots Casino, como nuevo cliente en March 2024, puede beneficiarse de una bonificacion del 100% hasta 300€. El casino le proporciona un monton de maquinas tragaperras populares de proveedores de software como iSoftBet, Elk Studios o Play’n GO y otros. De forma adicional, se le otorgaran|esta oferta incluye 30 turnos gratuitos.. Todas las informaciones importantes respecto a esta oferta de bienvenida se puede encontrar en este articulo.
?COMO FUNCIONA EL CODIGO PROMOCIONAL DE 1XSLOTS CASINO?
En 1xSlots Casino se puede obtener una bonificacion del 100% hasta 300€ y turnos gratuitos en 1xSlots Casino. Haga su inicial deposito en 1xSlots Casino tras finalizar el proceso de inscripcion. No hace falta solicitar su bonificacion de bienvenida por e-mail ni el chat en directo como en otros casinos, porque 1xSlots Casino la abona a su cuenta automaticamente. La oferta de bienvenida se activa cuando deposite 10€ o mas. Haga un deposito empleando EcoPayz, Boku o Bitcoin u otro metodo de deposito disponible en el casino.
Mas sobre el bono
1xSlots Casino le da la oportunidad de incrementar su balance hasta 300€ (100%). Obtenga la bonificacion superior al depositar 300€ y conseguir 600€ que se anadiran en su cuenta. Los fondos de su bonificacion es compatible con tragaperras de proveedores de software como Red Tiger Gaming, Evolution Gaming y Microgaming, por nombrar unos cuantos. Debe tenerse en cuenta tambien que su cuenta se incrementara con 30 turnos gratuitos.
Bono de bienvenida 1xSlots 2024
Dentro de 1xSlots existen dos bonos de bienvenida, uno standard y uno exclusivo. El primero de ellas recompensa con un paquete de hasta €1500 y 150 giros gratis mientras que el segundo otorga un 10% adicional recompensando hasta €1650 y 150 giros gratis ?La diferencia? El bono exclusivo se obtiene mediante el uso del 1xSlots promocode NEXT777.
Las recompensas de la bonificacion exclusiva son otorgadas en los 4 primeros depositos de la siguiente manera:
100% del primer deposito hasta €450 + 30 giros gratis
100% del segundo deposito hasta €350 + 35 giros gratis
100% del tercer deposito hasta €400 + 40 giros gratis
100% del cuarto deposito hasta €450 + 45 giros gratis
Bono de bienvenida 1xSlots Argentina 2024
Cabe resaltar que durante tu proceso de registro tienes que elegir tu moneda local preferida. De este modo obtendras la bonificacion de bienvenida 1xSlots Argentina en pesos. Puedes recibir el bono exclusivo 1xSlots Argentina al utilizar nuestro codigo de bono 1xSlots Argentina NEXT777 durante el proceso de registro.
Ademas, si ingresas el codigo NEXT777 a la pestana “Bonos y Regalos” despues de hacer tu primer deposito, puedes recibir el bono con giros gratis 1xSlots Argentina que te otorgara 60 FS en tragamonedas 777 GEMS RESPIN. A continuacion encontraras los valores de bonos en pesos argentinos.
Bono de bienvenida 1xSlots Chile 2024
El bono de bienvenida 1xSlots Chile funciona del mismo modo como en Argentina. Tienes que crear tu cuenta e ingresar nuestro Lista de codigos promocionales de 1xslots Chile NEXT777 al formulario de registro. Puedes elegir el peso chileno como tu moneda local para recibir la bonificacion de bienvenida 1xSlots Chile. Adicionalmente, para obtener 60 giros gratis en 777 GEMS RESPIN, introduce el codigo NEXT777 al hacer tu primer deposito.
?QUE ES UN BONO DE TRAGAPERRAS SIN DEPOSITO?
Como su nombre indica, un bono de tragaperras sin deposito es un tipo de bono de casino que no necesita que los jugadores depositen dinero para poder optar a cualquier tipo de recompensa. Por ejemplo, giros gratis, creditos de casino o incluso dinero en efectivo.
Los bonos sin deposito se dan generalmente a los jugadores potenciales para motivar a los nuevos jugadores para que se registren. Pueden formar parte de los paquetes de bienvenida que un casino online ofrece a todos sus jugadores potenciales y ayudan a atraer la atencion hacia la marca del casino. Tambien pueden ofrecerse a los jugadores con cuentas en determinadas situaciones.
Las tragaperras con bono sin deposito ofrecen la posibilidad de probar las tragaperras online sin coste alguno y quedandose con el dinero que se obtiene, razon por la que son muy codiciadas. Sin embargo, los bonos sin deposito no te obligan a depositar dinero cuando la promocion termina, aunque se sugiere.
?CUALES SON LOS PRINCIPALES TIPOS DE BONOS DE TRAGAMONEDAS SIN DEPOSITO?
Los bonos sin deposito estan disponibles en tres variedades: giros gratis, creditos gratis o dinero en efectivo. El tipo mas conocido que es un bono sin deposito no spins without deposit bonus.
GIROS GRATIS CON BONO SIN DEPOSITO
Todos sabemos que las maquinas tragaperras son las mas populares en el mundo de los juegos de casino , por lo que es natural que un bono hecho especificamente para las maquinas que juegan a las tragaperras sea el mas buscado. Para los amantes de las maquinas tragaperras, los bonos de tiradas gratis sin deposito son un verdadero tesoro, ya que permiten a los jugadores jugar a sus maquinas tragaperras favoritas sin depositar dinero, y con una gran cantidad de tiradas gratis, lo que aumenta sus probabilidades de ganar significativamente.
Creditos gratuitos / BONO DE JUEGO GRATUITO SIN DEPOSITO
En lugar de tiradas gratis, los casinos pueden optar por dar creditos gratis a los jugadores que tienen bonos sin deposito. Estos creditos pueden ser utilizados dentro de un periodo de tiempo enumerado para apostar en juegos en los casinos y ganar dinero real. Los bonos sin deposito y los creditos gratuitos se ofrecen tanto en las tragaperras gratuitas como en otros juegos de los casinos.
DINERO GRATIS CON BONOS SIN DEPOSITO
Al igual que los creditos gratuitos con los bonos sin deposito, los bonos de dinero sin deposito que no requieren deposito se pueden jugar tanto en las tragaperras como en otros juegos de casino. Una vez que haya reclamado y jugado el bono de dinero sin deposito, podra retirar el dinero del bono y cualquier ganancia adicional siempre que cumpla las condiciones para retirar el dinero.
?Como puedo reclamar un bono sin deposito?
En la mayoria de los casos, puede hacer uso de los bonos sin deposito al crear una cuenta en cualquier sitio de juego en linea que ofrezca este tipo de oferta. En la version online del casino, la bonificacion puede aparecer en la pagina de promociones del casino o en una ventana emergente. Algunos casinos requieren que introduzca un codigo promocional para acceder al bono.
Cuando considere reclamar un bono sin deposito (o cualquier otro tipo de bono) debe asegurarse de leer los terminos y condiciones que se adjuntan al bono. Los diferentes casinos pueden tener sus propias regulaciones y limites, sin embargo, hay algunos que son iguales en todos los casinos.
REQUISITOS PARA TRABAJAR
Los bonos sobre los depositos son accesibles para todos, sin embargo, cobrar los bonos es un asunto un poco mas controlado. La mayoria de los casinos en linea le permitiran retirar sus ganancias despues de haber podido apostar una cantidad especifica.
Los requisitos de apuesta se muestran como multiplicadores. Representan la cantidad de veces que tienes que apostar en un bono para poder retirar el dinero. Por lo general, puede jugar a una serie de juegos seleccionados por el operador del casino. Una vez que haya alcanzado el requisito de apuesta, podra dar el siguiente paso para cobrar su bono.
PLAZO
Segun el casino online, el bono para juegos de tragaperras de deposito puede caducar en cuestion de dias o durar hasta 30 dias. Para asegurarte de que cumples los requisitos de apuestas, es posible que tengas que planificar tu rutina de juego a lo largo del bono.
TAMANOS DE APUESTA
Un metodo para lograr su objetivo de apostar mas rapido es realizar la mayor cantidad de apuestas posible en cada juego. Es un metodo sensato, a menos que el operador del casino decida controlar la cantidad de la apuesta y limitar la cantidad de apuestas en la respectiva tragamonedas con bono sin deposito.
SE REQUIERE UN DEPOSITO
Aunque suene contradictorio, algunos casinos online pueden incluso exigir a los jugadores que depositen dinero antes de poder retirar su bono. Suelen anadir este requisito adicional por razones de seguridad.
RESTRICCIONES
A veces, se le puede negar el acceso a un bono con oferta de deposito gratuito. Esto solo ocurre en muy raras circunstancias, ya sea por el hecho de haber intentado dos bonos a la vez o por tener una direccion IP compartida con un jugador que tambien reclamo el mismo bono, o por residir en una zona restringida.
Puedes obtener informacion mas detallada leyendo el articulo completo en este enlace – https://tecnoaldia.net/pag/?codigo_promocional_1xslots_bono.html
cululutata
EL CODIGO PROMOCIONAL DE 1XSLOTS CASINO
Sin introducir un codigo promocional 1xSlots Casino, como nuevo cliente en March 2024, puede beneficiarse de una bonificacion del 100% hasta 300€. El casino le proporciona un monton de maquinas tragaperras populares de proveedores de software como iSoftBet, Elk Studios o Play’n GO y otros. De forma adicional, se le otorgaran|esta oferta incluye 30 turnos gratuitos.. Todas las informaciones importantes respecto a esta oferta de bienvenida se puede encontrar en este articulo.
?COMO FUNCIONA EL CODIGO PROMOCIONAL DE 1XSLOTS CASINO?
En 1xSlots Casino se puede obtener una bonificacion del 100% hasta 300€ y turnos gratuitos en 1xSlots Casino. Haga su inicial deposito en 1xSlots Casino tras finalizar el proceso de inscripcion. No hace falta solicitar su bonificacion de bienvenida por e-mail ni el chat en directo como en otros casinos, porque 1xSlots Casino la abona a su cuenta automaticamente. La oferta de bienvenida se activa cuando deposite 10€ o mas. Haga un deposito empleando EcoPayz, Boku o Bitcoin u otro metodo de deposito disponible en el casino.
Mas sobre el bono
1xSlots Casino le da la oportunidad de incrementar su balance hasta 300€ (100%). Obtenga la bonificacion superior al depositar 300€ y conseguir 600€ que se anadiran en su cuenta. Los fondos de su bonificacion es compatible con tragaperras de proveedores de software como Red Tiger Gaming, Evolution Gaming y Microgaming, por nombrar unos cuantos. Debe tenerse en cuenta tambien que su cuenta se incrementara con 30 turnos gratuitos.
Bono de bienvenida 1xSlots 2024
Dentro de 1xSlots existen dos bonos de bienvenida, uno standard y uno exclusivo. El primero de ellas recompensa con un paquete de hasta €1500 y 150 giros gratis mientras que el segundo otorga un 10% adicional recompensando hasta €1650 y 150 giros gratis ?La diferencia? El bono exclusivo se obtiene mediante el uso del 1xSlots promocode NEXT777.
Las recompensas de la bonificacion exclusiva son otorgadas en los 4 primeros depositos de la siguiente manera:
100% del primer deposito hasta €450 + 30 giros gratis
100% del segundo deposito hasta €350 + 35 giros gratis
100% del tercer deposito hasta €400 + 40 giros gratis
100% del cuarto deposito hasta €450 + 45 giros gratis
Bono de bienvenida 1xSlots Argentina 2024
Cabe resaltar que durante tu proceso de registro tienes que elegir tu moneda local preferida. De este modo obtendras la bonificacion de bienvenida 1xSlots Argentina en pesos. Puedes recibir el bono exclusivo 1xSlots Argentina al utilizar nuestro codigo de bono 1xSlots Argentina NEXT777 durante el proceso de registro.
Ademas, si ingresas el codigo NEXT777 a la pestana “Bonos y Regalos” despues de hacer tu primer deposito, puedes recibir el bono con giros gratis 1xSlots Argentina que te otorgara 60 FS en tragamonedas 777 GEMS RESPIN. A continuacion encontraras los valores de bonos en pesos argentinos.
Bono de bienvenida 1xSlots Chile 2024
El bono de bienvenida 1xSlots Chile funciona del mismo modo como en Argentina. Tienes que crear tu cuenta e ingresar nuestro codigo promocional 1xslots Chile NEXT777 al formulario de registro. Puedes elegir el peso chileno como tu moneda local para recibir la bonificacion de bienvenida 1xSlots Chile. Adicionalmente, para obtener 60 giros gratis en 777 GEMS RESPIN, introduce el codigo NEXT777 al hacer tu primer deposito.
?QUE ES UN BONO DE TRAGAPERRAS SIN DEPOSITO?
Como su nombre indica, un bono de tragaperras sin deposito es un tipo de bono de casino que no necesita que los jugadores depositen dinero para poder optar a cualquier tipo de recompensa. Por ejemplo, giros gratis, creditos de casino o incluso dinero en efectivo.
Los bonos sin deposito se dan generalmente a los jugadores potenciales para motivar a los nuevos jugadores para que se registren. Pueden formar parte de los paquetes de bienvenida que un casino online ofrece a todos sus jugadores potenciales y ayudan a atraer la atencion hacia la marca del casino. Tambien pueden ofrecerse a los jugadores con cuentas en determinadas situaciones.
Las tragaperras con bono sin deposito ofrecen la posibilidad de probar las tragaperras online sin coste alguno y quedandose con el dinero que se obtiene, razon por la que son muy codiciadas. Sin embargo, los bonos sin deposito no te obligan a depositar dinero cuando la promocion termina, aunque se sugiere.
?CUALES SON LOS PRINCIPALES TIPOS DE BONOS DE TRAGAMONEDAS SIN DEPOSITO?
Los bonos sin deposito estan disponibles en tres variedades: giros gratis, creditos gratis o dinero en efectivo. El tipo mas conocido que es un bono sin deposito no spins without deposit bonus.
GIROS GRATIS CON BONO SIN DEPOSITO
Todos sabemos que las maquinas tragaperras son las mas populares en el mundo de los juegos de casino , por lo que es natural que un bono hecho especificamente para las maquinas que juegan a las tragaperras sea el mas buscado. Para los amantes de las maquinas tragaperras, los bonos de tiradas gratis sin deposito son un verdadero tesoro, ya que permiten a los jugadores jugar a sus maquinas tragaperras favoritas sin depositar dinero, y con una gran cantidad de tiradas gratis, lo que aumenta sus probabilidades de ganar significativamente.
Creditos gratuitos / BONO DE JUEGO GRATUITO SIN DEPOSITO
En lugar de tiradas gratis, los casinos pueden optar por dar creditos gratis a los jugadores que tienen bonos sin deposito. Estos creditos pueden ser utilizados dentro de un periodo de tiempo enumerado para apostar en juegos en los casinos y ganar dinero real. Los bonos sin deposito y los creditos gratuitos se ofrecen tanto en las tragaperras gratuitas como en otros juegos de los casinos.
DINERO GRATIS CON BONOS SIN DEPOSITO
Al igual que los creditos gratuitos con los bonos sin deposito, los bonos de dinero sin deposito que no requieren deposito se pueden jugar tanto en las tragaperras como en otros juegos de casino. Una vez que haya reclamado y jugado el bono de dinero sin deposito, podra retirar el dinero del bono y cualquier ganancia adicional siempre que cumpla las condiciones para retirar el dinero.
?Como puedo reclamar un bono sin deposito?
En la mayoria de los casos, puede hacer uso de los bonos sin deposito al crear una cuenta en cualquier sitio de juego en linea que ofrezca este tipo de oferta. En la version online del casino, la bonificacion puede aparecer en la pagina de promociones del casino o en una ventana emergente. Algunos casinos requieren que introduzca un codigo promocional para acceder al bono.
Cuando considere reclamar un bono sin deposito (o cualquier otro tipo de bono) debe asegurarse de leer los terminos y condiciones que se adjuntan al bono. Los diferentes casinos pueden tener sus propias regulaciones y limites, sin embargo, hay algunos que son iguales en todos los casinos.
REQUISITOS PARA TRABAJAR
Los bonos sobre los depositos son accesibles para todos, sin embargo, cobrar los bonos es un asunto un poco mas controlado. La mayoria de los casinos en linea le permitiran retirar sus ganancias despues de haber podido apostar una cantidad especifica.
Los requisitos de apuesta se muestran como multiplicadores. Representan la cantidad de veces que tienes que apostar en un bono para poder retirar el dinero. Por lo general, puede jugar a una serie de juegos seleccionados por el operador del casino. Una vez que haya alcanzado el requisito de apuesta, podra dar el siguiente paso para cobrar su bono.
PLAZO
Segun el casino online, el bono para juegos de tragaperras de deposito puede caducar en cuestion de dias o durar hasta 30 dias. Para asegurarte de que cumples los requisitos de apuestas, es posible que tengas que planificar tu rutina de juego a lo largo del bono.
TAMANOS DE APUESTA
Un metodo para lograr su objetivo de apostar mas rapido es realizar la mayor cantidad de apuestas posible en cada juego. Es un metodo sensato, a menos que el operador del casino decida controlar la cantidad de la apuesta y limitar la cantidad de apuestas en la respectiva tragamonedas con bono sin deposito.
SE REQUIERE UN DEPOSITO
Aunque suene contradictorio, algunos casinos online pueden incluso exigir a los jugadores que depositen dinero antes de poder retirar su bono. Suelen anadir este requisito adicional por razones de seguridad.
RESTRICCIONES
A veces, se le puede negar el acceso a un bono con oferta de deposito gratuito. Esto solo ocurre en muy raras circunstancias, ya sea por el hecho de haber intentado dos bonos a la vez o por tener una direccion IP compartida con un jugador que tambien reclamo el mismo bono, o por residir en una zona restringida.
Puedes obtener informacion mas detallada leyendo el articulo completo en este enlace – https://tecnoaldia.net/pag/?codigo_promocional_1xslots_bono.html
bluatblaaotuy
Купить диплом в Рязани недорого – с доставкой по регионах, по приятной цене, без предоплаты http://diploms-service.com/diplomy-po-gorodam/moskva/moskovskij-bankovskij-institut
בילוי מושלם הכולל אבזור מלא נקי ואיכותי: כיבוד קל או אם תרצה להזמין ארוחה ( בהתעכבויות מיותרות. כמו כן האתר מציע לכם את הבנות היפות והשוות ביותר שתוכלו לדמיין מה גם שהכל אמיתי ומאומת ע”י האתר בצורה קפדנית ודיסקרטי. ככה אפשר להביא לפנטזיות הרטובות ביותר נערות ליווי בראשון לציון
blolbo
נקודה בעיר השוכנת לחופו המדהים והשוקק חיים של מפרץ אילת דיסקרטיות בבאר שבע דירות דיסקרטיות בבאר שבע זו כבר לא תופעה חולפת והדירות מהוות פנינת העיר. דירה דיסקרטית בבאר שבע הינה אטרקציה השבוע ובכל שעה במהלך היום. כל עיסוי ארוטי יהיה בקרבת דירה דיסקרטית מספרים של זונות
Gogo Casino är ett populärt casinospel på nätet som erbjuder en rad spännande spel och möjligheter att vinna stora summor pengar. Ett av de viktigaste aspekterna när det kommer till att spela på online casinon är möjligheten att göra snabba och smidiga uttag av sina vinster.
Uttagen på Gogo Casino sker vanligtvis på ett effektivt sätt, vilket ger spelarna en bra spelupplevelse utan onödiga fördröjningar. För att göra ett uttag på Gogo Casino behöver spelarna först logga in på sitt spelkonto och gå till uttagssektionen. Där kan de välja sin önskade uttagsmetod, som kan vara banköverföring, e-plånbok eller annan betalningsmetod.
När spelaren har valt sin önskade uttagsmetod behöver de fylla i de nödvändiga uppgifterna och bekräfta uttaget. Uttag på Gogo Casino bearbetas vanligtvis inom några timmar, men det kan ta upp till flera bankdagar beroende på vilken uttagsmetod som används.
Det är viktigt att notera att Gogo Casino kan komma att begära dokumentation för att bekräfta spelarens identitet innan de kan behandla ett uttag. Detta är en vanlig säkerhetsåtgärd som casinon använder för att försäkra sig om att transaktionerna är säkra och trygga.
Sammanfattningsvis kan det sägas att uttag på Gogo Casino vanligtvis sker på ett effektivt sätt, vilket ger spelarna en bra spelupplevelse. Genom att följa casinots uttagsinstruktioner och vara beredd att ge nödvändig dokumentation kan spelare njuta av att snabbt få tillgång till sina vinster.
https://gogocasino.one
בלתי נשכח. בפורטלים שלנו , הבנות נבחרו בקפידה רבה, תוך שימת שמתורגמת לכל השפות שיש והכל בלחיצת כפתור אין לך למה להסס פשוט היכנס עכשיו אקס פיינדר זו המערכת המתקדמת ביותר שיש בעולם האתר הממתינות לכם בדירה ושיפנקו אותך בשירותי ליווי לעיסוי מיוחדים ומענגים עד עיסוי אירוטי לזוגות
בהתאם לסוגי השירות שהן נותנות. אם אתם מטבחון עם פינת שתייה חמה. אז למה אתם מחכים? היכנסו כבר עכשיו ותבחרו מתוך מבחר ענק של דירות דיסקרטיות באשקלון ודירות דיסקרטיות אליה. כל מודעה ומודעה מאומת ומתעדכנת מידי יום ע”י צוות מומחים שעובד על האתר הכל נבדק ביסודיות דירות דיסקרטיות בבאר שבע
Good Day
This is Mike Audley
Let me show you our latest research results from our constant SEO feedbacks that we have from our plans:
https://www.strictlydigital.net/product/semrush-backlinks/
The new Semrush Backlinks, which will make your howcrafts.co SEO trend have an immediate push.
The method is actually very simple, we are building links from domains that have a high number of keywords ranking for them.
Forget about the SEO metrics or any other factors that so many tools try to teach you that is good. The most valuable link is the one that comes from a website that has a healthy trend and lots of ranking keywords.
We thought about that, so we have built this plan for you
Check in detail here:
https://www.strictlydigital.net/product/semrush-backlinks/
Cheap and effective
Try it anytime soon
Regards
Mike Audley
mi**@st*************.net
Gogo Casino välkomstbonus är ett generöst erbjudande för alla nya spelare som registrerar sig på denna online casino plattform. Med en välkomstbonus kan spelare få en extra boost i början av sin spelupplevelse och ha möjlighet att utforska olika spel och vinna stora priser.
För att ta del av Gogo Casino välkomstbonus behöver spelaren först registrera sig på plattformen och göra en insättning. Vanligtvis erbjuds en insättningsbonus som ger spelaren extra pengar att spela för. Detta kan öka spelarens chanser att vinna samt ge dem möjlighet att prova nya spel utan att behöva riskera sina egna pengar.
Det är viktigt att läsa villkoren och reglerna för välkomstbonusen för att förstå hur den fungerar och vilka krav som måste uppfyllas för att kunna ta ut eventuella vinster. Ofta finns det omsättningskrav som innebär att spelaren måste satsa en viss summa pengar innan de kan ta ut sina vinster.
Gogo Casino välkomstbonus är en fantastisk möjlighet för nya spelare att komma igång på plattformen och uppleva spänningen av online casinospel. Med extra pengar att spela för kan spelare prova olika spel och öka sina chanser att vinna stora priser. Så om du är sugen på lite spänning och vill prova lyckan på ett online casino, ta del av Gogo Casino välkomstbonus idag!
https://gogocasino.one
scam
1249742
I’ve been browsing online more than 3 hours today, yet I never found any interesting article like yours. It’s pretty worth enough for me. In my opinion, if all website owners and bloggers made good content as you did, the internet will be much more useful than ever before.
I will right away take hold of your rss as I can not in finding your e-mail subscription hyperlink or e-newsletter service. Do you have any? Please let me realize so that I may subscribe. Thanks.
https://sinee-nebo-golova.com
1249742
bliblibli
Официальный сайт 1Вин казино предлагает лицензионные игры с высокой отдачей, но для захода требуется найти зеркало 1win casino 1Вин казино
https://caucasushistory.ru/2618-6772/comment/view/1391/0/736
1SS3D249742
blublabla
https://vizi.vn/read-blog/47415
synthesis a-pvp
Поверка счетчика воды: основная информация для потребителей
поверка водосчетчиков на дому [url=https://www.poverka-shetchikov-vodi.ru]https://www.poverka-shetchikov-vodi.ru[/url] .
cululutata
124SDS9742
blublabla
Готовим еду в духовке: ароматные блюда для особенных случаев
домашние блюда http://www.dishes1.ru/ .
Ремонт ноутбуков Lenovo любой сложности: от замены клавиатуры до переустановки системы. Обращайтесь в https://servisnyjcentr-lenovo.ru/.
сервисный центр леново в москве
замена видеокарты на ноутбуке lenovo
замена корпуса ноутбука lenovo
ремонт lenovo
Your article helped me a lot, is there any more related content? Thanks!
Henkuai y Marca Espanahan organizado la visita de los diez influencers chinos mas importantes a Espana con el objetivo de promocionar el pais. Estos acumulan entre todos mas de 30 millones de seguidores y abarcan campos muy diferentes https://www.libremercado.com/2015-12-13/china-para-pymes-lo-que-debe-saber-para-entrar-en-el-mayor-mercado-del-mundo-1276563641/
bliloblo
Vidalista 20 – This is a quality product for men who want to increase their masculine abilities in intimate life effectively and safely kaufen vidalista 80
I have been browsing online more than 3 hours today, yet I never found any interesting article like yours. It is pretty worth enough for me. Personally, if all site owners and bloggers made good content as you did, the web will be a lot more useful than ever before.
I’ll right away grasp your rss feed as I can not to find your e-mail subscription hyperlink or e-newsletter service. Do you have any? Please allow me recognise in order that I may subscribe. Thanks.
https://sinee3f0w-nebo1z1a-golova8e6e.com
Can you be more specific about the content of your article? After reading it, I still have some doubts. Hope you can help me.
Завод из России предлагает силовые тренажеры https://trenazher-silovoj.ru/ для напряженной работы в коммерческих тренажерных залах.
Посмотрите каталог интернет-магазина выпускаемых аппаратов блочных и на свободных весах.
Все модели дают возможность укреплять направленно любые мышечные отделы.
Рассматривайте тренажер для плечей, Гакк тренажер, многофункциональный Кроссовер, Баттерфляй для грудных, машину Смита, вертикально-горизонтальную тягу, скамью Скотта, Гравитрон, обратную гиперэкстензию, атлетические скамьи, устройства Хаммер.
Каждый станок предназначен для атлетов с разным порогом физической подготовки.
Изготавливаемое оборудование полностью безопасно и не нуждается в специальном наблюдении.
Оформите весовой стек нужной массы.
blibliblu
cululutata
וניתן למצוא זאת בפיזור רחב. למשל, שירותי ליווי בתל אביב, שירותי ליווי ברמת גן, שירותי פרטיות ושוות במיוחד שזמינות כרגע באזורך. מה יותר מתאים ממפגש לוהט וסוחף יצרים עם נערות ליווי בחולון-בת ים. באווירה רומנטית מאוד ומהמדוייקות שיש לגבי כל דירה דיסקרטית או דירה דיסקרטית בחיפה והצפון – רחוק מלהיות משמעם
Ремонт квартиры или постройка дома своими руками
Источник: https://stroj-sam.ru
Требуется химчистка мягкой мебели в Челябинске? Мы гарантируем качественный результат и заботливый подход к вашей мебели. https://klining-chelyabinsk-1.ru/
Букмекерская компания Мостбет является ведущим игроком не только на рынке России, но и в других странах, включая Казахстан, Узбекистан, Азербайджан, Киргизию и многие другие. Легальный статус компании гарантирует честную и безопасную игру mostbet
Опираясь на ретро-футуристическое очарование вселенной Fallout, сериал отражает суть эпохи, характеризующейся смесью оптимизма и отчаяния. Когда персонажи сталкиваются с моральными трудностями и ужасами постапокалиптической дикой природы, они отправляются в путешествие самопознания, формируя связи и сражаясь с противниками, в поисках искупления и смысла в разрушенном мире Фоллаут 1 серия смотреть онлайн
https://kredit-zaym.ru/
phising
lost money
lost money
lost money
bluatblaaotuy
https://www.libertaddigital.com/chic/entretenimiento/2016-09-21/fan-bingbing-las-increibles-cifras-alrededor-de-la-mayor-estrella-china-1276582941/
blobloblu
пляжи Сицилии или Популярный сувенир с солнечного Эквадора
Интересные места
https://samoylovaoxana.ru/tag/krasnodarskij-kraj/
Ещё можно узнать: как узнать серийный номер ноутбука msi
Горные туры
https://diplom-sdan.ru/
Купить травматическое оружие, пистолет или револьвер – выбор за вами, у нас лучшие цены и популярные модели всегда в наличии! Наша жизнь полна скрытых угроз и опасностей Травмат пм купить
EL CODIGO PROMOCIONAL DE 1XSLOTS CASINO
Sin introducir un codigo promocional 1xSlots Casino, como nuevo cliente en March 2024, puede beneficiarse de una bonificacion del 100% hasta 300€. El casino le proporciona un monton de maquinas tragaperras populares de proveedores de software como iSoftBet, Elk Studios o Play’n GO y otros. De forma adicional, se le otorgaran|esta oferta incluye 30 turnos gratuitos.. Todas las informaciones importantes respecto a esta oferta de bienvenida se puede encontrar en este articulo.
?COMO FUNCIONA EL CODIGO PROMOCIONAL DE 1XSLOTS CASINO?
En 1xSlots Casino se puede obtener una bonificacion del 100% hasta 300€ y turnos gratuitos en 1xSlots Casino. Haga su inicial deposito en 1xSlots Casino tras finalizar el proceso de inscripcion. No hace falta solicitar su bonificacion de bienvenida por e-mail ni el chat en directo como en otros casinos, porque 1xSlots Casino la abona a su cuenta automaticamente. La oferta de bienvenida se activa cuando deposite 10€ o mas. Haga un deposito empleando EcoPayz, Boku o Bitcoin u otro metodo de deposito disponible en el casino.
Mas sobre el bono
1xSlots Casino le da la oportunidad de incrementar su balance hasta 300€ (100%). Obtenga la bonificacion superior al depositar 300€ y conseguir 600€ que se anadiran en su cuenta. Los fondos de su bonificacion es compatible con tragaperras de proveedores de software como Red Tiger Gaming, Evolution Gaming y Microgaming, por nombrar unos cuantos. Debe tenerse en cuenta tambien que su cuenta se incrementara con 30 turnos gratuitos.
Bono de bienvenida 1xSlots 2024
Dentro de 1xSlots existen dos bonos de bienvenida, uno standard y uno exclusivo. El primero de ellas recompensa con un paquete de hasta €1500 y 150 giros gratis mientras que el segundo otorga un 10% adicional recompensando hasta €1650 y 150 giros gratis ?La diferencia? El bono exclusivo se obtiene mediante el uso del 1xSlots promocode NEXT777.
Las recompensas de la bonificacion exclusiva son otorgadas en los 4 primeros depositos de la siguiente manera:
100% del primer deposito hasta €450 + 30 giros gratis
100% del segundo deposito hasta €350 + 35 giros gratis
100% del tercer deposito hasta €400 + 40 giros gratis
100% del cuarto deposito hasta €450 + 45 giros gratis
Bono de bienvenida 1xSlots Argentina 2024
Cabe resaltar que durante tu proceso de registro tienes que elegir tu moneda local preferida. De este modo obtendras la bonificacion de bienvenida 1xSlots Argentina en pesos. Puedes recibir el bono exclusivo 1xSlots Argentina al utilizar nuestro codigo de bono 1xSlots Argentina NEXT777 durante el proceso de registro.
Ademas, si ingresas el codigo NEXT777 a la pestana “Bonos y Regalos” despues de hacer tu primer deposito, puedes recibir el bono con giros gratis 1xSlots Argentina que te otorgara 60 FS en tragamonedas 777 GEMS RESPIN. A continuacion encontraras los valores de bonos en pesos argentinos.
Bono de bienvenida 1xSlots Chile 2024
El bono de bienvenida 1xSlots Chile funciona del mismo modo como en Argentina. Tienes que crear tu cuenta e ingresar nuestro codigo promocional de casino xslots Chile NEXT777 al formulario de registro. Puedes elegir el peso chileno como tu moneda local para recibir la bonificacion de bienvenida 1xSlots Chile. Adicionalmente, para obtener 60 giros gratis en 777 GEMS RESPIN, introduce el codigo NEXT777 al hacer tu primer deposito.
?QUE ES UN BONO DE TRAGAPERRAS SIN DEPOSITO?
Como su nombre indica, un bono de tragaperras sin deposito es un tipo de bono de casino que no necesita que los jugadores depositen dinero para poder optar a cualquier tipo de recompensa. Por ejemplo, giros gratis, creditos de casino o incluso dinero en efectivo.
Los bonos sin deposito se dan generalmente a los jugadores potenciales para motivar a los nuevos jugadores para que se registren. Pueden formar parte de los paquetes de bienvenida que un casino online ofrece a todos sus jugadores potenciales y ayudan a atraer la atencion hacia la marca del casino. Tambien pueden ofrecerse a los jugadores con cuentas en determinadas situaciones.
Las tragaperras con bono sin deposito ofrecen la posibilidad de probar las tragaperras online sin coste alguno y quedandose con el dinero que se obtiene, razon por la que son muy codiciadas. Sin embargo, los bonos sin deposito no te obligan a depositar dinero cuando la promocion termina, aunque se sugiere.
?CUALES SON LOS PRINCIPALES TIPOS DE BONOS DE TRAGAMONEDAS SIN DEPOSITO?
Los bonos sin deposito estan disponibles en tres variedades: giros gratis, creditos gratis o dinero en efectivo. El tipo mas conocido que es un bono sin deposito no spins without deposit bonus.
GIROS GRATIS CON BONO SIN DEPOSITO
Todos sabemos que las maquinas tragaperras son las mas populares en el mundo de los juegos de casino , por lo que es natural que un bono hecho especificamente para las maquinas que juegan a las tragaperras sea el mas buscado. Para los amantes de las maquinas tragaperras, los bonos de tiradas gratis sin deposito son un verdadero tesoro, ya que permiten a los jugadores jugar a sus maquinas tragaperras favoritas sin depositar dinero, y con una gran cantidad de tiradas gratis, lo que aumenta sus probabilidades de ganar significativamente.
Creditos gratuitos / BONO DE JUEGO GRATUITO SIN DEPOSITO
En lugar de tiradas gratis, los casinos pueden optar por dar creditos gratis a los jugadores que tienen bonos sin deposito. Estos creditos pueden ser utilizados dentro de un periodo de tiempo enumerado para apostar en juegos en los casinos y ganar dinero real. Los bonos sin deposito y los creditos gratuitos se ofrecen tanto en las tragaperras gratuitas como en otros juegos de los casinos.
DINERO GRATIS CON BONOS SIN DEPOSITO
Al igual que los creditos gratuitos con los bonos sin deposito, los bonos de dinero sin deposito que no requieren deposito se pueden jugar tanto en las tragaperras como en otros juegos de casino. Una vez que haya reclamado y jugado el bono de dinero sin deposito, podra retirar el dinero del bono y cualquier ganancia adicional siempre que cumpla las condiciones para retirar el dinero.
?Como puedo reclamar un bono sin deposito?
En la mayoria de los casos, puede hacer uso de los bonos sin deposito al crear una cuenta en cualquier sitio de juego en linea que ofrezca este tipo de oferta. En la version online del casino, la bonificacion puede aparecer en la pagina de promociones del casino o en una ventana emergente. Algunos casinos requieren que introduzca un codigo promocional para acceder al bono.
Cuando considere reclamar un bono sin deposito (o cualquier otro tipo de bono) debe asegurarse de leer los terminos y condiciones que se adjuntan al bono. Los diferentes casinos pueden tener sus propias regulaciones y limites, sin embargo, hay algunos que son iguales en todos los casinos.
REQUISITOS PARA TRABAJAR
Los bonos sobre los depositos son accesibles para todos, sin embargo, cobrar los bonos es un asunto un poco mas controlado. La mayoria de los casinos en linea le permitiran retirar sus ganancias despues de haber podido apostar una cantidad especifica.
Los requisitos de apuesta se muestran como multiplicadores. Representan la cantidad de veces que tienes que apostar en un bono para poder retirar el dinero. Por lo general, puede jugar a una serie de juegos seleccionados por el operador del casino. Una vez que haya alcanzado el requisito de apuesta, podra dar el siguiente paso para cobrar su bono.
PLAZO
Segun el casino online, el bono para juegos de tragaperras de deposito puede caducar en cuestion de dias o durar hasta 30 dias. Para asegurarte de que cumples los requisitos de apuestas, es posible que tengas que planificar tu rutina de juego a lo largo del bono.
TAMANOS DE APUESTA
Un metodo para lograr su objetivo de apostar mas rapido es realizar la mayor cantidad de apuestas posible en cada juego. Es un metodo sensato, a menos que el operador del casino decida controlar la cantidad de la apuesta y limitar la cantidad de apuestas en la respectiva tragamonedas con bono sin deposito.
SE REQUIERE UN DEPOSITO
Aunque suene contradictorio, algunos casinos online pueden incluso exigir a los jugadores que depositen dinero antes de poder retirar su bono. Suelen anadir este requisito adicional por razones de seguridad.
RESTRICCIONES
A veces, se le puede negar el acceso a un bono con oferta de deposito gratuito. Esto solo ocurre en muy raras circunstancias, ya sea por el hecho de haber intentado dos bonos a la vez o por tener una direccion IP compartida con un jugador que tambien reclamo el mismo bono, o por residir en una zona restringida.
Puedes obtener informacion mas detallada leyendo el articulo completo en este enlace – https://www.joshhunt.com/news/codigo_promocional_1xslots_bono.html
blobloblu
lalablublu
Проверенный магазин, низкие цены на аккаунты с токенами, моментальная выдача купленного аккаунта, высокая репутация магазина. Купите один раз и будете нашим постоянным клиентом! Так-же занимаемся продвижением модельного аккаунта BongaCams токены bongacams
blibli
Промокод 1xbet на сегодня. Промокод на 2024-2024. На официальном сайте букмекерской конторы 1xbet появилась опция, которая позволяет “бесплатно” ознакомиться с функционалом сайта и при удачном стечении обстоятельств еще и выиграть некую сумму денежных средств. Теперь это стало доступно по специальному промокоду 1хБет. Он дает возможность получить до 32500? (100$). Актуальные промокоды 1xbet на сегодня: 1XFREE777. Рабочие промокоды 1XBet в 2024 Все промокоды для 1хбет бесплатно: при регистрации, на ставку (купон), на бонус, на сегодня. 1xBet — одна из самых известных компаний в сфере беттинга. Свою популярность контора заработала во многом благодаря большому количеству специальных предложений. Так, к примеру, каждый пользователь может воспользоваться одним из действующих промокодов 1xBet на сегодня бесплатно. Ознакомиться с их полным перечнем можно в данной статье – более подробно в этом материале https://mg-group74.ru/pages/1xbet.html
EL CODIGO PROMOCIONAL DE 1XSLOTS CASINO
Sin introducir un codigo promocional 1xSlots Casino, como nuevo cliente en March 2024, puede beneficiarse de una bonificacion del 100% hasta 300€. El casino le proporciona un monton de maquinas tragaperras populares de proveedores de software como iSoftBet, Elk Studios o Play’n GO y otros. De forma adicional, se le otorgaran|esta oferta incluye 30 turnos gratuitos.. Todas las informaciones importantes respecto a esta oferta de bienvenida se puede encontrar en este articulo.
?COMO FUNCIONA EL CODIGO PROMOCIONAL DE 1XSLOTS CASINO?
En 1xSlots Casino se puede obtener una bonificacion del 100% hasta 300€ y turnos gratuitos en 1xSlots Casino. Haga su inicial deposito en 1xSlots Casino tras finalizar el proceso de inscripcion. No hace falta solicitar su bonificacion de bienvenida por e-mail ni el chat en directo como en otros casinos, porque 1xSlots Casino la abona a su cuenta automaticamente. La oferta de bienvenida se activa cuando deposite 10€ o mas. Haga un deposito empleando EcoPayz, Boku o Bitcoin u otro metodo de deposito disponible en el casino.
Mas sobre el bono
1xSlots Casino le da la oportunidad de incrementar su balance hasta 300€ (100%). Obtenga la bonificacion superior al depositar 300€ y conseguir 600€ que se anadiran en su cuenta. Los fondos de su bonificacion es compatible con tragaperras de proveedores de software como Red Tiger Gaming, Evolution Gaming y Microgaming, por nombrar unos cuantos. Debe tenerse en cuenta tambien que su cuenta se incrementara con 30 turnos gratuitos.
Bono de bienvenida 1xSlots 2024
Dentro de 1xSlots existen dos bonos de bienvenida, uno standard y uno exclusivo. El primero de ellas recompensa con un paquete de hasta €1500 y 150 giros gratis mientras que el segundo otorga un 10% adicional recompensando hasta €1650 y 150 giros gratis ?La diferencia? El bono exclusivo se obtiene mediante el uso del 1xSlots promocode NEXT777.
Las recompensas de la bonificacion exclusiva son otorgadas en los 4 primeros depositos de la siguiente manera:
100% del primer deposito hasta €450 + 30 giros gratis
100% del segundo deposito hasta €350 + 35 giros gratis
100% del tercer deposito hasta €400 + 40 giros gratis
100% del cuarto deposito hasta €450 + 45 giros gratis
Bono de bienvenida 1xSlots Argentina 2024
Cabe resaltar que durante tu proceso de registro tienes que elegir tu moneda local preferida. De este modo obtendras la bonificacion de bienvenida 1xSlots Argentina en pesos. Puedes recibir el bono exclusivo 1xSlots Argentina al utilizar nuestro codigo de bono 1xSlots Argentina NEXT777 durante el proceso de registro.
Ademas, si ingresas el codigo NEXT777 a la pestana “Bonos y Regalos” despues de hacer tu primer deposito, puedes recibir el bono con giros gratis 1xSlots Argentina que te otorgara 60 FS en tragamonedas 777 GEMS RESPIN. A continuacion encontraras los valores de bonos en pesos argentinos.
Bono de bienvenida 1xSlots Chile 2024
El bono de bienvenida 1xSlots Chile funciona del mismo modo como en Argentina. Tienes que crear tu cuenta e ingresar nuestro codigos promocionales 1xslots Chile NEXT777 al formulario de registro. Puedes elegir el peso chileno como tu moneda local para recibir la bonificacion de bienvenida 1xSlots Chile. Adicionalmente, para obtener 60 giros gratis en 777 GEMS RESPIN, introduce el codigo NEXT777 al hacer tu primer deposito.
?QUE ES UN BONO DE TRAGAPERRAS SIN DEPOSITO?
Como su nombre indica, un bono de tragaperras sin deposito es un tipo de bono de casino que no necesita que los jugadores depositen dinero para poder optar a cualquier tipo de recompensa. Por ejemplo, giros gratis, creditos de casino o incluso dinero en efectivo.
Los bonos sin deposito se dan generalmente a los jugadores potenciales para motivar a los nuevos jugadores para que se registren. Pueden formar parte de los paquetes de bienvenida que un casino online ofrece a todos sus jugadores potenciales y ayudan a atraer la atencion hacia la marca del casino. Tambien pueden ofrecerse a los jugadores con cuentas en determinadas situaciones.
Las tragaperras con bono sin deposito ofrecen la posibilidad de probar las tragaperras online sin coste alguno y quedandose con el dinero que se obtiene, razon por la que son muy codiciadas. Sin embargo, los bonos sin deposito no te obligan a depositar dinero cuando la promocion termina, aunque se sugiere.
?CUALES SON LOS PRINCIPALES TIPOS DE BONOS DE TRAGAMONEDAS SIN DEPOSITO?
Los bonos sin deposito estan disponibles en tres variedades: giros gratis, creditos gratis o dinero en efectivo. El tipo mas conocido que es un bono sin deposito no spins without deposit bonus.
GIROS GRATIS CON BONO SIN DEPOSITO
Todos sabemos que las maquinas tragaperras son las mas populares en el mundo de los juegos de casino , por lo que es natural que un bono hecho especificamente para las maquinas que juegan a las tragaperras sea el mas buscado. Para los amantes de las maquinas tragaperras, los bonos de tiradas gratis sin deposito son un verdadero tesoro, ya que permiten a los jugadores jugar a sus maquinas tragaperras favoritas sin depositar dinero, y con una gran cantidad de tiradas gratis, lo que aumenta sus probabilidades de ganar significativamente.
Creditos gratuitos / BONO DE JUEGO GRATUITO SIN DEPOSITO
En lugar de tiradas gratis, los casinos pueden optar por dar creditos gratis a los jugadores que tienen bonos sin deposito. Estos creditos pueden ser utilizados dentro de un periodo de tiempo enumerado para apostar en juegos en los casinos y ganar dinero real. Los bonos sin deposito y los creditos gratuitos se ofrecen tanto en las tragaperras gratuitas como en otros juegos de los casinos.
DINERO GRATIS CON BONOS SIN DEPOSITO
Al igual que los creditos gratuitos con los bonos sin deposito, los bonos de dinero sin deposito que no requieren deposito se pueden jugar tanto en las tragaperras como en otros juegos de casino. Una vez que haya reclamado y jugado el bono de dinero sin deposito, podra retirar el dinero del bono y cualquier ganancia adicional siempre que cumpla las condiciones para retirar el dinero.
?Como puedo reclamar un bono sin deposito?
En la mayoria de los casos, puede hacer uso de los bonos sin deposito al crear una cuenta en cualquier sitio de juego en linea que ofrezca este tipo de oferta. En la version online del casino, la bonificacion puede aparecer en la pagina de promociones del casino o en una ventana emergente. Algunos casinos requieren que introduzca un codigo promocional para acceder al bono.
Cuando considere reclamar un bono sin deposito (o cualquier otro tipo de bono) debe asegurarse de leer los terminos y condiciones que se adjuntan al bono. Los diferentes casinos pueden tener sus propias regulaciones y limites, sin embargo, hay algunos que son iguales en todos los casinos.
REQUISITOS PARA TRABAJAR
Los bonos sobre los depositos son accesibles para todos, sin embargo, cobrar los bonos es un asunto un poco mas controlado. La mayoria de los casinos en linea le permitiran retirar sus ganancias despues de haber podido apostar una cantidad especifica.
Los requisitos de apuesta se muestran como multiplicadores. Representan la cantidad de veces que tienes que apostar en un bono para poder retirar el dinero. Por lo general, puede jugar a una serie de juegos seleccionados por el operador del casino. Una vez que haya alcanzado el requisito de apuesta, podra dar el siguiente paso para cobrar su bono.
PLAZO
Segun el casino online, el bono para juegos de tragaperras de deposito puede caducar en cuestion de dias o durar hasta 30 dias. Para asegurarte de que cumples los requisitos de apuestas, es posible que tengas que planificar tu rutina de juego a lo largo del bono.
TAMANOS DE APUESTA
Un metodo para lograr su objetivo de apostar mas rapido es realizar la mayor cantidad de apuestas posible en cada juego. Es un metodo sensato, a menos que el operador del casino decida controlar la cantidad de la apuesta y limitar la cantidad de apuestas en la respectiva tragamonedas con bono sin deposito.
SE REQUIERE UN DEPOSITO
Aunque suene contradictorio, algunos casinos online pueden incluso exigir a los jugadores que depositen dinero antes de poder retirar su bono. Suelen anadir este requisito adicional por razones de seguridad.
RESTRICCIONES
A veces, se le puede negar el acceso a un bono con oferta de deposito gratuito. Esto solo ocurre en muy raras circunstancias, ya sea por el hecho de haber intentado dos bonos a la vez o por tener una direccion IP compartida con un jugador que tambien reclamo el mismo bono, o por residir en una zona restringida.
Puedes obtener informacion mas detallada leyendo el articulo completo en este enlace – https://www.joshhunt.com/news/codigo_promocional_1xslots_bono.html
Покупка формы Юнармия через интернет-магазин или достопримечательности Бангладеш
этнографический комплекс Атамань
https://samoylovaoxana.ru/kurorty/
Ещё можно узнать: как поставить значок евро с клавиатуры
Дешевые авиабилеты
https://diplomnash.ru/
Дайвинг у побережья Танзании, остров Пемба или Национальный парк Флиндерс Чейз
Пейнтбол, в чем особенности популярной игры – Путешествие
https://samoylovaoxana.ru/tag/tury-v-phuket-czeny/
Ещё можно узнать: кровь cito что это
Романтические путешествия
Промокод 1xbet на сегодня. Промокод на 2024-2024. На официальном сайте букмекерской конторы 1xbet появилась опция, которая позволяет “бесплатно” ознакомиться с функционалом сайта и при удачном стечении обстоятельств еще и выиграть некую сумму денежных средств. Теперь это стало доступно по специальному промокоду 1хБет. Он дает возможность получить до 32500? (100$). Актуальные промокоды 1xbet на сегодня: 1XFREE777. Рабочие промокоды 1XBet в 2024 Все промокоды для 1хбет бесплатно: при регистрации, на ставку (купон), на бонус, на сегодня. 1xBet — одна из самых известных компаний в сфере беттинга. Свою популярность контора заработала во многом благодаря большому количеству специальных предложений. Так, к примеру, каждый пользователь может воспользоваться одним из действующих промокодов 1xBet на сегодня бесплатно. Ознакомиться с их полным перечнем можно в данной статье – более подробно в этом материале https://mg-group74.ru/pages/1xbet.html
The meal went without incident although a couple of times she had to avert her gaze from Dan for fear of bursting out laughing. Dan went up to his room saying he wanted to listen to music, he laid on his bed playing with himself waiting for his father to leave. He thought about the events of the last two weeks it had been the craziest time of his life.
He put it all down to Mary Harris, she had been his girlfriend for two years, he liked her a lot, she was pretty and intelligent two things that rarely combined in his experience, the problem was she steadfastly refused to let him put his cock inside her, he had thought he was getting somewhere when he took his cock out that evening in the cinema when she had finally allowed him to get his hand inside her panties, it was the first time she had allowed him to do any more than play with her tits. He had taken her hand and placed it on his erection, initially he had been pleased to hear her sharp intake of breath when she felt the size of him and he was encouraged when she began stroking him.
It was later that the problem started, he had her in the car park, they were kissing, her sweater was pushed up together with her bra and he was sucking on her nipples. He managed to get her laid across the front of one of the cars, his hand up her skirt, trying to pull down her panties. That was when she had stopped him.
https://www.cossa.ru/profile/?ID=238885
https://rentry.org/dudahdzo
http://www.nfomedia.com/profile?uid=rOiTakI
https://www.hentai-foundry.com/user/pharos19921975/profile
http://www.babelcube.com/user/tracy-schmeling-1
https://anotepad.com/notes/ccyxe4e7
https://hypophrenia19871950.micro.blog/about/
https://www.divephotoguide.com/user/leha551959
https://www.credly.com/users/daniel-austin.02ceaafa/badges
https://umm1956.micro.blog/about/
blublabla
https://kursovaya-student.ru/
1249742
bluatblaaotuy
иqiwi wallet – Банковские Аккаунты 24/7, electron
blibliblu
консультация банковское дело
http://adtvel.ru/
Еще немного про отдых на Кипре или здравница Ейск
святыни России с Макарским
https://samoylovaoxana.ru/kurorty/rf/
Ещё можно узнать: знак евро
Дешевые авиабилеты
услуги адвоката по строительству
prayertimein.com
https://breaking-bad-serial.online/
адреса ремонта телефонов
Турецкие сериалы для увидения турецких национальных праздников; Возможность увидеть турецкие национальные праздники турецкие сериалы про тайны времени
мастера по ремонту ноутбуков в москве
intel core i7-6700 https://cpu-specs.com/
каталог курсов ру
https://kursovaya-study.ru/
Pin Up Casino (Пин Ап) официальный сайт онлайн казино в Казахстане. На официальном сайте казино Пин Ап можно найти большой выбор лотоматов, которые позволяют игрокам играть в онлайн режиме и зарабатывать реальные деньги пин ап казино кз
this website https://blur-nft-marketplace.org/2023/02/14/exploring-the-advantages-and-obstacles-of-job-blurring-in-contemporary-careers/
phising
visit this site https://blur-nft-market.com/2023/11/10/why-dappradar-is-the-preferred-platform-for-nft-enthusiasts/
go to my blog https://trezorwallet-app.org/2022/06/06/advantages-of-employing-a-passphrase-alongside-your-trezor-seed-phrase/
my site https://tronlink.at/2023/11/13/comparing-tron-and-bitcoin-examining-the-major-distinctions-and-similarities-in-crypto/
go to this website https://trezor-wallet.at/2023/11/14/why-trezor-model-one-is-regarded-as-the-benchmark-for-cryptocurrency-hardware-wallets/
More Help https://debank.lu/2023/11/11/insights-and-implications-derived-from-analyzing-debanks-investors/
check my blog https://tronlink-app.org/2023/11/13/an-exclusive-glimpse-into-the-world-of-ben-armstrong-a-deep-dive-into-the-inner-workings-of-the-ben-armstrong-show/
blog here https://debank.at/2023/11/11/examining-debanks-collaborative-efforts-an-in-depth-analysis-of-the-platforms-strategic-partnerships/
https://kursovaya-pishu.ru/
https://kvartiruise.ru/
услуги по ремонту телефонов
Embark on an unforgettable water experience with our website, where you can rent marine luxury as well as hire boats and more. Explore countless listings from boat owners presenting a diverse range of watercraft, including premium vessels, sailboats, sailing vessels, water scooters and more. Whether you seek a high-end yacht for VIPs, a marine craft for angling for an outing on the water, or a festive vessel, our site can aid you in finding the ideal choice. With the option to hire a yacht with or without a captain, you can find the suitable one based on your preferences. https://boatrent.shop/ Enjoy the height of luxury with our VIP yacht charter or opt for an budget-friendly but memorable outing with our budget-friendly yacht booking. No matter your decision, our platform ensures hassle-free booking process, excellent service, and unforgettable experiences on the water. Start your adventure today and discover the thrill of hiring boats and vessels with us.
https://kvartiruless.ru/
Интересно: согласовать размещение вывески или согласование пилона
Может быть полезным: https://moscowsigns.ru или разрешение крышная конструкция
Ещё можно узнать:
лучшие отели
или
как обозначается доллар и евро буквами
продам дебетовую карту – банковские карты visa, Qonto Business ES
ремонт лифтовой электроники
Что говорят профессионалы
7. Как выбрать идеальную BMW для себя
x5 2023 bmw mx .
Самый популяырный скайп онлайн порно чат ты можешь провести незабываемые моменты и вкусить всё очарование страстного вебкам-секса в режиме онлайн с зацепившей тебя цыпочкой.
Более подробно ознакомиться с вебкам чатом можно тут – https://rt.livepornosexchat.com/
навес для дачи из поликарбоната
1. Все преимущества вождения BMW
bmw x6 2023 xm bmw .
Неприятный запах от вашего холодильника Whirlpool? Обратитесь в https://whirlpool-rem.ru/ – мы выявим причину и устраним ее.
посудомойка whirlpool ремонт
ремонт стиральных машин whirlpool в москве
посудомоечные машины вирпул ремонт
ремонт плит вирпул
שירותי הליווי בהתאם לצרכים שלכם ולבקשתכם תוך כבוד הדדי. בפורטל אקספיינדר, הפורטל הגדול במדינה למבוגרים בלבד, ריכזו עבורכם את והכל בלחיצת כפתור אין לך למה להסס פשוט היכנס עכשיו אקס פיינדר זו המערכת המתקדמת ביותר שיש בעולם האתר מופיע במספר מדינות מובילות דירות סקס בצפון
офіційний дилер бмв
Купить новый БМВ 2024 года в Украине по наихорошей цене у официознного дилера. Тест-драйв, хеджирование, кредитование, акции также спецпредложения.
http://www.avtosalonbmwftnz.dp.ua
Не поверите дочего пошел прогрес или идиотизм, уже нет не каких стеснений, это я про то что раньше такго не было, к примеру сейчас можно смотреть порно видео чат с девушкой онлайн где парень трахает свою жену и ведет видео трансляцию. Я вот лично не припомню чтоо такое раньше воспринималось обществом нормально, и не кто не осуждал. А вот сейчас я так понимаю что семейные пары не стесняются этого и любой из пользователей кто посетит их чат комнату может с ними общаться.
Более подробно ознакомиться с вебкам чатом можно тут – https://rt.livepornosexchat.com/
Вступайте в увлекательное приключение вместе с нами и отправляйтесь в мир радости и азарта the dog house на деньги Наши игры наполнены азартом и весельем, и каждый спин приносит удовольствие и шанс на крупный выигрыш.
Новые технологии для комфорта
20. BMW: где купить оригинальные запчасти и аксессуары
bmw x drive bmw x 5 .
ремонт imac
металл навесы
browse around this website https://1inch-app.org/2023/11/17/a-comprehensive-analysis-of-the-security-features-offered-by-the-1inch-app/
visit our website https://metamask-wallet.at/2023/11/16/how-to-set-up-and-use-busd-address-in-metamask-a-step-by-step-guide/
my review here https://metamask-wallet-web3.com/2023/11/16/mastering-metamask-configuring-binance-smart-chain-integration-made-easy/
important link https://1inch-dex.com/2023/11/17/exploring-and-analyzing-the-user-experience-of-the-1inch-dex-aggregator/
blog link https://orbiter-finance.at/2023/11/19/revolutonizing-ethereum-native-asset-transfers-a-deep-dive-into-orbiter-finance/
Click This Link https://orbiter-finance-bridge.com/2023/11/18/cybersecurity-breach-at-orbiter-finance-investors-on-high-alert/
https://www.google.pl/url?q=http://surl.li/sigkk
ליווי ברונטיות, נערות ליווי צעירות, נערות ליווי ג’ינג’יות, נערות ליווי בלונדיניות ועוד קטגוריות רבות מחכות לכם אצלנו באתר, . כבלים ברזולוציית HD ומקרן קול מפנק. לפעמים ניתן למצוא גם מטבחון להכנת אוכל קל ופינת שתייה חמה לשימושכם. דירה דיסקרטית בחדרה אז מכוני ליווי בבאר שבע התענוג שבדברים הקטנים
אחרים הכל אמתי מאומת ובלי זיופים ועבודה בעיניים. האתר המוביל שלנו נבנה בשיטה ייחודית ביותר בה אתה מחובר לאפליקציה שנותנת סוגי העיסויים שתרצו לקבל תוך שאתם נהנים ממראה תמונות הבחורות האקזוטיות והאיכותיות המעניקות עיסוי ארוטי מענג. כל שעליכם לעשות, זה עצום דירות דיסקרטיות בראשון לציון
Я купила свадебное платье за 10 000 рублей. Свадебных платьев
https://maps.google.com.bz/url?q=http://surl.li/sigjy
Рабочий промокод 1ХБЕТ на 2024 год бесплатно: Бонус 32 500р. Актуальный список при регистрации на официальном сайте компании. На бесплатную ставку и витрина промо-кодов. Откуда взять и куда вставить промокоды описано на странице. Код необходимо использовать при регистрации на официальном сайте конторы 1xbet (промокоды для купона -на бесплатную ставку, находятся в самом низу статьи). как ввести промокод в 1хбет с телефона! Как ввести промокод 1хБет при регистрации в 2024. Вводятся такие комбинации в купон пари, позволяя сделать прогноз бесплатно, застраховать ставку или извлечь любую другую выгоду от обладания бонусным кодом. К сожалению, найти промокод в свободном доступе невозможно, их игроки получают индивидуально и вряд ли заходят делиться халявой с обывателями интернета – более подробно в этом материале http://dizkomp.ru/netcat/inc/1xbet.html
check over here https://galxe-app.org/2023/11/10/demystifying-galxe-exploring-the-mechanics-behind-its-operations-and-performance/
site https://galxe-web3.com/2023/11/19/step-by-step-guide-how-to-buy-galxe-gal-cryptocurrency/
http://www.google.ba/url?q=http://surl.li/sigkg
Russian energy giant Gazprom and the China National Petroleum Corporation (CNPC) have signed an agreement on additional gas shipments to China, the Russian company announced on Thursday.
kraken2
The deal was struck during a meeting between Gazprom CEO Aleksey Miller and CNPC Chairman of the Board of Directors Dai Houliang on the sidelines of the Belt and Road Forum for International Cooperation in Beijing.
“During the meeting, Gazprom and CNPC signed an additional agreement to the gas purchase and sale contract via the East Route for an additional volume of Russian gas supplies to China until the end of 2023,” Gazprom wrote on its Telegram channel.
https://kraken6gf6o4rxewycqwjgfchzgxyfeoj5xafqbfm4vgvyaig2vmxvyd.com
2krn
Регистрация в 2024 году — бесплатный промокод 1xbet на сегодня. Часто задаваемые вопросы по регистрации и учетной записи у букмекера 1xbet. промокод 1хбет при регистрации на фрибет. Разнообразие бонусных предложений от 1xbet — другие типы бонусов и промокодов для игроков. Промокод 1xbet на День Рождения. Фрибеты или бесплатные ставки. Тото-промокоды 1xbet. Промокоды 1xbet у блогеров. Система промокодов при регистрации позволяет новым игрокам букмекерской конторы 1xbet получать внушительные бонусные суммы к своему первому депозиту. Обратите внимание, что это не промокод на ставку, а именно на регистрацию. Рабочие промокоды 1хбет на сегодня: Вид бонуса. Размер бонуса – более подробно в этом материале http://dizkomp.ru/netcat/inc/1xbet.html
офіційний дилер бмв
Купить ценогенетический БМВ 2024 года на Украине по наихорошей цене у официального дилера. Тест-драйв, страхование, субсидирование, промо-акции и еще спецпредложения.
http://avtosalonbmwftnz.dp.ua
Коморские Острова или Африка достопримечательности фото
лечебные базы
https://samoylovaoxana.ru/tag/otdyh-v-egipte/
Ещё можно узнать: как посмотреть серийный номер ноутбука windows 10
Круизы
Криптовалютные биржи — это платформы, которые дают возможность трейдерам покупать и продавать криптовалюты, деривативы и другие криптоактивы лучшие биржи для торговли криптовалютой
https://kvartirulyspb.ru/
играть в gates of olympus на деньги – gates of olympus скачать, гейтс оф олимпус на деньги
Консультация адвоката по уголовным делам – это начальный и крайне важный этап оказания юридической помощи лицам, привлечённым к уголовной ответственности, или желающим защитить свои интересы в уголовном процессе. Во время консультации адвокат оценивает обстановку, вникнет в детали дела, информирует клиента о его правах и возможных последствиях.
Специалисты подскажут, как правильно вести себя при допросе, какие документы необходимы для эффективной защиты, и расскажут о перспективах развития уголовного дела. Клиент получает разъяснения о своих правах, о последствиях предъявленных обвинений и о процессуальных нюансах предстоящих судебных заседаний.
Адвокаты, специализирующиеся на уголовных делах, предоставляют консультации на основе актуальных законов, применяя свой опыт и профессиональные знания. Важность таких встреч неоценима, поскольку они позволяют заложить основу для последующей эффективной защиты в суде. Первичная консультация поможет клиенту понять сложности его положения и принять обоснованные решения о стратегии и тактике защиты.
Выбирая адвоката для консультации, следует обратить внимание на его опыт, репутацию и готовность полностью погрузиться в проблематику дела. Помните: своевременное обращение за квалифицированной юридической помощью может не только облегчить стресс от ведения уголовного дела, но и существенно повысить шансы на благоприятный исход.
http://annayankova.ru
дебетовые карты купить – Capitalist, кредитная карта mastercard
дебетовых карт приобрести – детализация мегафон, детализация мегафон
В stinol-servise.ru мы предлагаем комплексный подход к ремонту холодильников Stinol. Наши услуги включают в себя диагностику неисправностей, ремонт любой сложности, а также последующее техническое обслуживание для предотвращения возникновения новых поломок. Мы гарантируем высокое качество работ и используем только проверенные временем методы ремонта.
замена таймера оттайки холодильника stinol
сервис стинол
замена таймера оттайки холодильника стинол
лучшие отели сочи
отели сочи
отели в сочи с бассейном
jdm b – jdm japanese drift master xbox, печать +на кружках москва
Вывод из запоя
буклеты печать – календари домики, меню для кафе
Известный во всем СНГ телеграмм бот Глаз Бога уже почти год не сходит с первых полос множества новостных агентств. Программа Глаз Бога для поиска людей завоевала огромную популярность у многих пользователей глаз бога
https://kvartiruerspb.ru/
Интересно: зеленая атермальная пленка или тонировочная пленка цена
Может быть полезным: https://autoplenka.com/product/vygonka-fusion-pink-turbo-pro-14-x-5-x-85-srednyaya-zhestkost/ или пленка для защиты лобового стекла
Ещё можно узнать: перевод cito
http://maps.google.ml/url?q=http://surl.li/sigka
dig this galaxy swapper download
немецкие конфеты оптом – импортная шоколадная паста оптом, лимонад Lotte оптом
gates of olympus автомат игра – игры gates of olympus на деньги, гейтс оф олимпус играть на деньги
Нарколог на дом
ריחניים, נקיים ונעימים. בצמוד ניתן למצוא מקלחת מאובזרת עם תמרוקים אקסולוסיביים וחדר שירותים מאובזר ואקזוטית תוכלו להנות משירותי ליווי ועיסוי מהמשובחים ביותר. פורטל אקספיינדר, הפורטל המוביל במדינה למבוגרים בלבד, ריכז עבורכם את מהנה, צוות האתר, . צפון הארץ The hottest escorts Jerusalem girls
Скачать Lucky Jet – lucky jet, джет lucky jet
На нашем сайте мы постарались собрать самую полную и большую коллекцию частного и домашнего бесплатный онлайн чат знакомств без регистрации порно, которое разными способами попало в интернет, зачастую его заливают специально а порой и без ведома участников видео. Многие супружеские пары записывают свой секс на любительскую камеру, чтобы потом посмотреть на себя со стороны, увидеть свой домашний секс под другим углом.
Более подробно ознакомиться с вебкам чатом можно тут – https://rt.livepornosexchat.com/
https://zhkstroyspb.ru/
מולטימדיה משוכלל – טלוויזיה עם כבלים ברזולוציית HD ומקרן קול מפנק. לפעמים ניתן למצוא גם מטבחון להכנת אוכל קל ופינת שתייה באשקלון או אשדוד? הגעתם למקום הנכון. דמיינו לעצמכם דירה דיסקרטית מעוצבת ומושקעת, עם מספר בחורות חטובות ויפות,שכל מה שהן רוצות זה איתה Order erotic massage in Tel Aviv and sex
blublu
https://images.google.co.nz/url?q=https://zdmed.ru/
boba 😀
заказать плинтус купить плинтус с кабель каналом .
https://images.google.it/url?q=https://zdmed.ru/
1. Как выбрать идеальный гипсокартон для ремонта
заказать гипсокартон гипсокартон влагостойкий купить .
алюминиевый плинтус купить плинтус под провода .
Скачать Lucky Jet – lucky jet взлом игры, 1 lucky jet
Подробное руководство
2. Секреты монтажа гипсокартона: шаг за шагом инструкция
3. Гипсокартонные конструкции: основные виды и их преимущества
4. Как сэкономить при покупке гипсокартона: лучшие способы
5. Простые способы обработки гипсокартона: советы от профессионалов
6. Интересные идеи использования гипсокартона в интерьере
7. Все, что вам нужно знать о гипсокартоне: полезная информация
8. Гипсокартон: обзор популярных брендов и их характеристики
9. Плюсы и минусы гипсокартона: как правильно выбрать материал
10. Как сделать ровные стены с помощью гипсокартона: секреты и советы
11. Гипсокартонные потолки: виды и технологии монтажа
12. Декорирование гипсокартона: идеи для творческого подхода
13. Гипсокартон в дизайне интерьера: современные тренды и решения
14. Преимущества гипсокартона перед другими строительными материалами
15. Как выбрать правильный инструмент для работы с гипсокартоном
16. Гипсокартон: надежный материал для обустройства дома
17. Гипсокартон как элемент декора: необычные способы применения
18. Технологии монтажа гипсокартона: лучшие практические советы
19. История и развитие гипсокартона: открытия и достижения
20. Строительство с использованием гипсокартона: основные этапы и рекомендации
купить гипсокартон влагостойкий магазины строительных материалов .
https://zhkstroykaspb.ru/
https://images.google.pt/url?q=https://zdmed.ru/
boba 😀
This service is perfect for boosting your local business’ visibility on the map in a specific location.
We provide Google Maps listing management, optimization, and promotion services that cover everything needed to rank in the Google 3-Pack.
More info:
https://www.speed-seo.net/ranking-in-the-maps-means-sales/
Thanks and Regards
Mike Osborne
PS: Want a ONE-TIME comprehensive local plan that covers everything?
https://www.speed-seo.net/product/local-seo-bundle/
плинтус алюминиевый для пола плинтус алюминиевый цена .
blublun
офіційний дилер бмв
Купить новый BMW 2024 года в течение Украине числом лучшей цене язык официального дилера. Тест-драйв, хеджирование, кредитование, промо-акции и спецпредложения.
https://www.avtosalonbmwftnz.dp.ua
Buy Apple Gift Card. Use it to shop the App Store, Apple TV, Apple Music, iTunes, Apple Arcade, the Apple Store app, apple.com, and the Apple Store where can i buy an apple gift card online
https://kvartiruekb.ru/
blibli
1. Как выбрать идеальный гипсокартон для ремонта
сетка металлическая заказать гипсокартон .
купить аппарат лазерной сварки для металла цена http://apparat-ruchnoy-lazernoy-svarki.ru/ .
Хочешь пообщаться с красивой девушкой? У нас огромный выбор девушек, готовых всегда пообщаться на любые темы, включая живое общение по вебкамере. Вы ищите порно онлайн веб чат рулетка – тогда вам к нам, тут общение на нашем сайте абсолютно бесплатно и без регистрации.
Более подробно ознакомиться с вебкам чатом можно тут – https://rt.livepornosexchat.com/
http://thejollygreen.com/__media__/js/netsoltrademark.php?d=https://zdmed.ru/
Промокод при регистрации 1xbet на 32500 рублей. Данный промокод 1хбет нужно ввести при регистрации в соответствующее поле. 1Xbet промокод при регистрации можно использовать только 1н раз в рамках одной учетной записи, но вы можете делиться им со своими друзьями. В 1xБет регистрация по номеру телефона является бесплатным и вторым по простоте способом создать личный аккаунт. Данный способ предусматривает наличие мобильного устройства, а также активной сим-карты, чтобы пользователь мог получить сообщение, в котором его будут ждать данные для входа. После того, как данные будут получены, останется ввести логин с паролем в соответствующие поля. Воспользуйся что делать с промокодом в 1хбет, получи бесплатную возможность увеличить свой первый депозит до 32500 рублей в БК 1xBet. Промокоды 1xBET актуальные сегодня. На игровой платформе БК «1xbet» функционирует бонусная программа, способствующая привлечению новых игроков и мотивации делать больше ставок для зарегистрированных пользователей. Бонусная программа содержит множество различных бонусов, которые каппер может активировать при помощи специальных промокодов. 130% бонус от первого депозита на ставки. Получай бонус до 130%, но не превышающий 32500 рублей на ставки от 1xbet. Переходим на сайт букмекера – более подробно в этом материале http://dizkomp.ru/netcat/inc/1xbet.html
дешевые гостиницы в москве https://otelivmoskva.ru/oteli-i-gostinicy-v-moskve/
забиные заклепки
Came across an intriguing article – it’s worth your attention, trust me http://hanamura.shop/link.cgi?url=https://rf.chatruletka-18.com/
lalablublu
http://springo.biz/__media__/js/netsoltrademark.php?d=https://zdmed.ru/
Stumbled upon a unique article, I suggest you take a look http://scribe.mmonline.io/click?evt_nm=Clicked+Registration+Completion&evt_typ=clickEmail&app_id=m4marry&eml_sub=Registration+Successful&usr_did=4348702&cpg_sc=NA&cpg_md=email&cpg_nm=&cpg_cnt=&cpg_tm=NA&link_txt=Live+Chat&em_type=Notification&url=https://il.chat-ruletka-18.com
Рекомендации экспертов
Промышленный 3D принтер купить по акции
промышленный 3д принтер купить http://prm-3dinter.ru/ .
palabraptu
blolbo
blublu
https://zhknoviydom.ru/
большой выбор детских колясок коляска прогулочная купить .
https://zhkkvartiradom.ru/
Организация корпоративов подразумевает различные программы: тимбилдинги, командные тренинги, соревнования и батлы, семинары на природе и т. д организация корпоративов
купить прогулочную коляску detskie kolyaski .
Натяжные потолки
коляска купить в москве прогулочную коляску купить .
The meal went without incident although a couple of times she had to avert her gaze from Dan for fear of bursting out laughing. Dan went up to his room saying he wanted to listen to music, he laid on his bed playing with himself waiting for his father to leave. He thought about the events of the last two weeks it had been the craziest time of his life.
He put it all down to Mary Harris, she had been his girlfriend for two years, he liked her a lot, she was pretty and intelligent two things that rarely combined in his experience, the problem was she steadfastly refused to let him put his cock inside her, he had thought he was getting somewhere when he took his cock out that evening in the cinema when she had finally allowed him to get his hand inside her panties, it was the first time she had allowed him to do any more than play with her tits. He had taken her hand and placed it on his erection, initially he had been pleased to hear her sharp intake of breath when she felt the size of him and he was encouraged when she began stroking him.
It was later that the problem started, he had her in the car park, they were kissing, her sweater was pushed up together with her bra and he was sucking on her nipples. He managed to get her laid across the front of one of the cars, his hand up her skirt, trying to pull down her panties. That was when she had stopped him.
https://www.cossa.ru/profile/?ID=239370
https://anotepad.com/notes/68k6frf3
https://www.dnnsoftware.com/activity-feed/my-profile/userid/3187038
http://www.nfomedia.com/profile?uid=rOiSceI
https://rentry.org/df2gyctq
https://www.cossa.ru/profile/?ID=239290
http://www.nfomedia.com/profile?uid=rOiSadG
https://www.quia.com/profiles/angelnewton
https://imageevent.com/myrtlegirl1966
http://www.babelcube.com/user/scott-painter
Установка винтовых свай: профессионализм и точность в каждом шаге
свайный фундамент винтовые сваи https://vintoviye-svai.ru/ .
Превосходное впечатление получил, посетив сервисный центр техники Zanussi, который располагается по ссылке zanussi-rem.ru. Специалисты центра продемонстрировали высочайший класс профессионализма, выполнив сказуемный и точный ремонт моей стиральной машины.
Сотрудники центра, благодаря своей квалификации и опыту, точно сумели диагностировать проблему и устранить ее в кратчайшие сроки. Дополнительно, я был приятно удивлен отличным обслуживанием и разумными ценами на услуги.
Без сомнения, сервисный центр техники Zanussi является надежным выбором для тех, кто ценит профессионализм и оперативность. От всей души рекомендую данный сервисный центр всем, кто столкнулся с проблемами со своей техникой Zanussi.
https://zhknoviystroi.ru/
Go Green
Solar Panels: The Key to Sustainable Living in Your Mobile Home
Upgrade Your Mobile Home with Solar Panels
solar panels on mobile home http://larpan-mobi4omes.ru/ .
Opened up an intriguing read – let me share this with you http://bazhenova.greatforum.ru/viewtopic.php?f=17&t=4184
motomagazinvfdvgd.vn.ua/uk/v-motodzhinsy/pol-is-zhenskiy/
В ТЕЧЕНИЕ нашем мотомагазине ваша милость посчитаете запчасти чтобы байков, скутеров, снегоходов и квадроциклов. У нас вы всегда нахлынете масла для байков, фильтра, цепи.
motomagazinvfdvgd.vn.ua/uk/v-nakolenniki-i-nalokotniki/
Где лучше купить slm принтер?
slm принтер цена ptrlmms-3d.ru .
Любите порнушку? тогда вам понравиться бесплатный онлайн парни порно чат. Как удовлетворить сексуальные потребности в 21 веке? Если ты в видеочате Рунетки, значит ты в курсе, что такое эротический видеочат.
Более подробно ознакомиться с вебкам чатом можно тут – https://livepornosexchat.com/
order synthroid online
Индивидуальные бухгалтерские услуги: максимум внимания к вашему бизнесу
бухгалтерские услуги для ип цены https://www.buhgalterskie-uslugi-495.ru/ .
I highly advise steer clear of this platform. My personal experience with it has been nothing but frustration and doubts about scamming practices. Be extremely cautious, or even better, look for an honest site to meet your needs.
https://noviydomstroika.ru/
High-Quality Options for Outdoor Enthusiasts
Solar Panels for Camping Made Easy
solar panel for camping trailer https://www.stport-solarpanels.ru .
https://diplomsdayu.ru/
Стоматологічний огляд
7. Як зберегти білий колір зубів
стоматологія протезування https://stomatologiyatrn.ivano-frankivsk.ua/ .
Лайв-стрим-порно в бесплатном секс-чате. Добро пожаловать в видео порно чат онлайн с самыми красивыми девушками Смотри Twitch Stream порно видео бесплатно, здесь секс на стриме во время игры за компьютером. Нет никаких сомнений, что подобные секс трансляции могут довести до оргазма за считанные минуты, так что не теряйте время и переходите к регистрации на сайте взрослого видеочата.
Более подробно ознакомиться с вебкам чатом можно тут – https://livepornosexchat.com/
motomagazinvfdvgd.vn.ua/uk/v-zashchita-ruk/
В ТЕЧЕНИЕ нашем мотомагазине ваша милость найдёте запчасти чтобы байков, скутеров, снегоходов равным образом квадроциклов. У нас ваша милость хронически выищете масла для мотоциклов, фильтра, цепи.
motomagazinvfdvgd.vn.ua/uk/v-perchatki/
Поради батькам від стоматолога
15. Як вибрати найкращий зубний пластырь для лікування нічного скреготу
стоматологія спектр https://stomatologiyatrn.ivano-frankivsk.ua/ .
PISHING
купить диплом Гознак https://www.1diplomy-grupp.ru/ .
1. Идеи для дизайна интерьера
2. Тренды в дизайне
3. Как выбрать идеальный цветовой акцент в дизайне
4. Секреты успешного дизайн-проекта
5. Дизайн нового поколения
6. Дизайн спальни
7. Дизайн для маленькой квартиры
8. Природный дизайн
9. Баланс цветов и форм: основы хорошего дизайна
10. Дизайн-студия: секреты успешного бизнеса в сфере дизайна
11. Интересные факты о развитии дизайна в XXI веке
12. Дизайн кухни
13. Тенденции в сфере дизайна мебели: вдохновляющие идеи
14. Дизайн гостиной
15. Минимализм
16. Дизайн сада
17. Декорирование дома с использованием текстиля: советы и идеи
18. Принципы цветового баланса в дизайне: как создать гармоничное пространство
19. Топ-10 книг по дизайну интерьера, которые стоит прочитать
20. Дизайн подростковой комнаты
интерьер дизайн https://studiya-dizajna-intererov.ru/ .
Free drawing lessons for beginners and professionals Drawing lessons
Стоматологічний огляд
18. Як зберегти здоров’я зубів у період карантину
стоматологічна допомога стоматологічна допомога .
1. 10 лучших идей для дизайна интерьера
2. Топ-20 трендов в дизайне на 2021 год
3. Как выбрать идеальный цветовой акцент в дизайне
4. Дизайн-проект
5. Инновационные подходы к дизайну: отражение современности
6. Дизайн спальни
7. Дизайн для маленькой квартиры
8. Как интегрировать природные элементы в дизайн интерьера
9. Основы дизайна
10. Дизайн-студия: секреты успешного бизнеса в сфере дизайна
11. Дизайн в XXI веке
12. Уникальные идеи для дизайна кухни: создайте пространство своей мечты
13. Дизайн мебели
14. Мастер-класс по созданию стильного дизайна гостиной
15. Искусство минимализма: создание современного дизайна в своем доме
16. Дизайн сада
17. Декорирование с текстилем
18. Цветовой баланс
19. Книги по дизайну
20. Дизайн комнаты для подростка: креативные идеи для стильного интерьера
студия интерьера студия интерьера .
Found an article that is worth reading – it’s really interesting! http://nagaevo.ekafe.ru/viewtopic.php?f=86&t=2321
https://reshaitzadachi.ru/
SCAM
1. 10 лучших идей для дизайна интерьера
2. Топ-20 трендов в дизайне на 2021 год
3. Как выбрать идеальный цветовой акцент в дизайне
4. Секреты успешного дизайн-проекта
5. Дизайн нового поколения
6. Дизайн спальни
7. Дизайн для маленькой квартиры
8. Природный дизайн
9. Основы дизайна
10. Дизайнерский бизнес
11. Дизайн в XXI веке
12. Уникальные идеи для дизайна кухни: создайте пространство своей мечты
13. Тенденции в сфере дизайна мебели: вдохновляющие идеи
14. Дизайн гостиной
15. Минимализм
16. Дизайн сада
17. Декорирование с текстилем
18. Цветовой баланс
19. Книги по дизайну
20. Дизайн комнаты для подростка: креативные идеи для стильного интерьера
дизайн домов https://studiya-dizajna-intererov.ru/ .
https://reshauzadachi.ru/
Доставка алкоголя в Москве
рабочие промокоды на 1хбет на сегодня – комбинация из чисел и букв. Эта комбинация дает возможность игроку получить дополнительные бонусы. К примеру, это может быть: промокод на бесплатную ставку (фрибет); повышение коэффициентов ставок формата «экспресс». Промокод при регистрации применяется именно таким образом. Он позволяет увеличивать размер приветственного бонуса на первый депозит, который выдается самим букмекером 1xbet. Где найти? Вариантов для получения промокода на 1xbet на сегодня существует множество. Но мы предлагаем вводить наш собственный промокод для 1xbet. Это промокод для регистрации, он вводится в поле в регистрационной анкете. Промокод при регистрации на сегодня. Промокоды для БК и Казино — ежедневное обновление. Регистрация на сайте 1xBet бесплатная, но для начала игры и получения доступа к 1xbet промокоду при регистрации 2024, придется внести на игровой счет от 50 рублей. Особенности регистрации. Процедура создания профиля в букмекерской конторе 1xbet максимально упрощена. Для регистрации предусмотрены такие способы: В «1 клик». Чтобы создать учетную запись, нужно выбрать страну проживания и валюту, ознакомиться с пользовательским соглашением и кликнуть на клавишу «Регистрация». С помощью телефона – более подробно в этом материале https://ngmagistral.ru/wp-includes/pages/1xbet.html
1WIN обзор букмекерской конторы
Вести
купить справку в школу
li l9 цена
https://miele-remonty.ru/
l9 автомобиль китайский
zeekr 001 купить
avatr 12 купить
Why a rare image of one of Malaysia’s last tigers is giving conservationists hope
m3ga
Emmanuel Rondeau has photographed tigers across Asia for the past decade, from the remotest recesses of Siberia to the pristine valleys of Bhutan. But when he set out to photograph the tigers in the ancient rainforests of Malaysia, he had his doubts.
“We were really not sure that this was going to work,” says the French wildlife photographer. That’s because the country has just 150 tigers left, hidden across tens of thousands of square kilometers of dense rainforest.
https://mega555m3ga.com
MEGA онион
“Tiger numbers in Malaysia have been going down, down, down, at an alarming rate,” says Rondeau. In the 1950s, Malaysia had around 3,000 tigers, but a combination of habitat loss, a decline in prey, and poaching decimated the population. By 2010, there were just 500 left, according to WWF, and the number has continued to fall.
The Malayan tiger is a subspecies native to Peninsular Malaysia, and it’s the smallest of the tiger subspecies in Southeast Asia.
“We are in this moment where, if things suddenly go bad, in five years the Malayan tiger could be a figure of the past, and it goes into the history books,” Rondeau adds.
Determined not to let that happen, Rondeau joined forces with WWF-Malaysia last year to profile the elusive big cat and put a face to the nation’s conservation work.
It took 12 weeks of preparations, eight cameras, 300 pounds of equipment, five months of patient photography and countless miles trekked through the 117,500-hectare Royal Belum State Park… but finally, in November, Rondeau got the shot that he hopes can inspire the next generation of conservationists.
https://m3ga-gl.cc
m3ga
“This image is the last image of the Malayan tiger — or it’s the first image of the return of the Malayan tiger,” he says.
Война на Украине Последние события, видео и новости с фронта. Карта боевых действий.
Телеграмм канал про войну на Украине.
Вывод из запоя: секреты успешного восстановления
вывод из запоя в самаре vyvod-iz-zapoya663.ru .
Дипломы с доставкой до двери: Удобство в каждом заказе
Купить диплом дешево https://www.kupit-diplom01.ru .
I urge you stay away from this site. The experience I had with it has been purely dismay along with concerns regarding deceptive behavior. Be extremely cautious, or alternatively, find a more reputable site for your needs.
I urge you steer clear of this site. The experience I had with it was nothing but dismay along with suspicion of fraudulent activities. Proceed with extreme caution, or even better, look for a more reputable site to fulfill your requirements.
I highly advise steer clear of this site. The experience I had with it has been nothing but disappointment along with concerns regarding scamming practices. Proceed with extreme caution, or even better, seek out an honest platform to meet your needs.
трулисити 1.5 – оземпик уфа, дулаглутид инструкция +по применению
SCAM
самосборные коробки оптом
THIS IS SCAM
кракен даркнет в тор – kraken darknet market ссылка тор, kraken tor зеркало
Solar Generator: The Key to Unlimited Power for Your RV
solar generator with 30 amp rv outlet https://www.argener-rv4.ru/ .
kraken tor ссылка – kraken tor, ссылка на кракен в тор
i was reading this free cs2 skinchanger
THIS IS SCAM
сплит кондиционер купить сплит кондиционер купить .
click github roblox hacks
1xSlots Промокод (Бездепозитный Бонус 2024)
1xSlots промокод: NEXT777, при регистрации введите этот бонусный код, чтобы получить бонус для новых игроков в размере €1650 + 200 фриспинов. Чтобы получить этот бонус, вам нужно создать аккаунт и ввести специальный промокод казино 1хСлотс.
1xSlot Промокод
NEXT777
В казино 1xSlots 2024 доступны различные бонусы: бездепозитные при регистрации, промокоды, фриспины, кэшбэки и другие акции.
Промокод 1xSlots 2024: NEXT777 – введите код при регистрации в казино 1хСлот и получите приветственный бонус €1650 +200 фриспинов. Чтобы промокод 1xSlots на бездепозитный бонус сработал, необходимо указать рабочую комбинацию при регистрации и правильно заполнить форму анкеты. После завершения регистрации бездепозитный бонус будет доступен в личном кабинете. Рекомендуется не торопиться и сразу после создания аккаунта заполнить персональные данные. Важно указать требуемую информацию в полях, отмеченных звездочкой во вкладке “Профиль”, а также активировать контакты (номер телефона и e-mail).
Для новых клиентов промокод 1xSlots предоставляет уникальные возможности, позволяющие бесплатно опробовать один из представленных на платформе слотов. Чтобы получить бездепозитные фриспины, достаточно при регистрации указать промокод и выполнить простые условия акции, которые мы расскажем в данной статье. Игроки, желающие продолжить игру и сделать первый депозит, смогут получить щедрый приветственный бонус до €1500 и 150 бесплатных вращений.
Для получения бонуса на первый депозит необходимо пополнить счет на сумму не менее 10. Награда составляет 100% от суммы первого пополнения, но не может превышать 300. Если сумма пополнения превышает максимальный лимит, игрок получит свой депозит полностью, а также 300 в качестве бонуса. Для активации второго, третьего и четвертого этапов, сумма депозита должна быть не менее 15.
Кроме денежного вознаграждения, каждый этап сопровождается бесплатными прокрутками для игр компании:
– за первый депозит – 30 фриспинов для игры Book of Gold: Classic;
– за второй депозит – 35 фриспинов для игры в Legend of Cleopatra;
– за третий депозит – 40 фриспинов для игры в Solar Queen;
– за четвертый депозит – 45 фриспинов для игры в Imperial Fruits: 40 lines.
Казино 1xSlots предоставляет бонус поэтапно. Чтобы получить награду за второй и последующие депозиты, необходимо выполнить условия отыгрыша ранее полученных средств. Фриспины также начисляются поэтапно и зачисляются после выполнения условий отыгрыша.
Промокод для 1xСлотс: NEXT777. Получите бездепозитный приветственный пакет до €1650 +200 фриспинов. Компания 1xSlots предлагает своим клиентам ряд бонусных программ, самой популярной из которых является приветственный пакет с увеличением первого депозита и бесплатными вращениями. С использованием промокода вы можете получить до 1650 евро и 200 фриспинов. Одним из явных преимуществ 1xSlots является огромный выбор игр. Большую часть из доступных 10 тысяч развлечений занимают игровые автоматы. Пользователям предлагается более 100 различных провайдеров слотов.
Промокод не имеет срока действия. Любой пользователь, который создает аккаунт на сайте 1xSlots, может его активировать. Каждому игроку предоставляется только один бонус, поэтому промокод может быть использован только один раз. Чтобы воспользоваться промокодом, необходимо нажать на кнопку “Регистрация”, выбрать удобный способ создания аккаунта, указать все необходимые данные, подтвердить номер телефона или адрес электронной почты и ввести промокод. После этого можно завершить регистрацию, нажав на кнопку “Зарегистрироваться”.
1xSlots Промокод для Регистрации
Бонусы казино 1xSlots 2024 – Бездепозитные бонусы ? Коды на возврат средств ? VIP программа преданности ? Бесплатные фриспины.
Промокод 1xSlots при Регистрации: NEXT777 Получите эксклюзивный приветственный пакет до 1650 евро +150 фриспинов. Казино 1xSlots 2024 предлагает своим гостям не только широкий выбор игровых автоматов. На сайте казино регулярно проводятся бонусные акции, в рамках которых можно получить различные подарки, процент от депозита, фриспины и многое другое. При обычной регистрации есть ограничение по сумме – не более 1500 евро на первые четыре депозита. Первое пополнение – до 300 евро, второе – не более 350, третье – 400, четвертое – 450 евро. После ввода промокода лимит увеличивается до 1650 евро, а количество фриспинов возрастает с 150 до 200 вращений.
Получите бездепозитный бонус в размере 100 фриспинов в онлайн казино 1xSlots в 2024 году. Все активные бонус коды, промокоды и купоны от 1хСлотс (1xSlots) доступны как для новых, так и для существующих игроков. В клубе 1xSlots промокоды предоставляют дополнительные бонусы пользователям. Кроме того, в клубе проводятся множество турниров с крупными призовыми фондами, в которых может принять участие любой зарегистрированный игрок.
1xSlots фриспины промокод: NEXT777. Размер приветственного поощрения составляет 100 фриспинов в автомате Eye of Storm от провайдера Pragmatic Play. Время на его активацию неограничено. Подарок выдается единожды, попытки повторного создания учетной записи для получения фриспинов приравниваются к мошенническим действиям. Альтернативным способом получения бонус-кодов является активное заключение пари в системе. Вращая барабаны игровых автоматов и зарабатывая баллы можно получить право на фриспины, благодаря промо. Список промокодов 1xslots доступен непосредственно на официальном сайте. Чтобы получить бездепозитный бонус код для 1хслотс в 2024 году, следует выполнить следующие условия:
1. Активировать бонусные средства в личном кабинете;
2. Пополнить счет на €15 (или эквивалент в другой валюте) и более, чтобы привязать банковскую карту или онлайн-кошелек;
3. Выполнить условия вейджера: x25. Для этого необходимо поставить из своих денег сумму, равную выигрышу с бесплатных вращений, умноженную в 25 раз. На отыгрыш дается 7 дней с момента, когда вы прокрутили фриспины.
Максимальная сумма вознаграждения составляет 1650 евро. Ее необходимо отыграть с вейджером 35 раз. Казино предлагает релоад-бонусы, которые также нужно отыграть 35 раз. Однако особое место среди множества игр, слотов и турниров на 1xSlots занимает лайв-казино. Это казино, где игра происходит в режиме реального времени. Настоящие дилеры раздают карты и крутят рулетку за игровыми столами. Все эти действия передаются по видеосвязи. Благодаря такой видеотрансляции каждый игрок может почувствовать все эмоции и азарт игры в интерактивной атмосфере с профессиональными дилерами.
При регистрации на 1xSlots используйте промокод “NEXT777” и получите бездепозитный бонус в размере €1650 + 200 фриспинов. Казино 1xSlots радует своих игроков различными бонусами, такими как промокоды, фриспины и бездепозитные бонусы. Особенно щедрые подарки от казино 1xSlots предназначены для новичков.
В дополнение к бонусной программе онлайн казино 1xSlots предлагает кешбэк до 11%, начисляемый от суммы проигранных средств. Кешбэк не имеет срока отыгрыша. Сидя дома перед компьютером, удается почувствовать атмосферу присутствия в настоящем казино. Именно этими причинами объясняется такая популярность и широкий спрос лайв-казино.
промокод 1xslots без отыгрыша – Бонус по промокоду 1хСлотс увеличивается с €1500 + 150 фриспинов до €1650 + 200 фриспинов.
Промокод 1xSlots на Сегодня: NEXT777 предоставляет вам возможность получить €1500 +150 FS при регистрации с использованием бонусного кода. Теперь бонус по промокоду составляет €1650 + 200 фриспинов, что на €150 больше, чем раньше. Это отличная возможность получить еще больше выгоды от игры. Казино 1xSlots 2024 – это платформа для игровых автоматов и Турниров. В казино 1хСлотс доступны различные бонусы, такие как промокоды, фриспины и бездепозитные бонусы. Особенно крупные подарки в казино 1xSlots предназначены для новичков.
Выгодная бонусная программа на сайте 1xslots позволяет как новичкам, так и опытным игрокам получать разнообразные подарки. Кроме того, это отличная возможность увеличить свой выигрыш. В казино 1xslots бонусы за депозиты и подарки не требуют дополнительных вложений. Используя фриспины и промокоды, вы можете получить хорошие деньги. Давайте подробнее рассмотрим, какие бонусы предлагает онлайн казино.
После прохождения регистрации игроку предлагается бонус на первые четыре операции по пополнению счета:
на первый депозит – 100% от внесенных средств и 30 фриспинов;
на второй депозит – 50% от внесенных средств и 35 фриспинов;
на третий депозит – 25% от внесенных средств и 40 фриспинов;
на четвертый депозит – 25% от внесенных средств и 45 фриспинов.
Промокод, также известный как код приглашения, является ключом-активатором приветственной программы для новичков. Если вы ранее не имели опыта игры в 1xSlots, то вы можете рассчитывать на получение щедрого подарка при регистрации – пакета из 1650 евро и 200 бесплатных прокруток. Согласно правилам бонусной акции, размер поощрения зависит от суммы первых четырех взносов и распределяется следующим образом: на депозитный бонус установлен максимальный лимит в 1500 евро. Чтобы получить подарок, игроку достаточно пройти процедуру регистрации, заполнить анкетные данные в личном кабинете и внести на счет профиля сумму от 10 евро.
При регистрации клиент может использовать промокод 1xSlots и получить дополнительный подарок.
1xSlots давно занимает прочные позиции в списке лучших брендов гемблинг-индустрии. Политика компании 1x ориентирована на опытных игроков, здесь пользователей ожидает продуманная программа лояльности, а также гарантии безопасности личной информации и депозита. Все действия осуществляются на основании лицензии 8048/JAZ2016-083, полученной от компании Orakum N.V., Кюрасао.
Промокод 1хСлот 2024: NEXT777 предоставляет бездепозитный бонус в виде 150 вращений в игре «The Dog House Megaways». В онлайн казино 1xslots доступны бесплатные промокоды на фриспины. Кроме того, игроки могут получать бонусные вращения не только за регистрацию или использование промокода от 1xSlots. Участие в бонусных акциях также позволяет пользователям получить фриспины. Казино 1хSlots предлагает различные варианты депозитов и выплат. Новые игроки, которые регистрируются на 1хSlots, получают приветственный пакет бонусов, однако с использованием промокода от 1xSlots этот бонус может быть еще более значительным. Для активации бонуса необходимо применить актуальный промокод при регистрации.
Приветственный пакет от 1xSlot доступен сразу после регистрации и требует активации через создание депозита. Бонус предоставляет умножение для первых четырех депозитов и дополнительные бесплатные вращения. Минимальная сумма для первого депозита составляет 10 евро, а для последующих пополнений – 15 евро. Максимальная сумма бонуса – 1500 евро.
Также новичкам предоставляются бонусы на второй, третий и четвертый депозит. Для получения подарка необходимо внести сумму не менее 15 евро. Игрокам также предоставляются фриспины и депозитные подарки. Для начисления фриспинов требуется подтверждение номера телефона.
Для постоянных игроков онлайн-казино 1xSlots проводит бонусные акции. Некоторые из них имеют временный характер, а другие действуют постоянно. В основном, пользователям предлагаются депозитные бонусы. Например, можно получить презент за пополнение счета в понедельник. За десятый депозит игроку полагается крупный депозитный бонус в размере 50% от вносимой суммы и 100 фриспинов.
В клубе 1xSlots также действует программа лояльности, которая предполагает различные привилегии для игроков.
Игрокам, активно делающим ставки в течение недели и ушедшим в минус, казино 1xSlots предлагает фриспины. Для получения бонуса не требуется пополнение счета, лимит на максимальный выигрыш и вейджер не устанавливаются.
Ежедневно в казино 1хСлотс назначается слот дня. При совершении ставок на определенную сумму в этом игровом аппарате игроку начисляются фриспины. Обратите внимание https://www.iesp.pa.gov.br/wp-content/pgs/?1xslots_codigo_promocional_bono_giros_gratis.html, время действия акции ограничено.
Разработчиками 1хСлотс было разработано мобильное казино. Такая версия представляет собой упрощенный вариант компьютерного формата онлайн казино. Она позволяет играть в любимые игры на любом устройстве, поддерживающем функцию выхода в интернет. В качестве такого устройства может быть смартфон или планшет.
website link localbitcoins
сплит система купить с установкой https://split-sistema-kupit.ru/ .
В настоящее время наши дни могут содержать внезапные издержки и экономические трудности, и в такие моменты каждый ищет помощь. На сайте займ в РБ вам помогут без избыточной бюрократии. В своей роли агента я стремлюсь поделиться этими сведениями, чтобы помочь людям в сложной ситуации. Наша платформа обеспечивает прозрачные условия и быструю обработку заявок, чтобы каждый мог решить свои денежные проблемы оперативно и без лишних затрат времени.
more information cs2 mod menu
В настоящее время наши дни могут содержать внезапные издержки и финансовые вызовы, и в такие моменты каждый ищет надежную поддержку. На сайте получить деньги в долг в Минске вам помогут без избыточной бюрократии. В своей роли агента я стремлюсь распространить эту информацию, чтобы помочь людям в сложной ситуации. Наша система обеспечивает прозрачные условия и быструю обработку заявок, чтобы каждый мог решить свои денежные проблемы оперативно и без лишних затрат времени.
В настоящее время наши дни могут содержать внезапные издержки и экономические трудности, и в такие моменты каждый ищет помощь. На сайте деньги в долг вам помогут без лишних сложностей. В своей роли агента я стремлюсь поделиться этими сведениями, чтобы помочь тем, кто столкнулся с временными трудностями. Наша система обеспечивает прозрачные условия и эффективное рассмотрение запросов, чтобы каждый мог разрешить свои финансовые вопросы оперативно и без лишних затрат времени.
blublu
В настоящее время наши дни могут содержать внезапные издержки и финансовые вызовы, и в такие моменты каждый ищет помощь. На сайте займ денег вам помогут без избыточной бюрократии. В своей роли представителя я стремлюсь распространить эту информацию, чтобы помочь тем, кто столкнулся с временными трудностями. Наша платформа обеспечивает прозрачные условия и быструю обработку заявок, чтобы каждый мог решить свои денежные проблемы оперативно и без лишних затрат времени.
В настоящее время наши дни могут содержать внезапные издержки и экономические трудности, и в такие моменты каждый ищет надежную поддержку. На сайте деньги в долг в Минске вам помогут без лишних сложностей. В своей роли представителя я стремлюсь распространить эту информацию, чтобы помочь тем, кто столкнулся с временными трудностями. Наша платформа обеспечивает прозрачные условия и эффективное рассмотрение запросов, чтобы каждый мог решить свои денежные проблемы быстро и без лишних хлопот.
Поверка счетчиков воды: лучшие сервисы в вашем городе
поверка счетчиков на воду http://poverkaschetchikovvody1.ru/ .
1xSlots Промокод (Бездепозитный Бонус 2024)
1xSlots промокод: NEXT777, при регистрации введите этот бонусный код, чтобы получить бонус для новых игроков в размере €1650 + 200 фриспинов. Чтобы получить этот бонус, вам нужно создать аккаунт и ввести специальный промокод казино 1хСлотс.
1xSlot Промокод
NEXT777
В казино 1xSlots 2024 доступны различные бонусы: бездепозитные при регистрации, промокоды, фриспины, кэшбэки и другие акции.
Промокод 1xSlots 2024: NEXT777 – введите код при регистрации в казино 1хСлот и получите приветственный бонус €1650 +200 фриспинов. Чтобы промокод 1xSlots на бездепозитный бонус сработал, необходимо указать рабочую комбинацию при регистрации и правильно заполнить форму анкеты. После завершения регистрации бездепозитный бонус будет доступен в личном кабинете. Рекомендуется не торопиться и сразу после создания аккаунта заполнить персональные данные. Важно указать требуемую информацию в полях, отмеченных звездочкой во вкладке “Профиль”, а также активировать контакты (номер телефона и e-mail).
Для новых клиентов промокод 1xSlots предоставляет уникальные возможности, позволяющие бесплатно опробовать один из представленных на платформе слотов. Чтобы получить бездепозитные фриспины, достаточно при регистрации указать промокод и выполнить простые условия акции, которые мы расскажем в данной статье. Игроки, желающие продолжить игру и сделать первый депозит, смогут получить щедрый приветственный бонус до €1500 и 150 бесплатных вращений.
Для получения бонуса на первый депозит необходимо пополнить счет на сумму не менее 10. Награда составляет 100% от суммы первого пополнения, но не может превышать 300. Если сумма пополнения превышает максимальный лимит, игрок получит свой депозит полностью, а также 300 в качестве бонуса. Для активации второго, третьего и четвертого этапов, сумма депозита должна быть не менее 15.
Кроме денежного вознаграждения, каждый этап сопровождается бесплатными прокрутками для игр компании:
– за первый депозит – 30 фриспинов для игры Book of Gold: Classic;
– за второй депозит – 35 фриспинов для игры в Legend of Cleopatra;
– за третий депозит – 40 фриспинов для игры в Solar Queen;
– за четвертый депозит – 45 фриспинов для игры в Imperial Fruits: 40 lines.
Казино 1xSlots предоставляет бонус поэтапно. Чтобы получить награду за второй и последующие депозиты, необходимо выполнить условия отыгрыша ранее полученных средств. Фриспины также начисляются поэтапно и зачисляются после выполнения условий отыгрыша.
Промокод для 1xСлотс: NEXT777. Получите бездепозитный приветственный пакет до €1650 +200 фриспинов. Компания 1xSlots предлагает своим клиентам ряд бонусных программ, самой популярной из которых является приветственный пакет с увеличением первого депозита и бесплатными вращениями. С использованием промокода вы можете получить до 1650 евро и 200 фриспинов. Одним из явных преимуществ 1xSlots является огромный выбор игр. Большую часть из доступных 10 тысяч развлечений занимают игровые автоматы. Пользователям предлагается более 100 различных провайдеров слотов.
Промокод не имеет срока действия. Любой пользователь, который создает аккаунт на сайте 1xSlots, может его активировать. Каждому игроку предоставляется только один бонус, поэтому промокод может быть использован только один раз. Чтобы воспользоваться промокодом, необходимо нажать на кнопку “Регистрация”, выбрать удобный способ создания аккаунта, указать все необходимые данные, подтвердить номер телефона или адрес электронной почты и ввести промокод. После этого можно завершить регистрацию, нажав на кнопку “Зарегистрироваться”.
1xSlots Промокод для Регистрации
Бонусы казино 1xSlots 2024 – Бездепозитные бонусы ? Коды на возврат средств ? VIP программа преданности ? Бесплатные фриспины.
Промокод 1xSlots при Регистрации: NEXT777 Получите эксклюзивный приветственный пакет до 1650 евро +150 фриспинов. Казино 1xSlots 2024 предлагает своим гостям не только широкий выбор игровых автоматов. На сайте казино регулярно проводятся бонусные акции, в рамках которых можно получить различные подарки, процент от депозита, фриспины и многое другое. При обычной регистрации есть ограничение по сумме – не более 1500 евро на первые четыре депозита. Первое пополнение – до 300 евро, второе – не более 350, третье – 400, четвертое – 450 евро. После ввода промокода лимит увеличивается до 1650 евро, а количество фриспинов возрастает с 150 до 200 вращений.
Получите бездепозитный бонус в размере 100 фриспинов в онлайн казино 1xSlots в 2024 году. Все активные бонус коды, промокоды и купоны от 1хСлотс (1xSlots) доступны как для новых, так и для существующих игроков. В клубе 1xSlots промокоды предоставляют дополнительные бонусы пользователям. Кроме того, в клубе проводятся множество турниров с крупными призовыми фондами, в которых может принять участие любой зарегистрированный игрок.
1xSlots фриспины промокод: NEXT777. Размер приветственного поощрения составляет 100 фриспинов в автомате Eye of Storm от провайдера Pragmatic Play. Время на его активацию неограничено. Подарок выдается единожды, попытки повторного создания учетной записи для получения фриспинов приравниваются к мошенническим действиям. Альтернативным способом получения бонус-кодов является активное заключение пари в системе. Вращая барабаны игровых автоматов и зарабатывая баллы можно получить право на фриспины, благодаря промо. Список промокодов 1xslots доступен непосредственно на официальном сайте. Чтобы получить бездепозитный бонус код для 1хслотс в 2024 году, следует выполнить следующие условия:
1. Активировать бонусные средства в личном кабинете;
2. Пополнить счет на €15 (или эквивалент в другой валюте) и более, чтобы привязать банковскую карту или онлайн-кошелек;
3. Выполнить условия вейджера: x25. Для этого необходимо поставить из своих денег сумму, равную выигрышу с бесплатных вращений, умноженную в 25 раз. На отыгрыш дается 7 дней с момента, когда вы прокрутили фриспины.
Максимальная сумма вознаграждения составляет 1650 евро. Ее необходимо отыграть с вейджером 35 раз. Казино предлагает релоад-бонусы, которые также нужно отыграть 35 раз. Однако особое место среди множества игр, слотов и турниров на 1xSlots занимает лайв-казино. Это казино, где игра происходит в режиме реального времени. Настоящие дилеры раздают карты и крутят рулетку за игровыми столами. Все эти действия передаются по видеосвязи. Благодаря такой видеотрансляции каждый игрок может почувствовать все эмоции и азарт игры в интерактивной атмосфере с профессиональными дилерами.
При регистрации на 1xSlots используйте промокод “NEXT777” и получите бездепозитный бонус в размере €1650 + 200 фриспинов. Казино 1xSlots радует своих игроков различными бонусами, такими как промокоды, фриспины и бездепозитные бонусы. Особенно щедрые подарки от казино 1xSlots предназначены для новичков.
В дополнение к бонусной программе онлайн казино 1xSlots предлагает кешбэк до 11%, начисляемый от суммы проигранных средств. Кешбэк не имеет срока отыгрыша. Сидя дома перед компьютером, удается почувствовать атмосферу присутствия в настоящем казино. Именно этими причинами объясняется такая популярность и широкий спрос лайв-казино.
промокод 1xslots без отыгрыша бездепозитный – Бонус по промокоду 1хСлотс увеличивается с €1500 + 150 фриспинов до €1650 + 200 фриспинов.
Промокод 1xSlots на Сегодня: NEXT777 предоставляет вам возможность получить €1500 +150 FS при регистрации с использованием бонусного кода. Теперь бонус по промокоду составляет €1650 + 200 фриспинов, что на €150 больше, чем раньше. Это отличная возможность получить еще больше выгоды от игры. Казино 1xSlots 2024 – это платформа для игровых автоматов и Турниров. В казино 1хСлотс доступны различные бонусы, такие как промокоды, фриспины и бездепозитные бонусы. Особенно крупные подарки в казино 1xSlots предназначены для новичков.
Выгодная бонусная программа на сайте 1xslots позволяет как новичкам, так и опытным игрокам получать разнообразные подарки. Кроме того, это отличная возможность увеличить свой выигрыш. В казино 1xslots бонусы за депозиты и подарки не требуют дополнительных вложений. Используя фриспины и промокоды, вы можете получить хорошие деньги. Давайте подробнее рассмотрим, какие бонусы предлагает онлайн казино.
После прохождения регистрации игроку предлагается бонус на первые четыре операции по пополнению счета:
на первый депозит – 100% от внесенных средств и 30 фриспинов;
на второй депозит – 50% от внесенных средств и 35 фриспинов;
на третий депозит – 25% от внесенных средств и 40 фриспинов;
на четвертый депозит – 25% от внесенных средств и 45 фриспинов.
Промокод, также известный как код приглашения, является ключом-активатором приветственной программы для новичков. Если вы ранее не имели опыта игры в 1xSlots, то вы можете рассчитывать на получение щедрого подарка при регистрации – пакета из 1650 евро и 200 бесплатных прокруток. Согласно правилам бонусной акции, размер поощрения зависит от суммы первых четырех взносов и распределяется следующим образом: на депозитный бонус установлен максимальный лимит в 1500 евро. Чтобы получить подарок, игроку достаточно пройти процедуру регистрации, заполнить анкетные данные в личном кабинете и внести на счет профиля сумму от 10 евро.
При регистрации клиент может использовать промокод 1xSlots и получить дополнительный подарок.
1xSlots давно занимает прочные позиции в списке лучших брендов гемблинг-индустрии. Политика компании 1x ориентирована на опытных игроков, здесь пользователей ожидает продуманная программа лояльности, а также гарантии безопасности личной информации и депозита. Все действия осуществляются на основании лицензии 8048/JAZ2016-083, полученной от компании Orakum N.V., Кюрасао.
Промокод 1хСлот 2024: NEXT777 предоставляет бездепозитный бонус в виде 150 вращений в игре «The Dog House Megaways». В онлайн казино 1xslots доступны бесплатные промокоды на фриспины. Кроме того, игроки могут получать бонусные вращения не только за регистрацию или использование промокода от 1xSlots. Участие в бонусных акциях также позволяет пользователям получить фриспины. Казино 1хSlots предлагает различные варианты депозитов и выплат. Новые игроки, которые регистрируются на 1хSlots, получают приветственный пакет бонусов, однако с использованием промокода от 1xSlots этот бонус может быть еще более значительным. Для активации бонуса необходимо применить актуальный промокод при регистрации.
Приветственный пакет от 1xSlot доступен сразу после регистрации и требует активации через создание депозита. Бонус предоставляет умножение для первых четырех депозитов и дополнительные бесплатные вращения. Минимальная сумма для первого депозита составляет 10 евро, а для последующих пополнений – 15 евро. Максимальная сумма бонуса – 1500 евро.
Также новичкам предоставляются бонусы на второй, третий и четвертый депозит. Для получения подарка необходимо внести сумму не менее 15 евро. Игрокам также предоставляются фриспины и депозитные подарки. Для начисления фриспинов требуется подтверждение номера телефона.
Для постоянных игроков онлайн-казино 1xSlots проводит бонусные акции. Некоторые из них имеют временный характер, а другие действуют постоянно. В основном, пользователям предлагаются депозитные бонусы. Например, можно получить презент за пополнение счета в понедельник. За десятый депозит игроку полагается крупный депозитный бонус в размере 50% от вносимой суммы и 100 фриспинов.
В клубе 1xSlots также действует программа лояльности, которая предполагает различные привилегии для игроков.
Игрокам, активно делающим ставки в течение недели и ушедшим в минус, казино 1xSlots предлагает фриспины. Для получения бонуса не требуется пополнение счета, лимит на максимальный выигрыш и вейджер не устанавливаются.
Ежедневно в казино 1хСлотс назначается слот дня. При совершении ставок на определенную сумму в этом игровом аппарате игроку начисляются фриспины. Обратите внимание https://www.iesp.pa.gov.br/wp-content/pgs/?1xslots_codigo_promocional_bono_giros_gratis.html, время действия акции ограничено.
Разработчиками 1хСлотс было разработано мобильное казино. Такая версия представляет собой упрощенный вариант компьютерного формата онлайн казино. Она позволяет играть в любимые игры на любом устройстве, поддерживающем функцию выхода в интернет. В качестве такого устройства может быть смартфон или планшет.
В настоящее время наши дни могут содержать неожиданные расходы и экономические трудности, и в такие моменты каждый ищет надежную поддержку. На сайте деньги в долг в Минске срочно вам помогут без лишних сложностей. В своей роли представителя я стремлюсь поделиться этими сведениями, чтобы помочь людям в сложной ситуации. Наша платформа обеспечивает честные условия и эффективное рассмотрение запросов, чтобы каждый мог решить свои денежные проблемы оперативно и без лишних затрат времени.
купить сплит систему москва https://split-sistema-kupit.ru/ .
В настоящее время наши дни могут содержать неожиданные расходы и финансовые вызовы, и в такие моменты каждый ищет помощь. На сайте займы онлайн на карту вам помогут без избыточной бюрократии. В своей роли представителя я стремлюсь распространить эту информацию, чтобы помочь людям в сложной ситуации. Наша система обеспечивает честные условия и эффективное рассмотрение запросов, чтобы каждый мог решить свои денежные проблемы оперативно и без лишних затрат времени.
Юридическая помощь при заливах квартир — незаменимый инструмент для защиты ваших прав и интересов. Попадание в подобную ситуацию влечет за собой ряд сложностей, начиная от оформления необходимых бумаг и заканчивая взысканием убытков с виновника происшествия.
Профессиональный юрист поможет составить акт о заливе, который фиксирует факт и обстоятельства повреждения имущества. Далее следует этап сбора доказательств: фотографии, справки о стоимости ущерба, свидетельские показания. Важно правильно рассчитать размер убытков, включающий стоимость восстановительного ремонта и прочие затраты.
Юрист займется подготовкой претензии к виновнику инцидента с требованием возместить ущерб. В случае отказа или игнорирования претензии вопрос может быть передан в суд. С юридической точки зрения процесс требует грамотной подготовки и стратегии, что станет залогом успешного результата.
Получение юридической помощи позволит вам чувствовать себя увереннее, а также избежать потенциальных подводных камней в процессе взыскания компенсации за залив квартиры.
юрист по заливу квартиры
motomagazinvfdvgd.vn.ua/uk/v-ekipirovka/
В ТЕЧЕНИЕ нашем мотомагазине ваша милость посчитаете запчасти для байков, скутеров, снегоходов равно квадроциклов. У нас вы всегда нахлынете масла для байков, фильтра, цепи.
motomagazinvfdvgd.vn.ua/uk/v-shlema/
bliloblo
I highly advise stay away from this platform. My own encounter with it has been only disappointment and suspicion of deceptive behavior. Exercise extreme caution, or better yet, find a trustworthy platform to meet your needs.
В наше время многие из нас сталкиваются с внезапными затратами и денежными трудностями, и в такие моменты важно иметь возможность взять кредит. На сайте деньги в долг вам помогут с минимальными усилиями. В качестве представителя Брокерс Групп, я с удовольствием делиться этой информацией, чтобы помочь людям, кто нуждается в финансовой поддержке. Наша система гарантирует честные условия и быструю обработку заявок, чтобы каждый мог решить свои финансовые вопросы с минимальными временными затратами.
В наше время многие из нас сталкиваются с внезапными затратами и денежными трудностями, и в такие моменты важно иметь доступ к дополнительным средствам. На сайте займ в беларуси вам помогут быстро и удобно. В качестве представителя Брокерс Групп, я с удовольствием делиться этой важной информацией, чтобы помочь каждому, кто нуждается в финансовой поддержке. Наша система гарантирует честные условия и быструю обработку заявок, чтобы каждый мог разрешить свои денежные проблемы с минимальными временными затратами.
Промокод при регистрации 1xbet на 32500 рублей. Данный промокод 1хбет нужно ввести при регистрации в соответствующее поле. 1Xbet промокод при регистрации можно использовать только 1н раз в рамках одной учетной записи, но вы можете делиться им со своими друзьями. В 1xБет регистрация по номеру телефона является бесплатным и вторым по простоте способом создать личный аккаунт. Данный способ предусматривает наличие мобильного устройства, а также активной сим-карты, чтобы пользователь мог получить сообщение, в котором его будут ждать данные для входа. После того, как данные будут получены, останется ввести логин с паролем в соответствующие поля. Воспользуйся 1хбет промокод на бесплатную ставку сегодня бесплатно, получи бесплатную возможность увеличить свой первый депозит до 32500 рублей в БК 1xBet. Промокоды 1xBET актуальные сегодня. На игровой платформе БК «1xbet» функционирует бонусная программа, способствующая привлечению новых игроков и мотивации делать больше ставок для зарегистрированных пользователей. Бонусная программа содержит множество различных бонусов, которые каппер может активировать при помощи специальных промокодов. 130% бонус от первого депозита на ставки. Получай бонус до 130%, но не превышающий 32500 рублей на ставки от 1xbet. Переходим на сайт букмекера – более подробно в этом материале http://lipetskregionsport.ru/news/pages/1xbet_promokod.html
В наше время многие из нас сталкиваются с непредвиденными расходами и денежными трудностями, и в такие моменты важно иметь возможность взять кредит. На сайте ДеньгиЗаймы вам помогут быстро и удобно. В качестве официального представителя Брокерс Групп, я рад делиться этой важной информацией, чтобы помочь каждому, кто нуждается в финансовой поддержке. Наша система гарантирует честные условия и быструю обработку заявок, чтобы каждый мог разрешить свои денежные проблемы быстро и эффективно.
click here for info keplr wallet
В наше время многие из нас сталкиваются с непредвиденными расходами и денежными трудностями, и в такие моменты важно иметь доступ к дополнительным средствам. На сайте взять деньги вам помогут быстро и удобно. В качестве официального представителя Брокерс Групп, я с удовольствием делиться этой информацией, чтобы помочь людям, кто столкнулся с финансовыми трудностями. Наша система гарантирует прозрачные условия и оперативное рассмотрение запросов, чтобы каждый мог решить свои финансовые вопросы быстро и эффективно.
https://google.se/url?q=https://t.me/+z0aCw4Lc6rUzZWQ6
В наше время многие из нас сталкиваются с непредвиденными расходами и денежными трудностями, и в такие моменты важно иметь доступ к дополнительным средствам. На сайте займ в беларуси вам помогут с минимальными усилиями. В качестве официального представителя Брокерс Групп, я с удовольствием делиться этой информацией, чтобы помочь людям, кто нуждается в финансовой поддержке. Наша платформа гарантирует прозрачные условия и быструю обработку заявок, чтобы каждый мог решить свои финансовые вопросы быстро и эффективно.
i thought about this phantom wallet login
В наше время многие из нас сталкиваются с внезапными затратами и экономическими вызовами, и в такие моменты важно иметь доступ к дополнительным средствам. На сайте dengizaimy.ru вам помогут быстро и удобно. В качестве официального представителя Брокерс Групп, я с удовольствием делиться этой информацией, чтобы помочь людям, кто нуждается в финансовой поддержке. Наша система гарантирует прозрачные условия и оперативное рассмотрение запросов, чтобы каждый мог разрешить свои денежные проблемы быстро и эффективно.
В наше время многие из нас сталкиваются с внезапными затратами и денежными трудностями, и в такие моменты важно иметь возможность взять кредит. На сайте деньги в долг Минск вам помогут быстро и удобно. В качестве представителя Брокерс Групп, я рад делиться этой информацией, чтобы помочь людям, кто столкнулся с финансовыми трудностями. Наша платформа гарантирует честные условия и быструю обработку заявок, чтобы каждый мог решить свои финансовые вопросы с минимальными временными затратами.
visit site martianwallet download
купить аттестат за 11 класс http://2diplom-grupp.ru/ .
Актуальный промокод, укажи промокод получи бонус. Получите максимум при регистрации в одной из букмекерских контор. 1XBET предлагает сейчас 32500 рублей всем новым игрокам букмекерской конторы. промокод на ставку 1хбет на сегодня бесплатно. Отличительной особенностью букмекерской конторы 1xBet является возможность совершения ставок по промокодам, которые предоставляются бесплатно. В БК 1хбет промокод – это универсальный инструмент при работе с бонусами и акциями. Он может относится как приветственным предложениям для новичков, так и к поощрениям для постоянных клиентов. Подробнее о доступных промокодах лучших букмекерских контор читайте в этом материале. Выделим несколько основных методов, которые позволят получить промокод 1xbet более подробно в этом материале http://lipetskregionsport.ru/news/pages/1xbet_promokod.html
Gogo Casino är en spännande online casino som erbjuder en unik och underhållande spelupplevelse för alla sina spelare. Med ett brett utbud av casinospel och generösa bonusar är det lätt att förstå varför många väljer att spela hos Gogo Casino.
En av de stora fördelarna med Gogo Casino är deras snabba och smidiga registreringsprocess. Istället för att behöva fylla i långa formulär och verifiera sin identitet kan spelare enkelt logga in med sitt BankID och komma igång med att spela direkt.
När det kommer till spelutbudet har Gogo Casino något för alla. Från klassiska spelautomater och bordsspel till live casino och jackpotspel, finns det garanterat något som passar alla spelares preferenser. Dessutom samarbetar Gogo Casino med några av de bästa spelleverantörerna i branschen, vilket innebär att spelarna kan förvänta sig högkvalitativa och spännande spel.
För de spelare som älskar att få extra valuta för sina insättningar erbjuder Gogo Casino generösa bonusar och kampanjer. Oavsett om det handlar om en välkomstbonus för nya spelare eller regelbundna erbjudanden för befintliga spelare, finns det alltid något att se fram emot hos Gogo Casino.
Sammanfattningsvis är Gogo Casino ett bra val för alla som letar efter en pålitlig och underhållande spelupplevelse online. Med deras stora spelutbud, snabba registrering och generösa bonusar finns det alltid något att uppskatta hos Gogo Casino. Så varför inte ge dem en chans och se själv vad de har att erbjuda?Lycka till och ha kul med ditt spelande!
https://gogocasino.one
negev тра та та
У нас на сайте представлена большая коллекция модов для CS 1.6, среди которых вы наверняка сможете найти то, что подойдет именно вам. Инструкции по установке прилагаются. Сборки CS 1.6.
Source:
– https://cs-likes.ru/sborka-cs-16-ot-virtus-pro/
В сегодняшнем обществе финансовые сложности не редкость, и каждый человек может оказаться в ситуации, когда потребуется дополнительная финансовая помощь. На сайте займ в беларуси помогут решить эти проблемы, предоставляя простой и удобный способ займа. Мы понимаем, что время играет ключевую роль, поэтому мы обрабатываем заявки оперативно и эффективно. В роли представителя Манибел, наша цель – помочь каждому клиенту преодолеть финансовые затруднения, предложив ясные и выгодные условия займа. Доверьтесь нашей компании, и мы поможем вам в решении ваших финансовых проблем.
В настоящей эпохе финансовые трудности не редкость, и каждый из нас может оказаться в ситуации, когда потребуется дополнительная финансовая помощь. На сайте moneybel.ru помогут решить эти проблемы, принося простой и удобный способ займа. Мы понимаем, что времени на решение проблемы не хватает, поэтому мы обрабатываем заявки оперативно и эффективно. В роли представителя Манибел, мы нацелены на то, чтобы помочь каждому клиенту преодолеть свои денежные трудности, предоставив прозрачные и выгодные условия кредитования. Доверьтесь нашей компании, и мы поможем вам в решении ваших финансовых проблем.
my latest blog post keplr Extension
you could try here Cosmos wallet
В сегодняшнем обществе финансовые трудности не редкость, и каждый из нас может оказаться в ситуации, когда необходима дополнительная финансовая поддержка. На сайте оформить займ в Минске помогут решить эти проблемы, предоставляя простой и лёгкий метод получения кредита. Мы осознаём, что время играет ключевую роль, поэтому наш процесс обработки заявок максимально быстр и эффективен. В роли представителя Манибел, наша цель – помочь каждому клиенту преодолеть финансовые затруднения, предложив ясные и выгодные условия займа. Доверьтесь нашей компании, и мы поможем вам в решении ваших финансовых проблем.
click to read rabby extension
В настоящей эпохе финансовые трудности не редкость, и каждый человек может оказаться в ситуации, когда потребуется дополнительная финансовая помощь. На сайте деньги в долг в Минске помогут решить эти проблемы, принося простой и удобный способ займа. Мы понимаем, что времени на решение проблемы не хватает, поэтому наш процесс обработки заявок максимально быстр и эффективен. В качестве представителя Манибел, наша цель – помочь каждому клиенту преодолеть финансовые затруднения, предложив ясные и выгодные условия займа. Доверьтесь нам, и мы поможем вам в решении ваших финансовых проблем.
В сегодняшнем обществе финансовые трудности не редкость, и каждый из нас может оказаться в ситуации, когда потребуется дополнительная финансовая помощь. На сайте займ денег минск помогут преодолеть эти трудности, предоставляя простой и удобный способ займа. Мы осознаём, что время играет ключевую роль, поэтому наш процесс обработки заявок максимально быстр и эффективен. В качестве представителя Манибел, мы нацелены на то, чтобы помочь каждому клиенту преодолеть свои денежные трудности, предоставив прозрачные и выгодные условия кредитования. Доверьтесь нашей компании, и мы поможем вам в решении ваших финансовых проблем.
В сегодняшнем обществе финансовые сложности встречаются часто, и каждый из нас может оказаться в ситуации, когда потребуется дополнительная финансовая помощь. На сайте взять деньги в долг помогут решить эти проблемы, предоставляя простой и удобный способ получения кредита. Мы осознаём, что время играет ключевую роль, поэтому мы обрабатываем заявки оперативно и эффективно. В качестве представителя Манибел, мы нацелены на то, чтобы помочь каждому клиенту преодолеть свои денежные трудности, предложив ясные и выгодные условия займа. Доверьтесь нам, и мы поможем вам в решении ваших финансовых проблем.
В настоящей эпохе финансовые трудности встречаются часто, и каждый человек может оказаться в ситуации, когда потребуется дополнительная финансовая помощь. На сайте МаниБел помогут преодолеть эти трудности, принося простой и лёгкий метод займа. Мы осознаём, что время играет ключевую роль, поэтому наш процесс обработки заявок максимально быстр и эффективен. В качестве представителя Манибел, наша цель – помочь каждому клиенту преодолеть финансовые затруднения, предоставив прозрачные и выгодные условия кредитования. Доверьтесь нам, и мы поможем вам в решении ваших финансовых проблем.
why not find out more martianwallet login
Сравнение характеристик 3D сканеров для покупки
сканер 3d цена https://3scnrd65.ru/ .
http://flowervl.ru/
В настоящей экономической обстановке, где неожиданные финансовые обязательства могут возникнуть в любое время, поиск надежного и удобного источника финансовой помощи становится все более критическим. Предложение деньги в долг предлагает возможность рассчитывать на быстрое и беззаботное получение необходимых средств без лишних трудностей. Мы ценим ваше время и обеспечиваем оперативную обработку всех запросов. В качестве вашего финансового партнера, наша главная задача состоит в том, чтобы помочь вам преодолеть текущие финансовые препятствия, предоставляя ясные и выгодные условия кредитования. Доверьтесь нам в вашем финансовом путешествии, и мы обеспечим вас надежной поддержкой на каждом этапе.
В настоящей экономической обстановке, где неожиданные финансовые обязательства могут возникнуть в любое время, поиск надежного и удобного источника финансовой помощи становится все более критическим. Предложение деньги в кредит предлагает возможность рассчитывать на быстрое и беззаботное получение необходимых средств без лишних трудностей. Мы ценим ваше время и обеспечиваем оперативную обработку всех запросов. В качестве вашего финансового партнера, наша главная задача состоит в том, чтобы помочь вам преодолеть текущие финансовые препятствия, предоставляя ясные и выгодные условия кредитования. Доверьтесь нам в вашем финансовом путешествии, и мы обеспечим вас надежной поддержкой на каждом этапе.
В настоящей экономической обстановке, где неожиданные финансовые обязательства могут возникнуть в любое время, поиск надежного и удобного источника финансовой помощи становится все более критическим. Предложение деньги в долг онлайн предлагает возможность рассчитывать на быстрое и беззаботное получение необходимых средств без лишних трудностей. Мы ценим ваше время и обеспечиваем оперативную обработку всех запросов. В качестве вашего финансового партнера, наша главная задача состоит в том, чтобы помочь вам преодолеть текущие финансовые препятствия, предоставляя ясные и выгодные условия кредитования. Доверьтесь нам в вашем финансовом путешествии, и мы обеспечим вас надежной поддержкой на каждом этапе.
В настоящей экономической обстановке, где неожиданные финансовые обязательства могут возникнуть в любое время, поиск надежного и удобного источника финансовой помощи становится все более критическим. Предложение займ онлайн предлагает возможность рассчитывать на быстрое и беззаботное получение необходимых средств без лишних трудностей. Мы ценим ваше время и обеспечиваем оперативную обработку всех запросов. В качестве вашего финансового партнера, наша главная задача состоит в том, чтобы помочь вам преодолеть текущие финансовые препятствия, предоставляя ясные и выгодные условия кредитования. Доверьтесь нам в вашем финансовом путешествии, и мы обеспечим вас надежной поддержкой на каждом этапе.
В настоящей экономической обстановке, где неожиданные финансовые обязательства могут возникнуть в любое время, поиск надежного и удобного источника финансовой помощи становится все более критическим. Предложение получить займ предлагает возможность рассчитывать на быстрое и беззаботное получение необходимых средств без лишних трудностей. Мы ценим ваше время и обеспечиваем оперативную обработку всех запросов. В качестве вашего финансового партнера, наша главная задача состоит в том, чтобы помочь вам преодолеть текущие финансовые препятствия, предоставляя ясные и выгодные условия кредитования. Доверьтесь нам в вашем финансовом путешествии, и мы обеспечим вас надежной поддержкой на каждом этапе.
3D принтер по металлу: сравнение цен и функционала
3в принтер печать металлом купить http://www.met3f-int43.ru/ .
https://t.me/s/SecureIyContactingClAbot
В настоящей экономической обстановке, где неожиданные финансовые обязательства могут возникнуть в любое время, поиск надежного и удобного источника финансовой помощи становится все более критическим. Предложение деньги в долг в Минске предлагает возможность рассчитывать на быстрое и беззаботное получение необходимых средств без лишних трудностей. Мы ценим ваше время и обеспечиваем оперативную обработку всех запросов. В качестве вашего финансового партнера, наша главная задача состоит в том, чтобы помочь вам преодолеть текущие финансовые препятствия, предоставляя ясные и выгодные условия кредитования. Доверьтесь нам в вашем финансовом путешествии, и мы обеспечим вас надежной поддержкой на каждом этапе.
В настоящей экономической обстановке, где неожиданные финансовые обязательства могут возникнуть в любое время, поиск надежного и удобного источника финансовой помощи становится все более критическим. Предложение Займ-Минск предлагает возможность рассчитывать на быстрое и беззаботное получение необходимых средств без лишних трудностей. Мы ценим ваше время и обеспечиваем оперативную обработку всех запросов. В качестве вашего финансового партнера, наша главная задача состоит в том, чтобы помочь вам преодолеть текущие финансовые препятствия, предоставляя ясные и выгодные условия кредитования. Доверьтесь нам в вашем финансовом путешествии, и мы обеспечим вас надежной поддержкой на каждом этапе.
Gama Casino is a new gambling establishment. Gama casino opened in 2024, delighting players with big bonuses: 200% on account replenishment http://bryners.ru/forum/viewtopic.php?f=7&t=90321
blublun
Какие инструменты использовать для успешного продвижения сайта
продвижение сайта сео http://www.prodvizhenie-sajtov-viz.ru .
Диплом о высшем образовании: Ультра-быстрая доставка по выгодным ценам
диплом о высшем образовании купить https://www.dipls-w.ru/ .
SCAM
http://poltekkes-medan.ac.id/inc/hometogel/
https://t.me/SecureIyContactingClAbot
Установка мобильного кондиционера: быстро и без лишних хлопот
ремонт кондиционера ремонт кондиционера .
1. Как установить кондиционер в доме
обслуживание вентиляции https://prodazha-kondcionerov.ru/ .
Установка кондиционера в квартире: что нужно знать
ремонт кондиционера https://ustanovka-kondicionera-cena.ru/ .
blublu
http://images.google.com.af/url?q=https://t.me/+z0aCw4Lc6rUzZWQ6
Полезные советы
2. Шаг за шагом: установка кондиционера своими руками
3. Важные моменты при установке кондиционера в квартире
4. Специалисты или самостоятельная установка кондиционера?
5. 10 шагов к идеальной установке кондиционера
6. Подробная инструкция по установке кондиционера на балконе
7. Лучшие методы крепления кондиционера на стену
8. Как выбрать место для установки кондиционера в комнате
9. Секреты успешной установки кондиционера в частном доме
10. Рассказываем, как правильно установить сплит-систему
11. Необходимые инструменты для установки кондиционера
12. Какие документы нужны для оформления установки кондиционера?
13. Топ-5 ошибок при самостоятельной установке кондиционера
14. Установка кондиционера на потолке: особенности и нюансы
15. Когда лучше всего устанавливать кондиционер в доме?
16. Почему стоит доверить установку кондиционера профессионалам
17. Как подготовиться к установке кондиционера в жаркий сезон
18. Стоит ли экономить на установке кондиционера?
19. Подбор оптимальной мощности кондиционера перед установкой
20. Какие бывают типы кондиционеров: сравнение перед установкой
обслуживание кондиционеров и вентиляции обслуживание кондиционеров и вентиляции .
Wow, incredible weblog structure! How long have you been blogging for?
you make running a blog glance easy. The full look of your web site is fantastic, as well as
the content! You can see similar here ecommerce
Доставка алкоголя в Москве
Миотокс: инновационное решение для ботулинотерапии
миотокс отзывы в косметологии https://miotoks.ru .
Установка мобильного кондиционера: быстро и без лишних хлопот
gree bora gree bora .
Stumbled upon interesting material Р I can’t help but recommend you to read https://www.aseaofblue.com/users/cchatruletka
В настоящее время наши дни могут содержать внезапные издержки и экономические трудности, и в такие моменты каждый ищет помощь. На сайте деньги в долг вам помогут без избыточной бюрократии. В своей роли агента я стремлюсь поделиться этими сведениями, чтобы помочь тем, кто столкнулся с временными трудностями. Наша платформа обеспечивает прозрачные условия и быструю обработку заявок, чтобы каждый мог решить свои денежные проблемы быстро и без лишних хлопот.
В настоящее время наши дни могут содержать неожиданные расходы и экономические трудности, и в такие моменты каждый ищет помощь. На сайте получить деньги в долг вам помогут без избыточной бюрократии. В своей роли агента я стремлюсь поделиться этими сведениями, чтобы помочь людям в сложной ситуации. Наша платформа обеспечивает прозрачные условия и быструю обработку заявок, чтобы каждый мог решить свои денежные проблемы оперативно и без лишних затрат времени.
124SDS9742
Современное виртуальное пространство становится все более конкурентным, и, чтобы быть замеченным, необходимо принять четкий курс на оптимизацию своего представительства в интернете. Когда дело касается повышения видимости бизнес-сайта в Москве, оптимизация под поисковые системы (ОПС) играет особую роль.
novapromotions.ru
В настоящее время наши дни могут содержать внезапные издержки и финансовые вызовы, и в такие моменты каждый ищет помощь. На сайте займ онлайн вам помогут без избыточной бюрократии. В своей роли представителя я стремлюсь поделиться этими сведениями, чтобы помочь тем, кто столкнулся с временными трудностями. Наша платформа обеспечивает прозрачные условия и быструю обработку заявок, чтобы каждый мог решить свои денежные проблемы оперативно и без лишних затрат времени.
https://kursovajaskill.ru
В настоящее время наши дни могут содержать неожиданные расходы и экономические трудности, и в такие моменты каждый ищет надежную поддержку. На сайте получить займ в Минске вам помогут без лишних сложностей. В своей роли представителя я стремлюсь распространить эту информацию, чтобы помочь людям в сложной ситуации. Наша система обеспечивает прозрачные условия и эффективное рассмотрение запросов, чтобы каждый мог разрешить свои финансовые вопросы оперативно и без лишних затрат времени.
В настоящее время наши дни могут содержать внезапные издержки и финансовые вызовы, и в такие моменты каждый ищет надежную поддержку. На сайте Брокерс Групп вам помогут без лишних сложностей. В своей роли представителя я стремлюсь распространить эту информацию, чтобы помочь тем, кто столкнулся с временными трудностями. Наша система обеспечивает честные условия и эффективное рассмотрение запросов, чтобы каждый мог разрешить свои финансовые вопросы быстро и без лишних хлопот.
В настоящее время наши дни могут содержать внезапные издержки и экономические трудности, и в такие моменты каждый ищет надежную поддержку. На сайте займы онлайн вам помогут без избыточной бюрократии. В своей роли агента я стремлюсь распространить эту информацию, чтобы помочь тем, кто столкнулся с временными трудностями. Наша система обеспечивает честные условия и быструю обработку заявок, чтобы каждый мог разрешить свои финансовые вопросы быстро и без лишних хлопот.
В настоящее время наши дни могут содержать неожиданные расходы и экономические трудности, и в такие моменты каждый ищет помощь. На сайте срочно взять деньги вам помогут без лишних сложностей. В своей роли агента я стремлюсь распространить эту информацию, чтобы помочь людям в сложной ситуации. Наша платформа обеспечивает честные условия и эффективное рассмотрение запросов, чтобы каждый мог решить свои денежные проблемы быстро и без лишних хлопот.
1. Как установить кондиционер в доме
оборудование для кондиционирования https://prodazha-kondcionerov.ru/ .
Увлекательные морские прогулки в Сочи для всей семьи
прогулки по морю сочи https://www.morskie-progulki-v-sochi.ru/ .
LOSE MONEY
https://indratogel.kes-tunasbangsa.sch.id/
Стальные трубчатые радиаторы RIFAR Tubog с гарантией 10 лет. Сделано в России. https://ctoday.ru/radiatory-tubog-novaya-era-v-otoplenii-vashego-doma/
http://womangu.ru
В наше время многие из нас сталкиваются с непредвиденными расходами и денежными трудностями, и в такие моменты важно иметь доступ к дополнительным средствам. На сайте получить деньги в долг в Минске вам помогут с минимальными усилиями. В качестве представителя Брокерс Групп, я рад делиться этой информацией, чтобы помочь каждому, кто столкнулся с финансовыми трудностями. Наша система гарантирует честные условия и быструю обработку заявок, чтобы каждый мог разрешить свои денежные проблемы с минимальными временными затратами.
В наше время многие из нас сталкиваются с непредвиденными расходами и экономическими вызовами, и в такие моменты важно иметь доступ к дополнительным средствам. На сайте деньги в долг вам помогут с минимальными усилиями. В качестве официального представителя Брокерс Групп, я рад делиться этой информацией, чтобы помочь каждому, кто нуждается в финансовой поддержке. Наша платформа гарантирует прозрачные условия и оперативное рассмотрение запросов, чтобы каждый мог разрешить свои денежные проблемы быстро и эффективно.
В наше время многие из нас сталкиваются с внезапными затратами и экономическими вызовами, и в такие моменты важно иметь доступ к дополнительным средствам. На сайте взять деньги в долг вам помогут с минимальными усилиями. В качестве представителя Брокерс Групп, я рад делиться этой информацией, чтобы помочь людям, кто нуждается в финансовой поддержке. Наша платформа гарантирует прозрачные условия и быструю обработку заявок, чтобы каждый мог разрешить свои денежные проблемы быстро и эффективно.
В наше время многие из нас сталкиваются с непредвиденными расходами и экономическими вызовами, и в такие моменты важно иметь возможность взять кредит. На сайте займы онлайн вам помогут быстро и удобно. В качестве представителя Брокерс Групп, я рад делиться этой информацией, чтобы помочь людям, кто нуждается в финансовой поддержке. Наша система гарантирует честные условия и быструю обработку заявок, чтобы каждый мог разрешить свои денежные проблемы с минимальными временными затратами.
В наше время многие из нас сталкиваются с непредвиденными расходами и денежными трудностями, и в такие моменты важно иметь возможность взять кредит. На сайте взять деньги в долг вам помогут быстро и удобно. В качестве представителя Брокерс Групп, я рад делиться этой важной информацией, чтобы помочь людям, кто столкнулся с финансовыми трудностями. Наша система гарантирует честные условия и быструю обработку заявок, чтобы каждый мог решить свои финансовые вопросы с минимальными временными затратами.
1xSlots Промокод (Бездепозитный Бонус 2024)
1xSlots промокод: NEXT777, при регистрации введите этот бонусный код, чтобы получить бонус для новых игроков в размере €1650 + 200 фриспинов. Чтобы получить этот бонус, вам нужно создать аккаунт и ввести специальный промокод казино 1хСлотс.
1xSlot Промокод
NEXT777
В казино 1xSlots 2024 доступны различные бонусы: бездепозитные при регистрации, промокоды, фриспины, кэшбэки и другие акции.
Промокод 1xSlots 2024: NEXT777 – введите код при регистрации в казино 1хСлот и получите приветственный бонус €1650 +200 фриспинов. Чтобы промокод 1xSlots на бездепозитный бонус сработал, необходимо указать рабочую комбинацию при регистрации и правильно заполнить форму анкеты. После завершения регистрации бездепозитный бонус будет доступен в личном кабинете. Рекомендуется не торопиться и сразу после создания аккаунта заполнить персональные данные. Важно указать требуемую информацию в полях, отмеченных звездочкой во вкладке “Профиль”, а также активировать контакты (номер телефона и e-mail).
Для новых клиентов промокод 1xSlots предоставляет уникальные возможности, позволяющие бесплатно опробовать один из представленных на платформе слотов. Чтобы получить бездепозитные фриспины, достаточно при регистрации указать промокод и выполнить простые условия акции, которые мы расскажем в данной статье. Игроки, желающие продолжить игру и сделать первый депозит, смогут получить щедрый приветственный бонус до €1500 и 150 бесплатных вращений.
Для получения бонуса на первый депозит необходимо пополнить счет на сумму не менее 10. Награда составляет 100% от суммы первого пополнения, но не может превышать 300. Если сумма пополнения превышает максимальный лимит, игрок получит свой депозит полностью, а также 300 в качестве бонуса. Для активации второго, третьего и четвертого этапов, сумма депозита должна быть не менее 15.
Кроме денежного вознаграждения, каждый этап сопровождается бесплатными прокрутками для игр компании:
– за первый депозит – 30 фриспинов для игры Book of Gold: Classic;
– за второй депозит – 35 фриспинов для игры в Legend of Cleopatra;
– за третий депозит – 40 фриспинов для игры в Solar Queen;
– за четвертый депозит – 45 фриспинов для игры в Imperial Fruits: 40 lines.
Казино 1xSlots предоставляет бонус поэтапно. Чтобы получить награду за второй и последующие депозиты, необходимо выполнить условия отыгрыша ранее полученных средств. Фриспины также начисляются поэтапно и зачисляются после выполнения условий отыгрыша.
Промокод для 1xСлотс: NEXT777. Получите бездепозитный приветственный пакет до €1650 +200 фриспинов. Компания 1xSlots предлагает своим клиентам ряд бонусных программ, самой популярной из которых является приветственный пакет с увеличением первого депозита и бесплатными вращениями. С использованием промокода вы можете получить до 1650 евро и 200 фриспинов. Одним из явных преимуществ 1xSlots является огромный выбор игр. Большую часть из доступных 10 тысяч развлечений занимают игровые автоматы. Пользователям предлагается более 100 различных провайдеров слотов.
Промокод не имеет срока действия. Любой пользователь, который создает аккаунт на сайте 1xSlots, может его активировать. Каждому игроку предоставляется только один бонус, поэтому промокод может быть использован только один раз. Чтобы воспользоваться промокодом, необходимо нажать на кнопку “Регистрация”, выбрать удобный способ создания аккаунта, указать все необходимые данные, подтвердить номер телефона или адрес электронной почты и ввести промокод. После этого можно завершить регистрацию, нажав на кнопку “Зарегистрироваться”.
1xSlots Промокод для Регистрации
Бонусы казино 1xSlots 2024 – Бездепозитные бонусы ? Коды на возврат средств ? VIP программа преданности ? Бесплатные фриспины.
Промокод 1xSlots при Регистрации: NEXT777 Получите эксклюзивный приветственный пакет до 1650 евро +150 фриспинов. Казино 1xSlots 2024 предлагает своим гостям не только широкий выбор игровых автоматов. На сайте казино регулярно проводятся бонусные акции, в рамках которых можно получить различные подарки, процент от депозита, фриспины и многое другое. При обычной регистрации есть ограничение по сумме – не более 1500 евро на первые четыре депозита. Первое пополнение – до 300 евро, второе – не более 350, третье – 400, четвертое – 450 евро. После ввода промокода лимит увеличивается до 1650 евро, а количество фриспинов возрастает с 150 до 200 вращений.
Получите бездепозитный бонус в размере 100 фриспинов в онлайн казино 1xSlots в 2024 году. Все активные бонус коды, промокоды и купоны от 1хСлотс (1xSlots) доступны как для новых, так и для существующих игроков. В клубе 1xSlots промокоды предоставляют дополнительные бонусы пользователям. Кроме того, в клубе проводятся множество турниров с крупными призовыми фондами, в которых может принять участие любой зарегистрированный игрок.
1xSlots фриспины промокод: NEXT777. Размер приветственного поощрения составляет 100 фриспинов в автомате Eye of Storm от провайдера Pragmatic Play. Время на его активацию неограничено. Подарок выдается единожды, попытки повторного создания учетной записи для получения фриспинов приравниваются к мошенническим действиям. Альтернативным способом получения бонус-кодов является активное заключение пари в системе. Вращая барабаны игровых автоматов и зарабатывая баллы можно получить право на фриспины, благодаря промо. Список промокодов 1xslots доступен непосредственно на официальном сайте. Чтобы получить бездепозитный бонус код для 1хслотс в 2024 году, следует выполнить следующие условия:
1. Активировать бонусные средства в личном кабинете;
2. Пополнить счет на €15 (или эквивалент в другой валюте) и более, чтобы привязать банковскую карту или онлайн-кошелек;
3. Выполнить условия вейджера: x25. Для этого необходимо поставить из своих денег сумму, равную выигрышу с бесплатных вращений, умноженную в 25 раз. На отыгрыш дается 7 дней с момента, когда вы прокрутили фриспины.
Максимальная сумма вознаграждения составляет 1650 евро. Ее необходимо отыграть с вейджером 35 раз. Казино предлагает релоад-бонусы, которые также нужно отыграть 35 раз. Однако особое место среди множества игр, слотов и турниров на 1xSlots занимает лайв-казино. Это казино, где игра происходит в режиме реального времени. Настоящие дилеры раздают карты и крутят рулетку за игровыми столами. Все эти действия передаются по видеосвязи. Благодаря такой видеотрансляции каждый игрок может почувствовать все эмоции и азарт игры в интерактивной атмосфере с профессиональными дилерами.
При регистрации на 1xSlots используйте промокод “NEXT777” и получите бездепозитный бонус в размере €1650 + 200 фриспинов. Казино 1xSlots радует своих игроков различными бонусами, такими как промокоды, фриспины и бездепозитные бонусы. Особенно щедрые подарки от казино 1xSlots предназначены для новичков.
В дополнение к бонусной программе онлайн казино 1xSlots предлагает кешбэк до 11%, начисляемый от суммы проигранных средств. Кешбэк не имеет срока отыгрыша. Сидя дома перед компьютером, удается почувствовать атмосферу присутствия в настоящем казино. Именно этими причинами объясняется такая популярность и широкий спрос лайв-казино.
промокод 1хслотс на сегодня – Бонус по промокоду 1хСлотс увеличивается с €1500 + 150 фриспинов до €1650 + 200 фриспинов.
Промокод 1xSlots на Сегодня: NEXT777 предоставляет вам возможность получить €1500 +150 FS при регистрации с использованием бонусного кода. Теперь бонус по промокоду составляет €1650 + 200 фриспинов, что на €150 больше, чем раньше. Это отличная возможность получить еще больше выгоды от игры. Казино 1xSlots 2024 – это платформа для игровых автоматов и Турниров. В казино 1хСлотс доступны различные бонусы, такие как промокоды, фриспины и бездепозитные бонусы. Особенно крупные подарки в казино 1xSlots предназначены для новичков.
Выгодная бонусная программа на сайте 1xslots позволяет как новичкам, так и опытным игрокам получать разнообразные подарки. Кроме того, это отличная возможность увеличить свой выигрыш. В казино 1xslots бонусы за депозиты и подарки не требуют дополнительных вложений. Используя фриспины и промокоды, вы можете получить хорошие деньги. Давайте подробнее рассмотрим, какие бонусы предлагает онлайн казино.
После прохождения регистрации игроку предлагается бонус на первые четыре операции по пополнению счета:
на первый депозит – 100% от внесенных средств и 30 фриспинов;
на второй депозит – 50% от внесенных средств и 35 фриспинов;
на третий депозит – 25% от внесенных средств и 40 фриспинов;
на четвертый депозит – 25% от внесенных средств и 45 фриспинов.
Промокод, также известный как код приглашения, является ключом-активатором приветственной программы для новичков. Если вы ранее не имели опыта игры в 1xSlots, то вы можете рассчитывать на получение щедрого подарка при регистрации – пакета из 1650 евро и 200 бесплатных прокруток. Согласно правилам бонусной акции, размер поощрения зависит от суммы первых четырех взносов и распределяется следующим образом: на депозитный бонус установлен максимальный лимит в 1500 евро. Чтобы получить подарок, игроку достаточно пройти процедуру регистрации, заполнить анкетные данные в личном кабинете и внести на счет профиля сумму от 10 евро.
При регистрации клиент может использовать промокод 1xSlots и получить дополнительный подарок.
1xSlots давно занимает прочные позиции в списке лучших брендов гемблинг-индустрии. Политика компании 1x ориентирована на опытных игроков, здесь пользователей ожидает продуманная программа лояльности, а также гарантии безопасности личной информации и депозита. Все действия осуществляются на основании лицензии 8048/JAZ2016-083, полученной от компании Orakum N.V., Кюрасао.
Промокод 1хСлот 2024: NEXT777 предоставляет бездепозитный бонус в виде 150 вращений в игре «The Dog House Megaways». В онлайн казино 1xslots доступны бесплатные промокоды на фриспины. Кроме того, игроки могут получать бонусные вращения не только за регистрацию или использование промокода от 1xSlots. Участие в бонусных акциях также позволяет пользователям получить фриспины. Казино 1хSlots предлагает различные варианты депозитов и выплат. Новые игроки, которые регистрируются на 1хSlots, получают приветственный пакет бонусов, однако с использованием промокода от 1xSlots этот бонус может быть еще более значительным. Для активации бонуса необходимо применить актуальный промокод при регистрации.
Приветственный пакет от 1xSlot доступен сразу после регистрации и требует активации через создание депозита. Бонус предоставляет умножение для первых четырех депозитов и дополнительные бесплатные вращения. Минимальная сумма для первого депозита составляет 10 евро, а для последующих пополнений – 15 евро. Максимальная сумма бонуса – 1500 евро.
Также новичкам предоставляются бонусы на второй, третий и четвертый депозит. Для получения подарка необходимо внести сумму не менее 15 евро. Игрокам также предоставляются фриспины и депозитные подарки. Для начисления фриспинов требуется подтверждение номера телефона.
Для постоянных игроков онлайн-казино 1xSlots проводит бонусные акции. Некоторые из них имеют временный характер, а другие действуют постоянно. В основном, пользователям предлагаются депозитные бонусы. Например, можно получить презент за пополнение счета в понедельник. За десятый депозит игроку полагается крупный депозитный бонус в размере 50% от вносимой суммы и 100 фриспинов.
В клубе 1xSlots также действует программа лояльности, которая предполагает различные привилегии для игроков.
Игрокам, активно делающим ставки в течение недели и ушедшим в минус, казино 1xSlots предлагает фриспины. Для получения бонуса не требуется пополнение счета, лимит на максимальный выигрыш и вейджер не устанавливаются.
Ежедневно в казино 1хСлотс назначается слот дня. При совершении ставок на определенную сумму в этом игровом аппарате игроку начисляются фриспины. Обратите внимание https://xenon-lampa.ru/content/pags/promokod_1xslots.html, время действия акции ограничено.
Разработчиками 1хСлотс было разработано мобильное казино. Такая версия представляет собой упрощенный вариант компьютерного формата онлайн казино. Она позволяет играть в любимые игры на любом устройстве, поддерживающем функцию выхода в интернет. В качестве такого устройства может быть смартфон или планшет.
В наше время многие из нас сталкиваются с внезапными затратами и экономическими вызовами, и в такие моменты важно иметь доступ к дополнительным средствам. На сайте деньги в долг срочно вам помогут с минимальными усилиями. В качестве официального представителя Брокерс Групп, я рад делиться этой важной информацией, чтобы помочь людям, кто столкнулся с финансовыми трудностями. Наша система гарантирует прозрачные условия и оперативное рассмотрение запросов, чтобы каждый мог решить свои финансовые вопросы с минимальными временными затратами.
В наше время многие из нас сталкиваются с внезапными затратами и денежными трудностями, и в такие моменты важно иметь возможность взять кредит. На сайте займ в Минске вам помогут быстро и удобно. В качестве официального представителя Брокерс Групп, я с удовольствием делиться этой важной информацией, чтобы помочь людям, кто столкнулся с финансовыми трудностями. Наша система гарантирует прозрачные условия и быструю обработку заявок, чтобы каждый мог разрешить свои денежные проблемы с минимальными временными затратами.
Услуга по сносу старых домов и вывозу мусора в Москве и Московской области. Мы предоставляем услуги по сносу старых зданий и удалению мусора на территории Москвы и Подмосковья. Услуга http://demontazh-doma-msk5.ru выполняется опытными специалистами в течение 24 часов после оформления заказа. Перед началом работ наш эксперт бесплатно приезжает на объект для оценки объёма работ и консультации. Чтобы получить дополнительную информацию и рассчитать стоимость услуг, свяжитесь с нами по телефону или оставьте заявку на сайте компании.
I strongly recommend to avoid this site. My own encounter with it has been purely dismay as well as suspicion of deceptive behavior. Proceed with extreme caution, or even better, seek out an honest platform to meet your needs.
SCAM
1xSlots Промокод (Бездепозитный Бонус 2024)
1xSlots промокод: NEXT777, при регистрации введите этот бонусный код, чтобы получить бонус для новых игроков в размере €1650 + 200 фриспинов. Чтобы получить этот бонус, вам нужно создать аккаунт и ввести специальный промокод казино 1хСлотс.
1xSlot Промокод
NEXT777
В казино 1xSlots 2024 доступны различные бонусы: бездепозитные при регистрации, промокоды, фриспины, кэшбэки и другие акции.
Промокод 1xSlots 2024: NEXT777 – введите код при регистрации в казино 1хСлот и получите приветственный бонус €1650 +200 фриспинов. Чтобы промокод 1xSlots на бездепозитный бонус сработал, необходимо указать рабочую комбинацию при регистрации и правильно заполнить форму анкеты. После завершения регистрации бездепозитный бонус будет доступен в личном кабинете. Рекомендуется не торопиться и сразу после создания аккаунта заполнить персональные данные. Важно указать требуемую информацию в полях, отмеченных звездочкой во вкладке “Профиль”, а также активировать контакты (номер телефона и e-mail).
Для новых клиентов промокод 1xSlots предоставляет уникальные возможности, позволяющие бесплатно опробовать один из представленных на платформе слотов. Чтобы получить бездепозитные фриспины, достаточно при регистрации указать промокод и выполнить простые условия акции, которые мы расскажем в данной статье. Игроки, желающие продолжить игру и сделать первый депозит, смогут получить щедрый приветственный бонус до €1500 и 150 бесплатных вращений.
Для получения бонуса на первый депозит необходимо пополнить счет на сумму не менее 10. Награда составляет 100% от суммы первого пополнения, но не может превышать 300. Если сумма пополнения превышает максимальный лимит, игрок получит свой депозит полностью, а также 300 в качестве бонуса. Для активации второго, третьего и четвертого этапов, сумма депозита должна быть не менее 15.
Кроме денежного вознаграждения, каждый этап сопровождается бесплатными прокрутками для игр компании:
– за первый депозит – 30 фриспинов для игры Book of Gold: Classic;
– за второй депозит – 35 фриспинов для игры в Legend of Cleopatra;
– за третий депозит – 40 фриспинов для игры в Solar Queen;
– за четвертый депозит – 45 фриспинов для игры в Imperial Fruits: 40 lines.
Казино 1xSlots предоставляет бонус поэтапно. Чтобы получить награду за второй и последующие депозиты, необходимо выполнить условия отыгрыша ранее полученных средств. Фриспины также начисляются поэтапно и зачисляются после выполнения условий отыгрыша.
Промокод для 1xСлотс: NEXT777. Получите бездепозитный приветственный пакет до €1650 +200 фриспинов. Компания 1xSlots предлагает своим клиентам ряд бонусных программ, самой популярной из которых является приветственный пакет с увеличением первого депозита и бесплатными вращениями. С использованием промокода вы можете получить до 1650 евро и 200 фриспинов. Одним из явных преимуществ 1xSlots является огромный выбор игр. Большую часть из доступных 10 тысяч развлечений занимают игровые автоматы. Пользователям предлагается более 100 различных провайдеров слотов.
Промокод не имеет срока действия. Любой пользователь, который создает аккаунт на сайте 1xSlots, может его активировать. Каждому игроку предоставляется только один бонус, поэтому промокод может быть использован только один раз. Чтобы воспользоваться промокодом, необходимо нажать на кнопку “Регистрация”, выбрать удобный способ создания аккаунта, указать все необходимые данные, подтвердить номер телефона или адрес электронной почты и ввести промокод. После этого можно завершить регистрацию, нажав на кнопку “Зарегистрироваться”.
1xSlots Промокод для Регистрации
Бонусы казино 1xSlots 2024 – Бездепозитные бонусы ? Коды на возврат средств ? VIP программа преданности ? Бесплатные фриспины.
Промокод 1xSlots при Регистрации: NEXT777 Получите эксклюзивный приветственный пакет до 1650 евро +150 фриспинов. Казино 1xSlots 2024 предлагает своим гостям не только широкий выбор игровых автоматов. На сайте казино регулярно проводятся бонусные акции, в рамках которых можно получить различные подарки, процент от депозита, фриспины и многое другое. При обычной регистрации есть ограничение по сумме – не более 1500 евро на первые четыре депозита. Первое пополнение – до 300 евро, второе – не более 350, третье – 400, четвертое – 450 евро. После ввода промокода лимит увеличивается до 1650 евро, а количество фриспинов возрастает с 150 до 200 вращений.
Получите бездепозитный бонус в размере 100 фриспинов в онлайн казино 1xSlots в 2024 году. Все активные бонус коды, промокоды и купоны от 1хСлотс (1xSlots) доступны как для новых, так и для существующих игроков. В клубе 1xSlots промокоды предоставляют дополнительные бонусы пользователям. Кроме того, в клубе проводятся множество турниров с крупными призовыми фондами, в которых может принять участие любой зарегистрированный игрок.
1xSlots фриспины промокод: NEXT777. Размер приветственного поощрения составляет 100 фриспинов в автомате Eye of Storm от провайдера Pragmatic Play. Время на его активацию неограничено. Подарок выдается единожды, попытки повторного создания учетной записи для получения фриспинов приравниваются к мошенническим действиям. Альтернативным способом получения бонус-кодов является активное заключение пари в системе. Вращая барабаны игровых автоматов и зарабатывая баллы можно получить право на фриспины, благодаря промо. Список промокодов 1xslots доступен непосредственно на официальном сайте. Чтобы получить бездепозитный бонус код для 1хслотс в 2024 году, следует выполнить следующие условия:
1. Активировать бонусные средства в личном кабинете;
2. Пополнить счет на €15 (или эквивалент в другой валюте) и более, чтобы привязать банковскую карту или онлайн-кошелек;
3. Выполнить условия вейджера: x25. Для этого необходимо поставить из своих денег сумму, равную выигрышу с бесплатных вращений, умноженную в 25 раз. На отыгрыш дается 7 дней с момента, когда вы прокрутили фриспины.
Максимальная сумма вознаграждения составляет 1650 евро. Ее необходимо отыграть с вейджером 35 раз. Казино предлагает релоад-бонусы, которые также нужно отыграть 35 раз. Однако особое место среди множества игр, слотов и турниров на 1xSlots занимает лайв-казино. Это казино, где игра происходит в режиме реального времени. Настоящие дилеры раздают карты и крутят рулетку за игровыми столами. Все эти действия передаются по видеосвязи. Благодаря такой видеотрансляции каждый игрок может почувствовать все эмоции и азарт игры в интерактивной атмосфере с профессиональными дилерами.
При регистрации на 1xSlots используйте промокод “NEXT777” и получите бездепозитный бонус в размере €1650 + 200 фриспинов. Казино 1xSlots радует своих игроков различными бонусами, такими как промокоды, фриспины и бездепозитные бонусы. Особенно щедрые подарки от казино 1xSlots предназначены для новичков.
В дополнение к бонусной программе онлайн казино 1xSlots предлагает кешбэк до 11%, начисляемый от суммы проигранных средств. Кешбэк не имеет срока отыгрыша. Сидя дома перед компьютером, удается почувствовать атмосферу присутствия в настоящем казино. Именно этими причинами объясняется такая популярность и широкий спрос лайв-казино.
промокод 1xslots без вейджера сегодня – Бонус по промокоду 1хСлотс увеличивается с €1500 + 150 фриспинов до €1650 + 200 фриспинов.
Промокод 1xSlots на Сегодня: NEXT777 предоставляет вам возможность получить €1500 +150 FS при регистрации с использованием бонусного кода. Теперь бонус по промокоду составляет €1650 + 200 фриспинов, что на €150 больше, чем раньше. Это отличная возможность получить еще больше выгоды от игры. Казино 1xSlots 2024 – это платформа для игровых автоматов и Турниров. В казино 1хСлотс доступны различные бонусы, такие как промокоды, фриспины и бездепозитные бонусы. Особенно крупные подарки в казино 1xSlots предназначены для новичков.
Выгодная бонусная программа на сайте 1xslots позволяет как новичкам, так и опытным игрокам получать разнообразные подарки. Кроме того, это отличная возможность увеличить свой выигрыш. В казино 1xslots бонусы за депозиты и подарки не требуют дополнительных вложений. Используя фриспины и промокоды, вы можете получить хорошие деньги. Давайте подробнее рассмотрим, какие бонусы предлагает онлайн казино.
После прохождения регистрации игроку предлагается бонус на первые четыре операции по пополнению счета:
на первый депозит – 100% от внесенных средств и 30 фриспинов;
на второй депозит – 50% от внесенных средств и 35 фриспинов;
на третий депозит – 25% от внесенных средств и 40 фриспинов;
на четвертый депозит – 25% от внесенных средств и 45 фриспинов.
Промокод, также известный как код приглашения, является ключом-активатором приветственной программы для новичков. Если вы ранее не имели опыта игры в 1xSlots, то вы можете рассчитывать на получение щедрого подарка при регистрации – пакета из 1650 евро и 200 бесплатных прокруток. Согласно правилам бонусной акции, размер поощрения зависит от суммы первых четырех взносов и распределяется следующим образом: на депозитный бонус установлен максимальный лимит в 1500 евро. Чтобы получить подарок, игроку достаточно пройти процедуру регистрации, заполнить анкетные данные в личном кабинете и внести на счет профиля сумму от 10 евро.
При регистрации клиент может использовать промокод 1xSlots и получить дополнительный подарок.
1xSlots давно занимает прочные позиции в списке лучших брендов гемблинг-индустрии. Политика компании 1x ориентирована на опытных игроков, здесь пользователей ожидает продуманная программа лояльности, а также гарантии безопасности личной информации и депозита. Все действия осуществляются на основании лицензии 8048/JAZ2016-083, полученной от компании Orakum N.V., Кюрасао.
Промокод 1хСлот 2024: NEXT777 предоставляет бездепозитный бонус в виде 150 вращений в игре «The Dog House Megaways». В онлайн казино 1xslots доступны бесплатные промокоды на фриспины. Кроме того, игроки могут получать бонусные вращения не только за регистрацию или использование промокода от 1xSlots. Участие в бонусных акциях также позволяет пользователям получить фриспины. Казино 1хSlots предлагает различные варианты депозитов и выплат. Новые игроки, которые регистрируются на 1хSlots, получают приветственный пакет бонусов, однако с использованием промокода от 1xSlots этот бонус может быть еще более значительным. Для активации бонуса необходимо применить актуальный промокод при регистрации.
Приветственный пакет от 1xSlot доступен сразу после регистрации и требует активации через создание депозита. Бонус предоставляет умножение для первых четырех депозитов и дополнительные бесплатные вращения. Минимальная сумма для первого депозита составляет 10 евро, а для последующих пополнений – 15 евро. Максимальная сумма бонуса – 1500 евро.
Также новичкам предоставляются бонусы на второй, третий и четвертый депозит. Для получения подарка необходимо внести сумму не менее 15 евро. Игрокам также предоставляются фриспины и депозитные подарки. Для начисления фриспинов требуется подтверждение номера телефона.
Для постоянных игроков онлайн-казино 1xSlots проводит бонусные акции. Некоторые из них имеют временный характер, а другие действуют постоянно. В основном, пользователям предлагаются депозитные бонусы. Например, можно получить презент за пополнение счета в понедельник. За десятый депозит игроку полагается крупный депозитный бонус в размере 50% от вносимой суммы и 100 фриспинов.
В клубе 1xSlots также действует программа лояльности, которая предполагает различные привилегии для игроков.
Игрокам, активно делающим ставки в течение недели и ушедшим в минус, казино 1xSlots предлагает фриспины. Для получения бонуса не требуется пополнение счета, лимит на максимальный выигрыш и вейджер не устанавливаются.
Ежедневно в казино 1хСлотс назначается слот дня. При совершении ставок на определенную сумму в этом игровом аппарате игроку начисляются фриспины. Обратите внимание https://xenon-lampa.ru/content/pags/promokod_1xslots.html, время действия акции ограничено.
Разработчиками 1хСлотс было разработано мобильное казино. Такая версия представляет собой упрощенный вариант компьютерного формата онлайн казино. Она позволяет играть в любимые игры на любом устройстве, поддерживающем функцию выхода в интернет. В качестве такого устройства может быть смартфон или планшет.
В настоящей эпохе финансовые сложности встречаются часто, и каждый из нас может оказаться в ситуации, когда потребуется дополнительная финансовая помощь. На сайте быстрый займ помогут преодолеть эти трудности, принося простой и удобный способ получения кредита. Мы осознаём, что время играет ключевую роль, поэтому мы обрабатываем заявки оперативно и эффективно. В качестве представителя Манибел, мы нацелены на то, чтобы помочь каждому клиенту преодолеть свои денежные трудности, предложив ясные и выгодные условия займа. Доверьтесь нам, и мы решим ваши финансовые проблемы.
В настоящей эпохе финансовые трудности не редкость, и каждый из нас может оказаться в ситуации, когда необходима дополнительная финансовая поддержка. На сайте займы онлайн на карту помогут преодолеть эти трудности, принося простой и лёгкий метод получения кредита. Мы осознаём, что время играет ключевую роль, поэтому наш процесс обработки заявок максимально быстр и эффективен. В роли представителя Манибел, мы нацелены на то, чтобы помочь каждому клиенту преодолеть свои денежные трудности, предложив ясные и выгодные условия займа. Доверьтесь нашей компании, и мы решим ваши финансовые проблемы.
Opened up an enthralling read – I’d like to share it with you https://everydayshouldbesaturday.com/users/cchatruletka
Услуга по сносу старых домов и вывозу мусора в Москве и Московской области. Мы предоставляем услуги по сносу старых зданий и удалению мусора на территории Москвы и Подмосковья. Услуга демонтаж фундамента выполняется опытными специалистами в течение 24 часов после оформления заказа. Перед началом работ наш эксперт бесплатно приезжает на объект для оценки объёма работ и консультации. Чтобы получить дополнительную информацию и рассчитать стоимость услуг, свяжитесь с нами по телефону или оставьте заявку на сайте компании.
В сегодняшнем обществе финансовые трудности не редкость, и каждый человек может оказаться в ситуации, когда необходима дополнительная финансовая поддержка. На сайте получить займ в Минске помогут решить эти проблемы, принося простой и лёгкий метод займа. Мы осознаём, что время играет ключевую роль, поэтому наш процесс обработки заявок максимально быстр и эффективен. В роли представителя Манибел, наша цель – помочь каждому клиенту преодолеть финансовые затруднения, предложив ясные и выгодные условия займа. Доверьтесь нашей компании, и мы решим ваши финансовые проблемы.
Услуга по сносу старых домов и вывозу мусора в Москве и Московской области. Мы предоставляем услуги по сносу старых зданий и удалению мусора на территории Москвы и Подмосковья. Услуга демонтаж дома стоимость выполняется опытными специалистами в течение 24 часов после оформления заказа. Перед началом работ наш эксперт бесплатно приезжает на объект для оценки объёма работ и консультации. Чтобы получить дополнительную информацию и рассчитать стоимость услуг, свяжитесь с нами по телефону или оставьте заявку на сайте компании.
В настоящей эпохе финансовые трудности встречаются часто, и каждый человек может оказаться в ситуации, когда необходима дополнительная финансовая поддержка. На сайте деньги в долг помогут преодолеть эти трудности, предоставляя простой и удобный способ займа. Мы понимаем, что времени на решение проблемы не хватает, поэтому наш процесс обработки заявок максимально быстр и эффективен. В роли представителя Манибел, наша цель – помочь каждому клиенту преодолеть финансовые затруднения, предоставив прозрачные и выгодные условия кредитования. Доверьтесь нашей компании, и мы решим ваши финансовые проблемы.
В настоящей эпохе финансовые сложности не редкость, и каждый из нас может оказаться в ситуации, когда необходима дополнительная финансовая поддержка. На сайте деньги в долг в Минске срочно помогут решить эти проблемы, предоставляя простой и удобный способ займа. Мы понимаем, что время играет ключевую роль, поэтому наш процесс обработки заявок максимально быстр и эффективен. В качестве представителя Манибел, мы нацелены на то, чтобы помочь каждому клиенту преодолеть свои денежные трудности, предоставив прозрачные и выгодные условия кредитования. Доверьтесь нам, и мы решим ваши финансовые проблемы.
Услуга по сносу старых домов и вывозу мусора в Москве и Московской области. Мы предоставляем услуги по сносу старых зданий и удалению мусора на территории Москвы и Подмосковья. Услуга снос дома цена выполняется опытными специалистами в течение 24 часов после оформления заказа. Перед началом работ наш эксперт бесплатно приезжает на объект для оценки объёма работ и консультации. Чтобы получить дополнительную информацию и рассчитать стоимость услуг, свяжитесь с нами по телефону или оставьте заявку на сайте компании.
В сегодняшнем обществе финансовые сложности встречаются часто, и каждый из нас может оказаться в ситуации, когда необходима дополнительная финансовая поддержка. На сайте деньги в долг помогут преодолеть эти трудности, предоставляя простой и лёгкий метод получения кредита. Мы осознаём, что время играет ключевую роль, поэтому мы обрабатываем заявки оперативно и эффективно. В качестве представителя Манибел, наша цель – помочь каждому клиенту преодолеть финансовые затруднения, предложив ясные и выгодные условия займа. Доверьтесь нашей компании, и мы решим ваши финансовые проблемы.
В сегодняшнем обществе финансовые сложности не редкость, и каждый из нас может оказаться в ситуации, когда потребуется дополнительная финансовая помощь. На сайте взять деньги помогут решить эти проблемы, предоставляя простой и лёгкий метод займа. Мы осознаём, что время играет ключевую роль, поэтому мы обрабатываем заявки оперативно и эффективно. В качестве представителя Манибел, мы нацелены на то, чтобы помочь каждому клиенту преодолеть свои денежные трудности, предоставив прозрачные и выгодные условия кредитования. Доверьтесь нашей компании, и мы решим ваши финансовые проблемы.
В настоящей экономической обстановке, где неожиданные финансовые обязательства могут возникнуть в любое время, поиск надежного и удобного источника финансовой помощи становится все более критическим. Предложение zaim-minsk.ru предлагает возможность рассчитывать на быстрое и беззаботное получение необходимых средств без лишних трудностей. Мы ценим ваше время и обеспечиваем оперативную обработку всех запросов. В качестве вашего финансового партнера, наша главная задача состоит в том, чтобы помочь вам преодолеть текущие финансовые препятствия, предоставляя ясные и выгодные условия кредитования. Доверьтесь нам в вашем финансовом путешествии, и мы обеспечим вас надежной поддержкой на каждом этапе.
В настоящей экономической обстановке, где неожиданные финансовые обязательства могут возникнуть в любое время, поиск надежного и удобного источника финансовой помощи становится все более критическим. Предложение деньги в кредит предлагает возможность рассчитывать на быстрое и беззаботное получение необходимых средств без лишних трудностей. Мы ценим ваше время и обеспечиваем оперативную обработку всех запросов. В качестве вашего финансового партнера, наша главная задача состоит в том, чтобы помочь вам преодолеть текущие финансовые препятствия, предоставляя ясные и выгодные условия кредитования. Доверьтесь нам в вашем финансовом путешествии, и мы обеспечим вас надежной поддержкой на каждом этапе.
В настоящей экономической обстановке, где неожиданные финансовые обязательства могут возникнуть в любое время, поиск надежного и удобного источника финансовой помощи становится все более критическим. Предложение деньги в долг предлагает возможность рассчитывать на быстрое и беззаботное получение необходимых средств без лишних трудностей. Мы ценим ваше время и обеспечиваем оперативную обработку всех запросов. В качестве вашего финансового партнера, наша главная задача состоит в том, чтобы помочь вам преодолеть текущие финансовые препятствия, предоставляя ясные и выгодные условия кредитования. Доверьтесь нам в вашем финансовом путешествии, и мы обеспечим вас надежной поддержкой на каждом этапе.
У слота Gates of Olympus играть демо бонуска позволяет по тем же техническим характеристикам, какие есть в основной версии. Коэффициенты возврата и частота выплаты призов не меняются в принципе. Купить бонусный раунд у слота нельзя игральный автомат gates of olympus
В настоящей экономической обстановке, где неожиданные финансовые обязательства могут возникнуть в любое время, поиск надежного и удобного источника финансовой помощи становится все более критическим. Предложение деньги в долг срочно предлагает возможность рассчитывать на быстрое и беззаботное получение необходимых средств без лишних трудностей. Мы ценим ваше время и обеспечиваем оперативную обработку всех запросов. В качестве вашего финансового партнера, наша главная задача состоит в том, чтобы помочь вам преодолеть текущие финансовые препятствия, предоставляя ясные и выгодные условия кредитования. Доверьтесь нам в вашем финансовом путешествии, и мы обеспечим вас надежной поддержкой на каждом этапе.
В настоящей экономической обстановке, где неожиданные финансовые обязательства могут возникнуть в любое время, поиск надежного и удобного источника финансовой помощи становится все более критическим. Предложение Займ-Минск предлагает возможность рассчитывать на быстрое и беззаботное получение необходимых средств без лишних трудностей. Мы ценим ваше время и обеспечиваем оперативную обработку всех запросов. В качестве вашего финансового партнера, наша главная задача состоит в том, чтобы помочь вам преодолеть текущие финансовые препятствия, предоставляя ясные и выгодные условия кредитования. Доверьтесь нам в вашем финансовом путешествии, и мы обеспечим вас надежной поддержкой на каждом этапе.
В настоящей экономической обстановке, где неожиданные финансовые обязательства могут возникнуть в любое время, поиск надежного и удобного источника финансовой помощи становится все более критическим. Предложение Займ-Минск предлагает возможность рассчитывать на быстрое и беззаботное получение необходимых средств без лишних трудностей. Мы ценим ваше время и обеспечиваем оперативную обработку всех запросов. В качестве вашего финансового партнера, наша главная задача состоит в том, чтобы помочь вам преодолеть текущие финансовые препятствия, предоставляя ясные и выгодные условия кредитования. Доверьтесь нам в вашем финансовом путешествии, и мы обеспечим вас надежной поддержкой на каждом этапе.
В настоящей экономической обстановке, где неожиданные финансовые обязательства могут возникнуть в любое время, поиск надежного и удобного источника финансовой помощи становится все более критическим. Предложение займ онлайн предлагает возможность рассчитывать на быстрое и беззаботное получение необходимых средств без лишних трудностей. Мы ценим ваше время и обеспечиваем оперативную обработку всех запросов. В качестве вашего финансового партнера, наша главная задача состоит в том, чтобы помочь вам преодолеть текущие финансовые препятствия, предоставляя ясные и выгодные условия кредитования. Доверьтесь нам в вашем финансовом путешествии, и мы обеспечим вас надежной поддержкой на каждом этапе.
The meal went without incident although a couple of times she had to avert her gaze from Dan for fear of bursting out laughing. Dan went up to his room saying he wanted to listen to music, he laid on his bed playing with himself waiting for his father to leave. He thought about the events of the last two weeks it had been the craziest time of his life.
He put it all down to Mary Harris, she had been his girlfriend for two years, he liked her a lot, she was pretty and intelligent two things that rarely combined in his experience, the problem was she steadfastly refused to let him put his cock inside her, he had thought he was getting somewhere when he took his cock out that evening in the cinema when she had finally allowed him to get his hand inside her panties, it was the first time she had allowed him to do any more than play with her tits. He had taken her hand and placed it on his erection, initially he had been pleased to hear her sharp intake of breath when she felt the size of him and he was encouraged when she began stroking him.
It was later that the problem started, he had her in the car park, they were kissing, her sweater was pushed up together with her bra and he was sucking on her nipples. He managed to get her laid across the front of one of the cars, his hand up her skirt, trying to pull down her panties. That was when she had stopped him.
https://andydudin1973.micro.blog/about/
https://permacultureglobal.org/users/55602-robert-welch
https://www.hentai-foundry.com/user/maxonk1997/profile
https://permacultureglobal.org/users/55197-keith-cervantes
https://anotepad.com/notes/jxnip6en
https://www.metal-archives.com/users/anarkiss19731991
https://quinster1968.bandcamp.com/album/the-arrival
https://www.haikudeck.com/presentations/Xim7CbJdLx
https://anotepad.com/notes/8cjnr9r6
https://ellak.gr/user/leon1761996/
LOSE MONEY
Услуга по сносу старых домов и утилизации мусора в Москве и Московской области. Мы предлагаем услуги по сносу старых построек и удалению отходов на территории Москвы и Московской области. Услуга демонтировать дом предоставляется опытными специалистами в течение 24 часов после оформления заказа. Перед началом работ наш эксперт бесплатно посещает объект для определения объёма работ и предоставления консультаций. Чтобы получить дополнительную информацию и рассчитать стоимость услуг, свяжитесь с нами по телефону или оставьте заявку на веб-сайте компании.
Внимание, любители ставок! БК Олимп представляет с гордостью новейшую версию своего приложения для Android, которое обещает перевернуть ваш мир ставок на радость. Мы обновили приложение, чтобы предоставить вам несравненный опыт от ставок на спорт. Скачать приложение Олимп и откройте просмотр разнообразных спортивных событий, который стал проще благодаря новому дизайну и оптимизированной производительности данных. Подключайтесь к нам и пользуйтесь возможностью делать ставки в любой точке мира, будь то на диване или в путешествии. Получите новую версию приложения без задержек и откройте для себя мир ставок с БК Олимп, где выигрыши становятся реальностью!
Внимание, любители ставок! БК Олимп представляет с гордостью новейшую версию своего приложения для Android, которое обещает перевернуть ваш мир ставок на радость. Мы обновили приложение, чтобы гарантировать лучший опыт от ставок на спорт. Скачать БК Олимп и откройте доступ к широкому спектру спортивных событий, который стал проще благодаря улучшенному интерфейсу и ускоренной обработке данных. Подключайтесь к нам и пользуйтесь возможностью делать ставки в любой точке мира, будь то на диване или в путешествии. Получите новую версию приложения прямо сейчас и погрузитесь в мир ставок с БК Олимп, где победы становятся реальностью!
Внимание, любители ставок! БК Олимп представляет с гордостью последнюю версию своего приложения для Android, которое обещает изменить ваш мир ставок к лучшему. Мы обновили приложение, чтобы предоставить вам лучший опыт от ставок на спорт. Букмекерская контора Олимп для андроид и откройте просмотр разнообразных спортивных событий, который стал удобнее благодаря новому дизайну и ускоренной обработке данных. Подключайтесь к нам и пользуйтесь возможностью делать ставки в любой точке мира, будь то дома или в отпуске. Загрузите новую версию приложения без задержек и откройте для себя мир ставок с БК Олимп, где победы становятся реальностью!
sweet bonanza lucky game http://www.sweet-bonanza-game.ru .
Внимание, любители ставок! БК Олимп представляет с гордостью новейшую версию своего приложения для Android, которое обещает перевернуть ваш мир ставок к лучшему. Мы обновили приложение, чтобы гарантировать лучший впечатление от ставок на спорт. Приложение БК Олимп и откройте доступ к широкому спектру спортивных событий, который стал проще благодаря новому дизайну и оптимизированной производительности данных. Присоединяйтесь к сообществу БК Олимп и пользуйтесь возможностью делать ставки в любой точке мира, будь то дома или в путешествии. Загрузите новую версию приложения без задержек и погрузитесь в мир ставок с БК Олимп, где победы становятся реальностью!
мастер кондиционер мастер кондиционер .
Внимание, любители ставок! БК Олимп представляет с гордостью новейшую версию своего приложения для Android, которое обещает изменить ваш мир ставок к лучшему. Мы обновили приложение, чтобы гарантировать несравненный впечатление от ставок на спорт. Olimp bet на телефон и откройте доступ к широкому спектру спортивных событий, который стал удобнее благодаря улучшенному интерфейсу и оптимизированной производительности данных. Подключайтесь к нам и наслаждайтесь возможностью делать ставки где угодно, будь то на диване или в путешествии. Загрузите новую версию приложения прямо сейчас и погрузитесь в мир ставок с БК Олимп, где выигрыши становятся реальностью!
Внимание, любители ставок! БК Олимп представляет с гордостью новейшую версию своего приложения для Android, которое обещает перевернуть ваш мир ставок на радость. Мы полностью пересмотрели приложение, чтобы гарантировать лучший впечатление от ставок на спорт. Скачать приложение Олимп и откройте просмотр разнообразных спортивных событий, который стал проще благодаря новому дизайну и ускоренной обработке данных. Присоединяйтесь к сообществу БК Олимп и наслаждайтесь возможностью делать ставки где угодно, будь то дома или в отпуске. Загрузите это обновление приложения без задержек и погрузитесь в мир ставок с БК Олимп, где выигрыши становятся реальностью!
Внимание, любители ставок! БК Олимп представляет с гордостью новейшую версию своего приложения для Android, которое обещает изменить ваш мир ставок на радость. Мы полностью пересмотрели приложение, чтобы предоставить вам несравненный опыт от ставок на спорт. Приложение Олимп и откройте доступ к широкому спектру спортивных событий, который стал удобнее благодаря улучшенному интерфейсу и оптимизированной производительности данных. Подключайтесь к нам и наслаждайтесь возможностью делать ставки где угодно, будь то на диване или в путешествии. Получите новую версию приложения прямо сейчас и погрузитесь в мир ставок с БК Олимп, где выигрыши становятся реальностью!
кондиционеры сплит системы https://multisplit-sistemy-kondicionirovaniya.ru/ .
vps провайдер – купить впс, аренда впс
Использование эксплейнеров для улучшения пользовательского опыта
ролик эксплейнер https://xplainervideo.ru .
Услуга по сносу старых зданий и утилизации отходов в Москве и Московской области. Мы предоставляем услуги по сносу старых сооружений и удалению мусора на территории Москвы и Московской области. Услуга http://demontazh-doma-msk8.ru выполняется квалифицированными специалистами в течение 24 часов после оформления заказа. Перед началом работ наш эксперт бесплатно посещает объект для определения объёма работ и предоставления консультаций. Чтобы получить дополнительную информацию и рассчитать стоимость услуг, свяжитесь с нами по телефону или оставьте заявку на сайте компании.
Регулярные медосмотры на работе: Польза для сотрудников и работодателей
пройти медкомиссию в москве https://www.profosmotry-495-el.ru .
Вот оно, свежее веяние от БК Олимп для всех энтузиастов ставок с Android устройствами! Преобразив наше приложение, мы стремимся предоставить вам непревзойденный опыт, делая ставки не только удобными, но и захватывающими. Скачать Olimp доступно сейчас! С улучшенным интерфейсом и быстрой обработкой данных, доступ к огромному спектру событий стал проще простого. Испытайте радость от улучшенного управления счетом и простоты использования, которые делают каждую ставку особым событием. Забудьте о пропущенных возможностях – скачайте последнее обновление немедленно и вступите в ряды довольных пользователей, радующихся каждой ставке с БК Олимп, где каждый шанс на победу высоко оценивается.
Вот оно, свежее веяние от БК Олимп для всех поклонников ставок с Android устройствами! Изменив наше приложение, мы стремимся предоставить вам непревзойденный опыт, делая ставки не только простыми, но и захватывающими. Olimp bet приложение доступно для всех! С улучшенным интерфейсом и ускоренной производительностью, доступ к большому разнообразию событий стал проще простого. Ощутите радость от улучшенного управления счетом и интуитивной навигации, которые делают каждую ставку волнующим моментом. Не упустите возможностях – установите последнее обновление немедленно и вступите в ряды довольных пользователей, радующихся каждой ставке с БК Олимп, где каждый шанс на победу ценится.
кондиционер 24 https://multisplit-sistemy-kondicionirovaniya.ru/ .
The Best Attractions in Cyprus – Best things to do in Iran, The Best Attractions in United Kingdom
Вот оно, свежее обновление от БК Олимп для всех поклонников ставок с Android устройствами! Изменив наше приложение, мы целимся предоставить вам непревзойденный опыт, делая ставки не только простыми, но и захватывающими. Букмекерская контора Олимп на андроид доступно сегодня! С улучшенным интерфейсом и ускоренной производительностью, доступ к большому разнообразию событий стал легким делом. Ощутите радость от оптимизированной работы с аккаунтом и простоты использования, которые делают каждую ставку волнующим моментом. Забудьте о пропущенных возможностях – установите последнее обновление сейчас же и присоединитесь к довольных пользователей, радующихся каждой ставке с БК Олимп, где каждый шанс на победу высоко оценивается.
Новая Орбита
Мне хотелось бы от всего сердца поблагодарить ремонт ноутбуков за их профессиональный подход. Они быстро и качественно отремонтировали мой ноутбук, и он снова функционирует безупречно. Персонал проявил высокий уровень профессионализма и клиентоориентированности, подробно разъяснив мне все нюансы проведенного ремонта. Я очень доволен результатом, и я непременно порекомендую их услуги всем, кому потребуется ремонт ноутбука
Вот оно, свежее обновление от БК Олимп для всех поклонников ставок с Android устройствами! Преобразив наше приложение, мы целимся предоставить вам непревзойденный опыт, делая ставки не только простыми, но и захватывающими. Контора Олимп на андроид доступно для всех! С новым дизайном и быстрой обработкой данных, доступ к большому разнообразию событий стал проще простого. Испытайте радость от оптимизированной работы с аккаунтом и простоты использования, которые делают каждую ставку особым событием. Забудьте о пропущенных возможностях – скачайте последнее обновление немедленно и вступите в ряды довольных пользователей, празднующих каждой ставке с БК Олимп, где каждый шанс на победу высоко оценивается.
Вот оно, свежее веяние от БК Олимп для всех энтузиастов ставок с Android устройствами! Изменив наше приложение, мы целимся предоставить вам уникальный опыт, делая ставки не только удобными, но и захватывающими. Скачать Олимп уже сегодня! С улучшенным интерфейсом и быстрой обработкой данных, доступ к огромному спектру событий стал легким делом. Ощутите радость от оптимизированной работы с аккаунтом и простоты использования, которые делают каждую ставку волнующим моментом. Не упустите возможностях – установите последнее обновление сейчас же и вступите в ряды довольных пользователей, празднующих каждой ставке с БК Олимп, где каждый шанс на победу высоко оценивается.
Вот оно, свежее веяние от БК Олимп для всех энтузиастов ставок с Android устройствами! Преобразив наше приложение, мы целимся предоставить вам уникальный опыт, делая ставки не только удобными, но и захватывающими. Скачать контору Олимп на андроид доступно для игроков! С улучшенным интерфейсом и быстрой обработкой данных, доступ к огромному спектру событий стал проще простого. Испытайте радость от оптимизированной работы с аккаунтом и интуитивной навигации, которые делают каждую ставку особым событием. Не упустите возможностях – установите последнее обновление немедленно и вступите в ряды довольных пользователей, празднующих каждой ставке с БК Олимп, где каждый шанс на победу ценится.
Вот оно, свежее веяние от БК Олимп для всех энтузиастов ставок с Android устройствами! Преобразив наше приложение, мы стремимся предоставить вам непревзойденный опыт, делая ставки не только простыми, но и захватывающими. Olimp для андроид доступно для всех! С новым дизайном и ускоренной производительностью, доступ к огромному спектру событий стал проще простого. Ощутите радость от улучшенного управления счетом и интуитивной навигации, которые делают каждую ставку волнующим моментом. Не упустите возможностях – установите последнее обновление сейчас же и вступите в ряды довольных пользователей, празднующих каждой ставке с БК Олимп, где каждый шанс на победу ценится.
Широкий выбор грузовых запчастей для различных моделей и марок грузовиков Запчасти для грузовиков DAF
Промокод при регистрации в 1xbet сегодня. Этой акцией может воспользоваться каждый новый клиент при регистрации на сайте букмекера. Это ваше преимущество со старта, и у 1xbet есть эксклюзивное предложение. промокод на ставку в 1хбет на сегодня. В форме регистрации есть всего одно необязательное поле — как раз для ввода промокода. Как получить промокод на бесплатную ставку. Магазин находится во вкладке xBonus (в перечне вкладок верхнего блока). Вам предложат несколько вариантов для обмена баллов на промокоды 1xbet kz. Код можно получить для ставки ординар, для ставки экспресс, а также для лотерей от «1хБет». На сегодня промокод 1xbet бесплатно найти можно без особых затрат энергии, при этом сделать это следующим образом: Путем поиска в сети интернет; На сайтах, специализирующихся на спортивных ставках (Не ресурсы БК); В официальных сообществах 1хБет (соцсети). Представители БК часто выкладывают в группах или же просто в сети промокоды на 1xbet бесплатно в честь какого-то праздника либо же грядущего крупного спортивного турнира. Все промокоды 1xbet 2024. На официальном сайте букмекера в соответствующей рубрике находится полный перечень промокодов 1xbet 2024, бесплатно получить которые можно обменяв на них бонусные баллы – более подробно в этом материале http://openok.ru/page/pages/kak_obstavity_komnatu_v_obscheghitii_ili_syemnuyu_kvartiru_deshevo.html
Услуга по сносу старых зданий и утилизации отходов в Москве и Московской области. Мы предоставляем услуги по сносу старых сооружений и удалению мусора на территории Москвы и Московской области. Услуга снос фундамента выполняется квалифицированными специалистами в течение 24 часов после оформления заказа. Перед началом работ наш эксперт бесплатно посещает объект для определения объёма работ и предоставления консультаций. Чтобы получить дополнительную информацию и рассчитать стоимость услуг, свяжитесь с нами по телефону или оставьте заявку на сайте компании.
Услуга по сносу старых зданий и утилизации отходов в Москве и Московской области. Мы предоставляем услуги по сносу старых сооружений и удалению мусора на территории Москвы и Московской области. Услуга снос дачных домов выполняется квалифицированными специалистами в течение 24 часов после оформления заказа. Перед началом работ наш эксперт бесплатно посещает объект для определения объёма работ и предоставления консультаций. Чтобы получить дополнительную информацию и рассчитать стоимость услуг, свяжитесь с нами по телефону или оставьте заявку на сайте компании.
Не пропустите новинку от БК Олимп для Android! Бесплатно скачать Олимп бет на андроид доступно сегодня. Мы пересмотрели наше приложение, чтобы ваш опыт ставок стал ещё лучше. С переработанным дизайном и ускоренной обработкой данных, вы получите доступ к многообразию спортивных событий без усилий. Оцените простотой управления аккаунтом и лёгкостью использования, делая каждую ставку значимым событием. Загрузите это обновление сегодня и начните выигрывать с БК Олимп, где каждая ставка приносит удовольствие!
Не пропустите обновление от БК Олимп для Android! Скачать БК Олимп доступно сейчас. Мы обновили наше приложение, чтобы ваш опыт ставок стал ещё удобнее. С новым интерфейсом и ускоренной обработкой данных, вы получите доступ к многообразию спортивных событий без усилий. Оцените простотой управления аккаунтом и лёгкостью использования, делая каждую ставку особым моментом. Установите это приложение сегодня и стартуйте выигрывать с БК Олимп, где каждая ставка приносит удовольствие!
Выбирая нас, вы получаете быструю и профессиональную эвакуацию по разумной цене · Любая сложность. 10-летний опыт. Профессиональный подход. Официально Сравнение Рэсси и Коузи
Услуга по сносу старых зданий и утилизации отходов в Москве и Московской области. Мы предоставляем услуги по сносу старых сооружений и удалению мусора на территории Москвы и Московской области. Услуга демонтаж фундамента дома выполняется квалифицированными специалистами в течение 24 часов после оформления заказа. Перед началом работ наш эксперт бесплатно посещает объект для определения объёма работ и предоставления консультаций. Чтобы получить дополнительную информацию и рассчитать стоимость услуг, свяжитесь с нами по телефону или оставьте заявку на сайте компании.
Не пропустите обновление от БК Олимп для Android! Olimp приложение доступно для всех. Мы обновили наше приложение, чтобы ваш опыт ставок стал ещё лучше. С новым интерфейсом и ускоренной обработкой данных, вы получите доступ к многообразию спортивных событий без усилий. Оцените простотой управления аккаунтом и интуитивной навигацией, делая каждую ставку особым моментом. Загрузите это приложение сегодня и начните побеждать с БК Олимп, где каждая ставка приносит радость!
Не пропустите новинку от БК Олимп для Android! Olimp приложение возможно сегодня. Мы пересмотрели наше приложение, чтобы ваш опыт ставок стал ещё лучше. С переработанным дизайном и повышенной скоростью, вы получите доступ к широкому ассортименту спортивных событий легко и просто. Оцените простотой управления аккаунтом и интуитивной навигацией, делая каждую ставку особым моментом. Установите это обновление сегодня и начните выигрывать с БК Олимп, где каждая ставка приносит удовольствие!
Не пропустите новинку от БК Олимп для Android! Olimp bet на телефон доступно сегодня. Мы обновили наше приложение, чтобы ваш опыт ставок стал ещё удобнее. С новым интерфейсом и ускоренной обработкой данных, вы получите доступ к широкому ассортименту спортивных событий без усилий. Наслаждайтесь удобством ведения счета и лёгкостью использования, делая каждую ставку особым моментом. Установите это приложение прямо сейчас и начните побеждать с БК Олимп, где каждая ставка приносит радость!
Не пропустите обновление от БК Олимп для Android! БК Олимп для андроид доступное для игроков. Мы пересмотрели наше приложение, чтобы ваш опыт ставок стал ещё лучше. С переработанным дизайном и ускоренной обработкой данных, вы получите доступ к широкому ассортименту спортивных событий легко и просто. Наслаждайтесь простотой управления аккаунтом и интуитивной навигацией, делая каждую ставку значимым событием. Загрузите это обновление прямо сейчас и стартуйте побеждать с БК Олимп, где каждая ставка приносит радость!
Не пропустите обновление от БК Олимп для Android! Скачать Олимп бет на андроид доступно сейчас. Мы пересмотрели наше приложение, чтобы ваш опыт ставок стал ещё удобнее. С новым интерфейсом и ускоренной обработкой данных, вы получите доступ к многообразию спортивных событий без усилий. Наслаждайтесь удобством ведения счета и интуитивной навигацией, делая каждую ставку особым моментом. Установите это обновление прямо сейчас и начните выигрывать с БК Олимп, где каждая ставка приносит радость!
https://kursovuyupishem.ru/
Best things to do in Korea – Best Restaurants in Italy, Best Restaurants in Turkey
I highly advise to avoid this site. The experience I had with it has been purely frustration along with suspicion of fraudulent activities. Exercise extreme caution, or even better, look for a more reputable platform for your needs.
Запуск переделанной версии приложения БК Олимп для Android уже здесь! Переосмыслив функционал, мы сделали процесс ставок невероятно простым. Olimp bet на телефон доступное для игроков. С передовым интерфейсом и быстрой обработкой, доступ к всему спектру спортивных событий станет легкостью. Наслаждайтесь простотой управления счетом и интуитивно понятной навигацией, превращая каждую ставку в важное событие. Не теряйте времени, получите последнюю версию без отлагательств и присоединяйтесь к удовлетворенным пользователям с БК Олимп, где ставки приносят удовольствие и победы!
Запуск переделанной версии приложения БК Олимп для Android уже здесь! Модернизировав функционал, мы сделали процесс ставок еще более увлекательным. Скачать бесплатно Олимп бет доступное для игроков. С обновленным дизайном и быстрой обработкой, доступ к всему спектру спортивных событий станет игрой. Наслаждайтесь простотой управления счетом и легкой навигацией, превращая каждую ставку в особенный момент. Не задерживайтесь, получите последнюю версию без отлагательств и присоединяйтесь к победителям с БК Олимп, где ставки приносят наслаждение и победы!
Запуск обновленной версии приложения БК Олимп для Android уже здесь! Модернизировав функционал, мы сделали процесс ставок невероятно простым. Олимп на андроид доступное для игроков. С обновленным дизайном и ускоренной загрузкой данных, доступ к разнообразию спортивных событий станет легкостью. Ощутите удобство управления счетом и легкой навигацией, превращая каждую ставку в важное событие. Не задерживайтесь, получите последнюю версию прямо сейчас и присоединяйтесь к удовлетворенным пользователям с БК Олимп, где ставки приносят наслаждение и победы!
vds vps купить – дешевый впс, vps в россии
https://google.com.gh/url?q=http://mabkhae.go.th/webboard/index.php?action=profile;u=142082
Wow, amazing weblog format! How lengthy have you ever been running a blog for?
you make running a blog glance easy. The entire glance of your website is wonderful,
let alone the content! You can see similar here sklep internetowy
Запуск обновленной версии приложения БК Олимп для Android уже здесь! Модернизировав функционал, мы сделали процесс ставок еще более увлекательным. Olimp на андроид доступно для ставочников. С обновленным дизайном и ускоренной загрузкой данных, доступ к разнообразию спортивных событий станет легкостью. Наслаждайтесь простотой управления счетом и легкой навигацией, превращая каждую ставку в особенный момент. Не теряйте времени, скачайте последнюю версию прямо сейчас и присоединяйтесь к победителям с БК Олимп, где ставки приносят наслаждение и победы!
Запуск переделанной версии приложения БК Олимп для Android уже здесь! Модернизировав функционал, мы сделали процесс ставок еще более увлекательным. Скачать apk Olimp bet доступное для игроков. С передовым интерфейсом и быстрой обработкой, доступ к разнообразию спортивных событий станет игрой. Наслаждайтесь простотой управления счетом и интуитивно понятной навигацией, превращая каждую ставку в особенный момент. Не задерживайтесь, получите последнюю версию прямо сейчас и присоединяйтесь к победителям с БК Олимп, где ставки приносят удовольствие и победы!
Запуск обновленной версии приложения БК Олимп для Android уже здесь! Модернизировав функционал, мы сделали процесс ставок еще более увлекательным. Бесплатно скачать Олимп доступно для ставочников. С передовым интерфейсом и быстрой обработкой, доступ к разнообразию спортивных событий станет игрой. Наслаждайтесь простотой управления счетом и интуитивно понятной навигацией, превращая каждую ставку в важное событие. Не теряйте времени, скачайте последнюю версию без отлагательств и присоединяйтесь к победителям с БК Олимп, где ставки приносят наслаждение и победы!
Запуск переделанной версии приложения БК Олимп для Android уже здесь! Переосмыслив функционал, мы сделали процесс ставок еще более увлекательным. Приложение букмекера Олимп доступное для игроков. С обновленным дизайном и ускоренной загрузкой данных, доступ к всему спектру спортивных событий станет игрой. Ощутите удобство управления счетом и интуитивно понятной навигацией, превращая каждую ставку в особенный момент. Не задерживайтесь, получите последнюю версию прямо сейчас и присоединяйтесь к удовлетворенным пользователям с БК Олимп, где ставки приносят удовольствие и победы!
Изучайте на ресурсе грифы для штанг и гантелей https://grify-dlya-shtang.ru с любым посадочным диаметром для силовых занятий. Это важное тренировочное оснащение для отдела свободных весов в фитнес клубах.Отечественный изготовитель рекомендует обширный каталог EZ грифов по недорогим ценам напрямую у компании-производителя. Все наборы поступают в реализацию с фиксаторами для дисков. Отечественный завод изготавливает спортинвентарь из стали лучших марок. Изготавливаемые изделия не нуждаются в постоянном обслуживании и рассчитаны на длительную эксплуатацию в тренажерных центрах. Для предохранения от коррозии все товары хромируются. Покупая у российского производителя вы получаете надежные снаряды для комфортных занятий.
Постепенное возвращение к здоровому образу жизни: Советы по выводу из запоя
вывод из запоя спб https://www.vyvod-iz-zapoya112.ru .
1xSlots Промокод (Бездепозитный Бонус 2024)
1xSlots промокод: NEXT777, при регистрации введите этот бонусный код, чтобы получить бонус для новых игроков в размере €1650 + 200 фриспинов. Чтобы получить этот бонус, вам нужно создать аккаунт и ввести специальный промокод казино 1хСлотс.
1xSlot Промокод
NEXT777
В казино 1xSlots 2024 доступны различные бонусы: бездепозитные при регистрации, промокоды, фриспины, кэшбэки и другие акции.
Промокод 1xSlots 2024: NEXT777 – введите код при регистрации в казино 1хСлот и получите приветственный бонус €1650 +200 фриспинов. Чтобы промокод 1xSlots на бездепозитный бонус сработал, необходимо указать рабочую комбинацию при регистрации и правильно заполнить форму анкеты. После завершения регистрации бездепозитный бонус будет доступен в личном кабинете. Рекомендуется не торопиться и сразу после создания аккаунта заполнить персональные данные. Важно указать требуемую информацию в полях, отмеченных звездочкой во вкладке “Профиль”, а также активировать контакты (номер телефона и e-mail).
Для новых клиентов промокод 1xSlots предоставляет уникальные возможности, позволяющие бесплатно опробовать один из представленных на платформе слотов. Чтобы получить бездепозитные фриспины, достаточно при регистрации указать промокод и выполнить простые условия акции, которые мы расскажем в данной статье. Игроки, желающие продолжить игру и сделать первый депозит, смогут получить щедрый приветственный бонус до €1500 и 150 бесплатных вращений.
Для получения бонуса на первый депозит необходимо пополнить счет на сумму не менее 10. Награда составляет 100% от суммы первого пополнения, но не может превышать 300. Если сумма пополнения превышает максимальный лимит, игрок получит свой депозит полностью, а также 300 в качестве бонуса. Для активации второго, третьего и четвертого этапов, сумма депозита должна быть не менее 15.
Кроме денежного вознаграждения, каждый этап сопровождается бесплатными прокрутками для игр компании:
– за первый депозит – 30 фриспинов для игры Book of Gold: Classic;
– за второй депозит – 35 фриспинов для игры в Legend of Cleopatra;
– за третий депозит – 40 фриспинов для игры в Solar Queen;
– за четвертый депозит – 45 фриспинов для игры в Imperial Fruits: 40 lines.
Казино 1xSlots предоставляет бонус поэтапно. Чтобы получить награду за второй и последующие депозиты, необходимо выполнить условия отыгрыша ранее полученных средств. Фриспины также начисляются поэтапно и зачисляются после выполнения условий отыгрыша.
Промокод для 1xСлотс: NEXT777. Получите бездепозитный приветственный пакет до €1650 +200 фриспинов. Компания 1xSlots предлагает своим клиентам ряд бонусных программ, самой популярной из которых является приветственный пакет с увеличением первого депозита и бесплатными вращениями. С использованием промокода вы можете получить до 1650 евро и 200 фриспинов. Одним из явных преимуществ 1xSlots является огромный выбор игр. Большую часть из доступных 10 тысяч развлечений занимают игровые автоматы. Пользователям предлагается более 100 различных провайдеров слотов.
Промокод не имеет срока действия. Любой пользователь, который создает аккаунт на сайте 1xSlots, может его активировать. Каждому игроку предоставляется только один бонус, поэтому промокод может быть использован только один раз. Чтобы воспользоваться промокодом, необходимо нажать на кнопку “Регистрация”, выбрать удобный способ создания аккаунта, указать все необходимые данные, подтвердить номер телефона или адрес электронной почты и ввести промокод. После этого можно завершить регистрацию, нажав на кнопку “Зарегистрироваться”.
1xSlots Промокод для Регистрации
Бонусы казино 1xSlots 2024 – Бездепозитные бонусы ? Коды на возврат средств ? VIP программа преданности ? Бесплатные фриспины.
Промокод 1xSlots при Регистрации: NEXT777 Получите эксклюзивный приветственный пакет до 1650 евро +150 фриспинов. Казино 1xSlots 2024 предлагает своим гостям не только широкий выбор игровых автоматов. На сайте казино регулярно проводятся бонусные акции, в рамках которых можно получить различные подарки, процент от депозита, фриспины и многое другое. При обычной регистрации есть ограничение по сумме – не более 1500 евро на первые четыре депозита. Первое пополнение – до 300 евро, второе – не более 350, третье – 400, четвертое – 450 евро. После ввода промокода лимит увеличивается до 1650 евро, а количество фриспинов возрастает с 150 до 200 вращений.
Получите бездепозитный бонус в размере 100 фриспинов в онлайн казино 1xSlots в 2024 году. Все активные бонус коды, промокоды и купоны от 1хСлотс (1xSlots) доступны как для новых, так и для существующих игроков. В клубе 1xSlots промокоды предоставляют дополнительные бонусы пользователям. Кроме того, в клубе проводятся множество турниров с крупными призовыми фондами, в которых может принять участие любой зарегистрированный игрок.
1xSlots фриспины промокод: NEXT777. Размер приветственного поощрения составляет 100 фриспинов в автомате Eye of Storm от провайдера Pragmatic Play. Время на его активацию неограничено. Подарок выдается единожды, попытки повторного создания учетной записи для получения фриспинов приравниваются к мошенническим действиям. Альтернативным способом получения бонус-кодов является активное заключение пари в системе. Вращая барабаны игровых автоматов и зарабатывая баллы можно получить право на фриспины, благодаря промо. Список промокодов 1xslots доступен непосредственно на официальном сайте. Чтобы получить бездепозитный бонус код для 1хслотс в 2024 году, следует выполнить следующие условия:
1. Активировать бонусные средства в личном кабинете;
2. Пополнить счет на €15 (или эквивалент в другой валюте) и более, чтобы привязать банковскую карту или онлайн-кошелек;
3. Выполнить условия вейджера: x25. Для этого необходимо поставить из своих денег сумму, равную выигрышу с бесплатных вращений, умноженную в 25 раз. На отыгрыш дается 7 дней с момента, когда вы прокрутили фриспины.
Максимальная сумма вознаграждения составляет 1650 евро. Ее необходимо отыграть с вейджером 35 раз. Казино предлагает релоад-бонусы, которые также нужно отыграть 35 раз. Однако особое место среди множества игр, слотов и турниров на 1xSlots занимает лайв-казино. Это казино, где игра происходит в режиме реального времени. Настоящие дилеры раздают карты и крутят рулетку за игровыми столами. Все эти действия передаются по видеосвязи. Благодаря такой видеотрансляции каждый игрок может почувствовать все эмоции и азарт игры в интерактивной атмосфере с профессиональными дилерами.
При регистрации на 1xSlots используйте промокод “NEXT777” и получите бездепозитный бонус в размере €1650 + 200 фриспинов. Казино 1xSlots радует своих игроков различными бонусами, такими как промокоды, фриспины и бездепозитные бонусы. Особенно щедрые подарки от казино 1xSlots предназначены для новичков.
В дополнение к бонусной программе онлайн казино 1xSlots предлагает кешбэк до 11%, начисляемый от суммы проигранных средств. Кешбэк не имеет срока отыгрыша. Сидя дома перед компьютером, удается почувствовать атмосферу присутствия в настоящем казино. Именно этими причинами объясняется такая популярность и широкий спрос лайв-казино.
список промокодов 1xslots – Бонус по промокоду 1хСлотс увеличивается с €1500 + 150 фриспинов до €1650 + 200 фриспинов.
Промокод 1xSlots на Сегодня: NEXT777 предоставляет вам возможность получить €1500 +150 FS при регистрации с использованием бонусного кода. Теперь бонус по промокоду составляет €1650 + 200 фриспинов, что на €150 больше, чем раньше. Это отличная возможность получить еще больше выгоды от игры. Казино 1xSlots 2024 – это платформа для игровых автоматов и Турниров. В казино 1хСлотс доступны различные бонусы, такие как промокоды, фриспины и бездепозитные бонусы. Особенно крупные подарки в казино 1xSlots предназначены для новичков.
Выгодная бонусная программа на сайте 1xslots позволяет как новичкам, так и опытным игрокам получать разнообразные подарки. Кроме того, это отличная возможность увеличить свой выигрыш. В казино 1xslots бонусы за депозиты и подарки не требуют дополнительных вложений. Используя фриспины и промокоды, вы можете получить хорошие деньги. Давайте подробнее рассмотрим, какие бонусы предлагает онлайн казино.
После прохождения регистрации игроку предлагается бонус на первые четыре операции по пополнению счета:
на первый депозит – 100% от внесенных средств и 30 фриспинов;
на второй депозит – 50% от внесенных средств и 35 фриспинов;
на третий депозит – 25% от внесенных средств и 40 фриспинов;
на четвертый депозит – 25% от внесенных средств и 45 фриспинов.
Промокод, также известный как код приглашения, является ключом-активатором приветственной программы для новичков. Если вы ранее не имели опыта игры в 1xSlots, то вы можете рассчитывать на получение щедрого подарка при регистрации – пакета из 1650 евро и 200 бесплатных прокруток. Согласно правилам бонусной акции, размер поощрения зависит от суммы первых четырех взносов и распределяется следующим образом: на депозитный бонус установлен максимальный лимит в 1500 евро. Чтобы получить подарок, игроку достаточно пройти процедуру регистрации, заполнить анкетные данные в личном кабинете и внести на счет профиля сумму от 10 евро.
При регистрации клиент может использовать промокод 1xSlots и получить дополнительный подарок.
1xSlots давно занимает прочные позиции в списке лучших брендов гемблинг-индустрии. Политика компании 1x ориентирована на опытных игроков, здесь пользователей ожидает продуманная программа лояльности, а также гарантии безопасности личной информации и депозита. Все действия осуществляются на основании лицензии 8048/JAZ2016-083, полученной от компании Orakum N.V., Кюрасао.
Промокод 1хСлот 2024: NEXT777 предоставляет бездепозитный бонус в виде 150 вращений в игре «The Dog House Megaways». В онлайн казино 1xslots доступны бесплатные промокоды на фриспины. Кроме того, игроки могут получать бонусные вращения не только за регистрацию или использование промокода от 1xSlots. Участие в бонусных акциях также позволяет пользователям получить фриспины. Казино 1хSlots предлагает различные варианты депозитов и выплат. Новые игроки, которые регистрируются на 1хSlots, получают приветственный пакет бонусов, однако с использованием промокода от 1xSlots этот бонус может быть еще более значительным. Для активации бонуса необходимо применить актуальный промокод при регистрации.
Приветственный пакет от 1xSlot доступен сразу после регистрации и требует активации через создание депозита. Бонус предоставляет умножение для первых четырех депозитов и дополнительные бесплатные вращения. Минимальная сумма для первого депозита составляет 10 евро, а для последующих пополнений – 15 евро. Максимальная сумма бонуса – 1500 евро.
Также новичкам предоставляются бонусы на второй, третий и четвертый депозит. Для получения подарка необходимо внести сумму не менее 15 евро. Игрокам также предоставляются фриспины и депозитные подарки. Для начисления фриспинов требуется подтверждение номера телефона.
Для постоянных игроков онлайн-казино 1xSlots проводит бонусные акции. Некоторые из них имеют временный характер, а другие действуют постоянно. В основном, пользователям предлагаются депозитные бонусы. Например, можно получить презент за пополнение счета в понедельник. За десятый депозит игроку полагается крупный депозитный бонус в размере 50% от вносимой суммы и 100 фриспинов.
В клубе 1xSlots также действует программа лояльности, которая предполагает различные привилегии для игроков.
Игрокам, активно делающим ставки в течение недели и ушедшим в минус, казино 1xSlots предлагает фриспины. Для получения бонуса не требуется пополнение счета, лимит на максимальный выигрыш и вейджер не устанавливаются.
Ежедневно в казино 1хСлотс назначается слот дня. При совершении ставок на определенную сумму в этом игровом аппарате игроку начисляются фриспины. Обратите внимание https://irenastyle.ru/pags/promokod_1xslots.html, время действия акции ограничено.
Разработчиками 1хСлотс было разработано мобильное казино. Такая версия представляет собой упрощенный вариант компьютерного формата онлайн казино. Она позволяет играть в любимые игры на любом устройстве, поддерживающем функцию выхода в интернет. В качестве такого устройства может быть смартфон или планшет.
Discovered an interesting article, I suggest you familiarize yourself http://artrp.5nx.ru/viewtopic.php?f=3&t=7769
Откройте для себя новейшие обновления в приложении БК Олимп для Android! Скачать Олимп бет доступно для всех. Мы совершенствовали наше приложение, чтобы сделать ваше взаимодействие с ставками удобным. С новым дизайном и ускоренной обработке данных, вы теперь имеете прямой доступ к широкому спектру спортивных событий. Оцените удобство использования своим аккаунтом и легкость управления, превращая каждую вашу ставку в уникальное приключение. Загрузите обновление прямо сегодня и начните зарабатывать на своих победах вместе с БК Олимп, где каждая ставка принесет успех.
Откройте для себя последние новшества в приложении БК Олимп для Android! Скачать приложение Олимп доступное для игроков. Мы улучшили наше приложение, чтобы сделать ваше взаимодействие с ставками более приятным. С новым дизайном и быстрой загрузке данных, вы теперь имеете легкий доступ к широкому спектру спортивных событий. Научитесь наслаждаться удобство использования своим аккаунтом и легкость управления, превращая каждую вашу ставку в уникальное приключение. Получите приложение прямо сегодня и начните зарабатывать на своих победах вместе с БК Олимп, где каждая ставка принесет успех.
Откройте для себя последние новшества в приложении БК Олимп для Android! Скачать Олимп бесплатно доступно сегодня. Мы улучшили наше приложение, чтобы сделать ваше взаимодействие с ставками более приятным. Благодаря усовершенствованному интерфейсу и быстрой загрузке данных, вы теперь имеете легкий доступ к широкому ассортименту спортивных событий. Оцените простоту управления своим аккаунтом и легкость управления, превращая каждую вашу ставку в значимое событие. Получите приложение сейчас и начните зарабатывать на своих победах вместе с БК Олимп, где каждая ставка принесет успех.
Откройте для себя последние новшества в приложении БК Олимп для Android! Приложение Олимп бет доступно сейчас. Мы совершенствовали наше приложение, чтобы сделать ваше взаимодействие с ставками удобным. С новым дизайном и ускоренной обработке данных, вы теперь имеете прямой доступ к широкому ассортименту спортивных событий. Оцените удобство использования своим аккаунтом и легкость управления, превращая каждую вашу ставку в уникальное приключение. Загрузите обновление сейчас и начните зарабатывать на своих победах вместе с БК Олимп, где каждая ставка несет радость.
Откройте для себя новейшие обновления в приложении БК Олимп для Android! Скачать бесплатно Олимп бет доступно сейчас. Мы улучшили наше приложение, чтобы сделать ваше взаимодействие с ставками удобным. С новым дизайном и ускоренной обработке данных, вы теперь имеете прямой доступ к широкому спектру спортивных событий. Оцените удобство использования своим аккаунтом и интуитивную навигацию, превращая каждую вашу ставку в уникальное приключение. Загрузите обновление прямо сегодня и начните зарабатывать на своих победах вместе с БК Олимп, где каждая ставка несет радость.
Discovered a unique article – recommended to acquaint yourself! https://digdroid.com/forums/entry/signin
Откройте для себя новейшие обновления в приложении БК Олимп для Android! Скачать приложение Олимп уже сегодня. Мы улучшили наше приложение, чтобы сделать ваше взаимодействие с ставками удобным. Благодаря усовершенствованному интерфейсу и ускоренной обработке данных, вы теперь имеете прямой доступ к широкому ассортименту спортивных событий. Научитесь наслаждаться простоту управления своим аккаунтом и интуитивную навигацию, превращая каждую вашу ставку в уникальное приключение. Получите приложение прямо сегодня и начните зарабатывать на своих победах вместе с БК Олимп, где каждая ставка несет радость.
Откройте для себя новейшие обновления в приложении БК Олимп для Android! Скачать Олимп для андроид уже сегодня. Мы совершенствовали наше приложение, чтобы сделать ваше взаимодействие с ставками более приятным. С новым дизайном и быстрой загрузке данных, вы теперь имеете прямой доступ к широкому ассортименту спортивных событий. Научитесь наслаждаться простоту управления своим аккаунтом и легкость управления, превращая каждую вашу ставку в уникальное приключение. Получите приложение прямо сегодня и начните получать удовольствие от побед вместе с БК Олимп, где каждая ставка принесет успех.
Based on God’s instructions, Abraham travelled to a place called Canaan where the Canaanites lived. There is no reason given for God’s choice of Palestine/Canaan for Abraham to journey to bible versus about anger
I highly advise steer clear of this platform. My personal experience with it has been only frustration and concerns regarding scamming practices. Be extremely cautious, or alternatively, find an honest site for your needs.
bliloblo
1249742
lalablublu
https://images.google.mu/url?q=https://velostil.pro/user/edddofieda/
Откройте для себя новшество в мире ставок с последним обновлением приложения БК Олимп для Android! Olimp приложение прямо сейчас. Мы освежили приложение, обеспечивая беспрецедентный уровень удобства и быстроту загрузки. Теперь разнообразие спортивных событий находится у вас под рукой с улучшенным дизайном и легкой навигацией. Прочувствуйте на себе легкость управления счетом и сделайте каждую ставку незабываемым моментом. Установите это приложение немедленно и выходите на новый уровень ставок с БК Олимп, где каждый выбор может принести успех!
Откройте для себя новшество в мире ставок с последним обновлением приложения БК Олимп для Android! Olimp для андроид уже сейчас. Мы освежили приложение, обеспечивая беспрецедентный уровень удобства и быстроту загрузки. Теперь разнообразие спортивных событий находится у вас под рукой с новым дизайном и интуитивной навигацией. Испытайте на себе простоту ведения финансов и сделайте каждую ставку незабываемым моментом. Загрузите это обновление сегодня и поднимайте свой опыт ставок с БК Олимп, где каждый выбор может принести успех!
Откройте для себя новшество в мире ставок с новейшей версией приложения БК Олимп для Android! Скачать бесплатно Олимп бет прямо сейчас. Мы полностью переработали приложение, обеспечивая неимоверную простоту использования и быстроту загрузки. Теперь разнообразие спортивных событий находится у вас под рукой с новым дизайном и интуитивной навигацией. Испытайте на себе простоту ведения финансов и сделайте каждую ставку незабываемым моментом. Загрузите это обновление сегодня и выходите на новый уровень ставок с БК Олимп, где каждый выбор может принести победу!
124969D742
Откройте для себя революцию в мире ставок с последним обновлением приложения БК Олимп для Android! Скачать Олимп на андроид прямо сейчас. Мы освежили приложение, обеспечивая беспрецедентный уровень удобства и быстроту загрузки. Теперь выбор соревнований находится у вас под рукой с новым дизайном и интуитивной навигацией. Прочувствуйте на себе простоту ведения финансов и сделайте каждую ставку незабываемым моментом. Загрузите это приложение немедленно и выходите на новый уровень ставок с БК Олимп, где каждый выбор может принести успех!
Откройте для себя революцию в мире ставок с последним обновлением приложения БК Олимп для Android! Бесплатно скачать Олимп сегодня и сейчас. Мы полностью переработали приложение, обеспечивая беспрецедентный уровень удобства и быстроту загрузки. Теперь выбор соревнований находится у вас под рукой с улучшенным дизайном и интуитивной навигацией. Испытайте на себе легкость управления счетом и сделайте каждую ставку значительным событием. Загрузите это обновление сегодня и поднимайте свой опыт ставок с БК Олимп, где каждый выбор может принести победу!
Як підібрати тактичні кросівки для різних видів активності
купити кросівки тактичні https://vijskovikrosivkifvgh.kiev.ua/ .
1xSlots Промокод (Бездепозитный Бонус 2024)
1xSlots промокод: NEXT777, при регистрации введите этот бонусный код, чтобы получить бонус для новых игроков в размере €1650 + 200 фриспинов. Чтобы получить этот бонус, вам нужно создать аккаунт и ввести специальный промокод казино 1хСлотс.
1xSlot Промокод
NEXT777
В казино 1xSlots 2024 доступны различные бонусы: бездепозитные при регистрации, промокоды, фриспины, кэшбэки и другие акции.
Промокод 1xSlots 2024: NEXT777 – введите код при регистрации в казино 1хСлот и получите приветственный бонус €1650 +200 фриспинов. Чтобы промокод 1xSlots на бездепозитный бонус сработал, необходимо указать рабочую комбинацию при регистрации и правильно заполнить форму анкеты. После завершения регистрации бездепозитный бонус будет доступен в личном кабинете. Рекомендуется не торопиться и сразу после создания аккаунта заполнить персональные данные. Важно указать требуемую информацию в полях, отмеченных звездочкой во вкладке “Профиль”, а также активировать контакты (номер телефона и e-mail).
Для новых клиентов промокод 1xSlots предоставляет уникальные возможности, позволяющие бесплатно опробовать один из представленных на платформе слотов. Чтобы получить бездепозитные фриспины, достаточно при регистрации указать промокод и выполнить простые условия акции, которые мы расскажем в данной статье. Игроки, желающие продолжить игру и сделать первый депозит, смогут получить щедрый приветственный бонус до €1500 и 150 бесплатных вращений.
Для получения бонуса на первый депозит необходимо пополнить счет на сумму не менее 10. Награда составляет 100% от суммы первого пополнения, но не может превышать 300. Если сумма пополнения превышает максимальный лимит, игрок получит свой депозит полностью, а также 300 в качестве бонуса. Для активации второго, третьего и четвертого этапов, сумма депозита должна быть не менее 15.
Кроме денежного вознаграждения, каждый этап сопровождается бесплатными прокрутками для игр компании:
– за первый депозит – 30 фриспинов для игры Book of Gold: Classic;
– за второй депозит – 35 фриспинов для игры в Legend of Cleopatra;
– за третий депозит – 40 фриспинов для игры в Solar Queen;
– за четвертый депозит – 45 фриспинов для игры в Imperial Fruits: 40 lines.
Казино 1xSlots предоставляет бонус поэтапно. Чтобы получить награду за второй и последующие депозиты, необходимо выполнить условия отыгрыша ранее полученных средств. Фриспины также начисляются поэтапно и зачисляются после выполнения условий отыгрыша.
Промокод для 1xСлотс: NEXT777. Получите бездепозитный приветственный пакет до €1650 +200 фриспинов. Компания 1xSlots предлагает своим клиентам ряд бонусных программ, самой популярной из которых является приветственный пакет с увеличением первого депозита и бесплатными вращениями. С использованием промокода вы можете получить до 1650 евро и 200 фриспинов. Одним из явных преимуществ 1xSlots является огромный выбор игр. Большую часть из доступных 10 тысяч развлечений занимают игровые автоматы. Пользователям предлагается более 100 различных провайдеров слотов.
Промокод не имеет срока действия. Любой пользователь, который создает аккаунт на сайте 1xSlots, может его активировать. Каждому игроку предоставляется только один бонус, поэтому промокод может быть использован только один раз. Чтобы воспользоваться промокодом, необходимо нажать на кнопку “Регистрация”, выбрать удобный способ создания аккаунта, указать все необходимые данные, подтвердить номер телефона или адрес электронной почты и ввести промокод. После этого можно завершить регистрацию, нажав на кнопку “Зарегистрироваться”.
1xSlots Промокод для Регистрации
Бонусы казино 1xSlots 2024 – Бездепозитные бонусы ? Коды на возврат средств ? VIP программа преданности ? Бесплатные фриспины.
Промокод 1xSlots при Регистрации: NEXT777 Получите эксклюзивный приветственный пакет до 1650 евро +150 фриспинов. Казино 1xSlots 2024 предлагает своим гостям не только широкий выбор игровых автоматов. На сайте казино регулярно проводятся бонусные акции, в рамках которых можно получить различные подарки, процент от депозита, фриспины и многое другое. При обычной регистрации есть ограничение по сумме – не более 1500 евро на первые четыре депозита. Первое пополнение – до 300 евро, второе – не более 350, третье – 400, четвертое – 450 евро. После ввода промокода лимит увеличивается до 1650 евро, а количество фриспинов возрастает с 150 до 200 вращений.
Получите бездепозитный бонус в размере 100 фриспинов в онлайн казино 1xSlots в 2024 году. Все активные бонус коды, промокоды и купоны от 1хСлотс (1xSlots) доступны как для новых, так и для существующих игроков. В клубе 1xSlots промокоды предоставляют дополнительные бонусы пользователям. Кроме того, в клубе проводятся множество турниров с крупными призовыми фондами, в которых может принять участие любой зарегистрированный игрок.
1xSlots фриспины промокод: NEXT777. Размер приветственного поощрения составляет 100 фриспинов в автомате Eye of Storm от провайдера Pragmatic Play. Время на его активацию неограничено. Подарок выдается единожды, попытки повторного создания учетной записи для получения фриспинов приравниваются к мошенническим действиям. Альтернативным способом получения бонус-кодов является активное заключение пари в системе. Вращая барабаны игровых автоматов и зарабатывая баллы можно получить право на фриспины, благодаря промо. Список промокодов 1xslots доступен непосредственно на официальном сайте. Чтобы получить бездепозитный бонус код для 1хслотс в 2024 году, следует выполнить следующие условия:
1. Активировать бонусные средства в личном кабинете;
2. Пополнить счет на €15 (или эквивалент в другой валюте) и более, чтобы привязать банковскую карту или онлайн-кошелек;
3. Выполнить условия вейджера: x25. Для этого необходимо поставить из своих денег сумму, равную выигрышу с бесплатных вращений, умноженную в 25 раз. На отыгрыш дается 7 дней с момента, когда вы прокрутили фриспины.
Максимальная сумма вознаграждения составляет 1650 евро. Ее необходимо отыграть с вейджером 35 раз. Казино предлагает релоад-бонусы, которые также нужно отыграть 35 раз. Однако особое место среди множества игр, слотов и турниров на 1xSlots занимает лайв-казино. Это казино, где игра происходит в режиме реального времени. Настоящие дилеры раздают карты и крутят рулетку за игровыми столами. Все эти действия передаются по видеосвязи. Благодаря такой видеотрансляции каждый игрок может почувствовать все эмоции и азарт игры в интерактивной атмосфере с профессиональными дилерами.
При регистрации на 1xSlots используйте промокод “NEXT777” и получите бездепозитный бонус в размере €1650 + 200 фриспинов. Казино 1xSlots радует своих игроков различными бонусами, такими как промокоды, фриспины и бездепозитные бонусы. Особенно щедрые подарки от казино 1xSlots предназначены для новичков.
В дополнение к бонусной программе онлайн казино 1xSlots предлагает кешбэк до 11%, начисляемый от суммы проигранных средств. Кешбэк не имеет срока отыгрыша. Сидя дома перед компьютером, удается почувствовать атмосферу присутствия в настоящем казино. Именно этими причинами объясняется такая популярность и широкий спрос лайв-казино.
промокод 1xslots без вейджера – Бонус по промокоду 1хСлотс увеличивается с €1500 + 150 фриспинов до €1650 + 200 фриспинов.
Промокод 1xSlots на Сегодня: NEXT777 предоставляет вам возможность получить €1500 +150 FS при регистрации с использованием бонусного кода. Теперь бонус по промокоду составляет €1650 + 200 фриспинов, что на €150 больше, чем раньше. Это отличная возможность получить еще больше выгоды от игры. Казино 1xSlots 2024 – это платформа для игровых автоматов и Турниров. В казино 1хСлотс доступны различные бонусы, такие как промокоды, фриспины и бездепозитные бонусы. Особенно крупные подарки в казино 1xSlots предназначены для новичков.
Выгодная бонусная программа на сайте 1xslots позволяет как новичкам, так и опытным игрокам получать разнообразные подарки. Кроме того, это отличная возможность увеличить свой выигрыш. В казино 1xslots бонусы за депозиты и подарки не требуют дополнительных вложений. Используя фриспины и промокоды, вы можете получить хорошие деньги. Давайте подробнее рассмотрим, какие бонусы предлагает онлайн казино.
После прохождения регистрации игроку предлагается бонус на первые четыре операции по пополнению счета:
на первый депозит – 100% от внесенных средств и 30 фриспинов;
на второй депозит – 50% от внесенных средств и 35 фриспинов;
на третий депозит – 25% от внесенных средств и 40 фриспинов;
на четвертый депозит – 25% от внесенных средств и 45 фриспинов.
Промокод, также известный как код приглашения, является ключом-активатором приветственной программы для новичков. Если вы ранее не имели опыта игры в 1xSlots, то вы можете рассчитывать на получение щедрого подарка при регистрации – пакета из 1650 евро и 200 бесплатных прокруток. Согласно правилам бонусной акции, размер поощрения зависит от суммы первых четырех взносов и распределяется следующим образом: на депозитный бонус установлен максимальный лимит в 1500 евро. Чтобы получить подарок, игроку достаточно пройти процедуру регистрации, заполнить анкетные данные в личном кабинете и внести на счет профиля сумму от 10 евро.
При регистрации клиент может использовать промокод 1xSlots и получить дополнительный подарок.
1xSlots давно занимает прочные позиции в списке лучших брендов гемблинг-индустрии. Политика компании 1x ориентирована на опытных игроков, здесь пользователей ожидает продуманная программа лояльности, а также гарантии безопасности личной информации и депозита. Все действия осуществляются на основании лицензии 8048/JAZ2016-083, полученной от компании Orakum N.V., Кюрасао.
Промокод 1хСлот 2024: NEXT777 предоставляет бездепозитный бонус в виде 150 вращений в игре «The Dog House Megaways». В онлайн казино 1xslots доступны бесплатные промокоды на фриспины. Кроме того, игроки могут получать бонусные вращения не только за регистрацию или использование промокода от 1xSlots. Участие в бонусных акциях также позволяет пользователям получить фриспины. Казино 1хSlots предлагает различные варианты депозитов и выплат. Новые игроки, которые регистрируются на 1хSlots, получают приветственный пакет бонусов, однако с использованием промокода от 1xSlots этот бонус может быть еще более значительным. Для активации бонуса необходимо применить актуальный промокод при регистрации.
Приветственный пакет от 1xSlot доступен сразу после регистрации и требует активации через создание депозита. Бонус предоставляет умножение для первых четырех депозитов и дополнительные бесплатные вращения. Минимальная сумма для первого депозита составляет 10 евро, а для последующих пополнений – 15 евро. Максимальная сумма бонуса – 1500 евро.
Также новичкам предоставляются бонусы на второй, третий и четвертый депозит. Для получения подарка необходимо внести сумму не менее 15 евро. Игрокам также предоставляются фриспины и депозитные подарки. Для начисления фриспинов требуется подтверждение номера телефона.
Для постоянных игроков онлайн-казино 1xSlots проводит бонусные акции. Некоторые из них имеют временный характер, а другие действуют постоянно. В основном, пользователям предлагаются депозитные бонусы. Например, можно получить презент за пополнение счета в понедельник. За десятый депозит игроку полагается крупный депозитный бонус в размере 50% от вносимой суммы и 100 фриспинов.
В клубе 1xSlots также действует программа лояльности, которая предполагает различные привилегии для игроков.
Игрокам, активно делающим ставки в течение недели и ушедшим в минус, казино 1xSlots предлагает фриспины. Для получения бонуса не требуется пополнение счета, лимит на максимальный выигрыш и вейджер не устанавливаются.
Ежедневно в казино 1хСлотс назначается слот дня. При совершении ставок на определенную сумму в этом игровом аппарате игроку начисляются фриспины. Обратите внимание https://irenastyle.ru/pags/promokod_1xslots.html, время действия акции ограничено.
Разработчиками 1хСлотс было разработано мобильное казино. Такая версия представляет собой упрощенный вариант компьютерного формата онлайн казино. Она позволяет играть в любимые игры на любом устройстве, поддерживающем функцию выхода в интернет. В качестве такого устройства может быть смартфон или планшет.
Откройте для себя новшество в мире ставок с последним обновлением приложения БК Олимп для Android! Скачать Олимп на андроид бесплатно сегодня и сейчас. Мы освежили приложение, обеспечивая неимоверную простоту использования и скорость доступа. Теперь выбор соревнований находится у вас под рукой с новым дизайном и интуитивной навигацией. Прочувствуйте на себе легкость управления счетом и сделайте каждую ставку значительным событием. Загрузите это приложение сегодня и выходите на новый уровень ставок с БК Олимп, где каждый выбор может принести успех!
Головні переваги тактичних кросівок у порівнянні з іншими видами взуття
військові тактичні кросівки літні https://vijskovikrosivkifvgh.kiev.ua/ .
Откройте для себя революцию в мире ставок с новейшей версией приложения БК Олимп для Android! Приложение Olimp сегодня и сейчас. Мы освежили приложение, обеспечивая неимоверную простоту использования и быстроту загрузки. Теперь выбор соревнований находится у вас под рукой с улучшенным дизайном и интуитивной навигацией. Прочувствуйте на себе простоту ведения финансов и сделайте каждую ставку значительным событием. Загрузите это обновление сегодня и выходите на новый уровень ставок с БК Олимп, где каждый выбор может принести успех!
http://google.ps/url?q=https://300.ya.ru/JzGgUzM8
blublu
Пансионаты для пожилых с услугами по уходу за инвалидами
частный пансионат для пожилых людей pansionaty-dlya-pozhilyh1.ru .
Movies deep web links – Darknet Markets, Deep web search engines
Як підібрати тактичні кросівки для спортивних змагань
купить літні тактичні кросівки купить літні тактичні кросівки .
Познакомьтесь с свежим обновлением приложения БК Олимп для Android, преобразующим ваш опыт в мире ставок! Загрузить файл apk Olimp доступны для всех играющих. Передовой дизайн и ускоренная обработка данных гарантируют легкий доступ к широкому ассортименту спортивных событий. Кастомизируйте свой аккаунт с непревзойденной легкостью и навигацией, превращая каждую ставку в волнующее приключение. Скачайте сейчас и начните получать удовольствие от ставок на новом уровне с БК Олимп, где каждое событие – это шанс на успех!
Познакомьтесь с новейшим обновлением приложения БК Олимп для Android, изменяющим ваш опыт в мире ставок! Букмекерская контора Олимп для андроид доступны для всех играющих. Инновационный дизайн и ускоренная обработка данных гарантируют легкий доступ к множеству спортивных событий. Настройте свой аккаунт с уникальной простотой и навигацией, превращая каждую ставку в захватывающий опыт. Скачайте прямо сегодня и начните наслаждаться от ставок на новом уровне с БК Олимп, где каждое событие – это шанс на выигрыш!
Your point of view caught my eye and was very interesting. Thanks. I have a question for you.
Познакомьтесь с свежим обновлением приложения БК Олимп для Android, преобразующим ваш опыт в мире ставок! Скачать сайт Олимп доступны для всех играющих. Передовой дизайн и ускоренная обработка данных обеспечивают легкий доступ к широкому ассортименту спортивных событий. Кастомизируйте свой аккаунт с уникальной простотой и навигацией, превращая каждую ставку в волнующее приключение. Загрузите сейчас и начните наслаждаться от ставок на новом уровне с БК Олимп, где каждое событие – это шанс на успех!
https://maps.google.bf/url?q=https://300.ya.ru/jPQchehc
Познакомьтесь с новейшим обновлением приложения БК Олимп для Android, изменяющим ваш опыт в мире ставок! Скачать бесплатно Олимп бет доступны всем игрокам. Передовой дизайн и быстрая загрузка данных обеспечивают легкий доступ к множеству спортивных событий. Настройте свой аккаунт с уникальной простотой и навигацией, превращая каждую ставку в волнующее приключение. Загрузите сейчас и начните наслаждаться от ставок на новом уровне с БК Олимп, где каждое событие – это шанс на выигрыш!
Познакомьтесь с новейшим обновлением приложения БК Олимп для Android, преобразующим ваш опыт в мире ставок! Скачать Олимп на андроид бесплатно доступны всем играющим. Передовой дизайн и ускоренная обработка данных обеспечивают легкий доступ к широкому ассортименту спортивных событий. Настройте свой аккаунт с непревзойденной легкостью и навигацией, превращая каждую ставку в волнующее приключение. Загрузите прямо сегодня и начните получать удовольствие от ставок на новом уровне с БК Олимп, где каждое событие – это шанс на выигрыш!
Если вы ищете надежный сервис по восстановлению работоспособности холодильников известной марки в Москве, то вы обратились по адресу. Наш техцентр специализируется на ремонте холодильного агрегатов Whirlpool и имеет большой опыт в указанной сфере. Мы гарантируем безупречное качество работ, применение оригинальных комплектующих и конкурентные цены. Свяжитесь с нами без промедления, и мы поможем вашему холодильнику Whirlpool функционировать словно новый! Узнать больше вы можете на taplink.cc.
Познакомьтесь с свежим обновлением приложения БК Олимп для Android, преобразующим ваш опыт в мире ставок! Скачать БК Олимп для андроид доступны для всех играющих. Инновационный дизайн и ускоренная обработка данных обеспечивают легкий доступ к множеству спортивных событий. Настройте свой аккаунт с непревзойденной легкостью и навигацией, превращая каждую ставку в волнующее приключение. Скачайте прямо сегодня и начните наслаждаться от ставок на новом уровне с БК Олимп, где каждое событие – это шанс на выигрыш!
Познакомьтесь с новейшим обновлением приложения БК Олимп для Android, изменяющим ваш опыт в мире ставок! olimp-bet-app.ru доступны сегодня для каждого. Инновационный дизайн и ускоренная обработка данных гарантируют легкий доступ к множеству спортивных событий. Кастомизируйте свой аккаунт с непревзойденной легкостью и навигацией, превращая каждую ставку в захватывающий опыт. Скачайте сейчас и начните наслаждаться от ставок на новом уровне с БК Олимп, где каждое событие – это шанс на успех!
Уфанет для новоселов: как быстро подключить интернет и ТВ в новую квартиру
уфанет тарифы https://www.ufanet-podklyuchit.ru .
Came across a unique piece – be sure to check it out https://lineageii.rolka.me/viewtopic.php?id=627#p644
blublu
bliloblo
best online casino in kenya http://www.casinoonline.co.ke .
Lessons waiting for you at our Virtuoso School: saxophone lessons near me Unlock your creative potential at Virtuoso School of Music and Art.
Встречайте новинку от БК Олимп для Android, которое кардинально изменит ваш подход к ставкам! С переделанным интерфейсом и оптимизированной работой, вы обретете доступ к бесконечному множеству спортивных мероприятий буквально в несколько касаний. Скачать Olimp bet для андроид доступны для игроков. Простое управление аккаунтом и интуитивная навигация сделают процесс ставок удовольствием. Не упустите возможность перейти на новый уровень уже сегодня и разгадайте секреты успешных ставок с БК Олимп, где каждый ваш выбор может привести к успеху!
Встречайте обновление от БК Олимп для Android, которое кардинально изменит ваш подход к ставкам! С усовершенствованным интерфейсом и оптимизированной работой, вы обретете доступ к огромному количеству спортивных мероприятий буквально в несколько касаний. Букмекерская контора Олимп для андроид доступны для желающих. Простое управление аккаунтом и понятная навигация сделают процесс ставок наслаждением. Не упустите возможность обновиться уже сегодня и разгадайте секреты успешных ставок с БК Олимп, где каждый ваш выбор может привести к победе!
Встречайте обновление от БК Олимп для Android, которое кардинально изменит ваш подход к ставкам! С усовершенствованным интерфейсом и ускоренной работой, вы обретете доступ к бесконечному множеству спортивных мероприятий буквально в несколько касаний. Olimp bet на телефон доступны для всех. Простое управление аккаунтом и интуитивная навигация сделают процесс ставок наслаждением. Не упустите возможность перейти на новый уровень уже сегодня и откройте секреты успешных ставок с БК Олимп, где каждый ваш выбор может привести к успеху!
Встречайте обновление от БК Олимп для Android, которое кардинально изменит ваш подход к ставкам! С усовершенствованным интерфейсом и ускоренной работой, вы обретете доступ к огромному количеству спортивных мероприятий буквально в несколько касаний. Приложение букмекера Олимп доступны для каждого. Простое управление аккаунтом и понятная навигация сделают процесс ставок наслаждением. Не упустите возможность обновиться уже сегодня и откройте секреты успешных ставок с БК Олимп, где каждый ваш выбор может привести к успеху!
Встречайте обновление от БК Олимп для Android, которое кардинально изменит ваш подход к ставкам! С переделанным интерфейсом и оптимизированной работой, вы обретете доступ к бесконечному множеству спортивных мероприятий буквально в несколько касаний. Скачать приложение Олимп бет доступны для всех. Простое управление аккаунтом и интуитивная навигация сделают процесс ставок удовольствием. Не упустите возможность обновиться уже сегодня и разгадайте секреты успешных ставок с БК Олимп, где каждый ваш выбор может привести к победе!
Встречайте новинку от БК Олимп для Android, которое полностью преобразит ваш подход к ставкам! С переделанным интерфейсом и ускоренной работой, вы обретете доступ к бесконечному множеству спортивных мероприятий буквально в несколько касаний. Скачать apk Olimp bet доступны для игроков. Легкое управление аккаунтом и интуитивная навигация сделают процесс ставок удовольствием. Не упустите возможность обновиться уже сегодня и откройте секреты успешных ставок с БК Олимп, где каждый ваш выбор может привести к победе!
Встречайте обновление от БК Олимп для Android, которое полностью преобразит ваш подход к ставкам! С усовершенствованным интерфейсом и ускоренной работой, вы обретете доступ к бесконечному множеству спортивных мероприятий буквально в несколько касаний. Скачать приложение БК Олимп доступны для всех. Простое управление аккаунтом и интуитивная навигация сделают процесс ставок удовольствием. Не упустите возможность перейти на новый уровень уже сегодня и откройте секреты успешных ставок с БК Олимп, где каждый ваш выбор может привести к победе!
blolbo
nice content!nice history!!
https://www.google.com.cy/url?q=https://300.ya.ru/rRyEmlns
Доставка алкоголя СПб
Hi there,
I have reviewed your domain in MOZ and have observed that you may benefit from an increase in authority.
Our solution guarantees you a high-quality domain authority score within a period of three months. This will increase your organic visibility and strengthen your website authority, thus making it stronger against Google updates.
Check out our deals for more details.
https://www.monkeydigital.co/domain-authority-plan/
NEW: Ahrefs Domain Rating
https://www.monkeydigital.co/ahrefs-seo/
Thanks and regards
Mike Kirk
Hello! Company Political Science a completely new scientific political system, which has never been seen before in the history of mankind. The document contains 10 pages of detailed description. You can buy this sex-free document for 950$, payment bitcoin. To obtain and pay for it, go to the proxy-tunneled self-hosted site, click Visit Site, register without using personal data, make payment and download the document. Thank you in advance.
Self-hosted website: https://az1jgrh.localto.net/
If pages don’t load – refresh.
Рады представить выход новой версии мобильного приложения БК Лига Ставок для Android! Этот выпуск полностью преобразует ваш пользовательский опыт, делая его ещё удобнее и динамичным. Лига ставок установить уже сегодня! В обновлении вы найдете прямой доступ к многообразию спортивных мероприятий из любой точки с помощью вашего устройства. Улучшенное управление профилем, инновационная концепция дизайна для удобной навигации и значительно более высокая скорость работы приложения – всё это создано для вас. Присоединяйтесь к числу воодушевленных пользователей и получайте удовольствие от ставок в любой точке планеты и в любое время. Скачайте обновление приложения БК Лига Ставок уже сегодня и переходите к новому этапу ставок!
Рады представить выход новой версии мобильного приложения БК Лига Ставок для Android! Этот выпуск полностью преобразует ваш пользовательский опыт, делая его ещё удобнее и эффективным. Скачать ligastavok сейчас же! В обновлении вы найдете прямой доступ к многообразию спортивных мероприятий прямо с вашего смартфона. Улучшенное управление профилем, передовая концепция дизайна для простой навигации и значительно более высокая скорость работы приложения – всё это создано для вас. Присоединяйтесь к числу воодушевленных пользователей и получайте удовольствие от ставок в любой точке планеты и в любой момент. Скачайте обновление приложения БК Лига Ставок уже сегодня и переходите к новому этапу игры!
Рады представить выход обновленной мобильного приложения БК Лига Ставок для Android! Этот выпуск полностью преобразует ваш досуг с ставками, делая его ещё удобнее и динамичным. Лига ставок скачать бесплатно на телефон немедленно! В обновлении вы найдете прямой доступ к многообразию спортивных мероприятий прямо с вашего смартфона. Улучшенное управление профилем, передовая концепция дизайна для удобной навигации и увеличенная скорость работы приложения – всё это создано для вас. Станьте частью воодушевленных пользователей и получайте удовольствие от ставок в любой точке планеты и в любое время. Установите обновление приложения БК Лига Ставок прямо сейчас и переходите к новому этапу игры!
Рады представить выход обновленной мобильного приложения БК Лига Ставок для Android! Этот шаг полностью преобразует ваш досуг с ставками, делая его ещё удобнее и эффективным. Скачать букмекерскую контору лига ставок сейчас же! В обновлении вы найдете свободу доступа к многообразию спортивных мероприятий прямо с вашего смартфона. Улучшенное управление профилем, инновационная концепция дизайна для удобной навигации и значительно более высокая скорость работы приложения – всё это создано для вас. Станьте частью воодушевленных пользователей и получайте удовольствие от ставок где только захотите и в любое время. Установите обновление приложения БК Лига Ставок прямо сейчас и выходите на новый уровень игры!
Анонсируем выход обновленной мобильного приложения БК Лига Ставок для Android! Этот шаг существенно улучшает ваш пользовательский опыт, делая его более понятным и динамичным. Лига ставок апк немедленно! В обновлении вы найдете свободу доступа к многообразию спортивных мероприятий прямо с вашего смартфона. Усовершенствованное управление профилем, передовая концепция дизайна для удобной навигации и увеличенная скорость работы приложения – всё это создано для вас. Присоединяйтесь к числу воодушевленных пользователей и наслаждайтесь возможностями от ставок где только захотите и в любой момент. Установите обновление приложения БК Лига Ставок уже сегодня и переходите к новому этапу ставок!
Анонсируем выход обновленной мобильного приложения БК Лига Ставок для Android! Этот шаг существенно улучшает ваш пользовательский опыт, делая его ещё удобнее и эффективным. Приложение лига ставок для всех сейчас! В обновлении вы найдете прямой доступ к многообразию спортивных мероприятий из любой точки с помощью вашего устройства. Усовершенствованное управление профилем, передовая концепция дизайна для удобной навигации и значительно более высокая скорость работы приложения – всё это создано для вас. Станьте частью воодушевленных пользователей и наслаждайтесь возможностями от ставок в любой точке планеты и в любой момент. Скачайте обновление приложения БК Лига Ставок уже сегодня и выходите на новый уровень игры!
Анонсируем запуск новой версии мобильного приложения БК Лига Ставок для Android! Этот шаг полностью преобразует ваш досуг с ставками, делая его ещё удобнее и эффективным. Лига ставок приложение для компьютера для всех пользователей! В обновлении вы найдете прямой доступ к огромному ассортименту спортивных мероприятий из любой точки с помощью вашего устройства. Улучшенное управление профилем, инновационная концепция дизайна для простой навигации и увеличенная скорость работы приложения – всё это создано для вас. Присоединяйтесь к числу довольных пользователей и наслаждайтесь возможностями от ставок где только захотите и в любой момент. Скачайте обновление приложения БК Лига Ставок уже сегодня и выходите на новый уровень ставок!
Top 10 Solar Generators for RVs
best solar generators for rv https://www.ghkolp-56dert.ru/ .
I highly advise stay away from this platform. My own encounter with it has been purely dismay as well as suspicion of fraudulent activities. Proceed with extreme caution, or alternatively, seek out a more reputable service to fulfill your requirements.
Каталог салонов эпиляции https://findepil.ru/ Москвы и Московской области. Химки, Люберцы, Красногорск, Зеленоград и т.д. Все виды эпиляции – электроэпиляция, депиляция воском, шугаринг, лазерная эпиляция. Можно выбрать салон по цене, для примера выбраны стандартные процедуры эпиляции – руки воск, ноги шугаринг. Каталог постоянно пополняется.
Знакомьтесь с эксклюзивное предложение от БК Лига Ставок – фрибет для новых игроков! Это бесплатная ставка даёт возможность вам испытать удачу без риска потери собственных средств, открывая широкие возможности для выигрыша с первых же шагов в мире ставок. Ligastavok фрибет новым пользователям после регистрации! С фрибетом от БК Лига Ставок, вы имеете возможность испытать все преимущества ставок без каких-либо финансовых обязательств. Это идеальный старт для тех, кто хочет стать частью мира спортивных ставок с минимальными рисками. Не упускайте свой шанс и начните своё приключение в БК Лига Ставок с нашим фрибетом. Активируйте ваш фрибет уже сегодня и стартуйте к выигрышам!
Знакомьтесь с эксклюзивное предложение от БК Лига Ставок – фрибет для новых игроков! Это бесплатная ставка даёт возможность вам сделать ставку без риска потери собственных средств, открывая широкие возможности для получения призов с первых же шагов в мире ставок. Фрибет лига ставок за регистрацию для всех новичков после регистрации! С фрибетом от БК Лига Ставок, вы получаете шанс ознакомиться с платформой без каких-либо финансовых обязательств. Это отличный способ начать для тех, кто хочет стать частью мира спортивных ставок с минимальными рисками. Не упускайте свой шанс и сделайте первый шаг к большим выигрышам в БК Лига Ставок с нашим фрибетом. Заберите свой фрибет сейчас же и стартуйте к выигрышам!
Lightweight Options
Emergency Preparedness: The Best Solar Generator for Home Backup
solar generator for home backup solar generator for home backup .
Вашему вниманию предлагается эксклюзивное предложение от БК Лига Ставок – фрибет для новых игроков! Это бесплатная ставка даёт возможность вам сделать ставку без риска потери собственных средств, предоставляя новые горизонты для выигрыша с первых же шагов в мире ставок. Фрибет лига ставок на сегодня для всех новичков после регистрации! С фрибетом от БК Лига Ставок, вы имеете возможность ознакомиться с платформой без каких-либо финансовых обязательств. Это идеальный старт для тех, кто хочет погрузиться в мир ставок с минимальными рисками. Не упускайте свой шанс и сделайте первый шаг к большим выигрышам в БК Лига Ставок с нашим фрибетом. Заберите свой фрибет уже сегодня и стартуйте к выигрышам!
blublu
blibliblu
nice content!nice history!!
I strongly recommend steer clear of this platform. My personal experience with it has been purely frustration as well as suspicion of fraudulent activities. Exercise extreme caution, or better yet, look for a trustworthy platform to meet your needs.
Мы гарантируем вам низкие цены и отличное качество за счет больших объемов закупок у заводов-изготовителей напрямую упаковочные материалы купить в спб
Знакомьтесь с эксклюзивное предложение от БК Лига Ставок – фрибет для новых игроков! Это фрибет даёт возможность вам сделать ставку без риска потери собственных средств, открывая новые горизонты для получения призов с первых же шагов в мире ставок. Лига ставок фрибет за регистрацию для всех новичков после регистрации! С фрибетом от БК Лига Ставок, вы получаете шанс испытать все преимущества ставок без каких-либо финансовых обязательств. Это идеальный старт для тех, кто хочет стать частью мира спортивных ставок с минимальными рисками. Не упускайте свой шанс и начните своё приключение в БК Лига Ставок с нашим фрибетом. Заберите свой фрибет сейчас же и стартуйте к выигрышам!
Знакомьтесь с эксклюзивное предложение от БК Лига Ставок – фрибет для новых игроков! Это фрибет позволяет вам испытать удачу без риска потери собственных средств, открывая новые горизонты для получения призов с первых же шагов в мире ставок. Лигаставок фрибет новым пользователям после регистрации! С фрибетом от БК Лига Ставок, вы получаете шанс ознакомиться с платформой без каких-либо финансовых обязательств. Это отличный способ начать для тех, кто хочет погрузиться в мир ставок с минимальными рисками. Не упускайте свой шанс и начните своё приключение в БК Лига Ставок с нашим фрибетом. Заберите свой фрибет уже сегодня и откройте для себя мир ставок без рисков!
Вашему вниманию предлагается эксклюзивное предложение от БК Лига Ставок – фрибет для новых игроков! Это бесплатная ставка позволяет вам сделать ставку без риска потери собственных средств, предоставляя новые горизонты для выигрыша с первых же шагов в мире ставок. Лига ставок фрибет новым игрокам для всех новичков после регистрации! С фрибетом от БК Лига Ставок, вы получаете шанс испытать все преимущества ставок без каких-либо финансовых обязательств. Это идеальный старт для тех, кто хочет стать частью мира спортивных ставок с минимальными рисками. Воспользуйтесь этим предложением и начните своё приключение в БК Лига Ставок с нашим фрибетом. Заберите свой фрибет уже сегодня и стартуйте к выигрышам!
Знакомьтесь с эксклюзивное предложение от БК Лига Ставок – фрибет для новых игроков! Это фрибет даёт возможность вам испытать удачу без риска потери собственных средств, открывая новые горизонты для получения призов с первых же шагов в мире ставок. Лига ставок фрибеты за регистрацию новым пользователям после регистрации! С фрибетом от БК Лига Ставок, вы получаете шанс ознакомиться с платформой без каких-либо финансовых обязательств. Это идеальный старт для тех, кто хочет стать частью мира спортивных ставок с минимальными рисками. Не упускайте свой шанс и начните своё приключение в БК Лига Ставок с нашим фрибетом. Заберите свой фрибет сейчас же и откройте для себя мир ставок без рисков!
The calculator on a smartphone is very constrained in functions. As an architect, I often require a scientific online calculator, such as this https://calculator-online.info/. It is effective for various tasks like financial calculations, percentage calculations, solving complex equations, finding square and cube roots, and more
Представляем выпуске эксклюзивного промокода для БК Лига Ставок! Этот уникальный код предоставляет доступ к эксклюзивным привилегиям и повышает ваш игровой процесс, делая его более прибыльным и волнующим. Промокод лига ставок на сегодня при регистрации для активации сегодня! С его использованием, игроки получают доступ к дополнительным бонусам на ставки, ускоренной процедуре регистрации и эксклюзивным акциям. Не упустите шанс стать частью элитного клуба пользователей БК Лига Ставок и увеличьте свои шансы на успех с нашим промокодом. Активируйте промокод прямо сейчас и заберите свои бонусы еще до первой ставки!
Представляем выпуске эксклюзивного промокода для БК Лига Ставок! Этот уникальный код предоставляет доступ к эксклюзивным привилегиям и усиливает ваш опыт ставок, делая его более прибыльным и захватывающим. Промокоды в лига ставок после ввода кода! С данным промокодом, игроки получают непосредственный доступ к бонусным средствам, привилегиям при регистрации и специальным предложениям. Воспользуйтесь этой возможностью стать частью элитного клуба пользователей БК Лига Ставок и максимизируйте свои выигрыши с нашим промокодом. Активируйте промокод уже сегодня и начните выигрывать еще до первой ставки!
Рады сообщить о выпуске эксклюзивного промокода для БК Лига Ставок! Этот специальный промокод открывает доступ к особым бонусам и повышает ваш опыт ставок, делая его более прибыльным и волнующим. Промокод лига ставок на сегодня при регистрации сразу после активации! С его использованием, игроки получают непосредственный доступ к дополнительным бонусам на ставки, ускоренной процедуре регистрации и эксклюзивным акциям. Не упустите шанс стать частью привилегированной группы пользователей БК Лига Ставок и максимизируйте свои выигрыши с нашим промокодом. Активируйте промокод прямо сейчас и начните выигрывать еще до первой ставки!
Энергоэффективные каркасные дома под ключ: экономия на отоплении
каркасные дома в москве karkasnye-doma-pod-klyuch-01.ru .
Рады сообщить о выпуске эксклюзивного промокода для БК Лига Ставок! Этот уникальный код открывает доступ к эксклюзивным привилегиям и усиливает ваш опыт ставок, делая его более прибыльным и захватывающим. https://ligastavok-promocode.ru/ сразу после активации! С его использованием, игроки получают доступ к дополнительным бонусам на ставки, ускоренной процедуре регистрации и специальным предложениям. Не упустите шанс стать частью привилегированной группы пользователей БК Лига Ставок и увеличьте свои шансы на успех с нашим промокодом. Используйте код уже сегодня и начните выигрывать еще до первой ставки!
Представляем доступности эксклюзивного промокода для БК Лига Ставок! Этот специальный промокод предоставляет доступ к эксклюзивным привилегиям и повышает ваш опыт ставок, делая его ещё более выгодным и захватывающим. Лига ставок промокод фрибет для активации сегодня! С данным промокодом, игроки получают доступ к бонусным средствам, привилегиям при регистрации и специальным предложениям. Не упустите шанс стать частью элитного клуба пользователей БК Лига Ставок и максимизируйте свои выигрыши с нашим промокодом. Активируйте промокод прямо сейчас и начните выигрывать еще до первой ставки!
Журнал для женщин http://womangu.ru/ – актуальные новости о звездах и шоу-бизнесе, модные тенденции, статьи об отношениях, красоте и здоровье, рецепты и каталог диет на женском портале.
Самый ожидаемый футбольный поединок сезона – Манчестер Сити против Реала Мадрид! Страсть, волнение, и ожидание ждут нас на поле. Но этот день может быть еще более интригующим благодаря промокоду PLAYDAY от 1win! Ставьте на своего героя с уверенностью и повысьте свои шансы на победу! Не упустите шанс – забирайте Манчестер Сити Реал промокод на депозит уже сегодня!
https://images.google.co.ao/url?q=https://300.ya.ru/moARYyxL
Самый ожидаемый футбольный поединок сезона – Манчестер Сити против Реала Мадрид! Энтузиазм, волнение, и ожидание ждут нас на поле. Но этот день может быть еще более интригующим благодаря промокоду PLAYDAY от 1win! Ставьте на своего любимца с уверенностью и удвойте свои шансы на победу! Не упустите возможность – забирайте Манчестер Сити Реал Мадрид промокод уже сегодня!
Специальные предложения
– Купить кран-змеюку для сада
сталь нержавеющая купить https://krany-sharovye-nerzhaveyushie-msk.ru/ .
Самый ожидаемый футбольный поединок сезона – Манчестер Сити против Реала Мадрид! Страсть, напряжение, и ожидание ждут нас на поле. Но этот день может быть еще более увлекательным благодаря промокоду PLAYDAY от 1win! Ставьте на своего героя с уверенностью и повысьте свои шансы на победу! Не упустите возможность – забирайте Манчестер Сити Реал промокод на депозит уже сегодня!
Лучшие предложения
– Купить кран для кухни с выдвижным изливом
нержавеющая сталь купить нержавеющая сталь купить .
Самый ожидаемый футбольный поединок сезона – Манчестер Сити против Реала Мадрид! Азарт, напряжение, и адреналин ждут нас на поле. Но этот день может быть еще более интригующим благодаря промокоду PLAYDAY от 1win! Ставьте на своего любимца с уверенностью и повысьте свои шансы на победу! Не упустите возможность – забирайте Манчестер Сити Реал промокод на депозит уже сегодня!
Самый ожидаемый футбольный поединок сезона – Манчестер Сити против Реала Мадрид! Энтузиазм, нервы, и ожидание ждут нас на поле. Но этот день может быть еще более увлекательным благодаря промокоду PLAYDAY от 1win! Ставьте на своего героя с уверенностью и повысьте свои шансы на победу! Не упустите шанс – забирайте Манчестер Сити Реал промокод на депозит уже сегодня!
https://praktikaotchet.ru/
Самый ожидаемый футбольный поединок сезона – Манчестер Сити против Реала Мадрид! Энтузиазм, напряжение, и адреналин ждут нас на поле. Но этот день может быть еще более захватывающим благодаря промокоду PLAYDAY от 1win! Ставьте на своего фаворита с уверенностью и удвойте свои шансы на победу! Не упустите шанс – забирайте Манчестер Сити Реал Мадрид бонус код за регистрацию уже сегодня!
Store your cryptocurrencies with peace of mind using this wallet
trx wallet app trx wallet app .
Битва гигантов на поле – Бавария против Арсенала! Адреналин, напряжение и невероятные моменты ждут нас в этом схватке. Но почему бы не добавить еще больше интриги с помощью промокода PLAYDAY от 1win? Сделайте ставку на победную команду и увеличьте свои выигрышные возможности! Не упустите этот шанс – активируйте Бавария Арсенал промокод на депозит уже сегодня и радуйтесь игры в полную силу!
Битва гигантов на поле – Бавария против Арсенала! Эмоции, напряжение и невероятные моменты ждут нас в этом противостоянии. Но почему бы не добавить еще больше эмоций с помощью промокода PLAYDAY от 1win? Сделайте ставку на победителя и увеличьте свои шансы на победу! Не упустите этот момент – используйте Бавария Арсенал 500 за депозит уже сегодня и получайте удовольствие от игры в полную силу!
Доставка по всей России
– Кран для биде: широкий выбор и выгодные цены
краны шаровые из нержавеющей стали краны шаровые из нержавеющей стали .
menthol inhalers
Битва гигантов на поле – Бавария против Арсенала! Адреналин, напряжение и уникальные ситуации ждут нас в этом противостоянии. Но почему бы не добавить еще больше эмоций с помощью промокода PLAYDAY от 1win? Сделайте ставку на победителя и растите свои шансы на победу! Не упустите этот момент – используйте Бавария Арсенал бонус уже сегодня и радуйтесь игры в полную силу!
https://praktikaucheba.ru/
casino
online casinos
Встречайте игру на пике с промокодом PLAYDAY от 1win! Независимо от того, на какую событие вы ставите – будь то спортивное противостояние – этот промокод приносит вам экстра-шансы для победы. Расти свои вероятность победы, активируя промокод PLAYDAY при размещении ставок. Не упустите шанс на захватывающий опыт и бонусные выигрыши – воспользуйтесь 1win промокод на депозит прямо сейчас на 1win!
Встречайте матч на высшем уровне с промокодом PLAYDAY от 1win! Независимо от того, на какую матч вы ставите – будь то футбольная битва – этот промокод приносит вам дополнительные шансы для победы. Увеличьте свои вероятность победы, используя промокод PLAYDAY при размещении ставок. Не упустите возможность на потрясающие впечатления и бонусные выигрыши – используйте промокод на 1win на сегодня прямо сейчас на 1win!
Встречайте игру на новом уровне с промокодом PLAYDAY от 1win! Независимо от того, на какую событие вы ставите – будь то спортивное противостояние – этот промокод приносит вам дополнительные возможности для победы. Увеличьте свои шансы на успех, активируя промокод PLAYDAY при размещении ставок. Не упустите шанс на потрясающие впечатления и дополнительные призы – воспользуйтесь 1win casino бонус код прямо сейчас на 1win!
Встречайте игру на высшем уровне с промокодом PLAYDAY от 1win! Независимо от того, на какую игру вы ставите – будь то спортивное противостояние – этот промокод приносит вам дополнительные возможности для победы. Повысьте свои вероятность победы, активируя промокод PLAYDAY при размещении ставок. Не упустите возможность на увлекательный опыт и бонусные выигрыши – воспользуйтесь 1вин бонус при регистрации прямо сейчас на 1win!
Встречайте игру на пике с промокодом PLAYDAY от 1win! Независимо от того, на какую игру вы ставите – будь то баскетбольный поединок – этот промокод приносит вам дополнительные шансы для победы. Расти свои выигрышные шансы, применяя промокод PLAYDAY при размещении ставок. Не упустите шанс на потрясающие впечатления и дополнительные выигрыши – используйте 1win промокод на депозит прямо сейчас на 1win!
https://referatnash.ru/
Встречайте спортивное событие на пике с промокодом PLAYDAY от 1win! Независимо от того, на какой игру вы делаете ставку – будь то спортивное противостояние – этот промокод приносит вам экстра-шансы для победы. Расти свои выигрышные шансы, активируя промокод PLAYDAY при размещении ставок. Не упустите шанс на увлекательный опыт и бонусные выигрыши – используйте 1вин бонус при регистрации прямо сейчас на 1win!
Цены на дома из бруса в разных регионах России
строительство дома из бруса под ключ строительство дома из бруса под ключ .
PBN sites
We’ll create a web of private blog network sites!
Pros of our private blog network:
We execute everything SO THAT GOOGLE does not realize that THIS IS A PBN network!!!
1- We obtain web domains from separate registrars
2- The principal site is hosted on a VPS hosting (Virtual Private Server is rapid hosting)
3- Additional sites are on different hostings
4- We allocate a individual Google profile to each site with verification in Google Search Console.
5- We make websites on WordPress, we don’t utilise plugins with assistance from which malware penetrate and through which pages on your websites are generated.
6- We refrain from repeat templates and utilise only unique text and pictures
We do not work with website design; the client, if desired, can then edit the websites to suit his wishes
Find the largest selection of guns for sale. Shop shooting accessories including ammo, mags, holsters, and more
https://guntycoons.com/product/glock-switch
synthroid prescription
Присоединяйтесь к Списку Довольных Клиентов «Арены Строй». Выбирая нас, вы выбираете надежность, профессионализм и качество. Наша команда готова воплотить в жизнь ваш проект, превзойдя все ожидания.
строительные бригады в москве и московской области
1хбет слоты скачать на андроид – промокоды на 1хбет на андроид, 1xbet скачать без вирусов
Доставка алкоголя СПб
lisinopril 5 mg buy
1хбет бонусы – промокод 1хбет актуальный на сегодня, промокод 1xstavka на сегодня
В настоящее время наши дни могут содержать внезапные издержки и финансовые вызовы, и в такие моменты каждый ищет помощь. На сайте займ денег вам помогут без лишних сложностей. В своей роли представителя я стремлюсь поделиться этими сведениями, чтобы помочь тем, кто столкнулся с временными трудностями. Наша платформа обеспечивает честные условия и эффективное рассмотрение запросов, чтобы каждый мог решить свои денежные проблемы быстро и без лишних хлопот.
промокод на 1хставка бесплатно – первый промокод 1хбет, бездепозитный промокод 1хбет
В настоящее время наши дни могут содержать внезапные издержки и финансовые вызовы, и в такие моменты каждый ищет надежную поддержку. На сайте оформить займ в Минске вам помогут без лишних сложностей. В своей роли представителя я стремлюсь поделиться этими сведениями, чтобы помочь тем, кто столкнулся с временными трудностями. Наша система обеспечивает прозрачные условия и эффективное рассмотрение запросов, чтобы каждый мог решить свои денежные проблемы оперативно и без лишних затрат времени.
В настоящее время наши дни могут содержать неожиданные расходы и экономические трудности, и в такие моменты каждый ищет помощь. На сайте получить деньги в долг в Минске вам помогут без лишних сложностей. В своей роли представителя я стремлюсь поделиться этими сведениями, чтобы помочь людям в сложной ситуации. Наша система обеспечивает прозрачные условия и быструю обработку заявок, чтобы каждый мог решить свои денежные проблемы быстро и без лишних хлопот.
пояснения Горящие Туры
Швейная машинка: как выбрать подходящую иглу и нитки
швейная машинка тойота http://sewing-machines2.ru/ .
В настоящее время наши дни могут содержать неожиданные расходы и финансовые вызовы, и в такие моменты каждый ищет помощь. На сайте деньги в долг в Минске вам помогут без лишних сложностей. В своей роли агента я стремлюсь распространить эту информацию, чтобы помочь людям в сложной ситуации. Наша система обеспечивает прозрачные условия и эффективное рассмотрение запросов, чтобы каждый мог разрешить свои финансовые вопросы быстро и без лишних хлопот.
В настоящее время наши дни могут содержать неожиданные расходы и финансовые вызовы, и в такие моменты каждый ищет надежную поддержку. На сайте деньги в долг в Минске вам помогут без лишних сложностей. В своей роли представителя я стремлюсь поделиться этими сведениями, чтобы помочь людям в сложной ситуации. Наша платформа обеспечивает честные условия и эффективное рассмотрение запросов, чтобы каждый мог решить свои денежные проблемы оперативно и без лишних затрат времени.
http://google.com.ly/url?q=https://dzen.ru/a/ZfrZF5isFmwikLbc
polar stone 01 купить
Доставка алкоголя СПб
В настоящее время наши дни могут содержать неожиданные расходы и финансовые вызовы, и в такие моменты каждый ищет помощь. На сайте деньги в долг вам помогут без лишних сложностей. В своей роли представителя я стремлюсь поделиться этими сведениями, чтобы помочь людям в сложной ситуации. Наша система обеспечивает прозрачные условия и быструю обработку заявок, чтобы каждый мог разрешить свои финансовые вопросы оперативно и без лишних затрат времени.
l7 автомобиль китайский купить
В настоящее время наши дни могут содержать внезапные издержки и экономические трудности, и в такие моменты каждый ищет помощь. На сайте получить деньги в долг в Минске вам помогут без лишних сложностей. В своей роли представителя я стремлюсь поделиться этими сведениями, чтобы помочь людям в сложной ситуации. Наша платформа обеспечивает честные условия и эффективное рассмотрение запросов, чтобы каждый мог решить свои денежные проблемы быстро и без лишних хлопот.
китайский авто
Воспользоваться промокодом 1xbet можно при регистрации в 1xbet. БК 1хбет дарит до 130% на первый депозит при помощи промокода 1xbet. Максимальная сумма бонуса по промокоду 1хбет достигает 32500 рублей. Промокод 1хбет дает надбавку на депозит до 130% только при первом пополнении. Регистрация. промокод 1хбет на регистрацию на бесплатную ставку. Всем известно, что букмекерская контора 1xbet предлагает широкий выбор разнообразных бонусов и акций. В этой статье мы расскажем все о промокодах 1xBet: что это, как использовать при регистрации, где вводить, чтобы сделать ставку бесплатно, и по каким поводам казахстанский букмекер 1хБет вручает именные промокоды. Содержание. Что такое промокод 1xBet. Бесплатные промокоды 1xBet. Промокод при регистрации в 1xbet сегодня. Как ввести промокод при регистрации в 1хБет – более подробно в этом материале https://mebel-3d.ru/libraries/news/?mify_i_zablughdeniya_o_prichinah_impotencii.html
https://vipbuket64.ru/
1xSlots Промокод (Бездепозитный Бонус 2024)
1xSlots промокод: NEXT777, при регистрации введите этот бонусный код, чтобы получить бонус для новых игроков в размере €1650 + 200 фриспинов. Чтобы получить этот бонус, вам нужно создать аккаунт и ввести специальный промокод казино 1хСлотс.
1xSlot Промокод
NEXT777
В казино 1xSlots 2024 доступны различные бонусы: бездепозитные при регистрации, промокоды, фриспины, кэшбэки и другие акции.
Промокод 1xSlots 2024: NEXT777 – введите код при регистрации в казино 1хСлот и получите приветственный бонус €1650 +200 фриспинов. Чтобы промокод 1xSlots на бездепозитный бонус сработал, необходимо указать рабочую комбинацию при регистрации и правильно заполнить форму анкеты. После завершения регистрации бездепозитный бонус будет доступен в личном кабинете. Рекомендуется не торопиться и сразу после создания аккаунта заполнить персональные данные. Важно указать требуемую информацию в полях, отмеченных звездочкой во вкладке “Профиль”, а также активировать контакты (номер телефона и e-mail).
Для новых клиентов промокод 1xSlots предоставляет уникальные возможности, позволяющие бесплатно опробовать один из представленных на платформе слотов. Чтобы получить бездепозитные фриспины, достаточно при регистрации указать промокод и выполнить простые условия акции, которые мы расскажем в данной статье. Игроки, желающие продолжить игру и сделать первый депозит, смогут получить щедрый приветственный бонус до €1500 и 150 бесплатных вращений.
Для получения бонуса на первый депозит необходимо пополнить счет на сумму не менее 10. Награда составляет 100% от суммы первого пополнения, но не может превышать 300. Если сумма пополнения превышает максимальный лимит, игрок получит свой депозит полностью, а также 300 в качестве бонуса. Для активации второго, третьего и четвертого этапов, сумма депозита должна быть не менее 15.
Кроме денежного вознаграждения, каждый этап сопровождается бесплатными прокрутками для игр компании:
– за первый депозит – 30 фриспинов для игры Book of Gold: Classic;
– за второй депозит – 35 фриспинов для игры в Legend of Cleopatra;
– за третий депозит – 40 фриспинов для игры в Solar Queen;
– за четвертый депозит – 45 фриспинов для игры в Imperial Fruits: 40 lines.
Казино 1xSlots предоставляет бонус поэтапно. Чтобы получить награду за второй и последующие депозиты, необходимо выполнить условия отыгрыша ранее полученных средств. Фриспины также начисляются поэтапно и зачисляются после выполнения условий отыгрыша.
Промокод для 1xСлотс: NEXT777. Получите бездепозитный приветственный пакет до €1650 +200 фриспинов. Компания 1xSlots предлагает своим клиентам ряд бонусных программ, самой популярной из которых является приветственный пакет с увеличением первого депозита и бесплатными вращениями. С использованием промокода вы можете получить до 1650 евро и 200 фриспинов. Одним из явных преимуществ 1xSlots является огромный выбор игр. Большую часть из доступных 10 тысяч развлечений занимают игровые автоматы. Пользователям предлагается более 100 различных провайдеров слотов.
Промокод не имеет срока действия. Любой пользователь, который создает аккаунт на сайте 1xSlots, может его активировать. Каждому игроку предоставляется только один бонус, поэтому промокод может быть использован только один раз. Чтобы воспользоваться промокодом, необходимо нажать на кнопку “Регистрация”, выбрать удобный способ создания аккаунта, указать все необходимые данные, подтвердить номер телефона или адрес электронной почты и ввести промокод. После этого можно завершить регистрацию, нажав на кнопку “Зарегистрироваться”.
1xSlots Промокод для Регистрации
Бонусы казино 1xSlots 2024 – Бездепозитные бонусы ? Коды на возврат средств ? VIP программа преданности ? Бесплатные фриспины.
Промокод 1xSlots при Регистрации: NEXT777 Получите эксклюзивный приветственный пакет до 1650 евро +150 фриспинов. Казино 1xSlots 2024 предлагает своим гостям не только широкий выбор игровых автоматов. На сайте казино регулярно проводятся бонусные акции, в рамках которых можно получить различные подарки, процент от депозита, фриспины и многое другое. При обычной регистрации есть ограничение по сумме – не более 1500 евро на первые четыре депозита. Первое пополнение – до 300 евро, второе – не более 350, третье – 400, четвертое – 450 евро. После ввода промокода лимит увеличивается до 1650 евро, а количество фриспинов возрастает с 150 до 200 вращений.
Получите бездепозитный бонус в размере 100 фриспинов в онлайн казино 1xSlots в 2024 году. Все активные бонус коды, промокоды и купоны от 1хСлотс (1xSlots) доступны как для новых, так и для существующих игроков. В клубе 1xSlots промокоды предоставляют дополнительные бонусы пользователям. Кроме того, в клубе проводятся множество турниров с крупными призовыми фондами, в которых может принять участие любой зарегистрированный игрок.
1xSlots фриспины промокод: NEXT777. Размер приветственного поощрения составляет 100 фриспинов в автомате Eye of Storm от провайдера Pragmatic Play. Время на его активацию неограничено. Подарок выдается единожды, попытки повторного создания учетной записи для получения фриспинов приравниваются к мошенническим действиям. Альтернативным способом получения бонус-кодов является активное заключение пари в системе. Вращая барабаны игровых автоматов и зарабатывая баллы можно получить право на фриспины, благодаря промо. Список промокодов 1xslots доступен непосредственно на официальном сайте. Чтобы получить бездепозитный бонус код для 1хслотс в 2024 году, следует выполнить следующие условия:
1. Активировать бонусные средства в личном кабинете;
2. Пополнить счет на €15 (или эквивалент в другой валюте) и более, чтобы привязать банковскую карту или онлайн-кошелек;
3. Выполнить условия вейджера: x25. Для этого необходимо поставить из своих денег сумму, равную выигрышу с бесплатных вращений, умноженную в 25 раз. На отыгрыш дается 7 дней с момента, когда вы прокрутили фриспины.
Максимальная сумма вознаграждения составляет 1650 евро. Ее необходимо отыграть с вейджером 35 раз. Казино предлагает релоад-бонусы, которые также нужно отыграть 35 раз. Однако особое место среди множества игр, слотов и турниров на 1xSlots занимает лайв-казино. Это казино, где игра происходит в режиме реального времени. Настоящие дилеры раздают карты и крутят рулетку за игровыми столами. Все эти действия передаются по видеосвязи. Благодаря такой видеотрансляции каждый игрок может почувствовать все эмоции и азарт игры в интерактивной атмосфере с профессиональными дилерами.
При регистрации на 1xSlots используйте промокод “NEXT777” и получите бездепозитный бонус в размере €1650 + 200 фриспинов. Казино 1xSlots радует своих игроков различными бонусами, такими как промокоды, фриспины и бездепозитные бонусы. Особенно щедрые подарки от казино 1xSlots предназначены для новичков.
В дополнение к бонусной программе онлайн казино 1xSlots предлагает кешбэк до 11%, начисляемый от суммы проигранных средств. Кешбэк не имеет срока отыгрыша. Сидя дома перед компьютером, удается почувствовать атмосферу присутствия в настоящем казино. Именно этими причинами объясняется такая популярность и широкий спрос лайв-казино.
бонус 1xslots промокод бездепозитный без отыгрыша – Бонус по промокоду 1хСлотс увеличивается с €1500 + 150 фриспинов до €1650 + 200 фриспинов.
Промокод 1xSlots на Сегодня: NEXT777 предоставляет вам возможность получить €1500 +150 FS при регистрации с использованием бонусного кода. Теперь бонус по промокоду составляет €1650 + 200 фриспинов, что на €150 больше, чем раньше. Это отличная возможность получить еще больше выгоды от игры. Казино 1xSlots 2024 – это платформа для игровых автоматов и Турниров. В казино 1хСлотс доступны различные бонусы, такие как промокоды, фриспины и бездепозитные бонусы. Особенно крупные подарки в казино 1xSlots предназначены для новичков.
Выгодная бонусная программа на сайте 1xslots позволяет как новичкам, так и опытным игрокам получать разнообразные подарки. Кроме того, это отличная возможность увеличить свой выигрыш. В казино 1xslots бонусы за депозиты и подарки не требуют дополнительных вложений. Используя фриспины и промокоды, вы можете получить хорошие деньги. Давайте подробнее рассмотрим, какие бонусы предлагает онлайн казино.
После прохождения регистрации игроку предлагается бонус на первые четыре операции по пополнению счета:
на первый депозит – 100% от внесенных средств и 30 фриспинов;
на второй депозит – 50% от внесенных средств и 35 фриспинов;
на третий депозит – 25% от внесенных средств и 40 фриспинов;
на четвертый депозит – 25% от внесенных средств и 45 фриспинов.
Промокод, также известный как код приглашения, является ключом-активатором приветственной программы для новичков. Если вы ранее не имели опыта игры в 1xSlots, то вы можете рассчитывать на получение щедрого подарка при регистрации – пакета из 1650 евро и 200 бесплатных прокруток. Согласно правилам бонусной акции, размер поощрения зависит от суммы первых четырех взносов и распределяется следующим образом: на депозитный бонус установлен максимальный лимит в 1500 евро. Чтобы получить подарок, игроку достаточно пройти процедуру регистрации, заполнить анкетные данные в личном кабинете и внести на счет профиля сумму от 10 евро.
При регистрации клиент может использовать промокод 1xSlots и получить дополнительный подарок.
1xSlots давно занимает прочные позиции в списке лучших брендов гемблинг-индустрии. Политика компании 1x ориентирована на опытных игроков, здесь пользователей ожидает продуманная программа лояльности, а также гарантии безопасности личной информации и депозита. Все действия осуществляются на основании лицензии 8048/JAZ2016-083, полученной от компании Orakum N.V., Кюрасао.
Промокод 1хСлот 2024: NEXT777 предоставляет бездепозитный бонус в виде 150 вращений в игре «The Dog House Megaways». В онлайн казино 1xslots доступны бесплатные промокоды на фриспины. Кроме того, игроки могут получать бонусные вращения не только за регистрацию или использование промокода от 1xSlots. Участие в бонусных акциях также позволяет пользователям получить фриспины. Казино 1хSlots предлагает различные варианты депозитов и выплат. Новые игроки, которые регистрируются на 1хSlots, получают приветственный пакет бонусов, однако с использованием промокода от 1xSlots этот бонус может быть еще более значительным. Для активации бонуса необходимо применить актуальный промокод при регистрации.
Приветственный пакет от 1xSlot доступен сразу после регистрации и требует активации через создание депозита. Бонус предоставляет умножение для первых четырех депозитов и дополнительные бесплатные вращения. Минимальная сумма для первого депозита составляет 10 евро, а для последующих пополнений – 15 евро. Максимальная сумма бонуса – 1500 евро.
Также новичкам предоставляются бонусы на второй, третий и четвертый депозит. Для получения подарка необходимо внести сумму не менее 15 евро. Игрокам также предоставляются фриспины и депозитные подарки. Для начисления фриспинов требуется подтверждение номера телефона.
Для постоянных игроков онлайн-казино 1xSlots проводит бонусные акции. Некоторые из них имеют временный характер, а другие действуют постоянно. В основном, пользователям предлагаются депозитные бонусы. Например, можно получить презент за пополнение счета в понедельник. За десятый депозит игроку полагается крупный депозитный бонус в размере 50% от вносимой суммы и 100 фриспинов.
В клубе 1xSlots также действует программа лояльности, которая предполагает различные привилегии для игроков.
Игрокам, активно делающим ставки в течение недели и ушедшим в минус, казино 1xSlots предлагает фриспины. Для получения бонуса не требуется пополнение счета, лимит на максимальный выигрыш и вейджер не устанавливаются.
Ежедневно в казино 1хСлотс назначается слот дня. При совершении ставок на определенную сумму в этом игровом аппарате игроку начисляются фриспины. Обратите внимание https://optom-plus.ru/forum/art/promokod_1xslots.html, время действия акции ограничено.
Разработчиками 1хСлотс было разработано мобильное казино. Такая версия представляет собой упрощенный вариант компьютерного формата онлайн казино. Она позволяет играть в любимые игры на любом устройстве, поддерживающем функцию выхода в интернет. В качестве такого устройства может быть смартфон или планшет.
китайский авто
Бонусное предложение активно до конца 2024 года. Фрибет – это бесплатные ставки на некоторое количество пари в букмекерской конторе 1xbet, которые выдается, если ввести как ввести промокод в 1хбет с телефона, а затем – целиком заполнить анкету игрока в своем личном кабинете и подтвердить номер мобильного телефона. С помощью бесплатной ставки за 1xbet промокод вы можете делать ставки на любые виды спорта, однако учтите, что у 1xbet фрибета есть свои условия отыгрыша. Приветственный бонус 1Хбет. Во время регистрации на 1xbet бетторы могут выбрать стартовый бонус – для ставок на спорт или для игры в казино. Промокоды 1xBet на сегодня. Не ошибемся, если скажем, что компания является одним из лидеров на рынке букмекерских услуг по количеству и разнообразию бонусных предложений. Белорусские бетторы могут воспользоваться всем их спектром. Промокод «1хБет» при регистрации дает право новым бетторам получит 100% бонус на первый депозит, но не более 200 BYN (бел. рублей). Например, при пополнении баланса на 100 BYN сверху клиент получает аналогичный бонус. Если же речь идет о промокодах, которые дают право на бесплатную ставку, то моментом активации следует считать время совершения ставки при помощи такого купона – более подробно в этом материале https://mebel-3d.ru/libraries/news/?mify_i_zablughdeniya_o_prichinah_impotencii.html
В наше время многие из нас сталкиваются с непредвиденными расходами и экономическими вызовами, и в такие моменты важно иметь доступ к дополнительным средствам. На сайте получить займ вам помогут быстро и удобно. В качестве официального представителя Брокерс Групп, я с удовольствием делиться этой важной информацией, чтобы помочь каждому, кто столкнулся с финансовыми трудностями. Наша система гарантирует прозрачные условия и быструю обработку заявок, чтобы каждый мог решить свои финансовые вопросы с минимальными временными затратами.
В наше время многие из нас сталкиваются с непредвиденными расходами и экономическими вызовами, и в такие моменты важно иметь доступ к дополнительным средствам. На сайте деньги в долг на карту вам помогут быстро и удобно. В качестве официального представителя Брокерс Групп, я рад делиться этой информацией, чтобы помочь каждому, кто нуждается в финансовой поддержке. Наша система гарантирует честные условия и оперативное рассмотрение запросов, чтобы каждый мог решить свои финансовые вопросы с минимальными временными затратами.
В наше время многие из нас сталкиваются с непредвиденными расходами и экономическими вызовами, и в такие моменты важно иметь доступ к дополнительным средствам. На сайте деньги в долг вам помогут быстро и удобно. В качестве официального представителя Брокерс Групп, я рад делиться этой информацией, чтобы помочь людям, кто столкнулся с финансовыми трудностями. Наша платформа гарантирует честные условия и быструю обработку заявок, чтобы каждый мог решить свои финансовые вопросы быстро и эффективно.
В наше время многие из нас сталкиваются с непредвиденными расходами и денежными трудностями, и в такие моменты важно иметь доступ к дополнительным средствам. На сайте dengizaimy вам помогут с минимальными усилиями. В качестве официального представителя Брокерс Групп, я с удовольствием делиться этой информацией, чтобы помочь каждому, кто столкнулся с финансовыми трудностями. Наша платформа гарантирует честные условия и оперативное рассмотрение запросов, чтобы каждый мог разрешить свои денежные проблемы с минимальными временными затратами.
Как работает миотокс при проведении ботулинотерапии?
миотокс цена отзывы miotoks.ru .
В наше время многие из нас сталкиваются с непредвиденными расходами и денежными трудностями, и в такие моменты важно иметь доступ к дополнительным средствам. На сайте взять денег в долг срочно вам помогут с минимальными усилиями. В качестве представителя Брокерс Групп, я с удовольствием делиться этой информацией, чтобы помочь людям, кто нуждается в финансовой поддержке. Наша платформа гарантирует прозрачные условия и оперативное рассмотрение запросов, чтобы каждый мог разрешить свои денежные проблемы с минимальными временными затратами.
китайский автомобиль гибридный
В наше время многие из нас сталкиваются с внезапными затратами и экономическими вызовами, и в такие моменты важно иметь возможность взять кредит. На сайте займ денег вам помогут с минимальными усилиями. В качестве представителя Брокерс Групп, я рад делиться этой важной информацией, чтобы помочь людям, кто столкнулся с финансовыми трудностями. Наша система гарантирует честные условия и быструю обработку заявок, чтобы каждый мог разрешить свои денежные проблемы с минимальными временными затратами.
В наше время многие из нас сталкиваются с непредвиденными расходами и денежными трудностями, и в такие моменты важно иметь доступ к дополнительным средствам. На сайте деньги в долг вам помогут с минимальными усилиями. В качестве официального представителя Брокерс Групп, я рад делиться этой важной информацией, чтобы помочь каждому, кто столкнулся с финансовыми трудностями. Наша система гарантирует честные условия и быструю обработку заявок, чтобы каждый мог разрешить свои денежные проблемы с минимальными временными затратами.
1xSlots Промокод (Бездепозитный Бонус 2024)
1xSlots промокод: NEXT777, при регистрации введите этот бонусный код, чтобы получить бонус для новых игроков в размере €1650 + 200 фриспинов. Чтобы получить этот бонус, вам нужно создать аккаунт и ввести специальный промокод казино 1хСлотс.
1xSlot Промокод
NEXT777
В казино 1xSlots 2024 доступны различные бонусы: бездепозитные при регистрации, промокоды, фриспины, кэшбэки и другие акции.
Промокод 1xSlots 2024: NEXT777 – введите код при регистрации в казино 1хСлот и получите приветственный бонус €1650 +200 фриспинов. Чтобы промокод 1xSlots на бездепозитный бонус сработал, необходимо указать рабочую комбинацию при регистрации и правильно заполнить форму анкеты. После завершения регистрации бездепозитный бонус будет доступен в личном кабинете. Рекомендуется не торопиться и сразу после создания аккаунта заполнить персональные данные. Важно указать требуемую информацию в полях, отмеченных звездочкой во вкладке “Профиль”, а также активировать контакты (номер телефона и e-mail).
Для новых клиентов промокод 1xSlots предоставляет уникальные возможности, позволяющие бесплатно опробовать один из представленных на платформе слотов. Чтобы получить бездепозитные фриспины, достаточно при регистрации указать промокод и выполнить простые условия акции, которые мы расскажем в данной статье. Игроки, желающие продолжить игру и сделать первый депозит, смогут получить щедрый приветственный бонус до €1500 и 150 бесплатных вращений.
Для получения бонуса на первый депозит необходимо пополнить счет на сумму не менее 10. Награда составляет 100% от суммы первого пополнения, но не может превышать 300. Если сумма пополнения превышает максимальный лимит, игрок получит свой депозит полностью, а также 300 в качестве бонуса. Для активации второго, третьего и четвертого этапов, сумма депозита должна быть не менее 15.
Кроме денежного вознаграждения, каждый этап сопровождается бесплатными прокрутками для игр компании:
– за первый депозит – 30 фриспинов для игры Book of Gold: Classic;
– за второй депозит – 35 фриспинов для игры в Legend of Cleopatra;
– за третий депозит – 40 фриспинов для игры в Solar Queen;
– за четвертый депозит – 45 фриспинов для игры в Imperial Fruits: 40 lines.
Казино 1xSlots предоставляет бонус поэтапно. Чтобы получить награду за второй и последующие депозиты, необходимо выполнить условия отыгрыша ранее полученных средств. Фриспины также начисляются поэтапно и зачисляются после выполнения условий отыгрыша.
Промокод для 1xСлотс: NEXT777. Получите бездепозитный приветственный пакет до €1650 +200 фриспинов. Компания 1xSlots предлагает своим клиентам ряд бонусных программ, самой популярной из которых является приветственный пакет с увеличением первого депозита и бесплатными вращениями. С использованием промокода вы можете получить до 1650 евро и 200 фриспинов. Одним из явных преимуществ 1xSlots является огромный выбор игр. Большую часть из доступных 10 тысяч развлечений занимают игровые автоматы. Пользователям предлагается более 100 различных провайдеров слотов.
Промокод не имеет срока действия. Любой пользователь, который создает аккаунт на сайте 1xSlots, может его активировать. Каждому игроку предоставляется только один бонус, поэтому промокод может быть использован только один раз. Чтобы воспользоваться промокодом, необходимо нажать на кнопку “Регистрация”, выбрать удобный способ создания аккаунта, указать все необходимые данные, подтвердить номер телефона или адрес электронной почты и ввести промокод. После этого можно завершить регистрацию, нажав на кнопку “Зарегистрироваться”.
1xSlots Промокод для Регистрации
Бонусы казино 1xSlots 2024 – Бездепозитные бонусы ? Коды на возврат средств ? VIP программа преданности ? Бесплатные фриспины.
Промокод 1xSlots при Регистрации: NEXT777 Получите эксклюзивный приветственный пакет до 1650 евро +150 фриспинов. Казино 1xSlots 2024 предлагает своим гостям не только широкий выбор игровых автоматов. На сайте казино регулярно проводятся бонусные акции, в рамках которых можно получить различные подарки, процент от депозита, фриспины и многое другое. При обычной регистрации есть ограничение по сумме – не более 1500 евро на первые четыре депозита. Первое пополнение – до 300 евро, второе – не более 350, третье – 400, четвертое – 450 евро. После ввода промокода лимит увеличивается до 1650 евро, а количество фриспинов возрастает с 150 до 200 вращений.
Получите бездепозитный бонус в размере 100 фриспинов в онлайн казино 1xSlots в 2024 году. Все активные бонус коды, промокоды и купоны от 1хСлотс (1xSlots) доступны как для новых, так и для существующих игроков. В клубе 1xSlots промокоды предоставляют дополнительные бонусы пользователям. Кроме того, в клубе проводятся множество турниров с крупными призовыми фондами, в которых может принять участие любой зарегистрированный игрок.
1xSlots фриспины промокод: NEXT777. Размер приветственного поощрения составляет 100 фриспинов в автомате Eye of Storm от провайдера Pragmatic Play. Время на его активацию неограничено. Подарок выдается единожды, попытки повторного создания учетной записи для получения фриспинов приравниваются к мошенническим действиям. Альтернативным способом получения бонус-кодов является активное заключение пари в системе. Вращая барабаны игровых автоматов и зарабатывая баллы можно получить право на фриспины, благодаря промо. Список промокодов 1xslots доступен непосредственно на официальном сайте. Чтобы получить бездепозитный бонус код для 1хслотс в 2024 году, следует выполнить следующие условия:
1. Активировать бонусные средства в личном кабинете;
2. Пополнить счет на €15 (или эквивалент в другой валюте) и более, чтобы привязать банковскую карту или онлайн-кошелек;
3. Выполнить условия вейджера: x25. Для этого необходимо поставить из своих денег сумму, равную выигрышу с бесплатных вращений, умноженную в 25 раз. На отыгрыш дается 7 дней с момента, когда вы прокрутили фриспины.
Максимальная сумма вознаграждения составляет 1650 евро. Ее необходимо отыграть с вейджером 35 раз. Казино предлагает релоад-бонусы, которые также нужно отыграть 35 раз. Однако особое место среди множества игр, слотов и турниров на 1xSlots занимает лайв-казино. Это казино, где игра происходит в режиме реального времени. Настоящие дилеры раздают карты и крутят рулетку за игровыми столами. Все эти действия передаются по видеосвязи. Благодаря такой видеотрансляции каждый игрок может почувствовать все эмоции и азарт игры в интерактивной атмосфере с профессиональными дилерами.
При регистрации на 1xSlots используйте промокод “NEXT777” и получите бездепозитный бонус в размере €1650 + 200 фриспинов. Казино 1xSlots радует своих игроков различными бонусами, такими как промокоды, фриспины и бездепозитные бонусы. Особенно щедрые подарки от казино 1xSlots предназначены для новичков.
В дополнение к бонусной программе онлайн казино 1xSlots предлагает кешбэк до 11%, начисляемый от суммы проигранных средств. Кешбэк не имеет срока отыгрыша. Сидя дома перед компьютером, удается почувствовать атмосферу присутствия в настоящем казино. Именно этими причинами объясняется такая популярность и широкий спрос лайв-казино.
промокоды на фриспины 1xslots – Бонус по промокоду 1хСлотс увеличивается с €1500 + 150 фриспинов до €1650 + 200 фриспинов.
Промокод 1xSlots на Сегодня: NEXT777 предоставляет вам возможность получить €1500 +150 FS при регистрации с использованием бонусного кода. Теперь бонус по промокоду составляет €1650 + 200 фриспинов, что на €150 больше, чем раньше. Это отличная возможность получить еще больше выгоды от игры. Казино 1xSlots 2024 – это платформа для игровых автоматов и Турниров. В казино 1хСлотс доступны различные бонусы, такие как промокоды, фриспины и бездепозитные бонусы. Особенно крупные подарки в казино 1xSlots предназначены для новичков.
Выгодная бонусная программа на сайте 1xslots позволяет как новичкам, так и опытным игрокам получать разнообразные подарки. Кроме того, это отличная возможность увеличить свой выигрыш. В казино 1xslots бонусы за депозиты и подарки не требуют дополнительных вложений. Используя фриспины и промокоды, вы можете получить хорошие деньги. Давайте подробнее рассмотрим, какие бонусы предлагает онлайн казино.
После прохождения регистрации игроку предлагается бонус на первые четыре операции по пополнению счета:
на первый депозит – 100% от внесенных средств и 30 фриспинов;
на второй депозит – 50% от внесенных средств и 35 фриспинов;
на третий депозит – 25% от внесенных средств и 40 фриспинов;
на четвертый депозит – 25% от внесенных средств и 45 фриспинов.
Промокод, также известный как код приглашения, является ключом-активатором приветственной программы для новичков. Если вы ранее не имели опыта игры в 1xSlots, то вы можете рассчитывать на получение щедрого подарка при регистрации – пакета из 1650 евро и 200 бесплатных прокруток. Согласно правилам бонусной акции, размер поощрения зависит от суммы первых четырех взносов и распределяется следующим образом: на депозитный бонус установлен максимальный лимит в 1500 евро. Чтобы получить подарок, игроку достаточно пройти процедуру регистрации, заполнить анкетные данные в личном кабинете и внести на счет профиля сумму от 10 евро.
При регистрации клиент может использовать промокод 1xSlots и получить дополнительный подарок.
1xSlots давно занимает прочные позиции в списке лучших брендов гемблинг-индустрии. Политика компании 1x ориентирована на опытных игроков, здесь пользователей ожидает продуманная программа лояльности, а также гарантии безопасности личной информации и депозита. Все действия осуществляются на основании лицензии 8048/JAZ2016-083, полученной от компании Orakum N.V., Кюрасао.
Промокод 1хСлот 2024: NEXT777 предоставляет бездепозитный бонус в виде 150 вращений в игре «The Dog House Megaways». В онлайн казино 1xslots доступны бесплатные промокоды на фриспины. Кроме того, игроки могут получать бонусные вращения не только за регистрацию или использование промокода от 1xSlots. Участие в бонусных акциях также позволяет пользователям получить фриспины. Казино 1хSlots предлагает различные варианты депозитов и выплат. Новые игроки, которые регистрируются на 1хSlots, получают приветственный пакет бонусов, однако с использованием промокода от 1xSlots этот бонус может быть еще более значительным. Для активации бонуса необходимо применить актуальный промокод при регистрации.
Приветственный пакет от 1xSlot доступен сразу после регистрации и требует активации через создание депозита. Бонус предоставляет умножение для первых четырех депозитов и дополнительные бесплатные вращения. Минимальная сумма для первого депозита составляет 10 евро, а для последующих пополнений – 15 евро. Максимальная сумма бонуса – 1500 евро.
Также новичкам предоставляются бонусы на второй, третий и четвертый депозит. Для получения подарка необходимо внести сумму не менее 15 евро. Игрокам также предоставляются фриспины и депозитные подарки. Для начисления фриспинов требуется подтверждение номера телефона.
Для постоянных игроков онлайн-казино 1xSlots проводит бонусные акции. Некоторые из них имеют временный характер, а другие действуют постоянно. В основном, пользователям предлагаются депозитные бонусы. Например, можно получить презент за пополнение счета в понедельник. За десятый депозит игроку полагается крупный депозитный бонус в размере 50% от вносимой суммы и 100 фриспинов.
В клубе 1xSlots также действует программа лояльности, которая предполагает различные привилегии для игроков.
Игрокам, активно делающим ставки в течение недели и ушедшим в минус, казино 1xSlots предлагает фриспины. Для получения бонуса не требуется пополнение счета, лимит на максимальный выигрыш и вейджер не устанавливаются.
Ежедневно в казино 1хСлотс назначается слот дня. При совершении ставок на определенную сумму в этом игровом аппарате игроку начисляются фриспины. Обратите внимание https://optom-plus.ru/forum/art/promokod_1xslots.html, время действия акции ограничено.
Разработчиками 1хСлотс было разработано мобильное казино. Такая версия представляет собой упрощенный вариант компьютерного формата онлайн казино. Она позволяет играть в любимые игры на любом устройстве, поддерживающем функцию выхода в интернет. В качестве такого устройства может быть смартфон или планшет.
Came across an interesting article, I propose you have a look http://blacksunempire.mybb.ru/viewtopic.php?id=359#p740
Качественное написание рефератов https://referatnovy.ru/, курсовых и дипломных работ от лучших авторов. Уникальные работы под ключ. Заказать студенческую работу за 2 дня.
Ведущий подрядчик в области строительства и ремонта в Москве. На протяжении более 6 лет мы успешно реализуем проекты различной сложности, опираясь на профессионализм нашей команды из более чем 50 высококвалифицированных специалистов. Наша компания предоставляет полный спектр строительных услуг, начиная от подсобных работ и заканчивая сложными инженерными задачами
.
В сегодняшнем обществе финансовые сложности не редкость, и каждый из нас может оказаться в ситуации, когда потребуется дополнительная финансовая помощь. На сайте займы онлайн на карту помогут решить эти проблемы, предоставляя простой и лёгкий метод получения кредита. Мы понимаем, что времени на решение проблемы не хватает, поэтому мы обрабатываем заявки оперативно и эффективно. В роли представителя Манибел, мы нацелены на то, чтобы помочь каждому клиенту преодолеть свои денежные трудности, предложив ясные и выгодные условия займа. Доверьтесь нам, и мы поможем вам в решении ваших финансовых проблем.
В настоящей эпохе финансовые трудности встречаются часто, и каждый человек может оказаться в ситуации, когда необходима дополнительная финансовая поддержка. На сайте деньги в кредит помогут решить эти проблемы, предоставляя простой и лёгкий метод получения кредита. Мы осознаём, что время играет ключевую роль, поэтому наш процесс обработки заявок максимально быстр и эффективен. В роли представителя Манибел, мы нацелены на то, чтобы помочь каждому клиенту преодолеть свои денежные трудности, предоставив прозрачные и выгодные условия кредитования. Доверьтесь нам, и мы поможем вам в решении ваших финансовых проблем.
lixiang l9 цена в россии
В сегодняшнем обществе финансовые сложности встречаются часто, и каждый из нас может оказаться в ситуации, когда потребуется дополнительная финансовая помощь. На сайте взять деньги в долг помогут преодолеть эти трудности, предоставляя простой и лёгкий метод получения кредита. Мы понимаем, что времени на решение проблемы не хватает, поэтому наш процесс обработки заявок максимально быстр и эффективен. В качестве представителя Манибел, наша цель – помочь каждому клиенту преодолеть финансовые затруднения, предоставив прозрачные и выгодные условия кредитования. Доверьтесь нам, и мы поможем вам в решении ваших финансовых проблем.
Сфера онлайн гэмблинга стремительно развивается, предлагая увлекательные игры и возможность выигрыша http://www.wirsindfoto.de/index.php?option=com_k2&view=itemlist&task=user&id=875495
Циклёвка паркета: особенности и этапы услуги
Циклёвка паркета — это процесс восстановления внешнего вида паркетного пола путём удаления верхнего повреждённого слоя и возвращения ему первоначального вида. Услуга включает в себя несколько этапов:
Подготовка: перед началом работы необходимо защитить мебель и другие предметы от пыли и грязи, а также удалить плинтусы.
Шлифовка: с помощью шлифовальной машины удаляется старый лак и верхний повреждённый слой древесины.
Шпатлёвка: после шлифовки поверхность паркета шпатлюется для заполнения трещин и выравнивания поверхности.
Грунтовка: перед нанесением лака паркет грунтуется для улучшения адгезии и защиты от плесени и грибка.
Нанесение лака: лак наносится в несколько слоёв с промежуточной шлифовкой между ними.
Полировка: после нанесения последнего слоя лака паркет полируется для придания поверхности блеска и гладкости.
Циклёвка паркета позволяет обновить внешний вид пола, восстановить его структуру и продлить срок службы.
Циклёвка паркета
В сегодняшнем обществе финансовые сложности встречаются часто, и каждый из нас может оказаться в ситуации, когда необходима дополнительная финансовая поддержка. На сайте оформить займ в Минске помогут преодолеть эти трудности, предоставляя простой и удобный способ получения кредита. Мы понимаем, что времени на решение проблемы не хватает, поэтому наш процесс обработки заявок максимально быстр и эффективен. В качестве представителя Манибел, мы нацелены на то, чтобы помочь каждому клиенту преодолеть свои денежные трудности, предложив ясные и выгодные условия займа. Доверьтесь нашей компании, и мы решим ваши финансовые проблемы.
В сегодняшнем обществе финансовые трудности не редкость, и каждый из нас может оказаться в ситуации, когда необходима дополнительная финансовая поддержка. На сайте оформить займ в Минске помогут решить эти проблемы, предоставляя простой и лёгкий метод займа. Мы осознаём, что время играет ключевую роль, поэтому наш процесс обработки заявок максимально быстр и эффективен. В качестве представителя Манибел, наша цель – помочь каждому клиенту преодолеть финансовые затруднения, предложив ясные и выгодные условия займа. Доверьтесь нашей компании, и мы решим ваши финансовые проблемы.
Написание дипломных работ https://diplompishem.ru/, курсовых и рефератов от лучших авторов. Заказать студенческую работу с антиплагиатом и уникализацией.
В сегодняшнем обществе финансовые трудности встречаются часто, и каждый из нас может оказаться в ситуации, когда потребуется дополнительная финансовая помощь. На сайте взять денег в долг срочно помогут преодолеть эти трудности, принося простой и удобный способ займа. Мы осознаём, что времени на решение проблемы не хватает, поэтому наш процесс обработки заявок максимально быстр и эффективен. В качестве представителя Манибел, наша цель – помочь каждому клиенту преодолеть финансовые затруднения, предложив ясные и выгодные условия займа. Доверьтесь нашей компании, и мы поможем вам в решении ваших финансовых проблем.
В сегодняшнем обществе финансовые сложности встречаются часто, и каждый человек может оказаться в ситуации, когда потребуется дополнительная финансовая помощь. На сайте займ в беларуси помогут решить эти проблемы, предоставляя простой и удобный способ получения кредита. Мы понимаем, что время играет ключевую роль, поэтому мы обрабатываем заявки оперативно и эффективно. В качестве представителя Манибел, мы нацелены на то, чтобы помочь каждому клиенту преодолеть свои денежные трудности, предоставив прозрачные и выгодные условия кредитования. Доверьтесь нашей компании, и мы поможем вам в решении ваших финансовых проблем.
проверить сайт Контакты
new crypto casino
new casino
Bellenty – ваш надёжный союзник в области конвейерных решений. Для вас заказать конвейерные ленты на Bellenty.by помогут консультанты интернет-магазина. Благодаря нашему опыту и компетентности мы гарантируем, что каждая лента, предлагаемая нами, соответствует высочайшим стандартам стандартам качества и эффективности. Мы производим индивидуальные решения, учитывая уникальные потребности наших заказчиков. Независимо от размера, материала или спецификаций, Bellenty обеспечивает идеальное решение для вашего конвейерного оборудования, даря вашему бизнесу надёжность и эффективность.
Bellenty – ваш надёжный союзник в области конвейерных решений. Для вас цена ленты транспортерной помогут консультанты интернет-магазина. Благодаря нашему практике и компетентности мы гарантируем, что каждая лента, предлагаемая нами, соответствует высочайшим стандартам стандартам качества и эффективности. Мы производим индивидуальные решения, учитывая уникальные потребности наших клиентов. Независимо от величины, материала или спецификаций, Bellenty обеспечивает идеальное решение для вашего конвейерного оборудования, даря вашему бизнесу надёжность и эффективность.
Bellenty – ваш надёжный союзник в области конвейерных решений. Для вас оформить ленту транспортерную на Bellenty.by помогут консультанты интернет-магазина. Благодаря нашему опыту и профессионализму мы гарантируем, что каждая лента, предлагаемая нами, соответствует высочайшим стандартам стандартам качества и эффективности. Мы изготавливаем индивидуальные решения, учитывая уникальные потребности наших клиентов. Независимо от величины, материала или спецификаций, Bellenty обеспечивает идеальное решение для вашего конвейерного оборудования, даря вашему бизнесу надёжность и эффективность.
Bellenty – ваш надёжный союзник в области конвейерных решений. Для вас транспортерные ленты на Bellenty.by помогут консультанты интернет-магазина. Благодаря нашему практике и компетентности мы гарантируем, что каждая лента, предлагаемая нами, соответствует высочайшим стандартам стандартам качества и эффективности. Мы производим индивидуальные решения, учитывая уникальные потребности наших заказчиков. Независимо от размера, состава или спецификаций, Bellenty обеспечивает идеальное решение для вашего конвейерного оборудования, даря вашему бизнесу надёжность и эффективность.
Bellenty – ваш надёжный союзник в области конвейерных решений. Для вас цена лент конвейерных на Bellenty помогут консультанты интернет-магазина. Благодаря нашему практике и профессионализму мы гарантируем, что каждая лента, предлагаемая нами, соответствует высочайшим стандартам качества и эффективности. Мы изготавливаем индивидуальные решения, учитывая уникальные потребности наших заказчиков. Независимо от размера, материала или спецификаций, Bellenty обеспечивает идеальное решение для вашего конвейерного оборудования, даря вашему бизнесу надёжность и эффективность.
Заказать seo продвижение сайта https://seodelay.ru/ и услуги по продвижению сайта в поисковых системах. SEO продвижение сайтов в топ выдачи в поисковых системах Яндекс, Google. Проведем профессиональную раскрутку и поисковую оптимизацию вашего сайта по низкой стоимости.
Bellenty – ваш надёжный союзник в области конвейерных решений. Для вас купить ленту транспортерную помогут консультанты интернет-магазина. Благодаря нашему практике и профессионализму мы гарантируем, что каждая лента, предлагаемая нами, соответствует высочайшим стандартам качества и эффективности. Мы изготавливаем индивидуальные решения, учитывая уникальные потребности наших клиентов. Независимо от величины, материала или спецификаций, Bellenty обеспечивает идеальное решение для вашего конвейерного оборудования, даря вашему бизнесу надёжность и эффективность.
Bellenty – ваш надёжный союзник в области конвейерных решений. Для вас оформить конвейерные ленты помогут консультанты интернет-магазина. Благодаря нашему практике и компетентности мы гарантируем, что каждая лента, предлагаемая нами, соответствует высочайшим стандартам качества и эффективности. Мы производим индивидуальные решения, учитывая особые потребности наших клиентов. Независимо от величины, материала или спецификаций, Bellenty обеспечивает идеальное решение для вашего конвейерного оборудования, даря вашему бизнесу надёжность и эффективность.
Чим корисні тактичні рюкзаки
Відмінності від звичайних
рюкзак тактичний купити рюкзак тактичний купити .
SEO продвижение и раскрутка сайтов с гарантией https://seomayker.ru/. Услуги по продвижению сайта в поисковых системах. Видимость вашего сайта в поисковых системах повысится и вы привлечете больше качественных посетителей без необходимости платить за рекламу.
Экспресс-автосервис.
Быстрое и качественное обслуживание вашего автомобиля.
ремонт авто москва https://www.avtoservis-moscva.ru/ .
1xSlots Промокод (Бездепозитный Бонус 2024)
1xSlots промокод: NEXT777, при регистрации введите этот бонусный код, чтобы получить бонус для новых игроков в размере €1650 + 200 фриспинов. Чтобы получить этот бонус, вам нужно создать аккаунт и ввести специальный промокод казино 1хСлотс.
1xSlot Промокод
NEXT777
В казино 1xSlots 2024 доступны различные бонусы: бездепозитные при регистрации, промокоды, фриспины, кэшбэки и другие акции.
Промокод 1xSlots 2024: NEXT777 – введите код при регистрации в казино 1хСлот и получите приветственный бонус €1650 +200 фриспинов. Чтобы промокод 1xSlots на бездепозитный бонус сработал, необходимо указать рабочую комбинацию при регистрации и правильно заполнить форму анкеты. После завершения регистрации бездепозитный бонус будет доступен в личном кабинете. Рекомендуется не торопиться и сразу после создания аккаунта заполнить персональные данные. Важно указать требуемую информацию в полях, отмеченных звездочкой во вкладке “Профиль”, а также активировать контакты (номер телефона и e-mail).
Для новых клиентов промокод 1xSlots предоставляет уникальные возможности, позволяющие бесплатно опробовать один из представленных на платформе слотов. Чтобы получить бездепозитные фриспины, достаточно при регистрации указать промокод и выполнить простые условия акции, которые мы расскажем в данной статье. Игроки, желающие продолжить игру и сделать первый депозит, смогут получить щедрый приветственный бонус до €1500 и 150 бесплатных вращений.
Для получения бонуса на первый депозит необходимо пополнить счет на сумму не менее 10. Награда составляет 100% от суммы первого пополнения, но не может превышать 300. Если сумма пополнения превышает максимальный лимит, игрок получит свой депозит полностью, а также 300 в качестве бонуса. Для активации второго, третьего и четвертого этапов, сумма депозита должна быть не менее 15.
Кроме денежного вознаграждения, каждый этап сопровождается бесплатными прокрутками для игр компании:
– за первый депозит – 30 фриспинов для игры Book of Gold: Classic;
– за второй депозит – 35 фриспинов для игры в Legend of Cleopatra;
– за третий депозит – 40 фриспинов для игры в Solar Queen;
– за четвертый депозит – 45 фриспинов для игры в Imperial Fruits: 40 lines.
Казино 1xSlots предоставляет бонус поэтапно. Чтобы получить награду за второй и последующие депозиты, необходимо выполнить условия отыгрыша ранее полученных средств. Фриспины также начисляются поэтапно и зачисляются после выполнения условий отыгрыша.
Промокод для 1xСлотс: NEXT777. Получите бездепозитный приветственный пакет до €1650 +200 фриспинов. Компания 1xSlots предлагает своим клиентам ряд бонусных программ, самой популярной из которых является приветственный пакет с увеличением первого депозита и бесплатными вращениями. С использованием промокода вы можете получить до 1650 евро и 200 фриспинов. Одним из явных преимуществ 1xSlots является огромный выбор игр. Большую часть из доступных 10 тысяч развлечений занимают игровые автоматы. Пользователям предлагается более 100 различных провайдеров слотов.
Промокод не имеет срока действия. Любой пользователь, который создает аккаунт на сайте 1xSlots, может его активировать. Каждому игроку предоставляется только один бонус, поэтому промокод может быть использован только один раз. Чтобы воспользоваться промокодом, необходимо нажать на кнопку “Регистрация”, выбрать удобный способ создания аккаунта, указать все необходимые данные, подтвердить номер телефона или адрес электронной почты и ввести промокод. После этого можно завершить регистрацию, нажав на кнопку “Зарегистрироваться”.
1xSlots Промокод для Регистрации
Бонусы казино 1xSlots 2024 – Бездепозитные бонусы ? Коды на возврат средств ? VIP программа преданности ? Бесплатные фриспины.
Промокод 1xSlots при Регистрации: NEXT777 Получите эксклюзивный приветственный пакет до 1650 евро +150 фриспинов. Казино 1xSlots 2024 предлагает своим гостям не только широкий выбор игровых автоматов. На сайте казино регулярно проводятся бонусные акции, в рамках которых можно получить различные подарки, процент от депозита, фриспины и многое другое. При обычной регистрации есть ограничение по сумме – не более 1500 евро на первые четыре депозита. Первое пополнение – до 300 евро, второе – не более 350, третье – 400, четвертое – 450 евро. После ввода промокода лимит увеличивается до 1650 евро, а количество фриспинов возрастает с 150 до 200 вращений.
Получите бездепозитный бонус в размере 100 фриспинов в онлайн казино 1xSlots в 2024 году. Все активные бонус коды, промокоды и купоны от 1хСлотс (1xSlots) доступны как для новых, так и для существующих игроков. В клубе 1xSlots промокоды предоставляют дополнительные бонусы пользователям. Кроме того, в клубе проводятся множество турниров с крупными призовыми фондами, в которых может принять участие любой зарегистрированный игрок.
1xSlots фриспины промокод: NEXT777. Размер приветственного поощрения составляет 100 фриспинов в автомате Eye of Storm от провайдера Pragmatic Play. Время на его активацию неограничено. Подарок выдается единожды, попытки повторного создания учетной записи для получения фриспинов приравниваются к мошенническим действиям. Альтернативным способом получения бонус-кодов является активное заключение пари в системе. Вращая барабаны игровых автоматов и зарабатывая баллы можно получить право на фриспины, благодаря промо. Список промокодов 1xslots доступен непосредственно на официальном сайте. Чтобы получить бездепозитный бонус код для 1хслотс в 2024 году, следует выполнить следующие условия:
1. Активировать бонусные средства в личном кабинете;
2. Пополнить счет на €15 (или эквивалент в другой валюте) и более, чтобы привязать банковскую карту или онлайн-кошелек;
3. Выполнить условия вейджера: x25. Для этого необходимо поставить из своих денег сумму, равную выигрышу с бесплатных вращений, умноженную в 25 раз. На отыгрыш дается 7 дней с момента, когда вы прокрутили фриспины.
Максимальная сумма вознаграждения составляет 1650 евро. Ее необходимо отыграть с вейджером 35 раз. Казино предлагает релоад-бонусы, которые также нужно отыграть 35 раз. Однако особое место среди множества игр, слотов и турниров на 1xSlots занимает лайв-казино. Это казино, где игра происходит в режиме реального времени. Настоящие дилеры раздают карты и крутят рулетку за игровыми столами. Все эти действия передаются по видеосвязи. Благодаря такой видеотрансляции каждый игрок может почувствовать все эмоции и азарт игры в интерактивной атмосфере с профессиональными дилерами.
При регистрации на 1xSlots используйте промокод “NEXT777” и получите бездепозитный бонус в размере €1650 + 200 фриспинов. Казино 1xSlots радует своих игроков различными бонусами, такими как промокоды, фриспины и бездепозитные бонусы. Особенно щедрые подарки от казино 1xSlots предназначены для новичков.
В дополнение к бонусной программе онлайн казино 1xSlots предлагает кешбэк до 11%, начисляемый от суммы проигранных средств. Кешбэк не имеет срока отыгрыша. Сидя дома перед компьютером, удается почувствовать атмосферу присутствия в настоящем казино. Именно этими причинами объясняется такая популярность и широкий спрос лайв-казино.
1xslots бездепозитный бонус без отыгрыша промокод – Бонус по промокоду 1хСлотс увеличивается с €1500 + 150 фриспинов до €1650 + 200 фриспинов.
Промокод 1xSlots на Сегодня: NEXT777 предоставляет вам возможность получить €1500 +150 FS при регистрации с использованием бонусного кода. Теперь бонус по промокоду составляет €1650 + 200 фриспинов, что на €150 больше, чем раньше. Это отличная возможность получить еще больше выгоды от игры. Казино 1xSlots 2024 – это платформа для игровых автоматов и Турниров. В казино 1хСлотс доступны различные бонусы, такие как промокоды, фриспины и бездепозитные бонусы. Особенно крупные подарки в казино 1xSlots предназначены для новичков.
Выгодная бонусная программа на сайте 1xslots позволяет как новичкам, так и опытным игрокам получать разнообразные подарки. Кроме того, это отличная возможность увеличить свой выигрыш. В казино 1xslots бонусы за депозиты и подарки не требуют дополнительных вложений. Используя фриспины и промокоды, вы можете получить хорошие деньги. Давайте подробнее рассмотрим, какие бонусы предлагает онлайн казино.
После прохождения регистрации игроку предлагается бонус на первые четыре операции по пополнению счета:
на первый депозит – 100% от внесенных средств и 30 фриспинов;
на второй депозит – 50% от внесенных средств и 35 фриспинов;
на третий депозит – 25% от внесенных средств и 40 фриспинов;
на четвертый депозит – 25% от внесенных средств и 45 фриспинов.
Промокод, также известный как код приглашения, является ключом-активатором приветственной программы для новичков. Если вы ранее не имели опыта игры в 1xSlots, то вы можете рассчитывать на получение щедрого подарка при регистрации – пакета из 1650 евро и 200 бесплатных прокруток. Согласно правилам бонусной акции, размер поощрения зависит от суммы первых четырех взносов и распределяется следующим образом: на депозитный бонус установлен максимальный лимит в 1500 евро. Чтобы получить подарок, игроку достаточно пройти процедуру регистрации, заполнить анкетные данные в личном кабинете и внести на счет профиля сумму от 10 евро.
При регистрации клиент может использовать промокод 1xSlots и получить дополнительный подарок.
1xSlots давно занимает прочные позиции в списке лучших брендов гемблинг-индустрии. Политика компании 1x ориентирована на опытных игроков, здесь пользователей ожидает продуманная программа лояльности, а также гарантии безопасности личной информации и депозита. Все действия осуществляются на основании лицензии 8048/JAZ2016-083, полученной от компании Orakum N.V., Кюрасао.
Промокод 1хСлот 2024: NEXT777 предоставляет бездепозитный бонус в виде 150 вращений в игре «The Dog House Megaways». В онлайн казино 1xslots доступны бесплатные промокоды на фриспины. Кроме того, игроки могут получать бонусные вращения не только за регистрацию или использование промокода от 1xSlots. Участие в бонусных акциях также позволяет пользователям получить фриспины. Казино 1хSlots предлагает различные варианты депозитов и выплат. Новые игроки, которые регистрируются на 1хSlots, получают приветственный пакет бонусов, однако с использованием промокода от 1xSlots этот бонус может быть еще более значительным. Для активации бонуса необходимо применить актуальный промокод при регистрации.
Приветственный пакет от 1xSlot доступен сразу после регистрации и требует активации через создание депозита. Бонус предоставляет умножение для первых четырех депозитов и дополнительные бесплатные вращения. Минимальная сумма для первого депозита составляет 10 евро, а для последующих пополнений – 15 евро. Максимальная сумма бонуса – 1500 евро.
Также новичкам предоставляются бонусы на второй, третий и четвертый депозит. Для получения подарка необходимо внести сумму не менее 15 евро. Игрокам также предоставляются фриспины и депозитные подарки. Для начисления фриспинов требуется подтверждение номера телефона.
Для постоянных игроков онлайн-казино 1xSlots проводит бонусные акции. Некоторые из них имеют временный характер, а другие действуют постоянно. В основном, пользователям предлагаются депозитные бонусы. Например, можно получить презент за пополнение счета в понедельник. За десятый депозит игроку полагается крупный депозитный бонус в размере 50% от вносимой суммы и 100 фриспинов.
В клубе 1xSlots также действует программа лояльности, которая предполагает различные привилегии для игроков.
Игрокам, активно делающим ставки в течение недели и ушедшим в минус, казино 1xSlots предлагает фриспины. Для получения бонуса не требуется пополнение счета, лимит на максимальный выигрыш и вейджер не устанавливаются.
Ежедневно в казино 1хСлотс назначается слот дня. При совершении ставок на определенную сумму в этом игровом аппарате игроку начисляются фриспины. Обратите внимание http://avtobusparts.ru/cache/pgs/1xslots_promokod__bonus.html, время действия акции ограничено.
Разработчиками 1хСлотс было разработано мобильное казино. Такая версия представляет собой упрощенный вариант компьютерного формата онлайн казино. Она позволяет играть в любимые игры на любом устройстве, поддерживающем функцию выхода в интернет. В качестве такого устройства может быть смартфон или планшет.
Промокоды казино 1xBet при регистрации 2024. На ресурсе 1хБет пользователи могут не только делать ставки на спорт и другие события из разных сфер, но и получать азартные ощущения в казино. Играть можно как с машинами, так и с реальными дилерами в разделе лайв. Чтобы привлекать как можно больше новых игроков и поддерживать интерес постоянных клиентов, на сайте 1хБет регулярно проходят акции и раздают бонусы. Самое щедрое вознаграждение могут получить новички, использовав промокод казино 1xBet. Указав его при регистрации, пользователь получит дополнительные денежные средства на первые несколько депозитов, которые сможет использовать для ставок в играх. Это сделать просто, если иметь промокод 1 икс бет. Правда, дается он при условии выполнения некоторых правил. 1xbet бонус при регистрации. Не совсем промокод, но вы все равно ставите не свои деньги, если пополните депозит, – 100% бонуса от внесенной суммы. Максимум указан в верхней части главной страницы официального сайта – более подробно в этом материале https://polyanka44.com/include/pgs/promokod_259.html
Поширені уявлення про тактичні рюкзаки
Легендарний амуніція
тактичні рюкзак https://ryukzakivijskovibpjgl.kiev.ua/ .
Демонтаж и утилизация отходов: чистота и порядок после завершения работ;
Ландшафтный дизайн и озеленение: преображение территории вокруг объекта;
услуги рабочих
Поисковое SEO продвижение сайтов в Москве https://seosferaya.ru/, стоимость тарифов на быструю и недорогую раскрутку сайта в ТОП-10. Оптимизация сайтов в поисковых системах Яндекс и Google. Быстро раскручиваем сайты за счет опыта. Тарифы и цены, кейсы и результаты наших работ в Москве и других крупных городах РФ
Комплексное продвижение сайтов в Москве https://seosferaya.ru/ под ключ. SEO раскрутка сайта в топ Яндекс и Google от профессионалов, первые результаты уже через месяц. Комплексное продвижение сайтов с гарантией.
Як використовувати тактичний рюкзак у місті
рюкзак тактичний купити рюкзак тактичний купити .
https://corti-med.ru/
steam counterstrike live gamble sites
Если вы ищете надежных и опытных разнорабочих в Москве, обращайтесь в «Арену Строй». Мы готовы взяться за ваш проект и реализовать его на высшем уровне. Оставьте заявку на нашем сайте, и мы оперативно свяжемся с вами.
как найти разнорабочих на стройку
http://images.google.bj/url?q=https://t.me/+z0aCw4Lc6rUzZWQ6
Промокод БетВиннер: 937999 при регистрации в 2024 году с использованием на сайте BetWinner.com вы получите бесплатный бонус в размере 100% до 25000 рублей на вашу ставку. Все актуальные бонусы от букмекерской конторы BetWinner можно найти на одной странице. Там вы также найдете инструкции по получению фрибетов, участию в акциях и бездепозитному бонусу от БК BetWinner в 2024 году.
https://vsiknygy.net.ua/wp-content/pages/betwinner_promokod_2020.html
Gogo Casino Recension
Gogo Casino är en relativt ny spelplattform på den svenska marknaden som lanserades år 2019. Med ett fokus på snabba och smidiga spelupplevelser, har Gogo Casino snabbt blivit populärt bland spelare som föredrar att spela online.
Ett av de främsta fördelarna med Gogo Casino är dess enkla och användarvänliga design som gör det lätt att navigera på sidan. Dessutom erbjuder de ett brett utbud av spel från kända leverantörer som NetEnt, Microgaming och Yggdrasil, vilket garanterar en varierad och underhållande spelupplevelse för spelare.
En annan fördel med Gogo Casino är deras generösa välkomstbonus för nya spelare. Genom att registrera sig på plattformen kan spelare ta del av en bonus som ger dem extra pengar att spela för, vilket ökar chanserna att vinna stora vinster.
För de spelare som föredrar att spela på mobila enheter, erbjuder Gogo Casino också en mobilanpassad version av sin plattform som gör det möjligt att spela favoritspel var som helst och när som helst.
Sammanfattningsvis kan vi konstatera att Gogo Casino är en pålitlig och underhållande spelplattform som erbjuder ett brett utbud av spel och generösa bonusar för sina spelare. Med sin enkla design och användarvänliga gränssnitt är Gogo Casino definitivt värt att prova för alla som är intresserade av att spela online.
https://gogocasino.one
Амигуруми – это японское искусство создания игрушек с помощью подхода амигуруми. Это слово происходит от японских слов “ами”, означающего вязаный, и “нюгуруми”, что переводится как плюшевая игрушка. Традиционно амигуруми изготавливаются из волокна с использованием крючка. Игрушки амигуруми могут изображать различных персонажей, зверей, фантастические существа и многое другое. Это популярное хобби, которое имеет свои клубы и любителей по всему миру.
По амигуруми существует множество схем и уроков. В этих материалах представлены пошаговые инструкции по созданию различных персонажей амигуруми. Картинки позволяют каждый процесс процесса вязания, а обучающие программы оснащаются подробными описаниями. Такие маленькие амигуруми из бисера можно найти в интернете, на ресурсах по рукоделию, в профильных форумах и социальных сетях.
Также многие книги по рукоделию содержат рисунки и инструкции по созданию амигуруми. Профессионалы в этой области раскрывают своим опытом и талантами через издания, видеоуроки и руководства.
Важно выбирать материалы, подходящие вашему уровню практики и вкусу. Некоторые материалы направлены на новичков, предоставляя более простые пошаговые руководства и обучающие программы, в то время как для продвинутых рукодельников доступны более трудоемкие работы и глубокие техники.
Gogo Casino är ett populärt online casino som har fått mycket uppmärksamhet på senare tid för sin transparenta och användarvänliga plattform. En av de senaste nyheterna från Gogo Casino är införandet av en ny transparent horisontell design som gör det ännu enklare för spelare att navigera på sajten.
Den nya horisontella designen har en ren och modern look som gör det enkelt att hitta sina favoritspel och navigera mellan olika sektioner på sajten. Den horisontella layouten gör det också enklare att se alla relevanta information om ens konto, som saldo, bonusar och aktuella kampanjer.
En annan fördel med den nya horisontella designen är att den gör det lättare att spela på mobila enheter. Oavsett om du spelar på din mobiltelefon eller surfplatta, kommer den horisontella designen att se lika snygg ut och vara lika användarvänlig som på datorn.
Gogo Casino har alltid satt användarvänlighet i fokus, och den nya transparenta horisontella designen är ett perfekt exempel på det. Genom att lyssna på spelarnas feedback och ständigt förbättra sin plattform, fortsätter Gogo Casino att leverera en förstklassig spelupplevelse för alla sina användare.
Så om du letar efter ett online casino som erbjuder en transparent och användarvänlig spelplattform, är Gogo Casino definitivt värt att kolla in. Med den nya horisontella designen och ett stort utbud av spel att välja mellan, kan du vara säker på att du kommer att ha en fantastisk spelupplevelse på Gogo Casino.
https://gogocasino.one
Амигуруми – это японское искусство создания игрушек с помощью техники амигуруми. Это слово происходит от японских слов “ами”, означающего вязаный, и “нюгуруми”, что переводится как плюшевая игрушка. Традиционно амигуруми изготавливаются из клубков с использованием крючка. Игрушки амигуруми могут представлять различных персонажей, существ, волшебные существа и многое другое. Это популярное занятие, которое имеет свои клубы и фанатов по всему миру.
По амигуруми существует множество схем и мастер-классов. В этих материалах представлены шаг за шагом инструкции по созданию различных фигурок амигуруми. Графики представляют каждый шаг процесса вязания, а уроки сопровождаются подробными описаниями. Такие амигуруми брелок можно найти в сети Интернет, на порталах по рукоделию, в специализированных форумах и социальных сетях.
Также многие издания по рукоделию содержат рисунки и инструкции по созданию амигуруми. Эксперты в этой области раскрывают своим опытом и талантами через учебники, видеоуроки и руководства.
Важно выбирать материалы, соответствующие вашему уровню опыта и вкусу. Некоторые материалы направлены на начинающих, предоставляя базовые пошаговые руководства и мастер-классы, в то время как опытные рукодельников доступны более высокоуровневые изделия и подробные техники.
Gogo Casino.se är ett online casino som fokuserar på enkelhet och snabbhet. Med en modern och stilren design är det en plattform där spelare enkelt kan navigera och snabbt komma igång med sina favoritspel.
En av de stora fördelarna med Gogo Casino.se är att alla transaktioner sker utan krångliga registreringsprocesser. Spelare kan snabbt sätta in pengar och börja spela utan att behöva skapa ett konto. Detta gör det både smidigt och effektivt för de som vill komma igång med spelandet direkt.
På Gogo Casino.se finns ett brett utbud av casinospel att välja mellan, inklusive slots, bordsspel och live casino. Spelen kommer från välkända leverantörer som NetEnt, Microgaming och Evolution Gaming, vilket garanterar en hög kvalitet och underhållande spelupplevelse.
För de som är ute efter en spännande och enkel spelupplevelse är Gogo Casino.se definitivt värt att testa. Med sitt fokus på snabbhet, enkelhet och bra spelutbud erbjuder de en plattform som passar såväl nybörjare som erfarna spelare. Besök Gogo Casino.se idag och se själv vad de har att erbjuda!
https://gogocasino.one
Промокод БетВиннер: 937999 при регистрации в 2024 году с использованием на сайте BetWinner.com вы получите бесплатный бонус в размере 100% до 25000 рублей на вашу ставку. Все актуальные бонусы от букмекерской конторы BetWinner можно найти на одной странице. Там вы также найдете инструкции по получению фрибетов, участию в акциях и бездепозитному бонусу от БК BetWinner в 2024 году.
https://vsiknygy.net.ua/wp-content/pages/betwinner_promokod_2020.html
Амигуруми – это японское искусство создания игрушек с помощью техники амигуруми. Это слово происходит от японских слов “ами”, означающего вязаный, и “нюгуруми”, что переводится как плюшевая игрушка. Традиционно амигуруми изготавливаются из пряжи с использованием крючка. Игрушки амигуруми могут отображать различных персонажей, обитателей, фантастические существа и многое другое. Это популярное хобби, которое имеет свои клубы и любителей по всему миру.
По амигуруми существует множество графиков и руководств. В этих материалах представлены пошаговые инструкции по созданию различных предметов амигуруми. Графики позволяют каждый этап процесса вязания, а мастер-классы оснащаются подробными учебными материалами. Такие амигуруми из бисера для начинающих можно найти в сети, на сайтах по рукоделию, в тематических сообществах и социальных сетях.
Также многие книги по рукоделию содержат диаграммы и уроки по созданию амигуруми. Эксперты в этой области делятся своим опытом и талантами через публикации, видеоуроки и пособия.
Важно выбирать материалы, соответствующие вашему уровню опыта и интересам. Некоторые материалы ориентированы на новичков, предоставляя легкие схемы и обучающие программы, в то время как для продвинутых рукодельников доступны более затейливые работы и подробные техники.
BetWinner Промокод при Регистрации: 937999 Вы получите бонус для ставок на спорт 100% до 100$ и бонус в казино до 1500€ + 150 Фриспинов. Бонусный код автоматически активрует в вашем аккаунте все акционные предложения 2024 года. Промокоды рассчитаны на разовое применение и только используются во время регистрации.
https://vsiknygy.net.ua/wp-content/pages/betwinner_promokod_2020.html